For 1990-2009 cars only
Rocker Panel Molding Replacement SE
Removal Procedure
- Open both the front, and rear door.
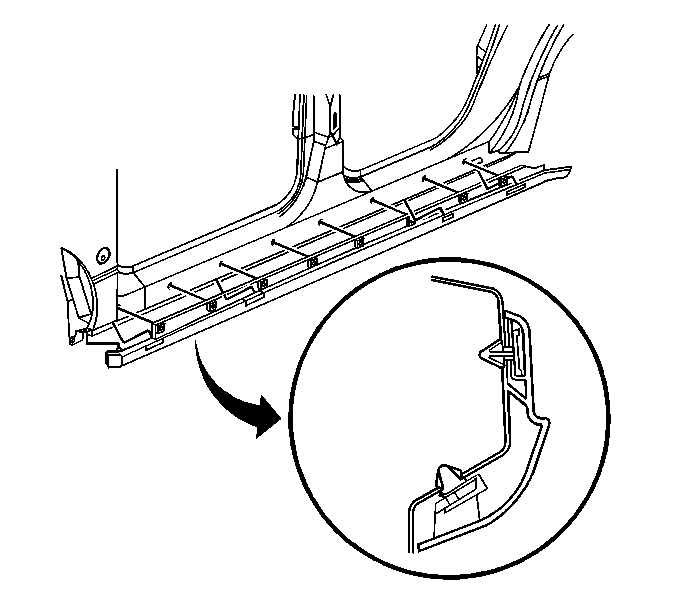
- Starting at the front of the molding, pull the rocker molding away from the vehicle in order to release the molding from the vehicle.

Installation Procedure
- Align the moldings retainers to the holes in the rocker panel and snap the molding into place.
- Close the doors and check the molding for proper fit.

Rocker Panel Molding Replacement SLE, SSEI
Removal Procedure
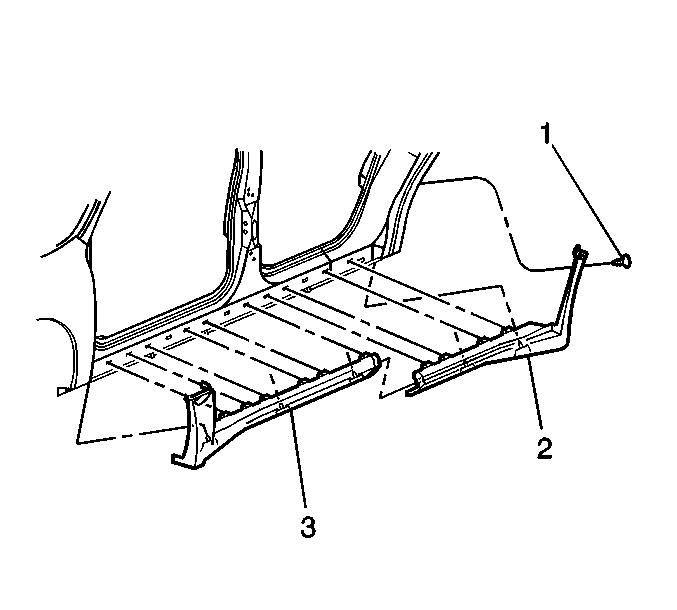
- Remove the push pin type retainer (1) from the rear rocker molding (2).
- At the 'dog leg' section of the front (3) and the rear (2) molding halves, split the foam tape using a braided wire or a flat-bladed tool inserted between the molding and the sheet metal.
- Open both the front, and rear door.
- Starting with the rear rocker molding (2), pull the rear rocker molding (2) away from the vehicle in order to release the molding (2) from the vehicle.
- Pull the front rocker molding (3) away from the vehicle in order to release the rocker molding (3) from the vehicle.
Protect the surrounding surfaces, in order to prevent damage to the vehicles paint.

Remove the rear rocker molding (2) from the slip joint on the front rocker molding (3).
Installation Procedure
- Remove all traces of the adhesive from the front and the rear body panels, and the rocker moldings (2, 3), using 3M General Purpose Adhesive Cleaner 08984 or equivalent.
- Wipe the panels and the rocker moldings (2, 3), with a clean, lint free cloth and an alcohol and water mixture.
- If the rocker moldings (2, 3) are being reused, apply new adhesive tape to the 'dog leg' on both rocker moldings (2, 3).
- Remove the backing from the adhesive tape on the front rocker molding (3).
- Align the front rocker molding (3) to the body and snap the front molding (3) into place.
- Remove the backing from the adhesive tape on the rear rocker molding (2).
- Install the front edge of the rear rocker molding (2) into the slip joint on the front rocker molding (3).
- Align the rear rocker molding (2) to the holes in the rocker panel and snap the molding into place.
- Apply hand pressure at the dog leg areas of the front and rear rocker moldings (2, 3), in order to ensure proper wet out of adhesive tape in these areas.
- Install the push pin retainer (1) to the rear rocker molding (2).
- Close the doors and check the moldings (2, 3) for proper fit.

