SQUEAKS AND RATTLES (SERVICE PROCEDURES)

SUBJECT: SQUEAKS AND RATTLES SERVICE PROCEDURES)
VEHICLES AFFECTED: 1987-91 "F" CAR
Note: The following information is to be used as an aid in correcting various squeaks and rattles on F-cars. The information by no means addresses all squeaks and rattles, and the technician is encouraged to investigate the cause of the squeak or rattle rather than to assume that it is one of the following:
Condition:
---------- Rattles from T-Top latch area on CC1 equipped vehicles.
Cause:
------ C-Clip used to retain latch pin rattles ONLY when top is installed on vehicle and latched.
Correction:
-----------
1. Remove latch handle and garnish moulding from T-Top panel.
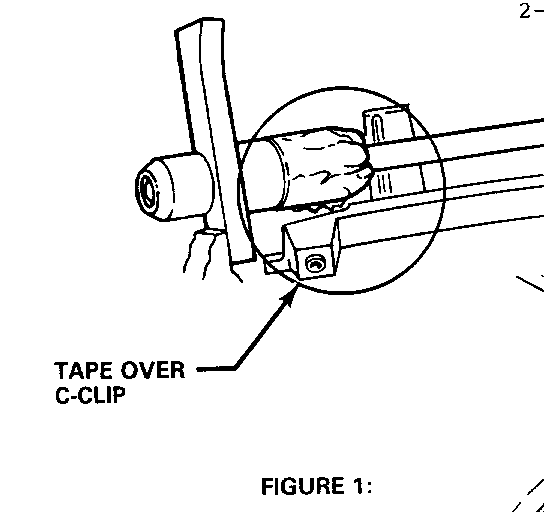
2. Apply cloth body tape (i.e. Duct tape) around latch pin over C-Clip groove as shown in Figure 1.
3. Repeat step two for remaining latch pin.
4. Reinstall garnish and latch handle.
5. Repeat steps 1-4 for opposite T-Top panel.
Condition: Rattle from rear compartment area Cause : Rear compartment cargo cover ends rattle against rear seatbelt retractor cover. Correction: Install adhesive-backed felt or "loop" side of a strip of hook-and-loop type fastener on cargo cover ends in area of contact.
Condition: Rattle from right rear area of vehicle on G80 equipped vehicles. Cause Mispositioned cardboard jacket on spare tire inflator canister. Correction: Position cardboard jacket so that bottom edge of jacket is flush with bottom edge of inflator canister.
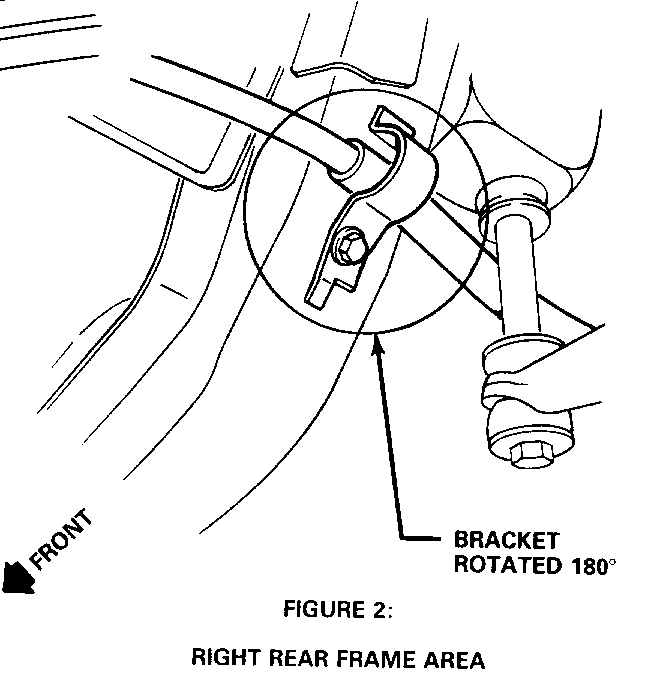
Condition: Squeak from right rear seat area (drum brake vehicles only) Cause Right side park brake cable rubs against control arm. Correction: Remove bracket securing cable to body at right rear frame rail. Bend (straighten) bracket locating tab and reinstall bracket and cable as shown in Figure 2.
Condition: Rattles from rear area of vehicle on rough roads. Cause: Upper coils of rear springs may contact each other due to spring orientation. Correction: Use Service Manual procedures (spring removal and reinstallation) to reposition (rotate) both right and left springs to orient LOWER spring wire ends (tails) of both springs pointing FORWARD.
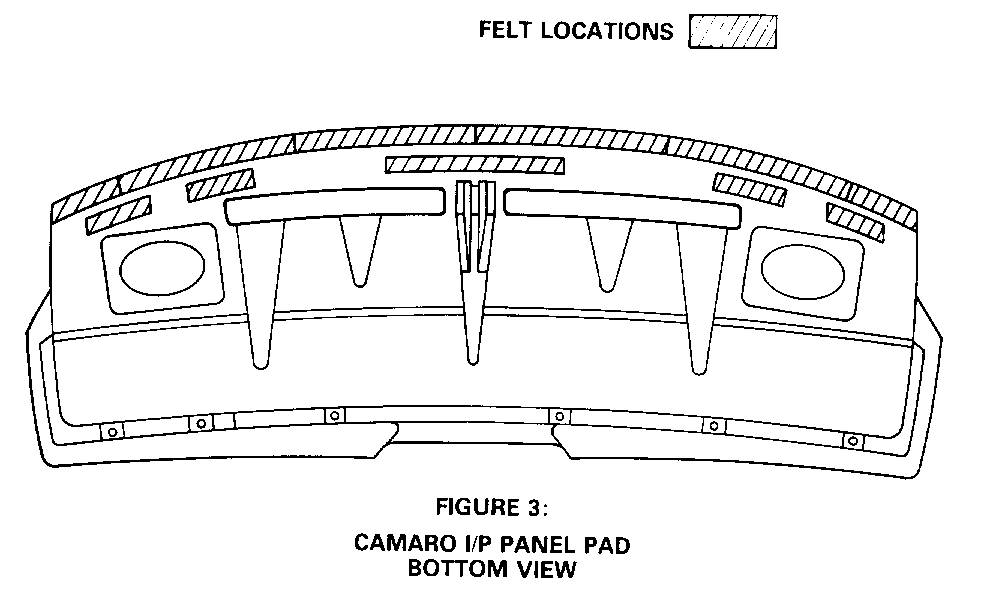
Condition: Chevrolet Instrument panel (IP) area buzz Cause: Contact between bottom surface of IP panel pad and instrument panel IP carrier. Correction: Install adhesive backed felt or "loop" side of a strip of hook-and-loop type fastener to the IP pad and carrier in the positions shown in Figure 3.
Use the most applicable Labour Operation and Time from the Canadian Labour Time Guide.


General Motors bulletins are intended for use by professional technicians, not a "do-it-yourselfer". They are written to inform those technicians of conditions that may occur on some vehicles, or to provide information that could assist in the proper service of a vehicle. Properly trained technicians have the equipment, tools, safety instructions and know-how to do a job properly and safely. If a condition is described, do not assume that the bulletin applies to your vehicle, or that your vehicle will have that condition. See a General Motors dealer servicing your brand of General Motors vehicle for information on whether your vehicle may benefit from the information.
