Battery Cable Replacement 3.8L V6
Removal Procedure
Negative Cable
- Remove the battery. Refer to Battery Replacement .
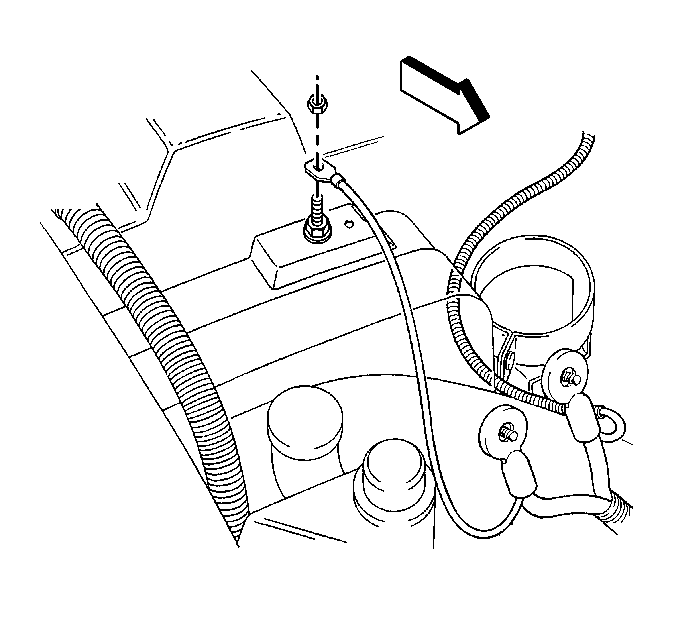
- Remove the battery negative cable nut.
- Remove the ground lead from the wheelhouse stud
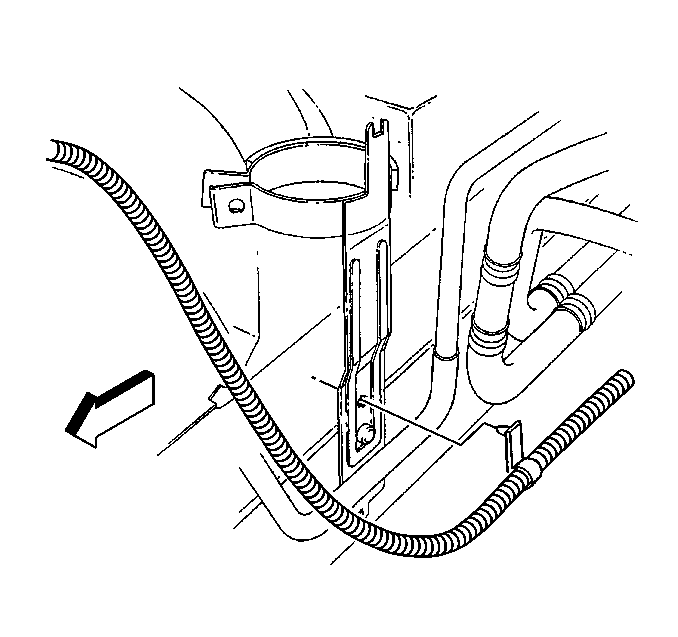
- Remove the battery cable from the rosebud clip at the accumulator bracket.
- Remove the negative battery cable nut from the engine block stud.
- Remove the negative battery cable from the conduit.
Positive Cable
- Remove the battery. Refer to Battery Replacement .
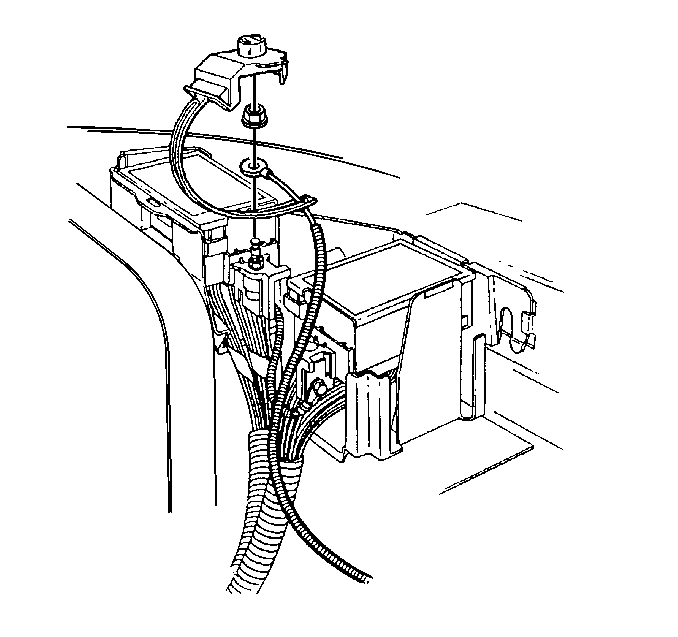
- Remove the positive battery cable from the stud on the fuseblock:
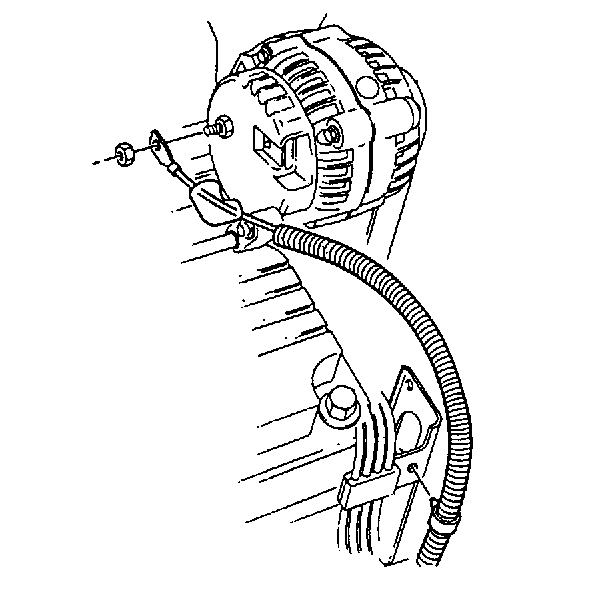
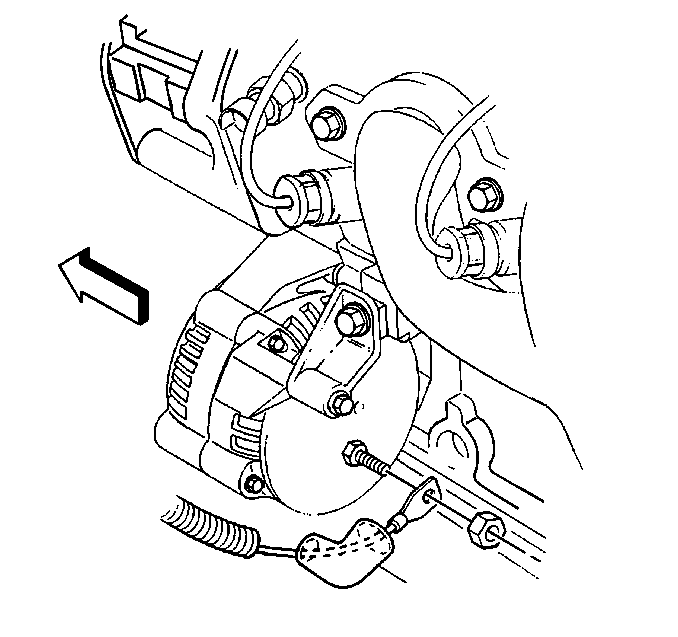
- Remove the positive cable from the generator:
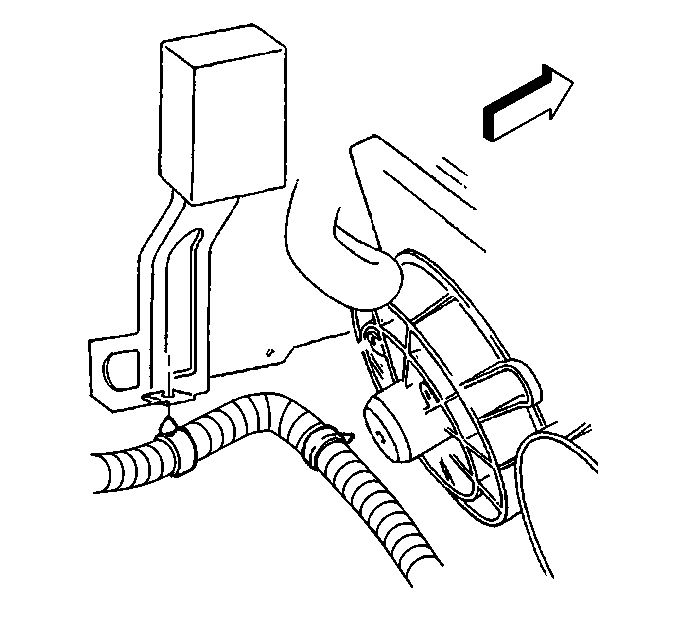
- Remove the positive cable rosebud clip from the engine lift bracket.
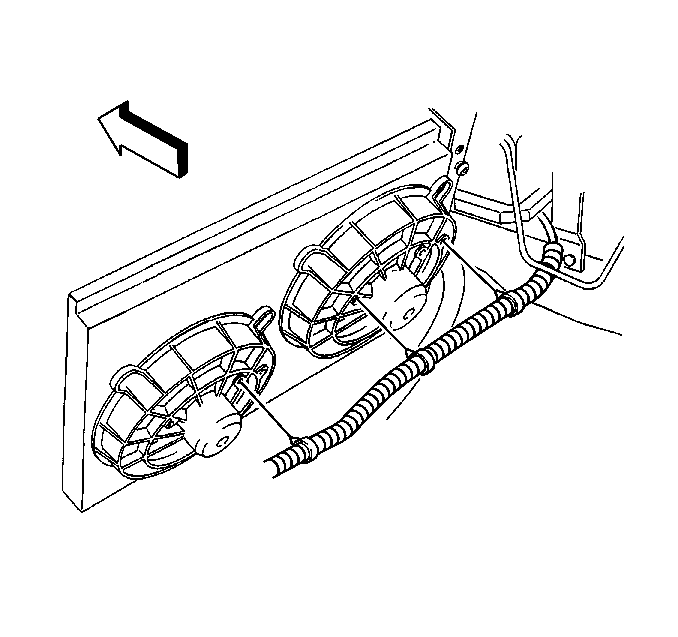
- Remove the positive cable rosebud clips from the cooling fans.
- Raise and suitably support the vehicle. Refer to Lifting and Jacking the Vehicle in General Information.
- Remove the positive cable from the rosebud clip at the power steering reservoir.
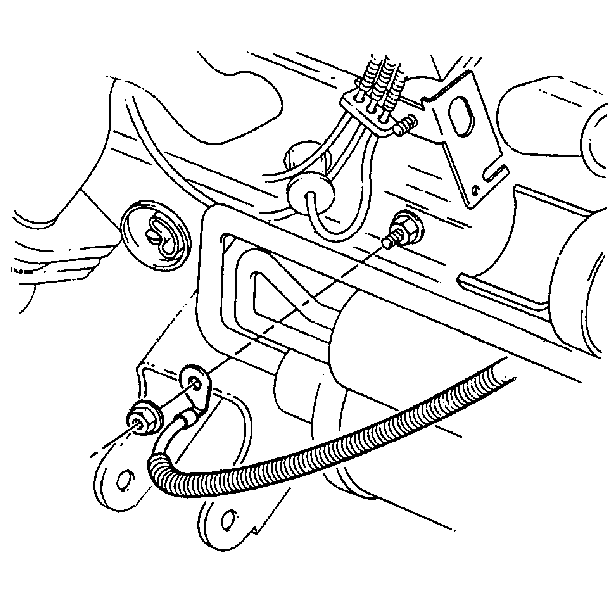
- Remove the bolt and ground strap at the driver side front rail.
- Remove the positive/negative cable from the engine mount stud:
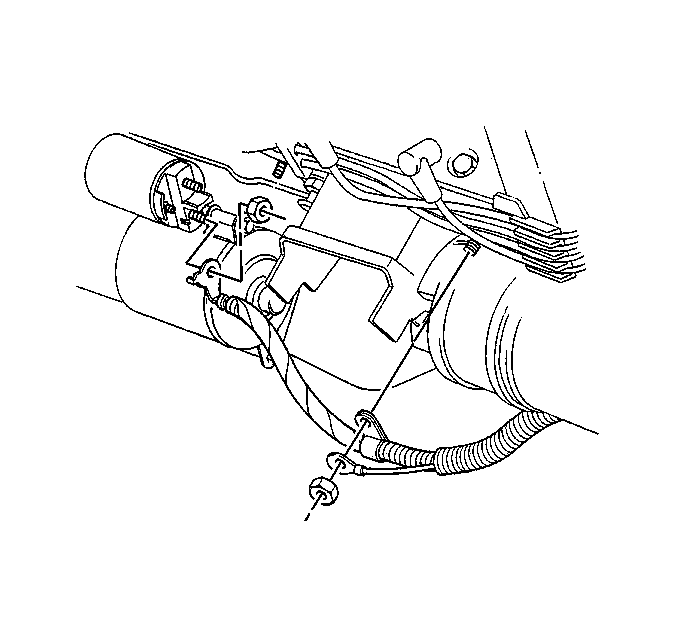
- Remove the starter shield. Refer to Starter Shield Replacement .
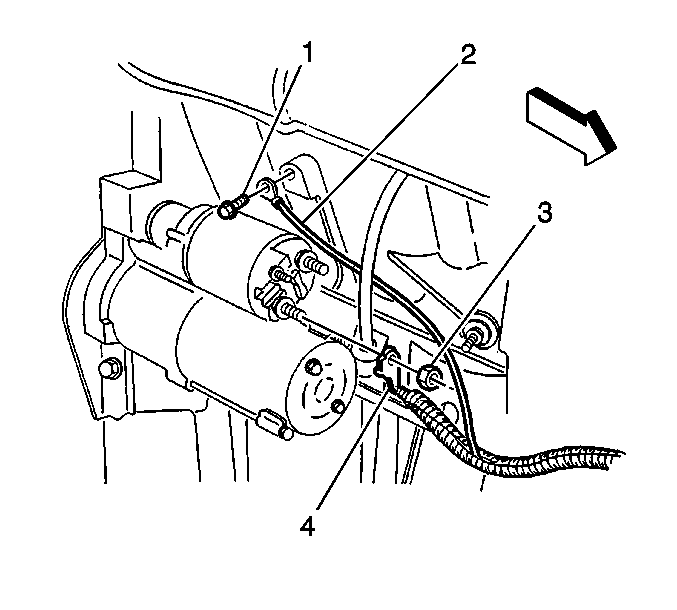
- Remove the positive cable from the starter solenoid:
| • | Open the positive cable cap. |
| • | Remove the positive cable nut. |
| • | Remove the positive lead from the stud. |
| • | Slide the boot down revealing the positive terminal stud. |
| • | Remove the positive cable nut at the generator. |
| • | Remove the positive cable. |
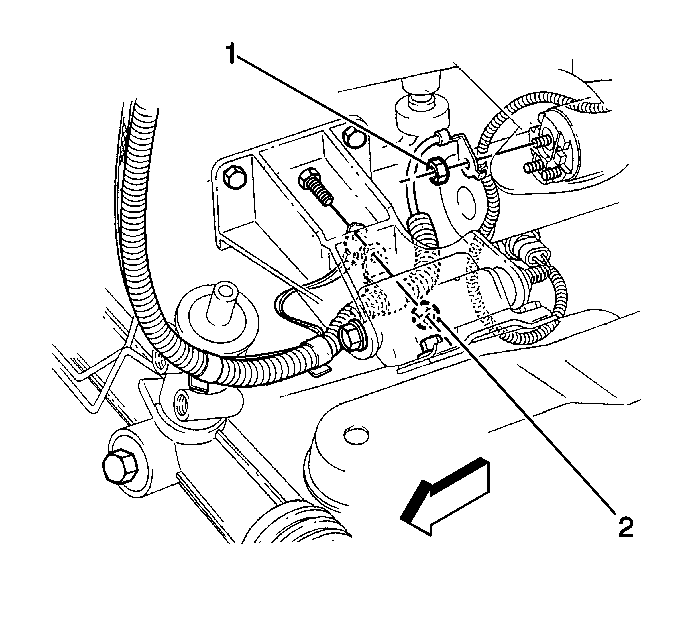
| • | Remove the battery positive cable nut (2). |
| • | Remove the harness clamp from the stud. |
| • | Remove the RF (Radio Frequency) ground strap. |
| • | Remove the cable to starter nut (1). |
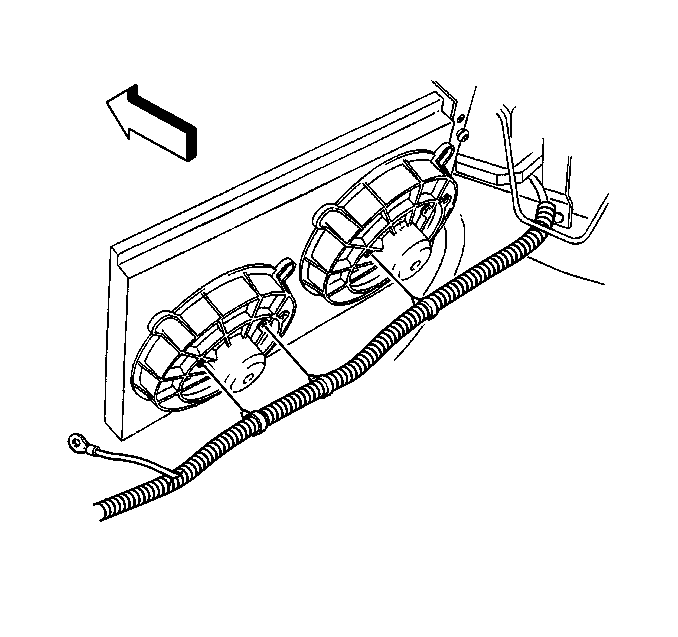
| • | Remove the positive cable from the conduit. |
Installation Procedure
Positive Cable
- Install the positive cable to the conduit.
- Install the cable to starter nut (1).
- Install the starter shield. Refer to Starter Shield Replacement .
- Install the positive/negative cable to the engine mount stud:
- Install the bolt and ground strap at the driver side front rail.
- Connect the positive cable to the rosebud clip at the power steering reservoir.
- Lower the vehicle.
- Install the positive cable rosebud clips to the cooling fans.
- Install the positive cable to the generator.
- Install the positive battery cable to the stud on the fuseblock:
- Install the battery. Refer to Battery Replacement .
Tighten
Tighten the positive cable to starter nut (1) to 10 N·m
(89 lb in).
| • | Install the RF (Radio Frequency) ground strap. |
| • | Install the harness clamp to the stud. |
| • | Install the battery positive cable nut (2). |
Tighten
Tighten the positive cable to block stud nut (2) to 25 N·m
(18 lb ft).
Tighten
Tighten the ground strap bolt to 12 N·m (106 lb in).
| • | Install the positive cable to the stud. |
| • | Install the positive cable nut to the generator. |
Tighten
Tighten the positive cable to generator nut to 22 N·m (16 lb ft).
| • | Slide the boot over the positive terminal stud. |
| • | Install the positive lead to the stud. |
| • | Install the positive battery cable nut. |
Tighten
Tighten the positive cable to fuseblock nut to 14 N·m (10 lb ft).
| • | Close the positive cable cap. |
Negative Cable
- Install the negative battery cable to the conduit.
- Install the negative cable to the engine block stud.
- Install the negative cable nut to the engine block stud.
- Install the battery cable to the rosebud clip on the accumulator bracket.
- Install the ground lead to the wheelhouse stud.
- Install the battery negative cable nut.
- Install the battery. Refer to Battery Replacement .
Tighten
Tighten the negative cable nut to engine block stud to 22 N·m
(16 lb ft).
Tighten
Tighten the negative cable nut to 6 N·m (53 lb in).
Battery Cable Replacement 5.7L V8
Removal Procedure
Negative Battery Cable
- Remove the battery. Refer to Battery Replacement .
- Remove the battery negative cable nut.
- Remove the ground lead from the wheelhouse stud.
- Remove the battery cable from the rosebud clip at the accumulator bracket.
- Remove the negative cable to engine block bolt (1).
- Remove the ground lead from the block.
- Remove the negative battery cable from the conduit.
Positive Cable
- Remove the battery. Refer to Battery Replacement .
- Remove the positive battery cable from the stud on the fuseblock.
- Raise and suitably support the vehicle. Refer to Lifting and Jacking the Vehicle in General Information.
- Remove the conduit rosebud clips from the cooling fans.
- Remove the bolt and ground strap at the driver side front rail.
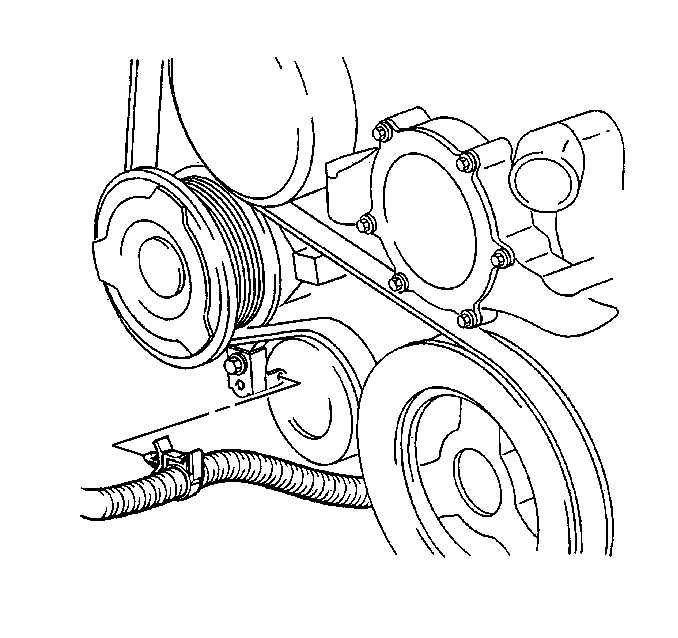
- Remove the positive cable from the generator.
- Remove the positive cable to starter nut (3).
- Remove the positive cable from the starter.
- Remove the positive cable from the conduit.
| • | Open the positive cable cap. |
| • | Remove the positive battery cable nut. |
| • | Remove the positive lead from the stud. |
| • | Slide the boot down revealing the positive terminal stud. |
| • | Remove the positive cable nut at the generator. |
| • | Remove the positive cable. |
Installation Procedure
Positive Cable
- Install the positive cable to the conduit.
- Install the positive cable to the starter.
- Install the positive cable to starter nut.
- Install the positive cable to the generator:
- Install the ground strap and bolt at the driver side front rail.
- Install the conduit rosebud clips to the cooling fans.
- Lower the vehicle.
- Install the positive cable into the clip:
- Install the positive battery to the stud on the fuseblock:
- Install the battery. Refer to Battery Replacement .
Tighten
Tighten the positive cable to starter nut to 10 N·m (89 lb in).
| • | Install the positive cable. |
| • | Install the positive cable nut. |
Tighten
Tighten the positive cable nut to generator to 22 N·m (16 lb ft).
| • | Slide the boot over the positive terminal stud. |
Tighten
Tighten the ground strap bolt to 12 N·m (106 lb in).
| • | Install the positive cable. |
| • | Snap the clip closed. |
| • | Lower the vehicle. |
| • | Install the positive lead to the stud. |
| • | Install the positive battery cable nut. |
Tighten
Tighten the cable nut to 14 N·m (10 lb ft).
| • | Close the positive cable cap. |
Negative Cable
- Install the negative cable to the conduit.
- Install the ground lead and negative cable to the engine block bolt (1).
- Install the battery cable to the rosebud clip at the accumulator bracket.
- Install the ground lead to the wheelhouse stud.
- Install the negative cable nut.
- Install the battery. Refer to Battery Replacement .
Tighten
Tighten the negative cable to engine block bolt (1) to 32 N·m
(24 lb ft).
Tighten
Tighten the negative cable nut to 6 N·m (53 lb in).
