Cooling System Draining and Filling V6
Draining Procedure
- Park the vehicle on a level surface.
- Remove the coolant recovery reservoir fill cap.
Caution: As long as there is pressure in the cooling system, the temperature
can be considerably higher than the boiling temperature of the solution in
the radiator without causing the solution to boil. Removal of the pressure
cap while the engine is hot and pressure is high will cause the solution
to boil instantaneously -- possibly with explosive force -- spewing
the solution over the engine, fenders and the person removing the cap.
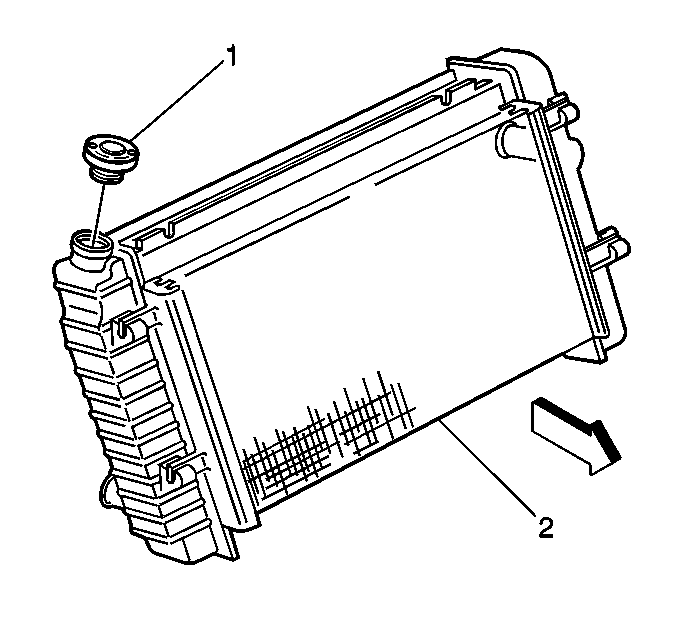
- Remove the radiator pressure
cap (1)
from the radiator (2).
| 3.1. | Slowly rotate the pressure cap (1) counterclockwise until the
cap (1) reaches the detent. Do not press down while rotating the pressure
cap (1). |
| 3.2. | Wait until any remaining pressure, indicated by a hissing sound,
is relieved. |
| 3.3. | After all the pressure is relieved, press down on the pressure
cap (1) and continue to rotate the pressure cap (1) counterclockwise. |
| | Important: Recover and store used coolant in a used coolant holding tank and submit
the used coolant for recycling on a regular basis. DO NOT pour used coolant
down the drain! Ethylene glycol antifreeze is very toxic. Disposing of ethylene
glycol into the sewer system or ground water is both illegal and ecologically
unsound!
|
- Place a drain pan under the radiator drain cock in order to collect
all the used coolant.
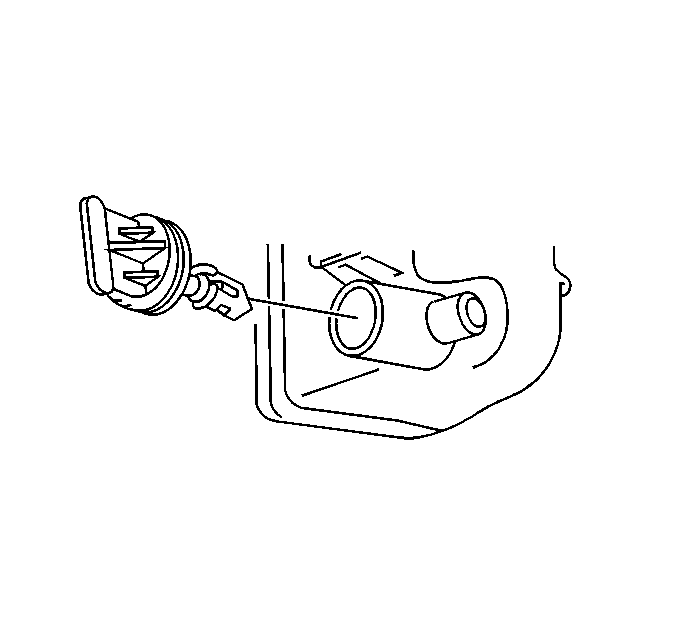
- Open the radiator drain
cock.
- Place a shop towel under the bleed valve in order to prevent coolant
from splashing onto the EGR valve outlet pipe.
- Open the air bleed vent on top of the water outlet two complete
turns.
- Place a drain pan under the engine block knock sensors in order
to collect the used coolant.
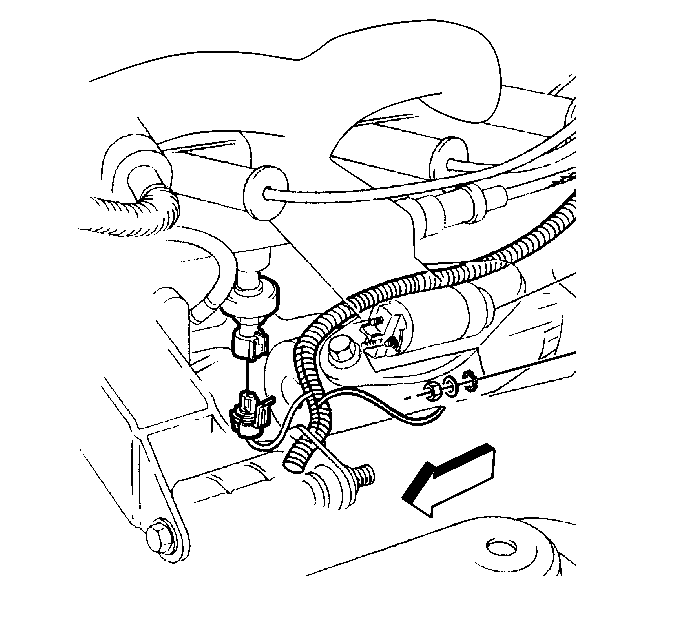
- Disconnect the knock sensor
electrical connectors. (left side shown, right side similar)
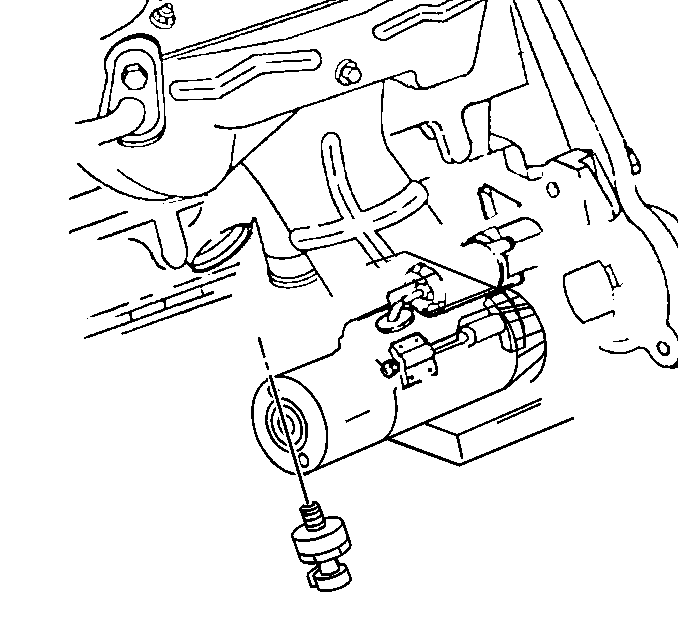
- Remove both of the engine
knock sensors. (left side shown, right side similar)
- Allow the cooling system to drain completely.
Filling Procedure
- Remove, clean, and reinstall the coolant recovery reservoir. Refer
to
Coolant Recovery Reservoir Replacement
.

- Close the radiator drain
cock.

- Install both the engine
knock sensors.
Tighten
| • | Tighten the knock sensors to 19 N·m (14 lb ft). |
| • | Tighten the radiator drain cock to 1.5 N·m (13 lb in). |

- Connect the knock sensor
electrical connectors.
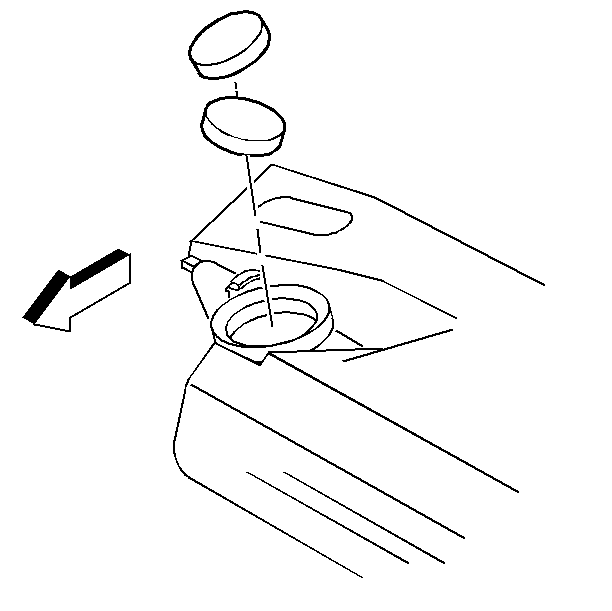
- Add two engine coolant
supplement sealant
pellets, GM P/N 3634621 or equivalent into the radiator.
NOTICE: When adding coolant, it is important that you use GM Goodwrench DEX-COOL®
or HAVOLINE® DEX-COOL® coolant. If Coolant other than DEX-COOL®
or HAVOLINE® DEX-COOL® is added to the system the engine coolant will
require change sooner; at 50 000 km (30,000 mi)
or 24 months.
- Slowly add a 50/50 mixture of GM Goodwrench DEX-COOL or HAVOLINE
DEX-COOL and clean drinkable water to the radiator until the coolant level
is at the base of the radiator fill neck.
- Close the air bleed vent when the bubbles disappear and only the
coolant is visible.
- Fill the coolant recovery reservoir to the FULL HOT mark with
a 50/50 mixture of GM Goodwrench DEX-COOL or HAVOLINE DEX-COOL and clean,
drinkable water.
- Install the coolant recovery reservoir cap.
- Run the engine until the engine reaches normal operating temperature.
The radiator inlet hose will become hot.
- After the engine reaches normal operating temperature, check for
coolant leaks.
- Wait for two minutes and recheck the level of the coolant in the
radiator.
- If needed, add coolant to the radiator until the coolant level
reaches the bottom of the radiator fill neck.

- Install the radiator pressure
cap (1)
to the radiator (2).
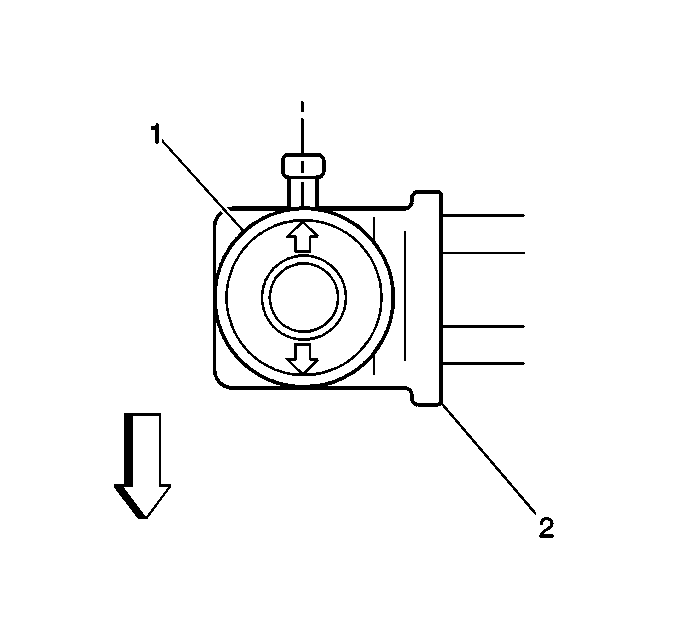
- Ensure that the radiator
cap (1) arrows
point toward the radiator overflow tube.
Cooling System Draining and Filling V8
Draining Procedure
- Park the vehicle on a level surface.
- Remove the coolant recovery reservoir fill cap.
Caution: As long as there is pressure in the cooling system, the temperature
can be considerably higher than the boiling temperature of the solution in
the radiator without causing the solution to boil. Removal of the pressure
cap while the engine is hot and pressure is high will cause the solution
to boil instantaneously -- possibly with explosive force -- spewing
the solution over the engine, fenders and the person removing the cap.

- Remove the radiator pressure
cap (1)
from the radiator (2).
| • | Slowly rotate the pressure cap (1) counterclockwise until the
cap (1) reaches the detent. Do not press down while rotating the pressure
cap (1). |
| • | Wait until any remaining pressure, indicated by a hissing sound,
is relieved. |
| • | After all the pressure is relieved, press down on the pressure
cap (1) and continue to rotate the pressure cap (1) counterclockwise. |
| | Important: Recover and store used coolant in a used coolant holding tank and submit
the used coolant for recycling on a regular basis. DO NOT pour used coolant
down the drain! Ethylene glycol antifreeze is very toxic. Disposing of ethylene
glycol into the sewer system or ground water is both illegal and ecologically
unsound!
|
- Place a drain pan under the radiator drain cock in order to collect
all the used coolant.

- Open the radiator drain
cock.
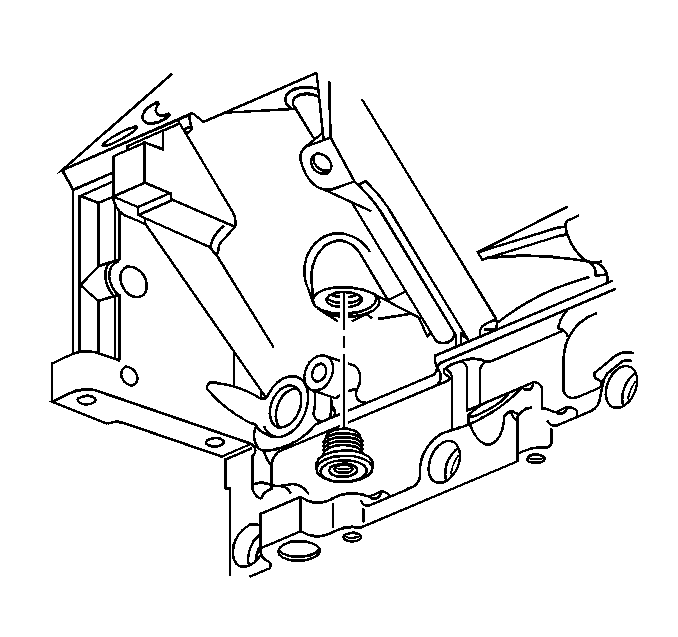
- Remove the right side
engine block drain hole plug.
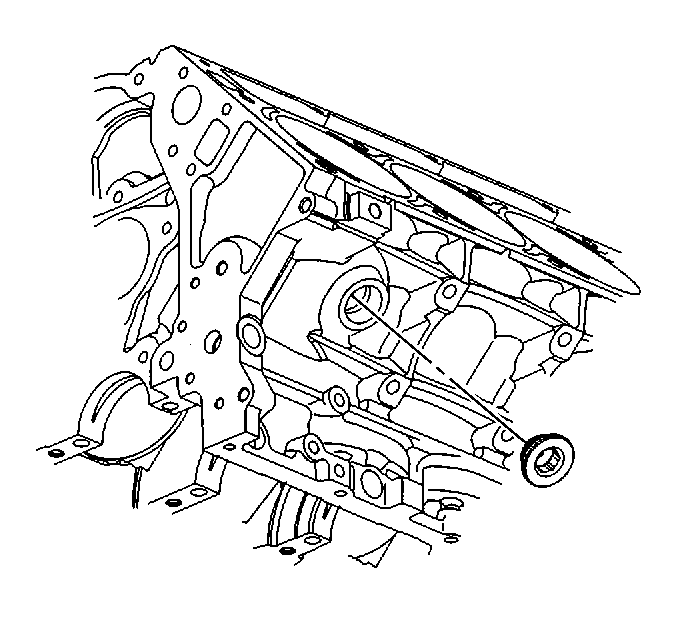
- Remove the left side engine
block drain hole plug.
- Allow the cooling system to drain completely.
Filling Procedure
Notice: DO NOT use cooling system seal tabs, or similar compounds, unless otherwise
instructed. The use of cooling system seal tabs, or similar compounds, may
restrict coolant flow through the passages of the cooling system or the engine
components. Restricted coolant flow may cause engine overheating and/or damage
to the cooling system or the engine components/assembly.
- Remove, clean, and reinstall the coolant recovery reservoir. Refer
to
Coolant Recovery Reservoir Replacement
.

- Install the left side
engine block drain hole plug.

- Remove the right side
engine block drain hole plug.

- Close the radiator drain
cock.
Tighten
| • | Tighten the drain hole plugs to 60 N·m (44 lb ft). |
| • | Tighten the radiator drain cock to 1.5 N·m (13 lb in). |
- Slowly add a 50/50 mixture of GM Goodwrench DEX-COOL or HAVOLINE
DEX-COOL and clean drinkable water to the radiator until the coolant level
is at the base of the radiator fill neck.
- Fill the coolant recovery reservoir to the FULL HOT mark with
a 50/50 mixture of GM Goodwrench DEX-COOL or HAVOLINE DEX-COOL and clean,
drinkable water.
- Install the coolant recovery reservoir cap.
- Run the engine until the engine reaches normal operating temperature.
The radiator inlet hose will become hot.
- After the engine reaches normal operating temperature, check for
coolant leaks.
- Wait two minutes and recheck the level of the coolant in the radiator.
- If needed, add coolant to the radiator until the coolant level
reaches the bottom of the radiator fill neck.

- Install the radiator pressure
cap (1) to the radiator (2).

- Ensure that the radiator
cap (1) arrows point toward the radiator overflow tube.


