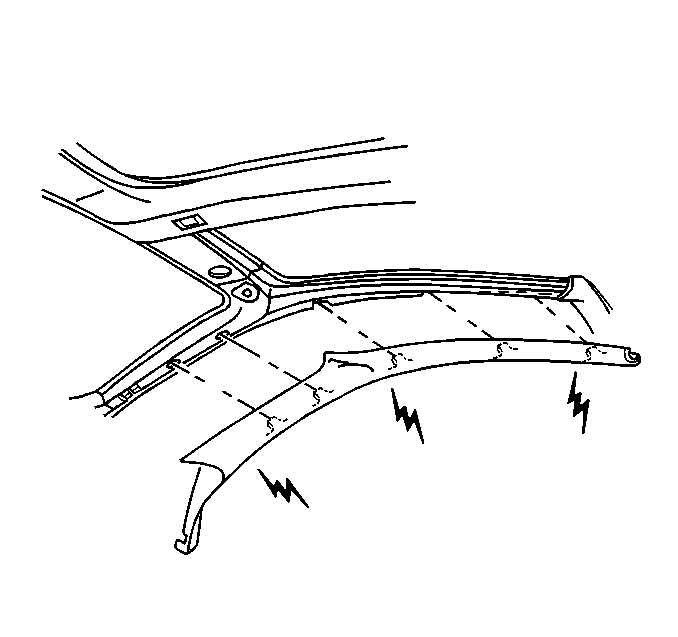
Noise Diagnosis - Instrument Panel and Header IP Hinge Pillar Trim Panel Rattle Or
Instrument Panel Hinge Pillar Trim Panel Rattle Or Itch
Symptom:
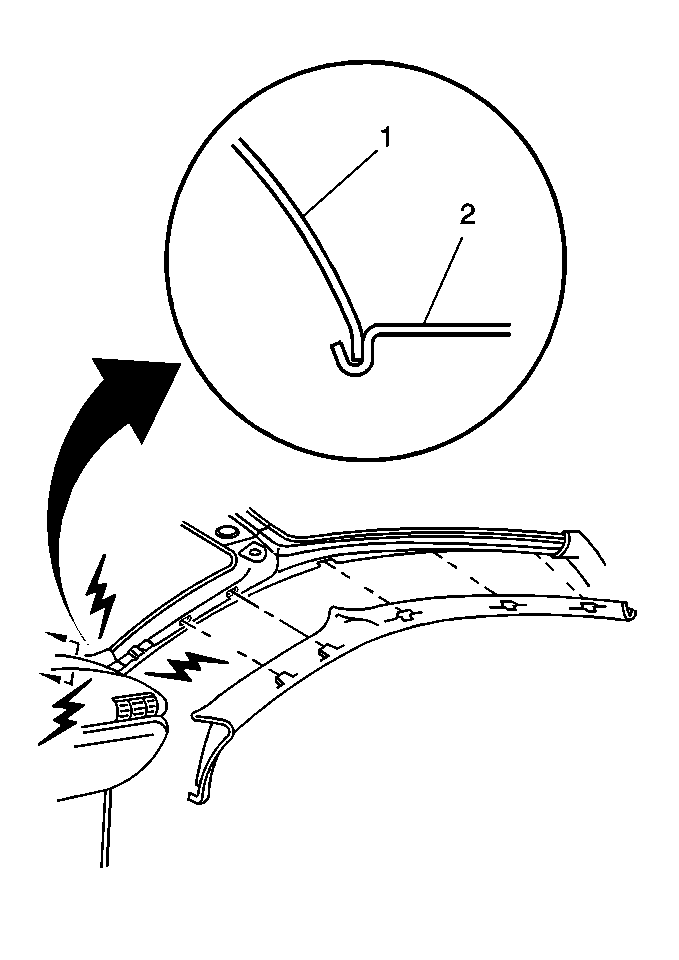
Rattle or itch coming from the right side of the instrument panel area.
Possible Cause:
| • | Body hinge pillar trim panel (1) rubbing against the upper extension
panel (2). |
| • | Body hinge pillar trim panel (1) contacts the right side wall
of the instrument panel. |
Diagnosis:
| • | Look for witness marks on the following: |
| • | Hinge pillar trim panel (1) |
| • | Upper extension panel (2) |
| • | Side wall of the instrument panel |
| • | Push down on the corner of the upper extension panel (2) to see
if it is able to spring back and touch the hinge pillar trim panel (1). |
| • | Push against the instrument panel wall to see if it is able to
spring back and touch the hinge pillar trim panel (1). |
Corrective Action:
| • | Apply felt tape to the upper extension panel (2) at the point
of contact. |
| • | Apply felt tape to the instrument panel wall at the point of contact. |
Noise Diagnosis - Instrument Panel and Header Instrument Panel Upper Trim Rattle
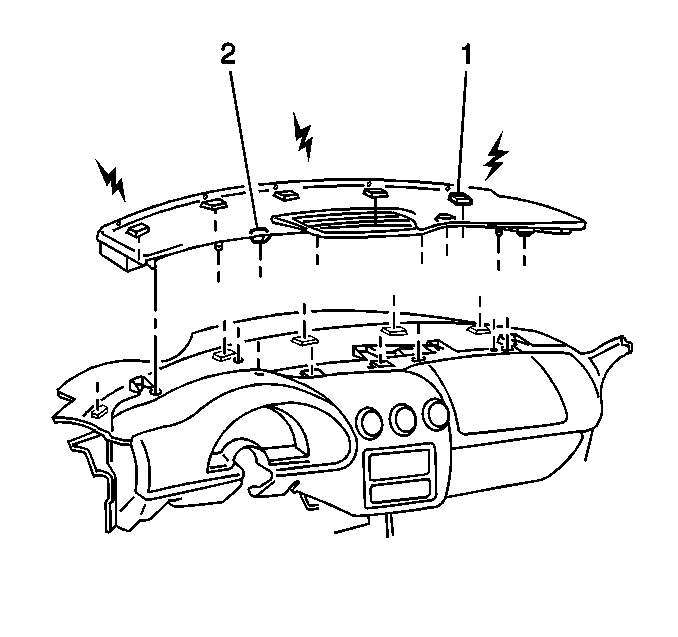
Instrument Panel Upper Trim Rattle
Symptom
Rattle from the top of the instrument panel.
Possible Cause
| • | Check the retaining clips (2) and dual lock fasteners (1) for
the following: |
| • | The adhesive attaching the dual lock fasteners (1) fails. |
Diagnosis
While test driving the vehicle, apply pressure to the upper trim panel
and listen for changes in noise.
Corrective Action
| • | If the adhesive has failed, replace the dual lock fastener. |
| • | Fully engage all clips and dual locks |
| • | Replace any damaged or missing clips (2) or dual lock fasteners
(1). |
Noise Diagnosis - Instrument Panel and Header Instrument Panel Knee BolsterItch
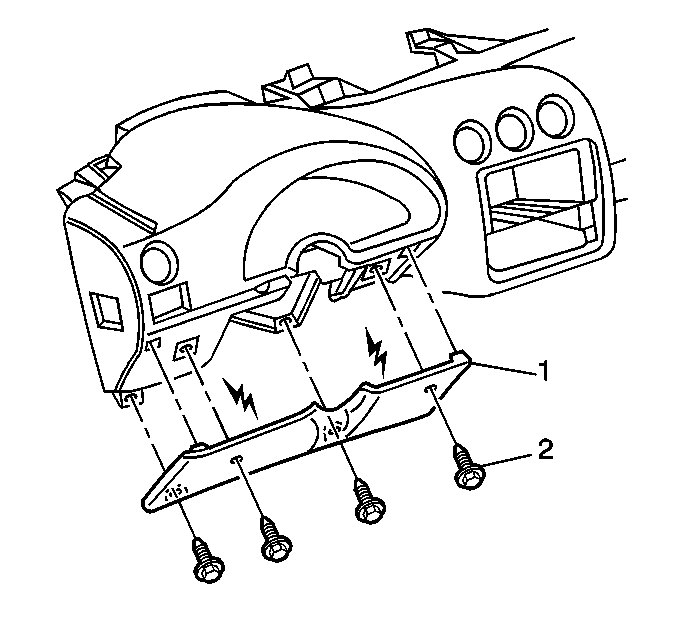
Instrument Panel Knee Bolster Itch
Symptom
Itching sound from below the steering column.
Possible Cause
Knee bolster rubbing against the cluster bezel.
Diagnosis
While test driving apply hard upward pressure and listen for the itch
to change.
Corrective Action
| • | Loosen knee bolster bolts. |
| • | Reposition knee bolster downward and forward to create clearance
to the bezel. |
Noise Diagnosis - Instrument Panel and Header Windshield Side Upper Garnish Molding
Windshield Side Upper Garnish Molding Itch
Symptom
Itch coming from the left or right side of the instrument panel.
Possible Cause
Windshield side upper garnish molding is loose.
Diagnosis
The edge of the garnish molding is contacting the windshield and/or
upper trim panel.
Corrective Action
| • | Replace the damaged clips on the garnish molding. |
| • | Replace the garnish molding if the clip area is broken. |
Noise Diagnosis - Instrument Panel and Header Radio Trim Plate Itch Or Buzz
Radio Trim Plate Itch Or Buzz
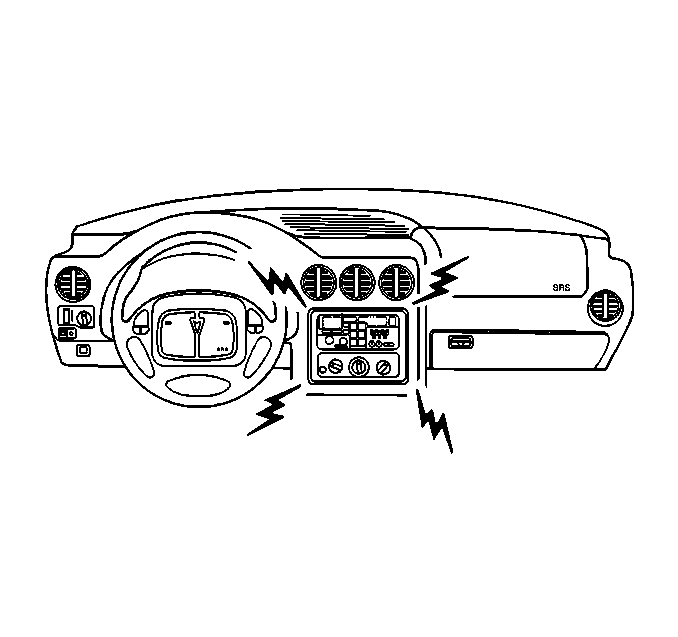
Symptom
Itch or buzz coming from the radio area of the instrument panel.
Possible Cause
Radio trim plate is contacting the radio at one or more locations.
Diagnosis
| • | Check the radio mounting bolt torque. |
| • | Inspect the trim plate for distortion. |
| • | Look for witness marks on the radio and/or trim plate. |
| • | Press against the radio trim plate to see if the noise can be
generated. |
| • | While test driving the vehicle, apply press the radio trim plate
and listen for changes in noise. |
Corrective Action
| • | Tighten the radio mounting bolts to 8 N·m (7 lb in).
Refer to
Fastener Tightening Specifications
Fastener Tightening Specificationsin
Instrument Panel, Gauges and Console. |
| • | Replace the radio trim plate. |
| • | Apply felt tape to the radio and/or edge of the radio trim plate
at the point(s) of contact. |
