For 1990-2009 cars only
Exhaust Manifold Replacement Left
Removal Procedure
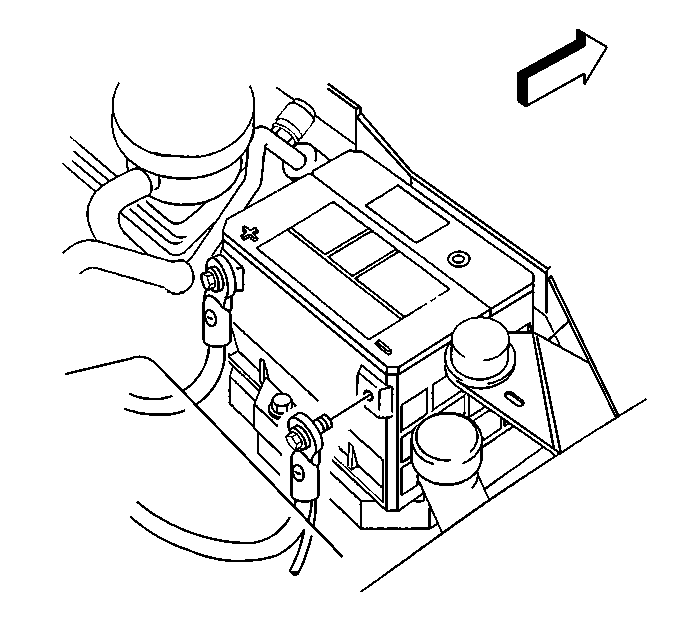
- Disconnect the negative battery cable. Refer to Battery Negative Cable Disconnection and Connection in Engine Electrical.
- Raise and suitably support the vehicle. Refer to Lifting and Jacking the Vehicle in General Information.
- Remove the 3-way catalytic converter. Refer to Catalytic Converter Replacement in Engine Exhaust.
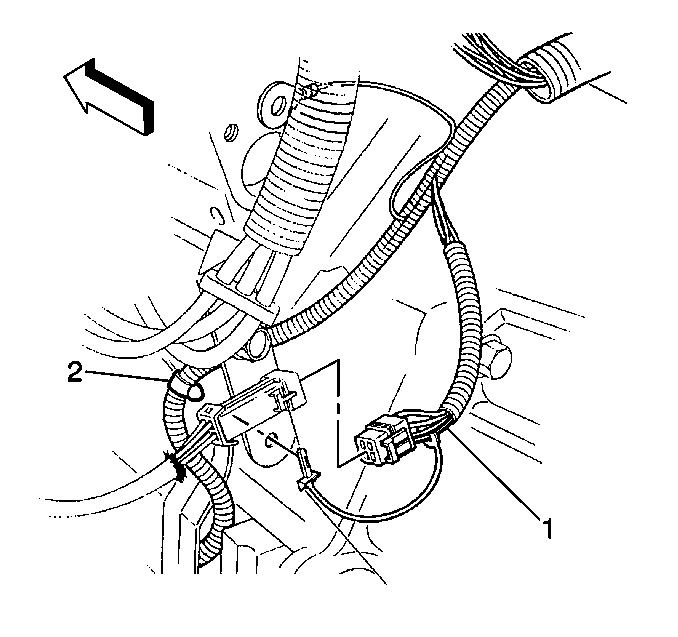
- Disconnect the secondary lock on the electrical connector.
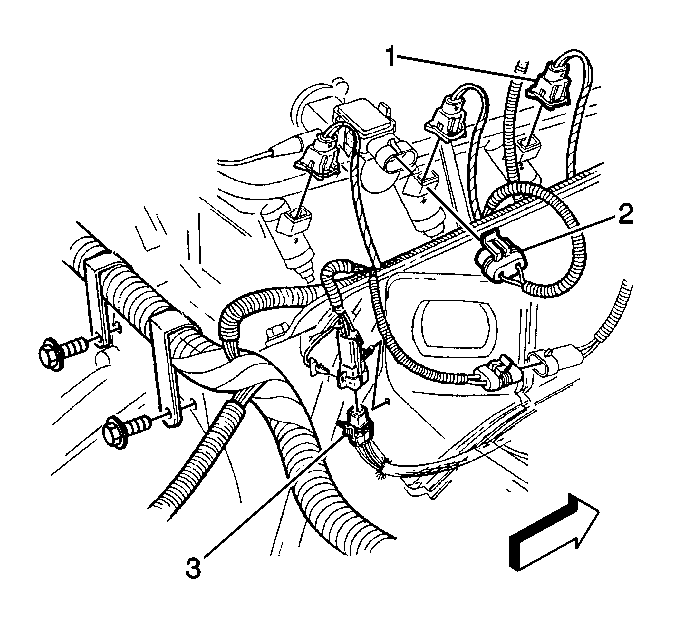
- Disconnect the wiring harness connector (1) from the oxygen sensor.
- Remove the oxygen sensor connector from the spark plug wire harness bracket.
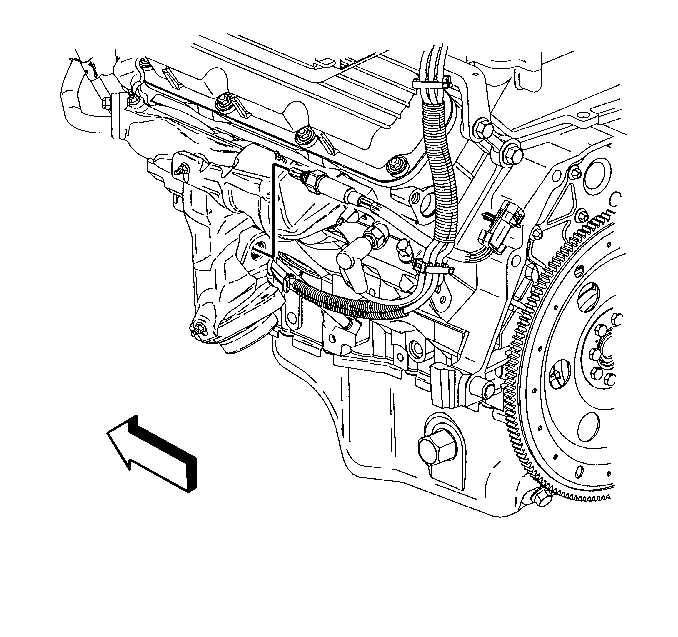
- Remove the oxygen sensor from the exhaust manifold.
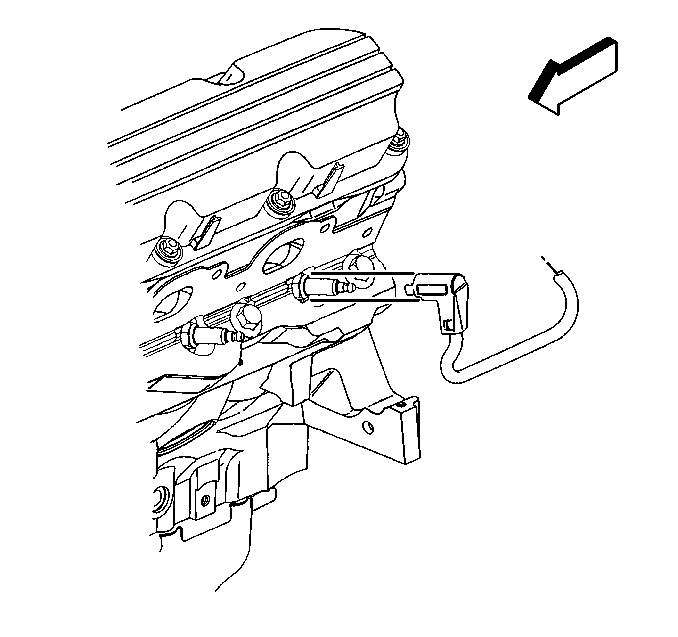
- Disconnect the numbers 1, 3 and 5 spark plug wires from the spark plugs.
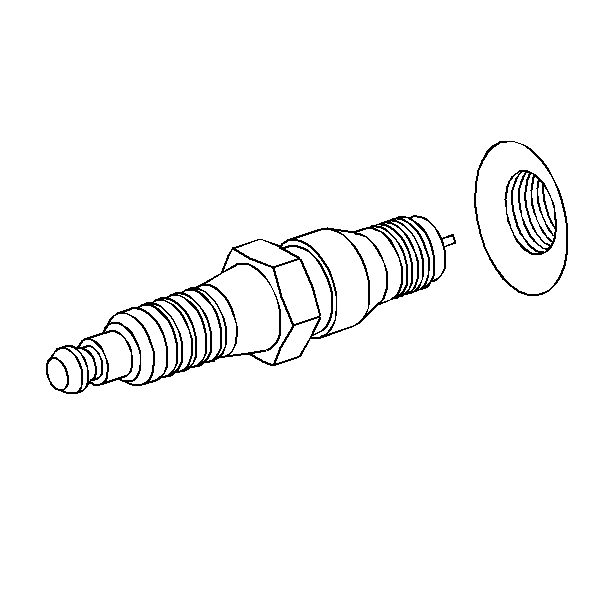
- Remove the numbers 3 and 5 spark plugs from the cylinder head.
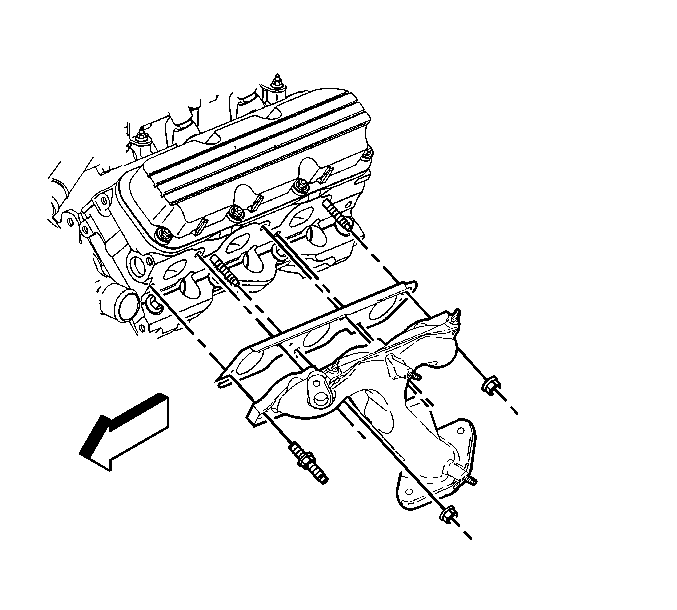
- Remove the two rear exhaust manifold studs and nut from the exhaust manifold.
- Lower the vehicle.
- Remove the number 1 spark plug from the cylinder head.
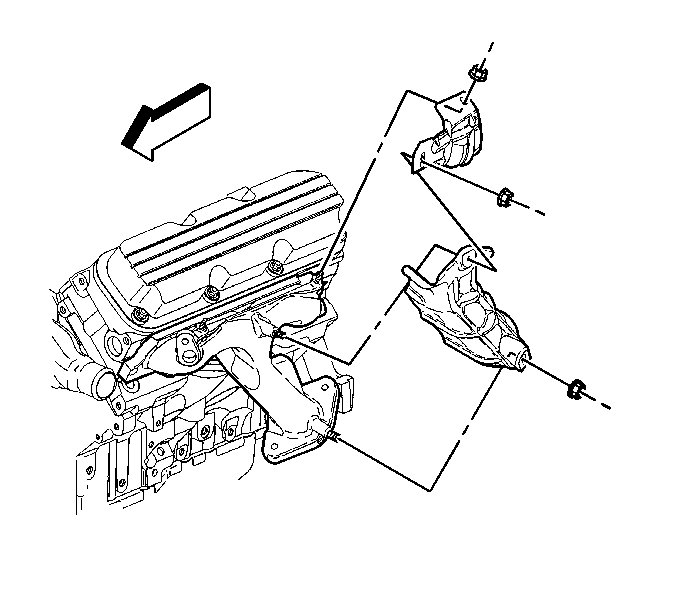
- Remove the exhaust manifold heat shield nuts.
- Remove the exhaust manifold heat shields from the exhaust manifold.
- Remove the exhaust manifold studs and nut from the exhaust manifold.
- Remove the exhaust manifold and gasket from the cylinder head.
- Remove the heat shield studs from the exhaust manifold, if necessary.


Installation Procedure
- Install the heat shield studs to the exhaust manifold, if necessary.
- Install the exhaust manifold gasket and manifold to the cylinder head studs.
- Install the front two exhaust manifold studs and nut to the exhaust manifold.
- Install the exhaust manifold heat shields to the exhaust manifold.
- Install the exhaust manifold heat shield nuts.
- Install the number 1 spark plug to the cylinder head.
- Raise and suitably support the vehicle. Refer to Lifting and Jacking the Vehicle in General Information.
- Install the two rear exhaust manifold studs and nut to the exhaust manifold.
- Install the numbers 3 and 5 spark plugs to the cylinder head.
- Connect the numbers 1, 3 and 5 spark plug wires to the spark plugs.
- Install the oxygen sensor to the exhaust manifold.
- Install the oxygen sensor connector to the spark plug wire harness bracket.
- Connect the wire harness connector (1) to the oxygen sensor connector.
- Connect the secondary lock on the electrical connector.
- Install the 3-way catalytic converter. Refer to Catalytic Converter Replacement in Engine Exhaust.
- Lower the vehicle.
- Connect the negative battery cable. Refer to Battery Negative Cable Disconnection and Connection in Engine Electrical.

Tighten
| • | Tighten the two front exhaust manifold studs to 15 N·m (11 lb ft). |
| • | Tighten the exhaust manifold nut to 18 N·m (13 lb ft). |

Tighten
Tighten the exhaust manifold heat shield nuts to 10 N·m
(89 lb in).

Tighten
Tighten the number 1 spark plug to 27 N·m (20 lb ft).

Tighten
| • | Tighten the two rear exhaust manifold studs to 15 N·m (11 lb ft). |
| • | Tighten the exhaust manifold nut to 18 N·m (13 lb ft). |

Tighten
Tighten the numbers 3 and 5 spark plugs to 27 N·m (20 lb ft).


Tighten
Tighten the oxygen sensor to 42 N·m (31 lb ft).


Exhaust Manifold Replacement Right
Removal Procedure
- Disconnect the negative battery cable. Refer to Battery Negative Cable Disconnection and Connection in Engine Electrical.
- Raise and suitably support the vehicle. Refer to Lifting and Jacking the Vehicle in General Information.
- Remove the 3-way catalytic converter. Refer to Catalytic Converter Replacement in Engine Exhaust.
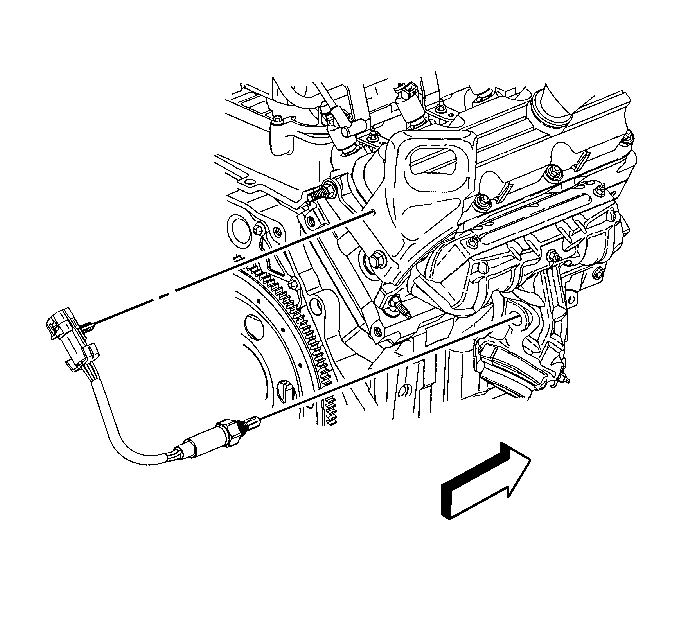
- Disconnect the secondary lock on the electrical connector.
- Disconnect the oxygen sensor electrical connector (3) from the harness.
- Remove the oxygen sensor connector rosebud from the engine lift bracket.
- Remove the oxygen sensor from the exhaust manifold.
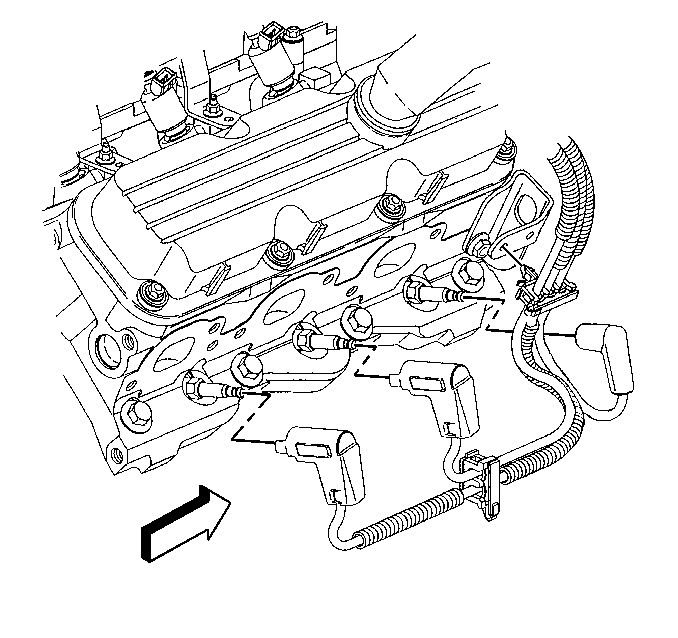
- Disconnect the numbers 4 and 6 spark plug wires from the spark plugs.
- Remove the number 6 spark plug from the cylinder head.
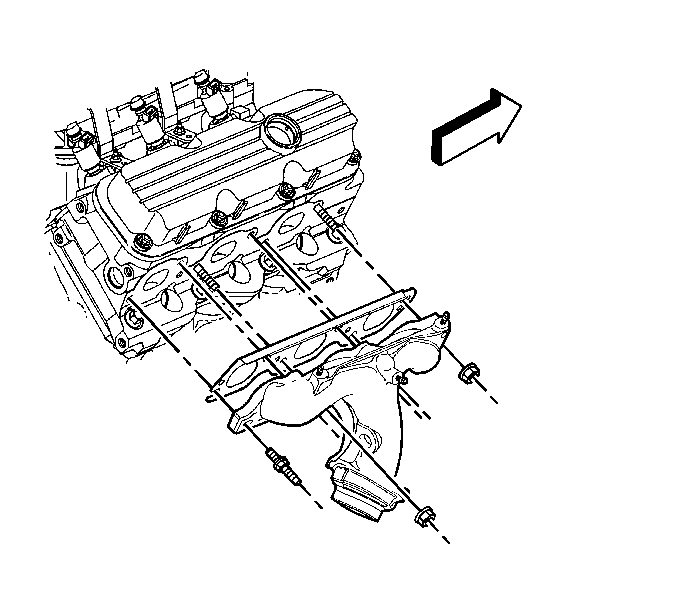
- Remove the two rear exhaust manifold studs and nut from the exhaust manifold.
- Lower the vehicle.
- Disconnect the number 2 spark plug wire from the spark plug.
- Remove the numbers 2 and 4 spark plugs from the cylinder head.
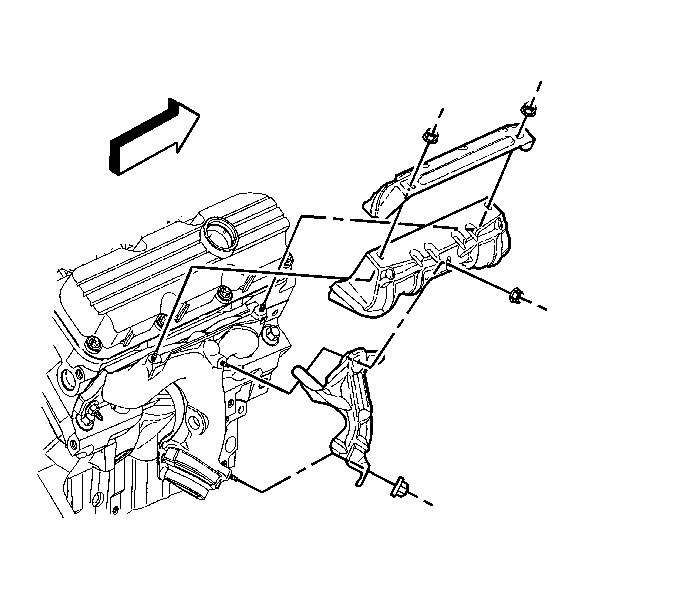
- Remove the exhaust manifold heat shield nuts.
- Remove the exhaust manifold heat shields from the exhaust manifold.
- Remove the two front exhaust manifold studs and nut from the exhaust manifold.
- Remove the right exhaust manifold and gasket from the cylinder head.
- Remove the heat shield studs from the exhaust manifold, if necessary.





Installation Procedure
- Install the heat shield stud to the exhaust manifold, if necessary.
- Install the right exhaust manifold gasket and manifold to the cylinder head studs.
- Install the two front exhaust manifold studs and nuts to the exhaust manifold.
- Install the exhaust manifold heat shields to the exhaust manifold.
- Install the exhaust manifold heat shield nut.
- Install the numbers 2 and 4 spark plugs to the cylinder head.
- Connect the number 2 spark plug wire to the spark plug.
- Raise and suitably support the vehicle. Refer to Lifting and Jacking the Vehicle in General Information.
- Install the two rear exhaust manifold studs and nut to the exhaust manifold.
- Install the number 6 spark plug to the cylinder head.
- Connect the numbers 4 and 6 spark plug wires to the spark plugs.
- Install the oxygen sensor to the exhaust manifold.
- Connect the oxygen sensor electrical connector rosebud to the engine lift bracket.
- Connect the oxygen sensor electrical connector (3) to the wiring harness.
- Connect the secondary lock on the electrical connector.
- Install the 3-way catalytic converter. Refer to Catalytic Converter Replacement in Engine Exhaust.
- Lower the vehicle.
- Connect the negative battery cable. Refer to Battery Negative Cable Disconnection and Connection in Engine Electrical.

Tighten
| • | Tighten the two front exhaust manifold studs to 15 N·m (11 lb ft). |
| • | Tighten the exhaust manifold nuts to 18 N·m (13 lb ft). |

Tighten
Tighten the exhaust manifold heat shield nuts to 10 N·m
(89 lb in).

Tighten
Tighten the numbers 2 and 4 spark plugs to 27 N·m (20 lb ft).


Tighten
| • | Tighten the two rear exhaust manifold studs to 15 N·m (11 lb ft). |
| • | Tighten the exhaust manifold nut to 18 N·m (13 lb ft). |

Tighten
Tighten the number 6 spark plug to 27 N·m (20 lb ft).


Tighten
Tighten the exhaust manifold to 42 N·m (31 lb ft).


