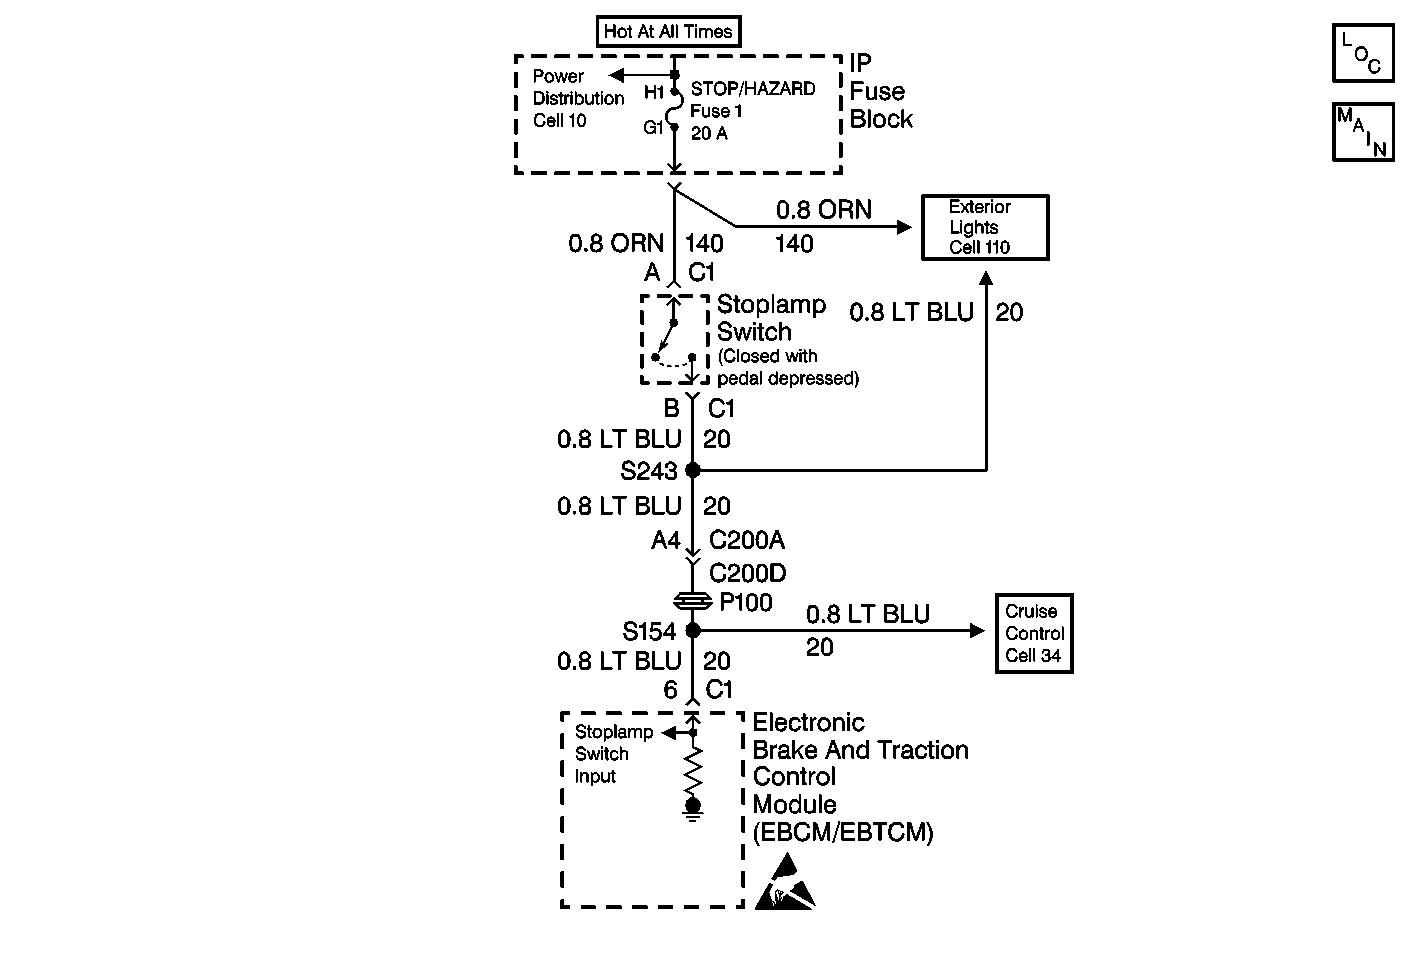
Circuit Description
The Stoplamp Switch is a normally open switch, when the brake pedal is depressed the EBCM/EBTCM will sense battery voltage. This allows the EBCM/EBTCM to determine the state of the brake lamps.
Conditions for Setting the DTC
| • | EBCM/EBTCM detects battery voltage at all times. |
| • | EBCM/EBTCM never detects battery voltage from CKT 20. |
| • | Both brake lamps are faulty. |
Action Taken When the DTC Sets
| • | DTC C0161 is set. |
| • | ABS and TCS remains active. |
Conditions for Clearing the DTC
| • | The condition responsible for setting the DTC no longer exists and the scan tool Clear DTCs function is used. |
| • | 100 ignition cycles pass with no DTCs detected. |
Diagnostic Aids
| • | It is very important that a thorough inspection of the wiring and connectors be performed. Failure to carefully and fully inspect wiring and connectors may result in misdiagnosis, causing part replacement with reappearance of the malfunction. |
| • | Thoroughly inspect any circuitry that may be causing the complaint for the following conditions: |
| - | Backed out terminals |
| - | Improper mating |
| - | Broken locks |
| - | Improperly formed or damaged terminals |
| - | Poor terminal-to-wiring connections |
| - | Physical damage to the wiring harness |
| • | The following conditions may cause an intermittent malfunction: |
| - | A poor connection |
| - | Rubbed-through wire insulation |
| - | A broken wire inside the insulation |
| • | If an intermittent malfunction exists refer to Troubleshooting Procedures Cell 4 in Electrical Diagnosis for further diagnosis. |
Test Description
The numbers below refer to the step numbers on the diagnostic table.
Step | Action | Value(s) | Yes | No |
|---|---|---|---|---|
1 | Was the Diagnostic System Check performed? | -- | ||
2 | Observe the rear brake lamps. Are the brake lamps off? | -- | ||
3 | Disconnect the Stoplamp Switch connector C1. Are the brake lamps on? | -- | ||
4 | Press the brake pedal. Do the brake lights come on? | -- | ||
Is the voltage within specifications? | Battery voltage | |||
6 | Replace the EBCM/EBTCM. Refer to Electronic Brake Control Module Replacement . Is the replacement complete? | -- | -- | |
7 | Repair the open or high resistance in CKT 20. Refer to Repair Procedures Cell 5 in Electrical Diagnosis. Is the circuit repair complete? | -- | -- | |
8 | Check the STOP/HAZARD fuse in the I/P Fuse Block. Is the fuse OK? | -- | ||
9 |
Is the voltage within specifications? | Battery voltage | ||
10 | Repair the open in CKT 140. Refer to Repair Procedures Cell 5 in Electrical Diagnosis. Is the circuit repair complete? | -- | -- | |
Connect a fused jumper wire between the Stoplamp Switch harness connector terminals A and B. Do the brake lamps come on? | -- | |||
12 | Adjust or repair the Stoplamp Switch as necessary. Is the repair complete? | -- | -- | |
13 |
Is the fuse OK? | -- | ||
14 | Repair the short to ground in CKT 140. Refer to Repair Procedures Cell 5 in Electrical Diagnosis. Is the circuit repair complete? | -- | -- | |
15 |
Is the fuse OK? | -- | ||
16 |
Is the fuse OK? | -- | ||
17 | Repair the short to ground in CKT 20. Refer to Repair Procedures Cell 5 in Electrical Diagnosis. Is the circuit repair complete? | -- | -- | |
18 | Repair CKT 20 for a short to voltage. Refer to Repair Procedures Cell 5 in Electrical Diagnosis. Is the repair complete? | -- | -- |
