For 1990-2009 cars only
Console Trim Plate Replacement Automatic
Removal Procedure
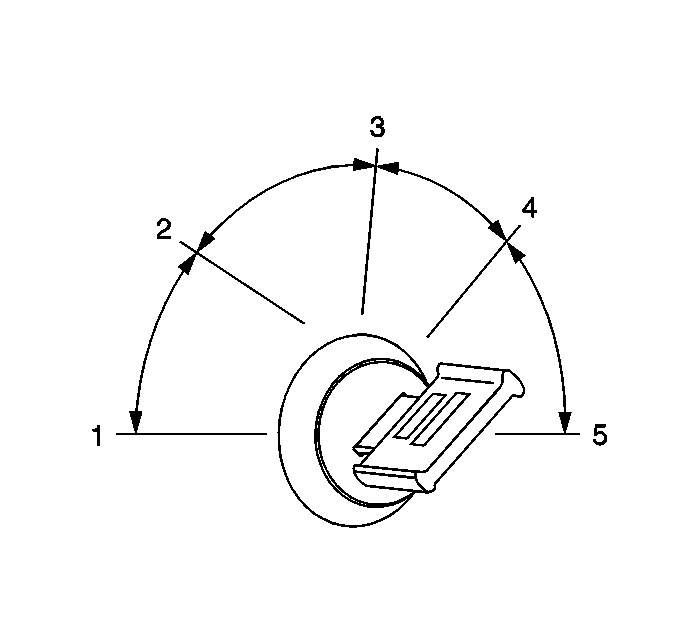
- Place the ignition switch in the RUN (4) position.
- Place the shift lever in the NEUTRAL position.
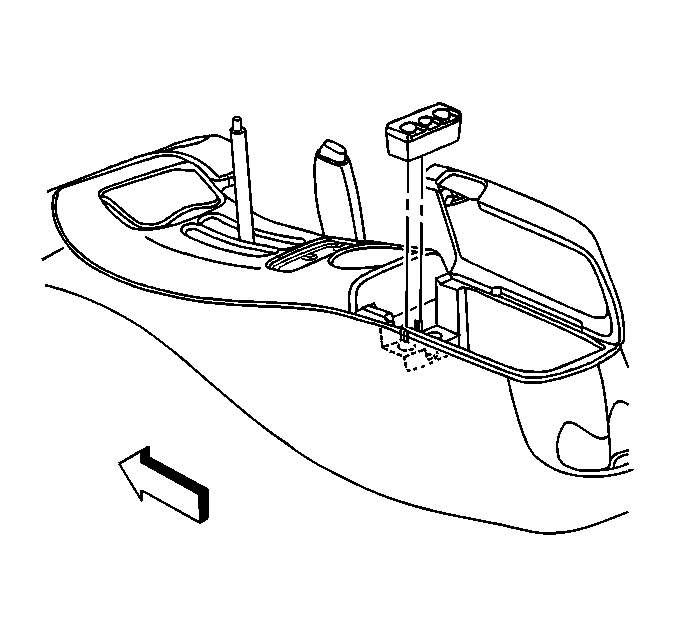
- Remove the shift control knob. Refer to Floor Shift Control Knob Replacement in Automatic Transmissions.
- Unsnap the floor console accessory bin, if equipped.
- Open the console armrest door.
- Remove the coin holder from inside the console.
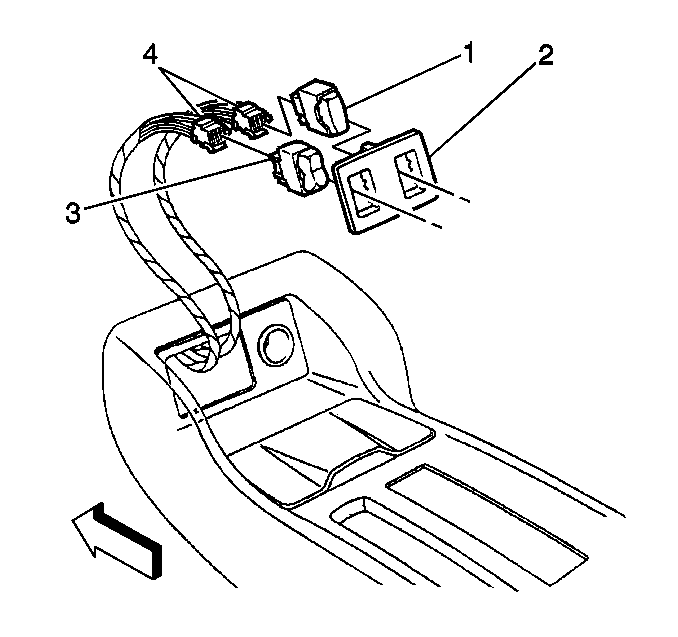
- Unsnap the switch plate (2) from the floor console.
- Disconnect the electrical connectors (4) from the switches (1, 3), if equipped.
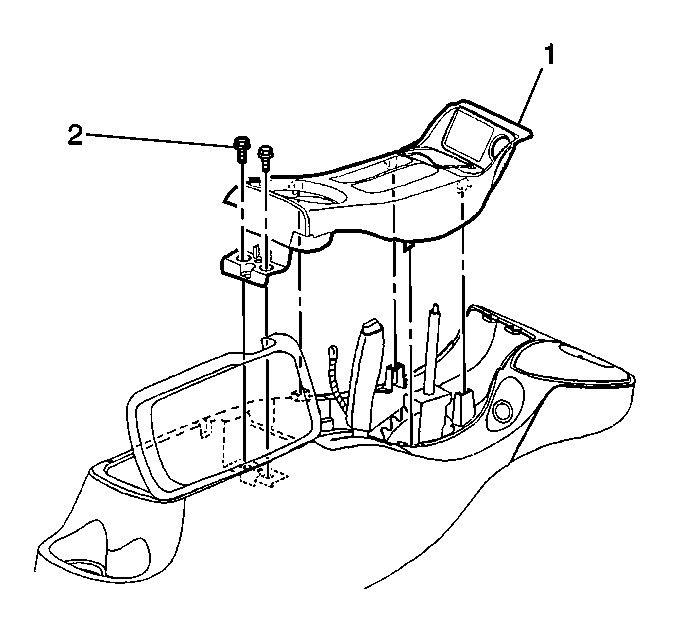
- Remove the console trim plate bolts (2).
- Disconnect the PRNDL lamp connector.
- Disconnect the cigarette lighter electrical connector.
- Remove the console trim plate (1).
Installation Procedure
- Position the console trim plate (1) over the shifter lever.
- Connect the cigarette lighter electrical connector.
- Connect the PRNDL lamp connector.
- Insert the forward end of the trim plate (1) into the console.
- Apply pressure to the console trim plate (1) and snap the trim plate (1) into place.
- Install the console trim plate bolts (2).
- Snap the switch plate (2) to the floor console.
- Connect the electrical connectors (4) to the switches (1, 3), if equipped.
- Install the coin holder to inside the console.
- Close the console armrest door.
- Snap the floor console accessory bin to the console, if equipped.
- install the shift control knob. Refer to Floor Shift Control Knob Replacement in Automatic Transmissions.
- Place the shift lever in the PARK position.
- Place the ignition switch in the OFF position.
Tighten
Tighten the console trim plate bolts (2) to 1.9 N·m (17 lb in).

Console Trim Plate Replacement Manual
Removal Procedure
- Set the park brake.
- Place the shift lever in the NEUTRAL position.
- Disconnect the negative battery cable. Refer to Battery Negative Cable Disconnection and Connection in Engine Electrical.
- Remove the shift lever knob from the shift lever.
- Unsnap the floor console accessory bin, if necessary.
- Open the console armrest door.
- Remove the coin holder from inside the console.
- Unsnap the switch plate from the floor console.
- Disconnect the electrical connectors from the switches, if equipped.
- Remove the console trim plate bolts (1).
- Disconnect the ashtray lamp connector.
- Disconnect the cigarette lighter electrical connector.
- Remove the console trim plate (2).
Lift the trim plate up.
Installation Procedure
- Position the trim plate (2) over the shifter lever.
- Connect the cigarette lighter electrical connector.
- Connect the ashtray lamp connector.
- Insert the forward end of the trim plate (2) into the console.
- Apply pressure to the console trim plate (2) and snap the trim plate (2) into place.
- Install the console trim plate bolts (1).
- Connect the electrical connectors to the switches, if equipped.
- Snap in the front floor console accessory trim plate.
- Install the coin holder to the inside of the console.
- Close the console armrest door.
- Snap the console accessory bin to the console, if equipped.
- Install the shift lever knob to the shift lever.
- Connect the negative battery cable. Refer to Battery Negative Cable Disconnection and Connection in Engine Electrical.
Tighten
Tighten the console trim plate bolts (1) to 1.9 N·m (17 lb in).
