For 1990-2009 cars only
Removal Procedure
- Raise and suitably support the vehicle. Refer to Lifting and Jacking the Vehicle in General Information.
- Remove the propeller shaft. Refer to One-Piece Propeller Shaft Replacement or Two-Piece Propeller Shaft Replacement in Propeller Shaft.
- Remove the rear axle torque arm. Refer to Torque Arm Replacement in Rear Suspension.
- Remove the catalytic converter hanger. Refer to Converter Hanger Assembly Replacement in Engine Exhaust.
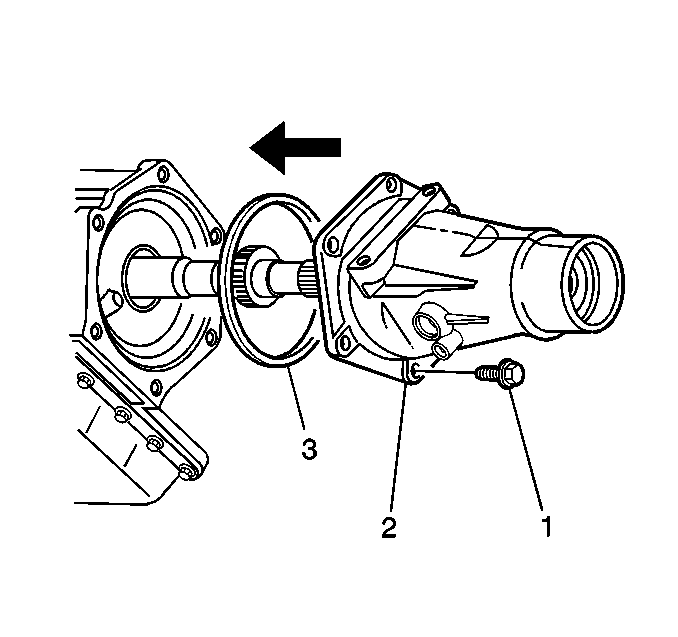
- Remove the case extension bolts (1).
- Remove the case extension (2).
- Remove the case extension seal (3). Discard the seal (3).
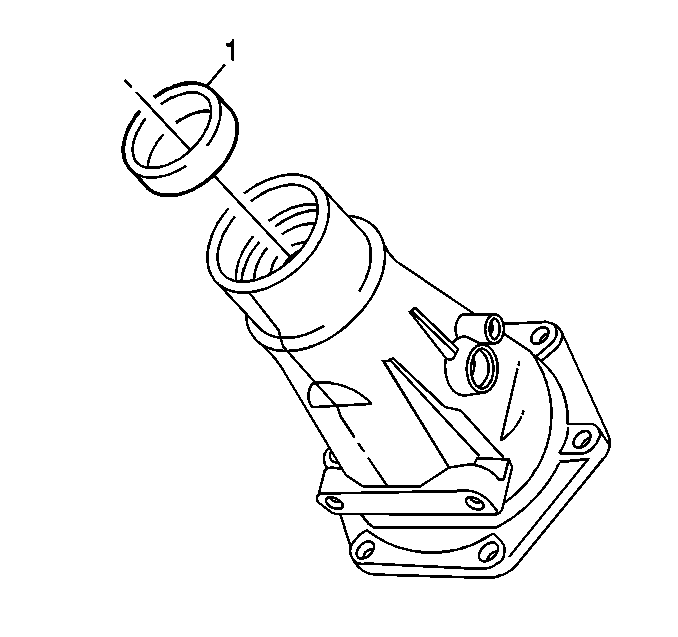
- Remove the case extension seal (1).
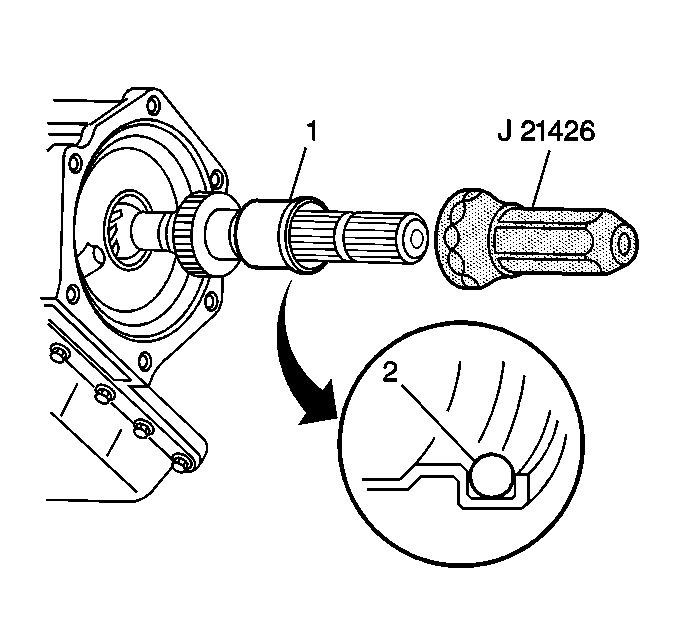
- Remove the output shaft sleeve (1), if necessary.
- Remove the output shaft seal (2), if necessary.


Installation Procedure
Tools Required
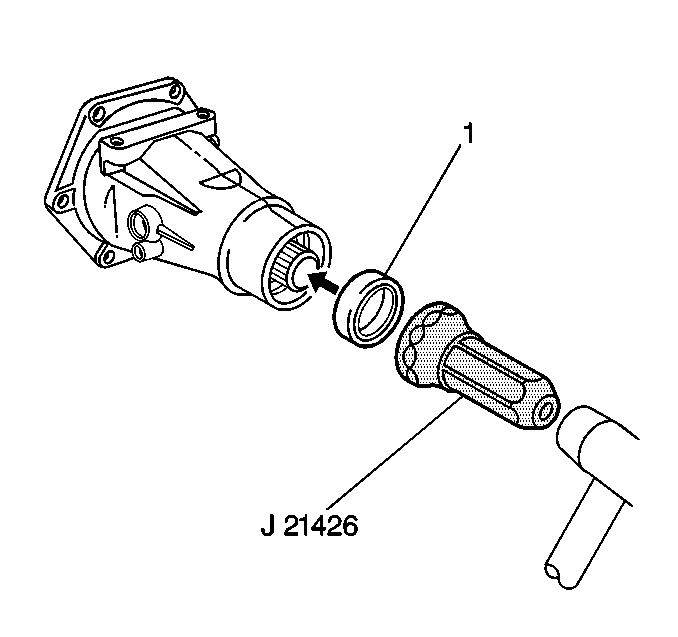
J 21426 Case Extension Oil Seal Installer
- Install the output shaft sleeve seal (2), if necessary.
- Install the output shaft (1) using J 21426 , if necessary.
- Install a new case extension seal (1) using a soft face hammer and J 21426 .
- Install a new case extension seal (3).
- Install the case extension (2).
- Install the case extension bolts (1).
- Install the rear axle torque arm. Refer to Torque Arm Replacement in Rear Suspension.
- Install the propeller shaft. Refer to One-Piece Propeller Shaft Replacement or Two-Piece Propeller Shaft Replacement in Propeller Shaft.
- Install the catalytic converter hanger. Refer to Converter Hanger Assembly Replacement in Engine Exhaust.
- Lower the vehicle.


Tighten
Tighten the case extension bolts (1) to 35 N·m (26 lb ft).
