Starter Replacement 3.8L
Removal Procedure
Important: This engine was designed for starter motor mounting without shims. However, if single or double shims have been added to correct a noise or engagement condition, reinstall the shims in their original location to ensure proper pinion-to-flywheel engagement.
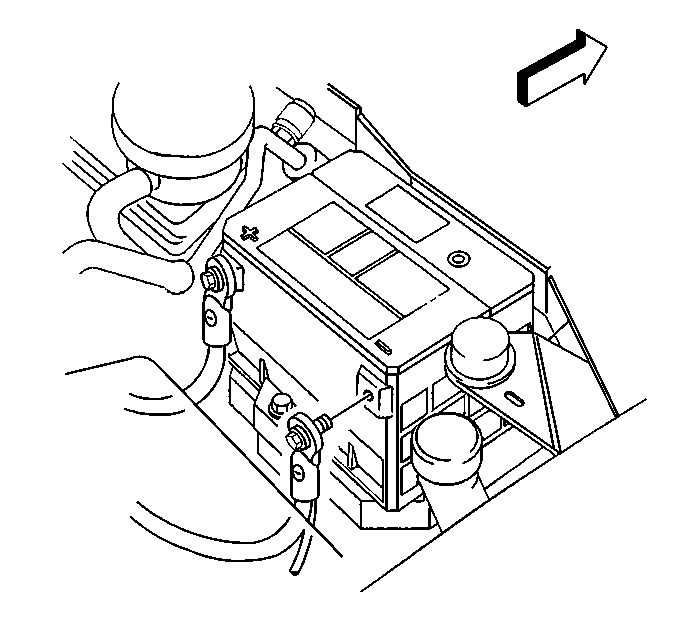
- Disconnect the negative battery cable. Refer to Battery Negative Cable Disconnection and Connection .
- Raise and suitably support the vehicle. Refer to Lifting and Jacking the Vehicle in General Information.
- Remove the starter motor shield. Refer to Starter Shield Replacement .
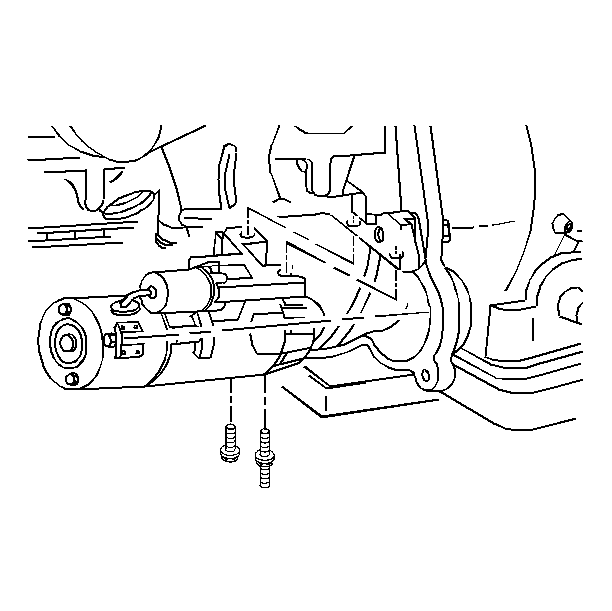
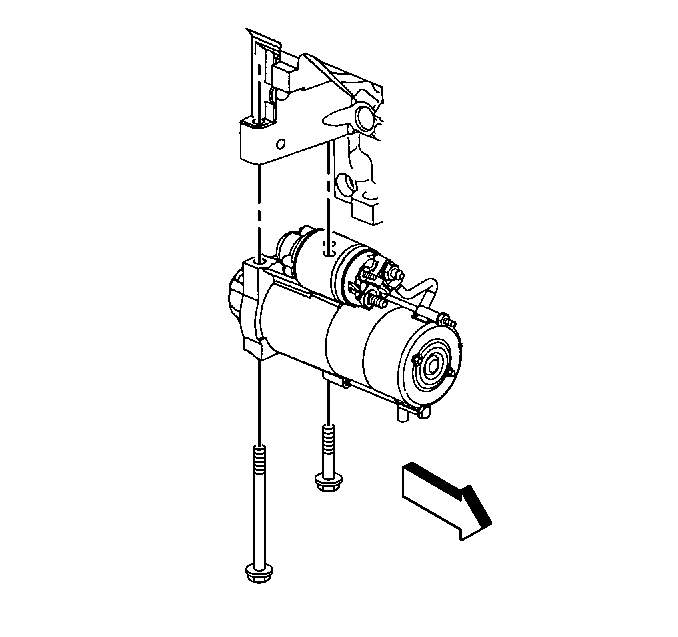
- Remove the starter motor bolt.
- Remove the starter motor stud.
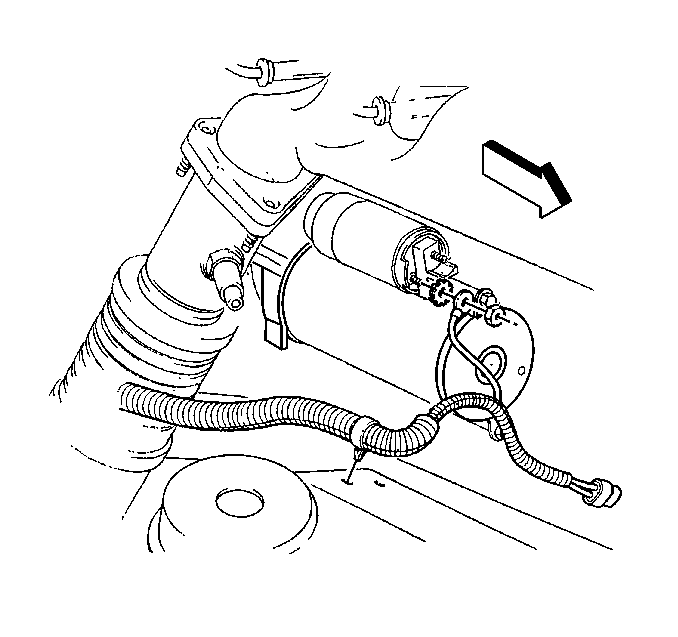
- Lower the starter motor from the engine block.
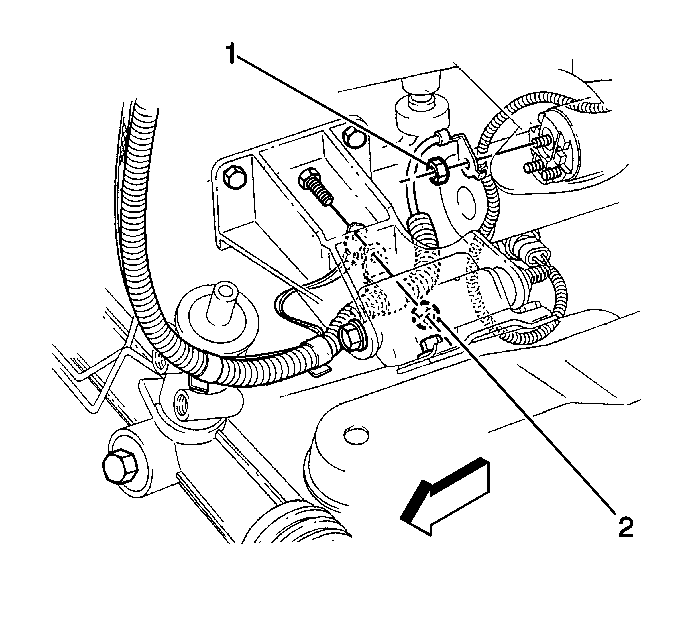
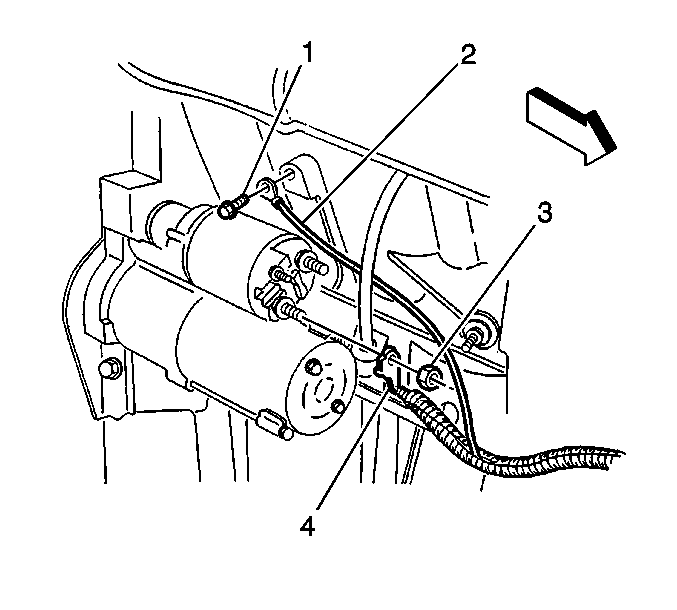
- Remove the positive cable to starter motor nut (1).
- Remove the positive cable from the starter motor.
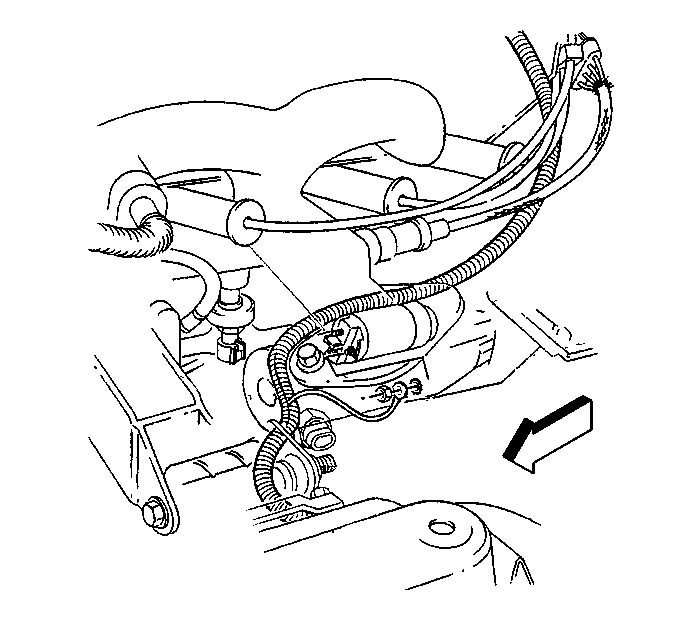
- Remove the wiring harness starter lead nut from the starter.
- Remove the starter lead and washer.
- Remove the starter motor.
Installation Procedure
- Lift the starter motor into position.
- Install the starter lead and washer to the starter.
- Install the wiring harness starter lead nut.
- Install the positive cable to the starter.
- Install the positive cable to starter motor nut (1).
- Raise the starter motor to the engine block.
- Install the starter motor bolt.
- Install the starter motor stud.
- Install the starter motor shield. Refer to Starter Shield Replacement .
- Connect the negative battery cable. Refer to Battery Negative Cable Disconnection and Connection .
Tighten
Tighten the wiring harness starter lead nut to 2 N·m (17 lb in).
Tighten
Tighten the positive cable to starter motor nut (1) to 10 N·m
(89 lb in).
Tighten
Tighten the starter motor bolt to 47 N·m (35 lb ft).
Tighten
Tighten the starter motor stud to 45 N·m (33 lb ft).
Starter Replacement 5.7L
Removal Procedure
Important: This engine was designed for starter motor mounting without shims. However, if single or double shims have been added to correct a noise or engagement condition, reinstall the shims in their original location to ensure proper pinion-to-flywheel engagement.
- Disconnect the negative battery cable. Refer to Battery Negative Cable Disconnection and Connection .
- Raise and suitably support the vehicle. Refer to Lifting and Jacking the Vehicle in General Information.
- Remove the left side oxidation catalytic converter. Refer to Oxidation Catalytic Converter Replacement in Engine Exhaust.
- Remove the starter motor bolts.
- Lower the starter motor from the engine block.
- Remove the wiring harness starter lead nut from the starter.
- Remove the wiring harness starter lead and washer from the starter.
- Remove the positive cable to starter motor nut (3).
- Remove the positive cable (4) from the starter motor.
- Remove the starter motor.
Installation Procedure
- Lift the starter motor into position.
- Install the positive cable (4) to the starter motor.
- Install the positive battery cable to starter motor nut (3).
- Install the wiring harness starter lead and washer to the starter motor.
- Install the wiring harness starter lead nut.
- Raise the starter motor to the engine block.
- Install the starter motor bolts.
- Install the left side oxidation catalytic converter. Refer to Oxidation Catalytic Converter Replacement In Engine Exhaust.
- Lower the vehicle.
- Connect the negative battery cable. Refer to Battery Negative Cable Disconnection and Connection .
Tighten
Tighten the positive battery cable to starter motor nut (3) to 10 N·m
(89 lb in).
Tighten
Tighten the wiring harness starter lead nut to 2 N·m (18 lb in).
Tighten
Tighten the starter motor bolts to 50 N·m (37 lb ft).
