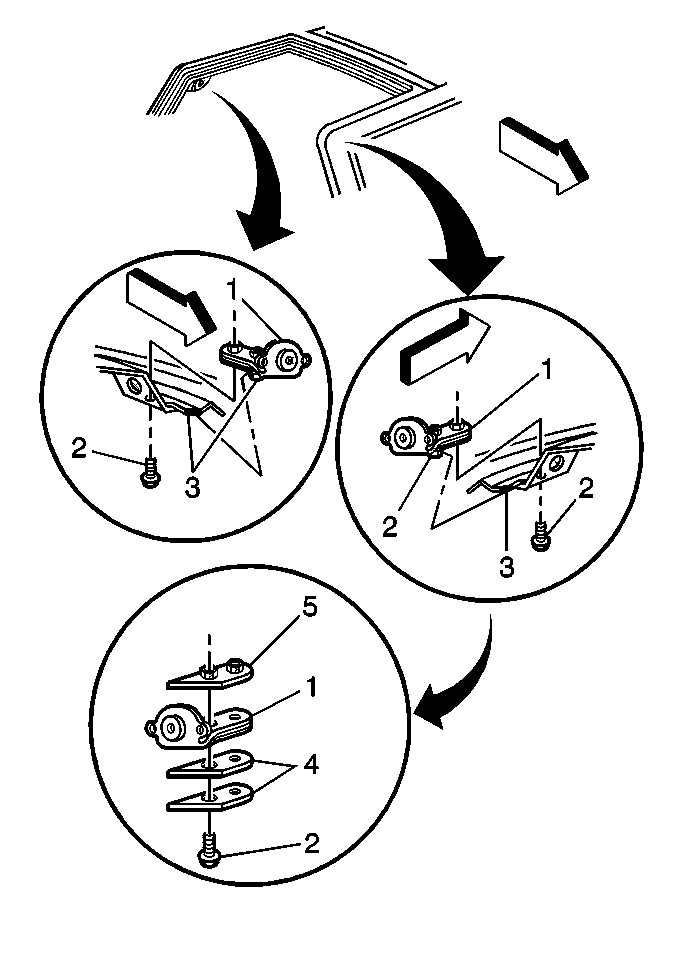
Removal Procedure
The roof lift-off window is adjustable within the lift-off window opening. The roof lift-off windows are adjusted up and down by adding or removing backing plates (4). Inboard/outboard and fore-and-aft travel is adjusted by loosening bolts/screws (2) and repositioning the front and rear strikers (1,3) as necessary. Adjustments should be made to get a flush fit of the roof lift-off window to the roof.
- Remove roof lift-off window .
- Remove windshield side upper garnish molding.
- Remove quarter trim finish panel bolts/screws.
- Remove quarter inner trim finish panel extension to access rear striker (3).
- Loosen bolts/screws (2).

Adjustment Procedure
- Adjust front and rear striker (1, 3) according to the following:
- Install roof lift-off panel window and inspect for proper fit.
- Remove roof lift-off windows once satisfactory fit is accomplished. If windows still do not fit satisfactorily, examine weatherstrip installation and repeat adjustment procedure.
Notice: Use the correct fastener in the correct location. Replacement fasteners must be the correct part number for that application. Fasteners requiring replacement or fasteners requiring the use of thread locking compound or sealant are identified in the service procedure. Do not use paints, lubricants, or corrosion inhibitors on fasteners or fastener joint surfaces unless specified. These coatings affect fastener torque and joint clamping force and may damage the fastener. Use the correct tightening sequence and specifications when installing fasteners in order to avoid damage to parts and systems.
| • | For up and down adjustment, add or remove backing plates (4) as necessary. |
| • | For inboard/outboard adjustment, move front or rear striker (1, 3) in or out as necessary. |
| • | For fore and aft adjustment, move front or rear striker (1, 3) fore or aft as necessary. |
Tighten
Once strikers are positioned, torque bolts/screws (2, 3)
to 10 N·m (89 lb in).
Installation Procedure
- Install quarter inner trim finish panel extension.
- Install quarter trim finish panel bolts/screws.
- Install windshield side upper garnish molding.
- Install roof lift-off window .

Notice: Use the correct fastener in the correct location. Replacement fasteners must be the correct part number for that application. Fasteners requiring replacement or fasteners requiring the use of thread locking compound or sealant are identified in the service procedure. Do not use paints, lubricants, or corrosion inhibitors on fasteners or fastener joint surfaces unless specified. These coatings affect fastener torque and joint clamping force and may damage the fastener. Use the correct tightening sequence and specifications when installing fasteners in order to avoid damage to parts and systems.
Tighten
Tighten the quarter trim finish panel bolts/screws to 1.7 N·m
(15 lb in).
