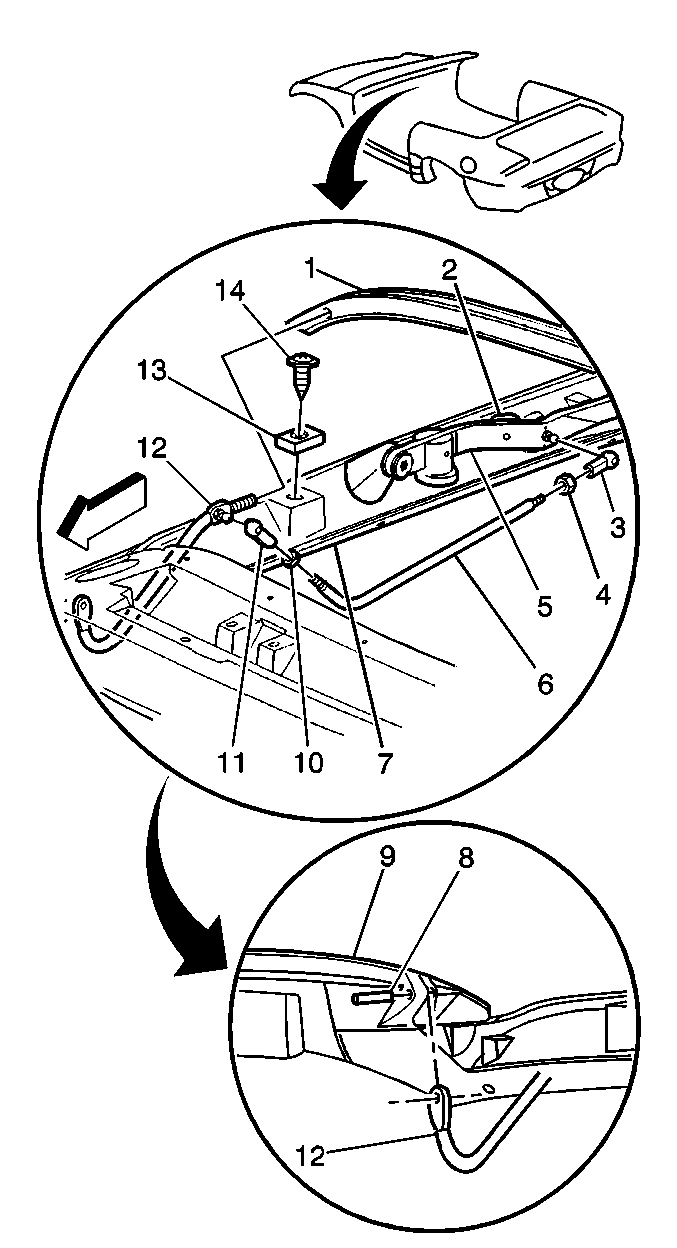
For 1990-2009 cars only
Folding Top Bow Link Replacement Procedure
Removal Procedure
- Lower the folding top to a suitable working position.
- Turn the pump bypass valve fully clockwise to the open position. Refer to Manual Operation in Folding Top Operation.
- Remove the side rail garnish molding. Refer to Windshield Pillar Garnish Molding Replacement in Interior Trim.
- Remove the outer locknuts from the number 2 bow links (6).
- Remove the number 2 bow links (6) from the number 1 bow links (12).
- Remove the number 1 bow links (12) from the number one bow (9) by punching out the pins.
- Remove the ball stud clips from the front side rail link (11).
- Remove the number 2 bow links (6).

Installation Procedure
- Install the number 2 bow links (6).
- Install the ball stud clip to the front side rail link (5).
- Install the number 1 bow links (12) to the number 1 bow (9).
- Install the number 2 bow links (6) to the number 1 bow links (12).
- Install the outer locknuts to the number 2 bow links (6).
- Install the side rail garnish molding. Refer to Windshield Pillar Garnish Molding Replacement in Interior Trim.
- Turn the pump bypass valve fully counterclockwise to the closed position.

Install the pins.
Notice: Use the correct fastener in the correct location. Replacement fasteners must be the correct part number for that application. Fasteners requiring replacement or fasteners requiring the use of thread locking compound or sealant are identified in the service procedure. Do not use paints, lubricants, or corrosion inhibitors on fasteners or fastener joint surfaces unless specified. These coatings affect fastener torque and joint clamping force and may damage the fastener. Use the correct tightening sequence and specifications when installing fasteners in order to avoid damage to parts and systems.
Tighten
Tighten the locknut to 5 N·m (44 lb in).
