For 1990-2009 cars only
Valve Rocker Arm Cover Replacement Left
Removal Procedure
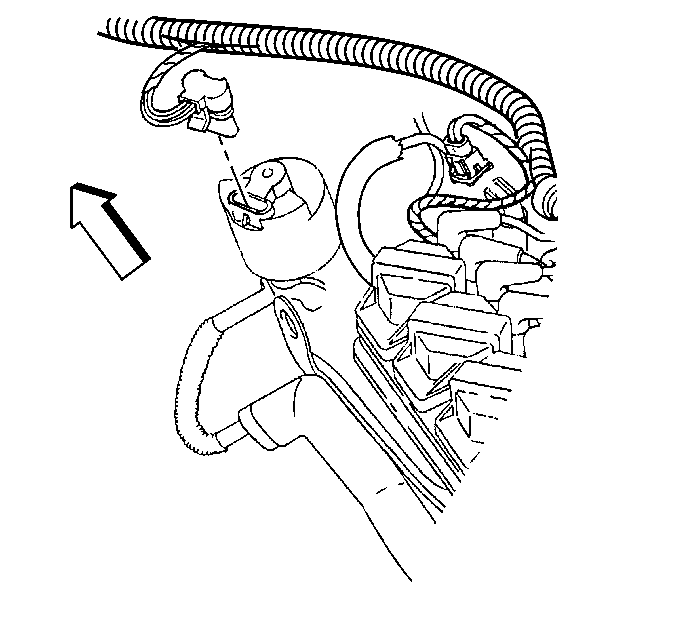
- Remove the ignition control module. Refer to Ignition Coil Module Replacement in Engine Electrical.
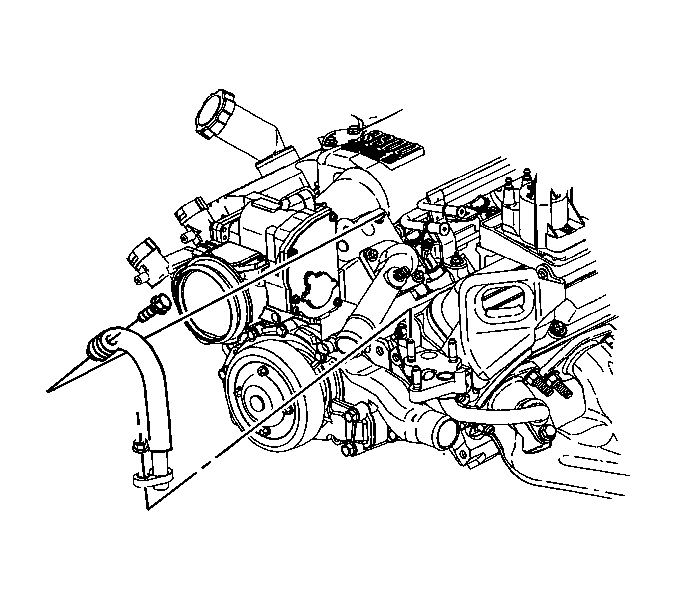
- Remove the exhaust gas recirculation (EGR) valve outlet pipe bolt from the upper intake manifold.
- Remove the EGR valve outlet pipe nut from the EGR valve adapter.
- Remove the EGR valve outlet pipe.
- Disconnect the EGR valve electrical connector.
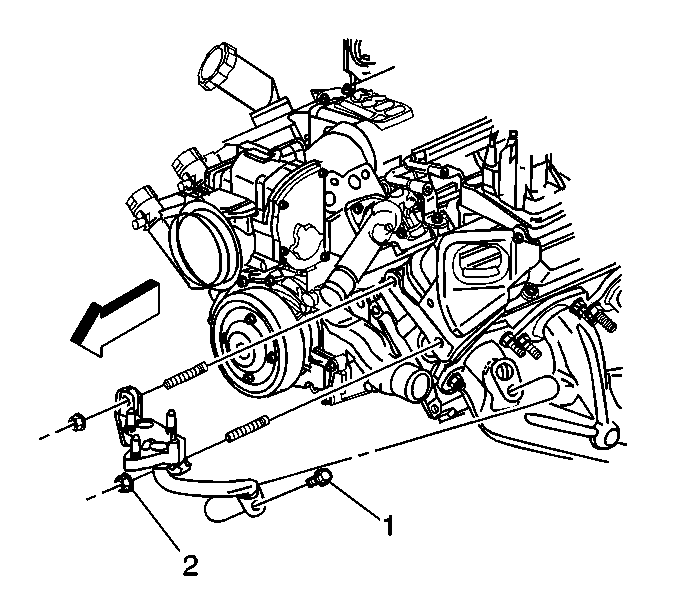
- Remove the EGR valve adapter nuts (2).
- Remove the EGR valve adapter bolt (1).
- Remove the EGR valve adapter from the cylinder head studs.
- Remove the oil level indicator tube. Refer to Oil Level Indicator and Tube Replacement .
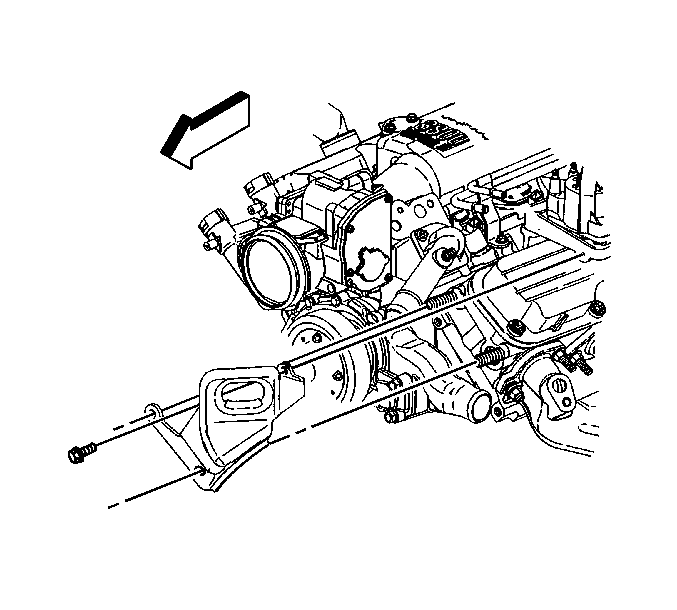
- Remove the engine lift bracket from the cylinder head studs.
- Remove the top ignition control module bracket bolt.
- Raise and suitably support the vehicle. Refer to Lifting and Jacking the Vehicle in General Information.
- Remove the rear ignition control module bracket bolts.
- Lower the vehicle.
- Remove the ignition control module bracket.
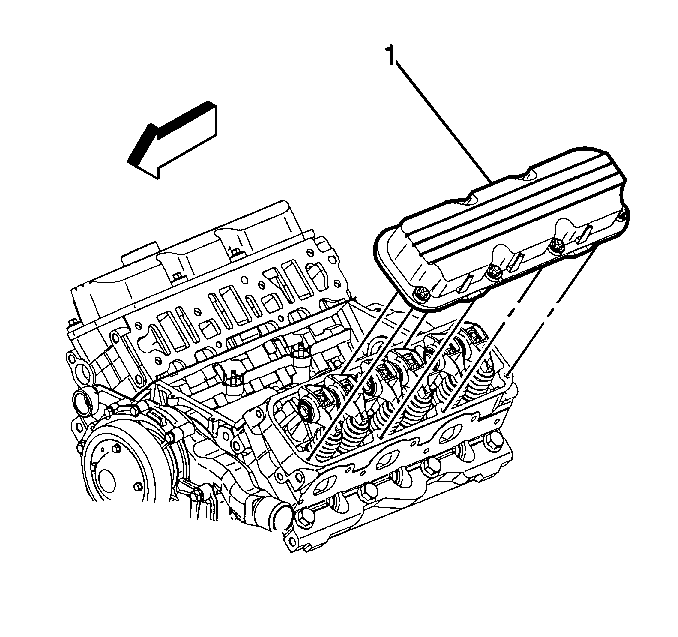
- Loosen the valve rocker arm cover bolts.
- Remove the valve rocker arm cover (1).
- Clean the following items:
| • | Valve rocker arm cover |
| • | Cylinder head gasket surface |
| • | Valve rocker arm cover bolts |
Installation Procedure
- Apply thread lock adhesive GM P/N 12345493 or equivalent, to the valve rocker arm cover bolt threads.
- Install the valve rocker arm cover (1).
- Tighten the valve rocker arm cover bolts.
- Install the ignition control module bracket.
- Raise and suitably support the vehicle. Refer to Lifting and Jacking the Vehicle in General Information.
- Install the rear ignition control module bracket bolts.
- Lower the vehicle.
- Install the top ignition control module bracket bolt.
- Install the engine lift bracket to the cylinder head studs.
- Install the oil level indicator tube. Refer to Oil Level Indicator and Tube Replacement .
- Install the EGR valve adapter to the cylinder head studs.
- Install the EGR valve adapter bolt (1).
- Install the EGR valve adapter nuts (2).
- Connect the EGR valve electrical connector.
- Install the EGR valve outlet pipe.
- Install the EGR valve outlet pipe nut to the EGR valve adapter.
- Install the EGR valve outlet pipe bolt to the upper intake manifold.
- Install the ignition control module. Refer to Ignition Coil Module Replacement in Engine Electrical.

Tighten
Tighten the valve rocker arm cover bolts to 10 N·m (89 lb in).
Tighten
Tighten the rear ignition control module bracket bolts to 50 N·m
(37 lb ft).
Tighten
Tighten the top ignition control module bracket bolt to 50 N·m
(37 lb ft).


Tighten
| • | Tighten the EGR valve adapter nuts (2) to 50 N·m (37 lb ft). |
| • | Tighten the EGR valve adapter bolt (1) to 25 N·m (18 lb ft). |


Tighten
| • | Tighten the EGR valve outlet pipe nut to 29 N·m (21 lb ft). |
| • | Tighten the EGR valve outlet pipe bolt to 29 N·m (21 lb ft). |
Valve Rocker Arm Cover Replacement Right
Removal Procedure
- Remove the generator. Refer to Generator Replacement in Engine Electrical.
- Remove the spark plug wires from the 1,3 and 5 spark plugs.
- Remove the spark plug wiring harness from the clip and reposition the harness.
- Raise and suitably support the vehicle. Refer to Lifting and Jacking the Vehicle in General Information.
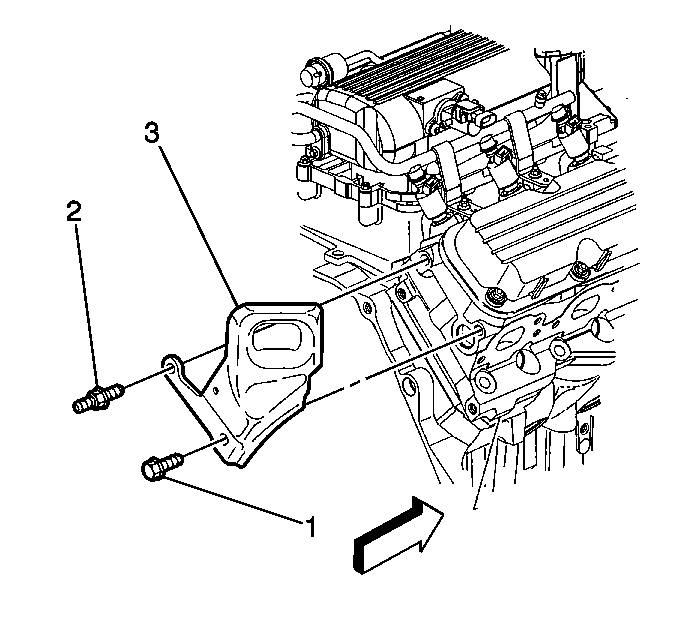
- Remove the rear engine left bracket bolt (1) and stud (2).
- Remove the rear engine lift bracket (3).
- Lower the vehicle.
- Loosen the valve rocker arm cover bolts.
- Remove the valve rocker arm cover.
- Remove the oil fill tube cap , if necessary.
- Remove the oil fill tube, if necessary.
- Clean the following items:
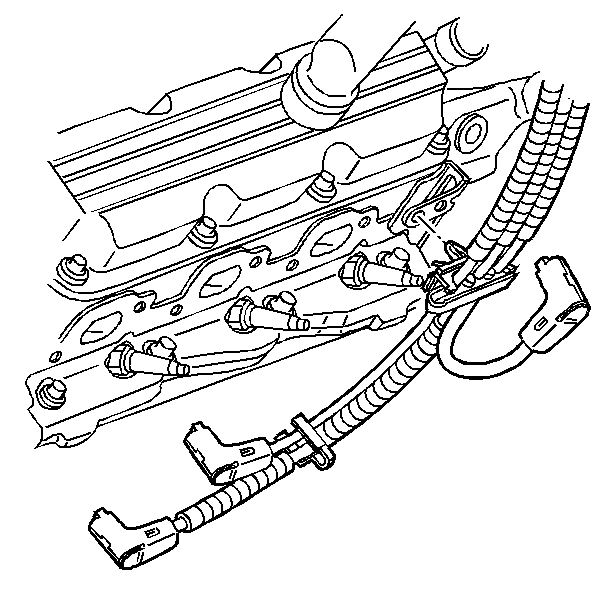
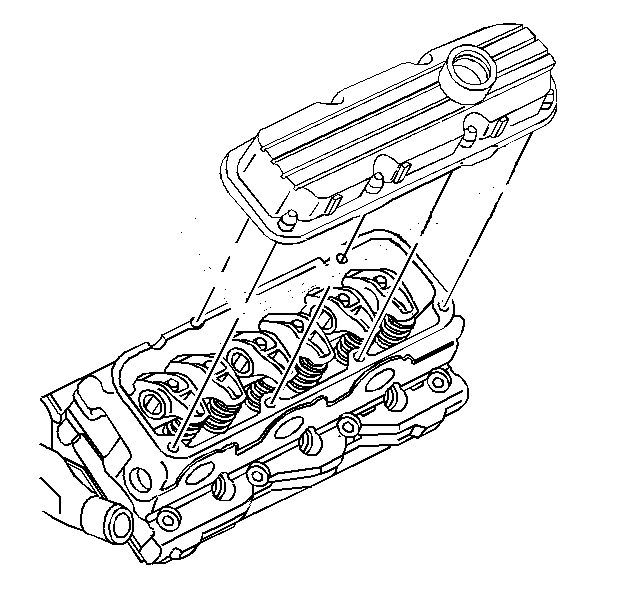
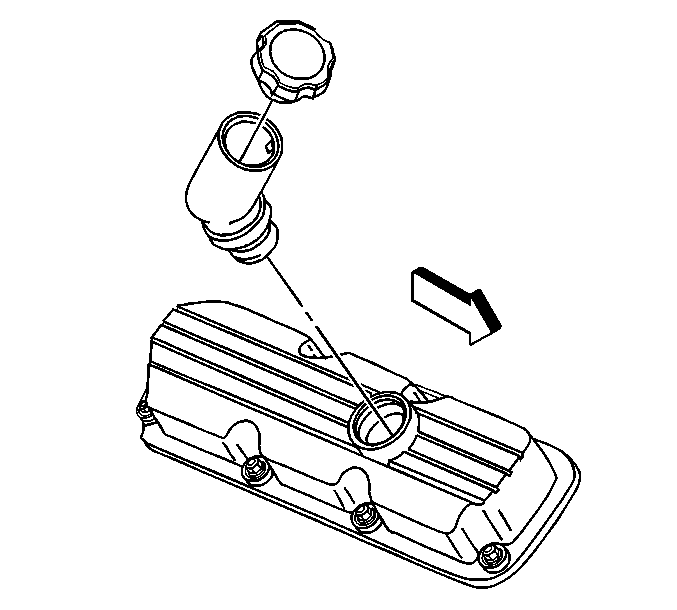
To remove the fill tube press the tangs inside the tube in and twist the tube.
| • | Valve rocker arm cover |
| • | Cylinder head gasket surface |
| • | Valve rocker arm cover bolts. |
Installation Procedure
- Install the oil fill tube to the valve rocker arm cover, if removed.
- Install the oil fill tube cap, if removed.
- Apply thread lock adhesive GM P/N 12345493 or equivalent to the valve rocker arm cover bolt threads.
- Install the valve rocker arm cover.
- Tighten the valve rocker arm cover bolts.
- Raise and suitably support the vehicle. Refer to Lifting and Jacking the Vehicle in General Information.
- Install the rear engine lift bracket (3).
- Install the rear engine lift bracket stud (2) and bolt (1).
- Lower the vehicle.
- Install the spark plug wiring harness to the clip.
- Install the spark plug wires to the 1,3 and 5 spark plugs.
- Install the generator. Refer to Generator Replacement in Engine Electrical.


Tighten
Tighten the valve rocker arm cover bolts to 10 N·m (89 lb in).

Tighten
Tighten the rear engine lift bracket stud (2) and bolt (1) to 50 N·m
(37 lb in).

