For 1990-2009 cars only
Ignition Coil Module Replacement 3.8 L
Removal Procedure
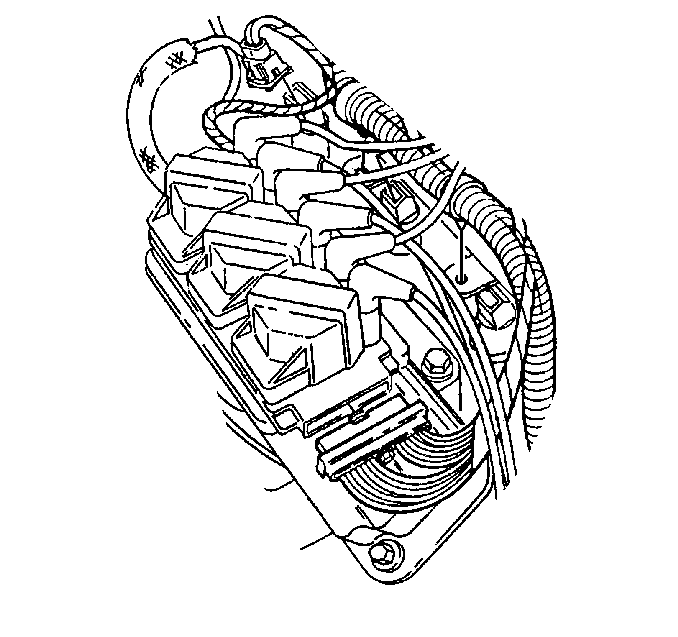
- Loosen the control module electrical connector bolt.
- Remove the control module electrical connector from the module.
- Remove the spark plug wires from the ignition control module.
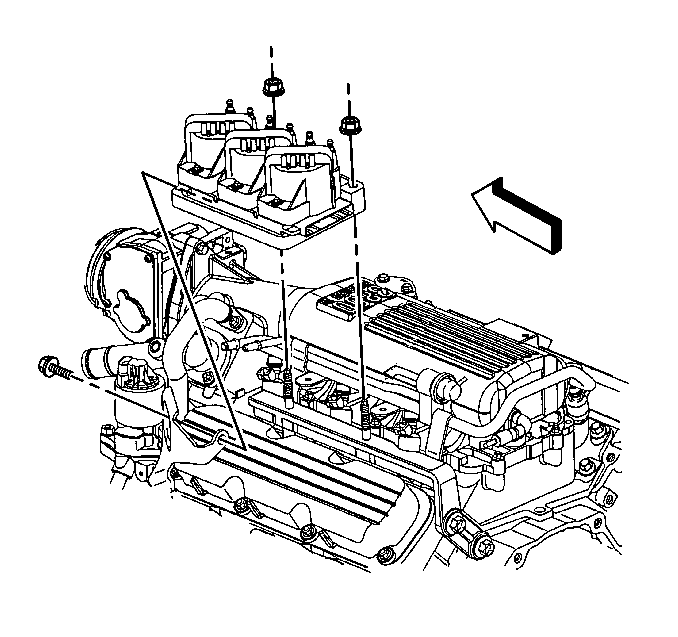
- Remove the ignition control module nuts.
- Remove the engine lift bracket to ignition control module bolt.
- Remove the ignition control module/coils.
- Lay the module/coils on a clean work surface.
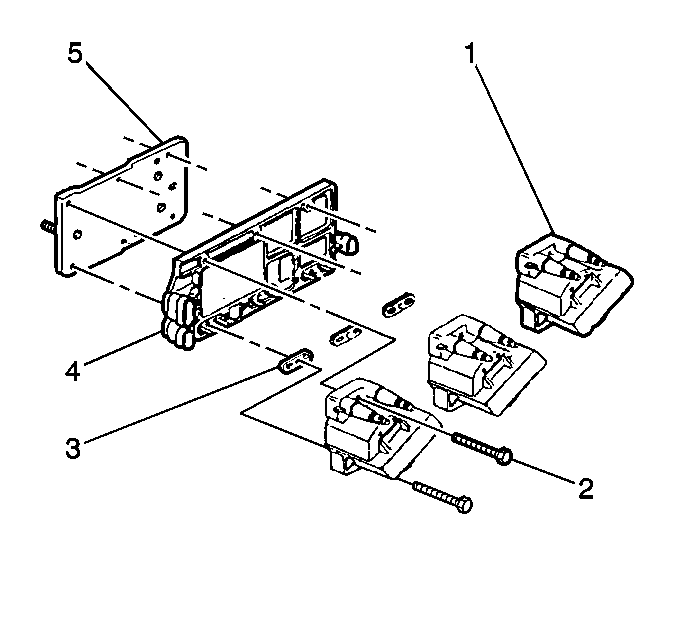
- Remove the ignition coil bolts (2) from all the coils (1).
- Remove the ignition coils (1) from the module (4).
- Remove the ignition coil seals (3).
- Remove the module (4) from the module bracket (5).


Installation Procedure
- Install the module (4) to the module bracket (5).
- Install the ignition coil seals (3).
- Install the ignition coils (1) to the module (4).
- Install the ignition coil bolts (2).
- Install the ignition control module/coils.
- Loosely install the engine lift bracket to ignition control module bolt.
- Install the ignition control module nuts.
- Install the spark plug wires to the ignition control module.
- Install the control module electrical connector to the module.
- Tighten the control module electrical connector bolt.

Tighten
Tighten the ignition coil bolts (2) to 4 N·m (35 lb in).

Tighten
| • | Tighten the ignition control module nuts to 30 N·m (22 lb ft). |
| • | Tighten the engine lift bracket to ignition control module bolt to 25 N·m (18 lb ft). |

Tighten
Tighten the ignition control module bolt to 3 N·m (27 lb in).
