Exhaust Manifold Replacement - Right Side 3.8L Engine
Removal Procedure
- Raise and suitably support the vehicle. Refer to Lifting and Jacking the Vehicle in General Information.
- Remove the catalytic converter. Refer to Catalytic Converter Replacement .
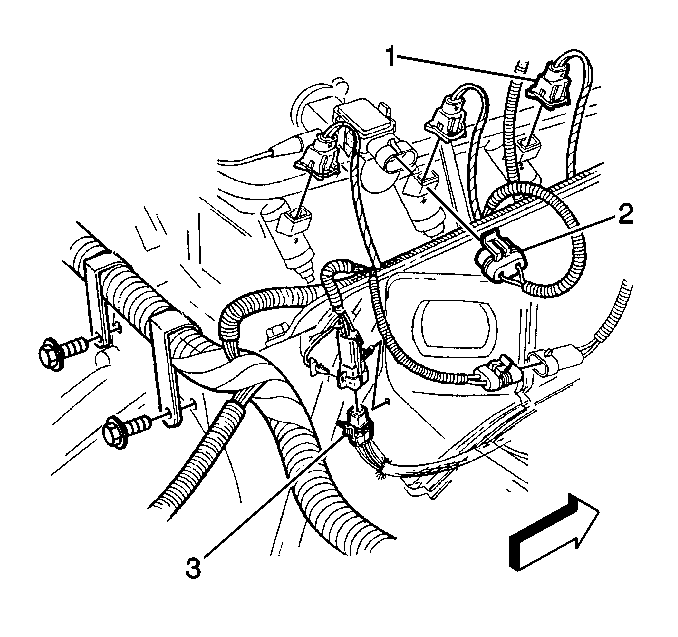
- Remove the connector position assurance (CPA) lock.
- Disconnect the oxygen sensor electrical connector (3) from the harness.
- Remove the oxygen sensor connector rosebud from the engine lift bracket.
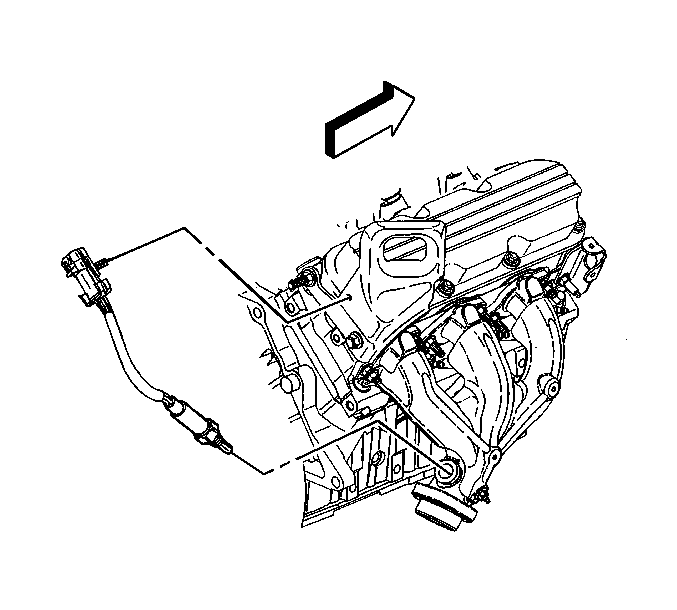
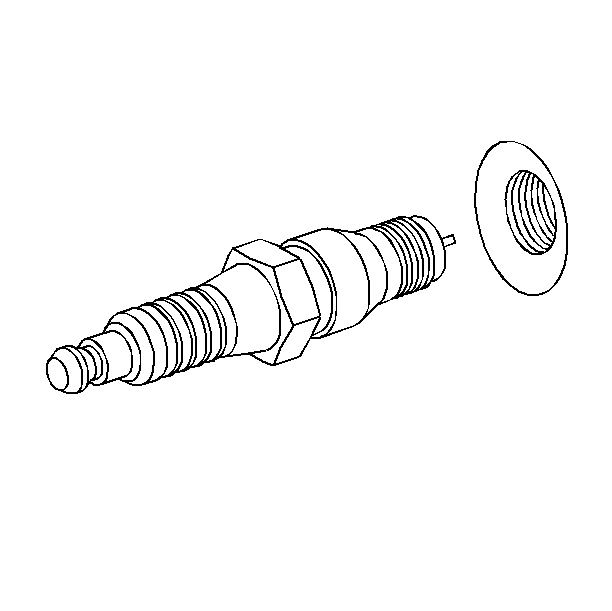
- Remove the oxygen sensor.
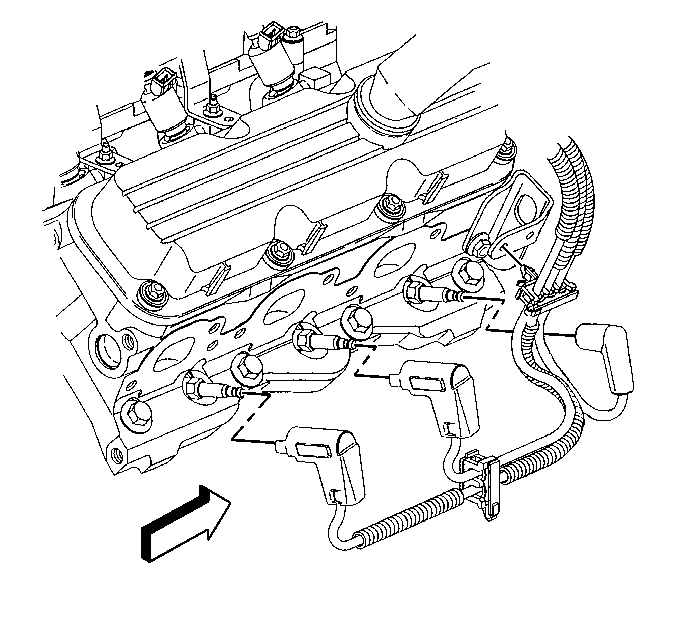
- Disconnect the numbers 4 and 6 spark plug wires from the spark plugs.
- Remove the number 6 spark plug from the cylinder head.
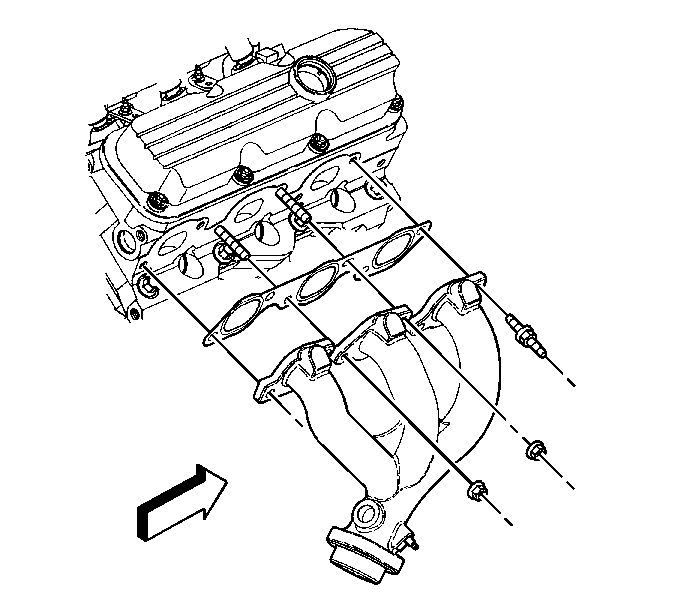
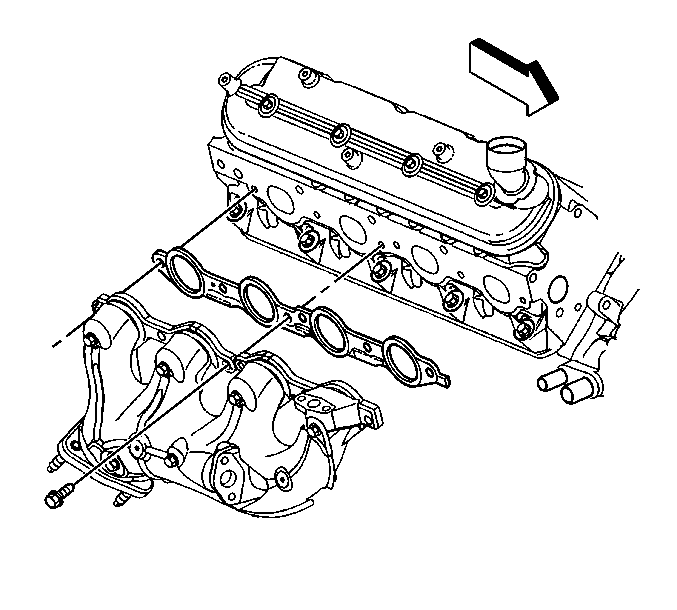
- Remove the two rear exhaust manifold studs and nut from the exhaust manifold.
- Lower the vehicle.
- Disconnect the number 2 spark plug wire from the spark plug.
- Remove the numbers 2 and 4 spark plugs from the cylinder head.
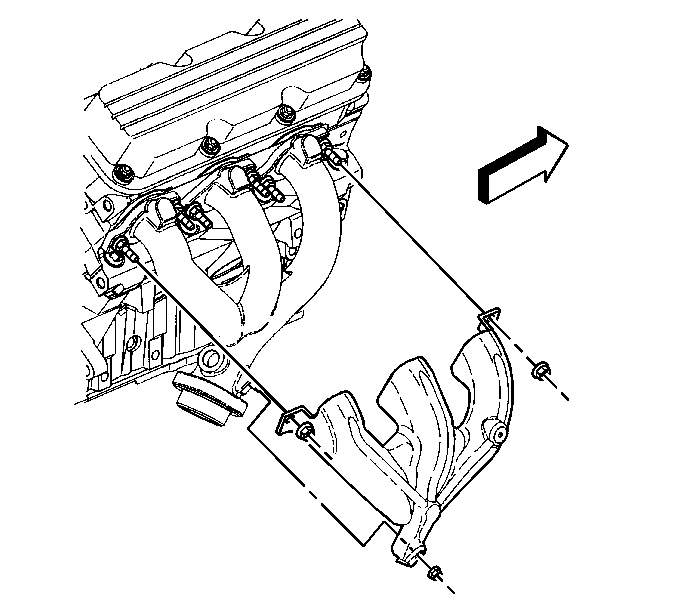
- Remove the exhaust manifold heat shield nuts.
- Remove the exhaust manifold heat shield from the exhaust manifold.
- Remove the two front exhaust manifold studs and nut from the exhaust manifold.
- Remove the right exhaust manifold and gasket from the cylinder head.
- Remove the heat shield studs from the exhaust manifold, if necessary.
Installation Procedure
- Install the heat shield stud to the exhaust manifold, if necessary.
- Install the right exhaust manifold gasket and manifold to the cylinder head studs.
- Install the two front exhaust manifold studs and nuts to the exhaust manifold.
- Install the exhaust manifold heat shield to the exhaust manifold.
- Install the exhaust manifold heat shield nut.
- Install the numbers 2 and 4 spark plugs to the cylinder head.
- Connect the number 2 spark plug wire to the spark plug.
- Raise the vehicle.
- Install the two rear exhaust manifold studs and nut to the exhaust manifold.
- Install the number 6 spark plug to the cylinder head.
- Connect the numbers 4 and 6 spark plug wires to the spark plugs.
- Install the oxygen sensor.
- Connect the oxygen sensor electrical connector rosebud to the engine lift bracket.
- Connect the oxygen sensor electrical connector (3) to the wiring harness.
- Install the CPA lock.
- Install the catalytic converter. Refer to Catalytic Converter Replacement .
- Lower the vehicle.
Notice: Use the correct fastener in the correct location. Replacement fasteners must be the correct part number for that application. Fasteners requiring replacement or fasteners requiring the use of thread locking compound or sealant are identified in the service procedure. Do not use paints, lubricants, or corrosion inhibitors on fasteners or fastener joint surfaces unless specified. These coatings affect fastener torque and joint clamping force and may damage the fastener. Use the correct tightening sequence and specifications when installing fasteners in order to avoid damage to parts and systems.
Tighten
| • | Tighten the two front exhaust manifold studs to 15 N·m (11 lb ft). |
| • | Tighten the exhaust manifold nuts to 18 N·m (13 lb ft). |
Tighten
Tighten the exhaust manifold heat shield nuts to 10 N·m
(89 lb in).
Tighten
Tighten the numbers 2 and 4 spark plugs to 27 N·m (20 lb ft).
Tighten
| • | Tighten the two rear exhaust manifold studs to 15 N·m (11 lb ft). |
| • | Tighten the exhaust manifold nut to 18 N·m (13 lb ft). |
Tighten
Tighten the number 6 spark plug to 27 N·m (20 lb ft).
Tighten
Tighten the oxygen sensor to 42 N·m (31 lb ft).
Exhaust Manifold Replacement - Right Side 5.7L Engine
Removal Procedure
- Remove the right valve rocker arm cover. Refer to Valve Rocker Arm Cover Replacement - Right Side .
- Remove the spark plugs. Refer to Spark Plug Replacement .
- Raise and suitably support the vehicle. Refer to Lifting and Jacking the Vehicle .
- Remove the right catalytic converter. Refer to Catalytic Converter Replacement - Right Side .
- Remove and discard the exhaust manifold bolts.
- Remove the exhaust manifold and gasket.
- Discard the gasket.
- Remove the heat shield bolts (3) and heat shield (2) from the manifold (1), if required.
Installation Procedure
- Install the exhaust manifold to the cylinder head. Refer to Exhaust Manifold Installation - Right Side .
- Install the heat shield (2) and heat shield bolts (3) to the manifold (1), if required.
- Install the right catalytic converter. Refer to Catalytic Converter Replacement - Right Side .
- Lower the vehicle.
- Install the spark plugs. Refer to Spark Plug Replacement .
- Install the right valve rocker arm cover. Refer to Valve Rocker Arm Cover Replacement - Right Side .
Notice: Refer to Fastener Notice in the Preface section.
Tighten
Tighten the heat shield bolts (3) to 9 N·m (80 lb in).
