For 1990-2009 cars only
Removal Procedure
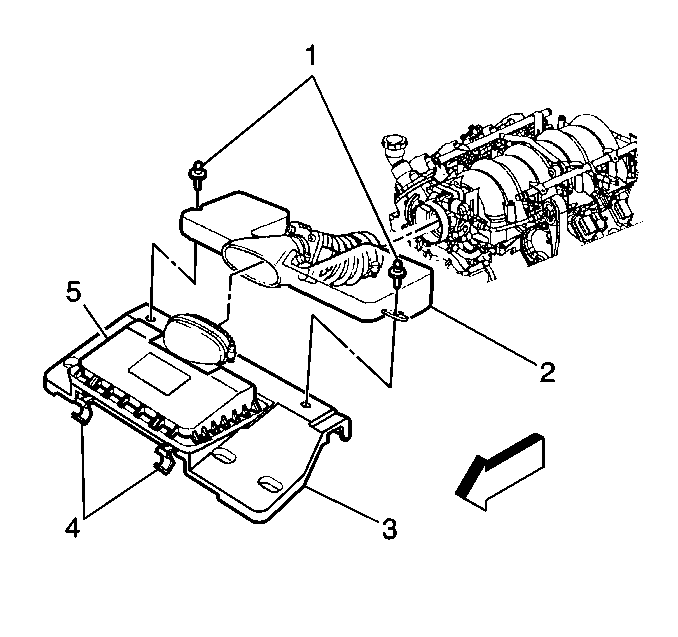
- Release the top cover latches (4).
- Remove the plastic rivets (1) securing the air intake resonator (2).
- Loosen the clamp at the air duct between the MAF sensor and the resonator (2).
- Disconnect the intake air temperature (IAT) sensor (2) connector.
- Remove the top of the air cleaner housing and the resonator as an assembly .
- Remove the 4 fasteners securing the air cleaner assembly (3) to the tie bar.
- Lift off the lower air cleaner assembly.
Notice: If the mass air flow (MAF) sensor is installed backwards, the system will go rich. An arrow cast into the plastic portion of the sensor indicates proper air flow direction. The arrow must point toward the engine.
Installation Procedure
- Position the lower air cleaner assembly (3) onto the tie bar. Ensure that the rubber isolators fit properly onto the top of the radiator.
- Fasten the lower air cleaner assembly (3) to the tie bar support.
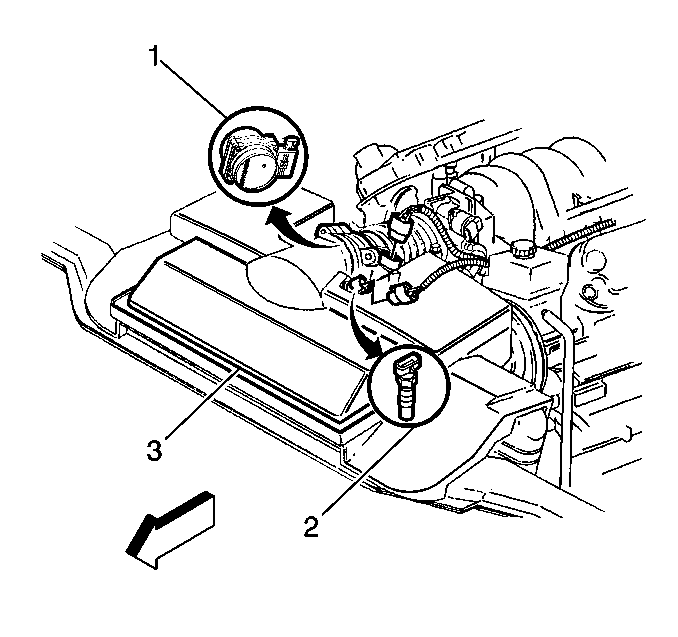
- Secure the upper air cleaner and resonator assembly (2) to the MAF sensor
- Secure the resonator to the lower air cleaner assembly using the plastic rivets (1).
- Connect the IAT sensor (2) connector.
- Tighten the clamp on the air duct at the MAF sensor (1).
- Secure the top cover latches (4). Ensure that the rear locating tabs on the air cleaner cove slip into the retainers located on the lower portion of the air cleaner housing.
