Air Conditioning Compressor Replacement 3.8L
Tools Required
J 39400-A Halogen Leak Detector
Removal Procedure
Important: Compressor related noise is generally A/C system related and not always caused by the compressor itself. Prior to replacing compressor, refer to Air Conditioning (A/C) System Performance Test .
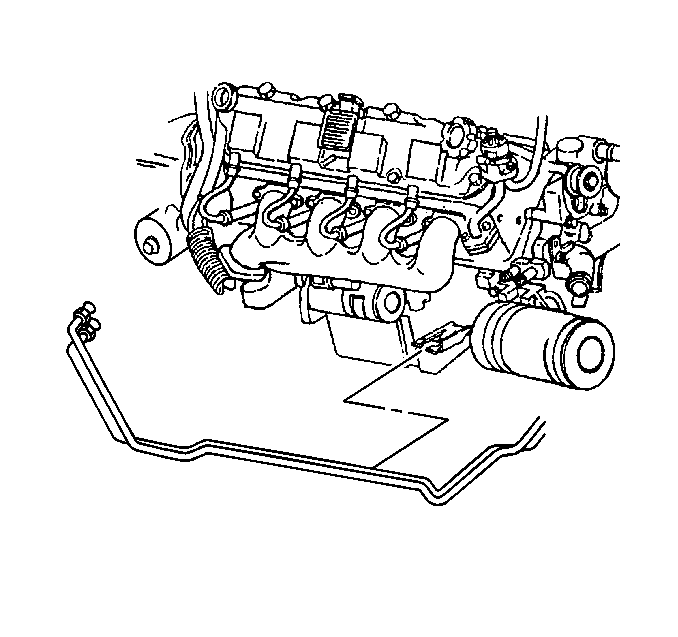
- Recover the refrigerant. Refer to Refrigerant Recovery and Recharging .
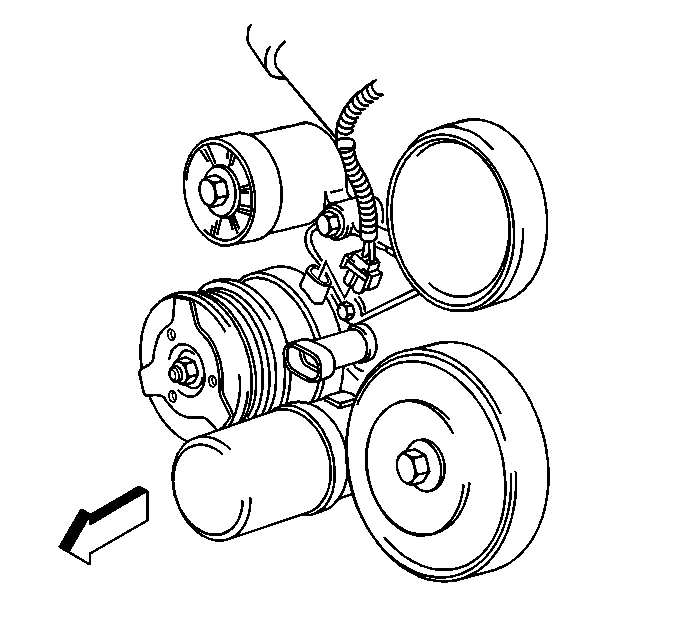
- Remove the serpentine drive belt. Refer to Drive Belt Replacement in Engine Mechanical - 3.8 L.
- Disconnect the electrical connector from the A/C compressor.
- Remove the negative battery cable nut and cable from the engine block .
- Raise and support the vehicle. Refer to Lifting and Jacking the Vehicle in General Information.
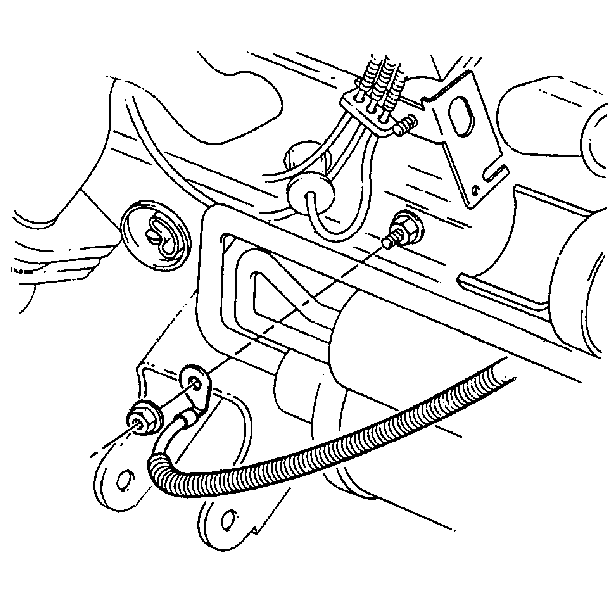
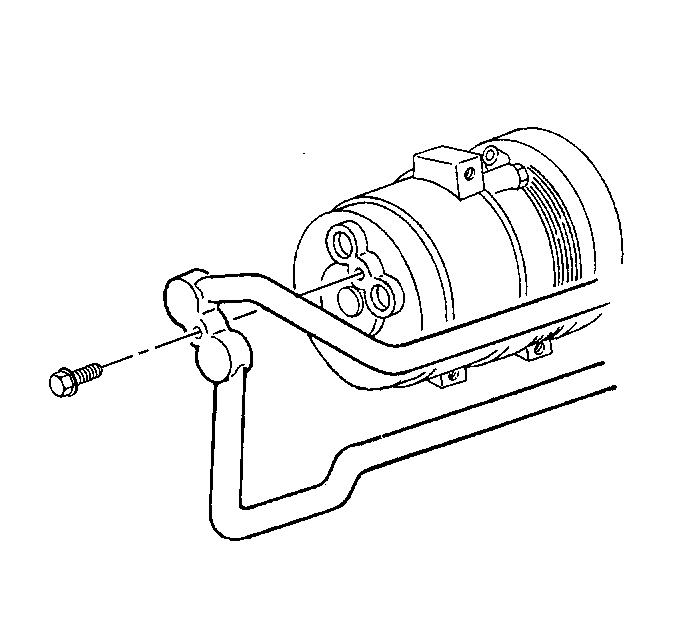
- Remove the A/C compressor hose assembly bolt.
- Remove the A/C compressor hose assembly.
- Discard the sealing washers.
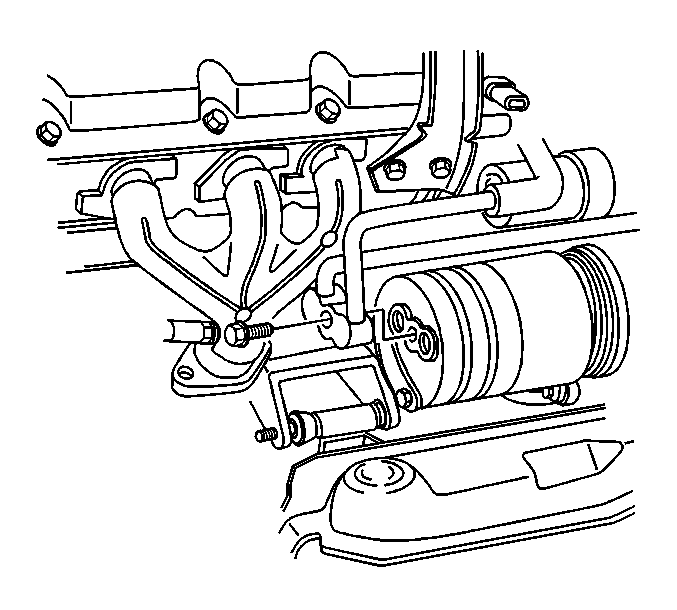
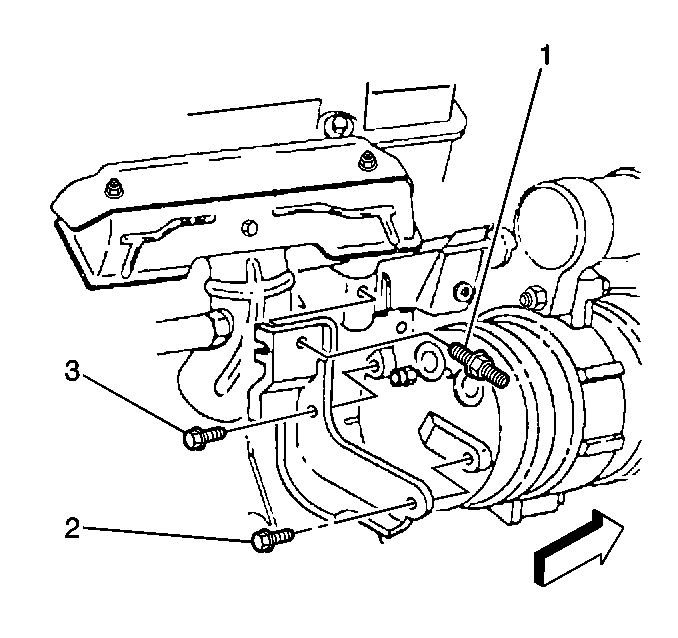
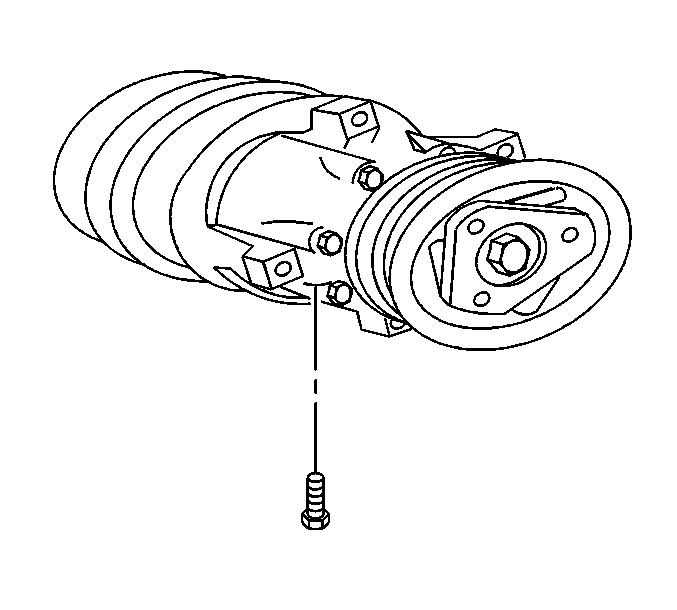
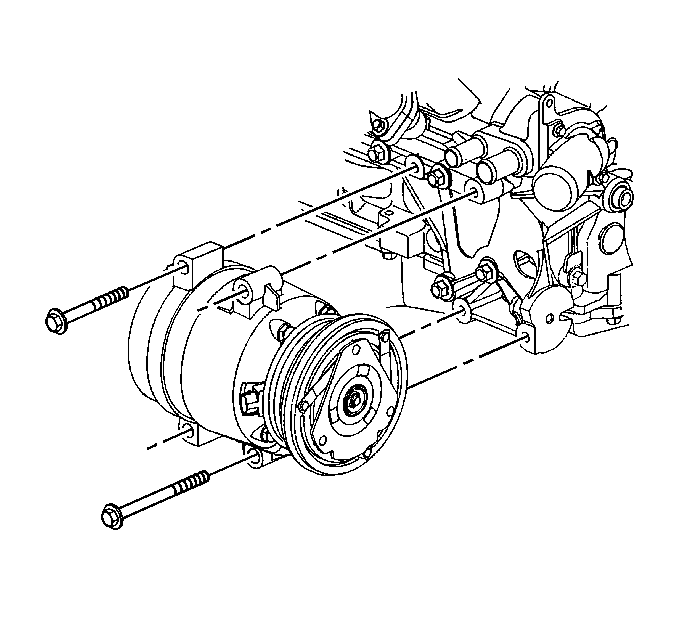
- Remove the A/C compressor rear bolts (2, 3).
- Remove the A/C compressor bolts.
- Remove the A/C compressor.

Installation Procedure
- If a new A/C compressor is being installed, add the proper amount of PAG oil to the compressor. Refer to Refrigerant System Capacities .
- If reinstalling the old A/C compressor perform the following:
- Install the A/C compressor.
- Install the front A/C compressor bolts.
- Install the A/C compressor rear bolts (2, 3).
- Install the new sealing washers.
- Install the A/C compressor hose assembly.
- Install the A/C compressor hose assembly bolt.
- Lower the vehicle.
- Install the negative battery cable and nut to the engine block.
- Connect the electrical connector to the A/C compressor.
- Install the serpentine drive belt. Refer to Drive Belt Replacement in Engine Mechanical - 3.8L.
- Evacuate and charge the refrigerant system. Refer to Refrigerant Recovery and Recharging .
- Leak test the fittings of the component using the J 39400-A .
Important: New A/C compressors are shipped WITHOUT poly-alkylene glycol (PAG) oil.
Notice: Refer to Fastener Notice in the Preface section.
| 2.1. | Drain, measure and record the amount of PAG oil from both the suction and discharge ports and the crankcase in the A/C compressor. |
| 2.2. | Add the proper amount of PAG oil to the compressor. Refer to Refrigerant System Capacities . |
| 2.3. | Install the compressor crankcase oil drain bolt to the replacement compressor. |
Tighten
Tighten the compressor crankcase oil drain bolt to 20 N·m
(15 lb ft).
Tighten
Tighten the front A/C compressor bolts to 50 N·m (37 lb ft).
Tighten
Tighten the A/C compressor rear bolts (2, 3) to 30 N·m
(22 lb ft).
Tighten
Tighten the A/C compressor hose assembly bolt to 33 N·m
(24 lb ft).
Tighten
Tighten the negative battery cable to 25 N·m (18 lb ft).
Air Conditioning Compressor Replacement 5.7L
Tools Required
J 39400-A Halogen Leak Detector
Removal Procedure
Important: Compressor related noise is generally A/C system related and not always the compressor itself. Prior to replacing the compressor, refer to Noise Diagnosis - Air Conditioning (A/C) System .
- Recover the refrigerant. Refer to Refrigerant Recovery and Recharging .
- Remove the A/C drive belt. Refer to Air Conditioning Compressor Belt Replacement
- Raise and support the vehicle. Refer to Lifting and Jacking the Vehicle in General Information.
- Remove the A/C compressor hose assembly bolt.
- Remove the A/C compressor hose assembly.
- Discard the sealing washers.
- Remove the transmission oil cooler pipes from the engine bracket, if necessary.
- Disconnect the electrical connector from the A/C compressor.
- Remove the A/C compressor bolts.
- Remove the A/C compressor.

Installation Procedure
- If a new A/C compressor is being installed, add the proper amount of PAG oil to the compressor. Refer to Refrigerant System Capacities .
- If reinstalling the OLD A/C compressor perform the following:
- Install the A/C compressor.
- Install the A/C compressor bolts.
- Connect the electrical connector to the A/C compressor.
- Install the transmission oil cooler pipes to the engine bracket, if necessary.
- Install the new sealing washers.
- Install the A/C compressor hose assembly.
- Install the A/C compressor hose assembly bolt.
- Lower the vehicle.
- Install the serpentine drive belt. Refer to Air Conditioning Compressor Belt Replacement .
- Evacuate and charge the refrigerant system. Refer to Refrigerant Recovery and Recharging .
- Leak test the fittings of the component using the J 39400-A .
Important: New A/C compressors are shipped WITHOUT poly-alkylene glycol (PAG) oil.
Notice: Refer to Fastener Notice in the Preface section.
| 2.1. | Drain, measure and record the amount of PAG oil from both the suction and discharge ports and the crankcase, from the compressor. |
| 2.2. | Add the proper amount of PAG oil. Refer to Refrigerant System Capacities . |
| 2.3. | Install the compressor crankcase oil drain bolt (1) to the replacement compressor. |
Tighten
Tighten the compressor crankcase oil drain bolt (1) to 20 N·m
(15 lb ft).
Tighten
Tighten the A/C compressor bolts to 50 N·m (37 lb ft).
Tighten
Tighten the A/C compressor hose assembly bolt to 33 N·m
(24 lb ft).
