Important: The filter, ACDelco P/N-1760 must be installed to the A/C evaporator tube (liquid line) between the condenser and the evaporator. The installation of this refrigerant filter eliminates the need for flushing the A/C system.
- Recover the A/C refrigerant. Refer to Refrigerant Recovery and Recharging .
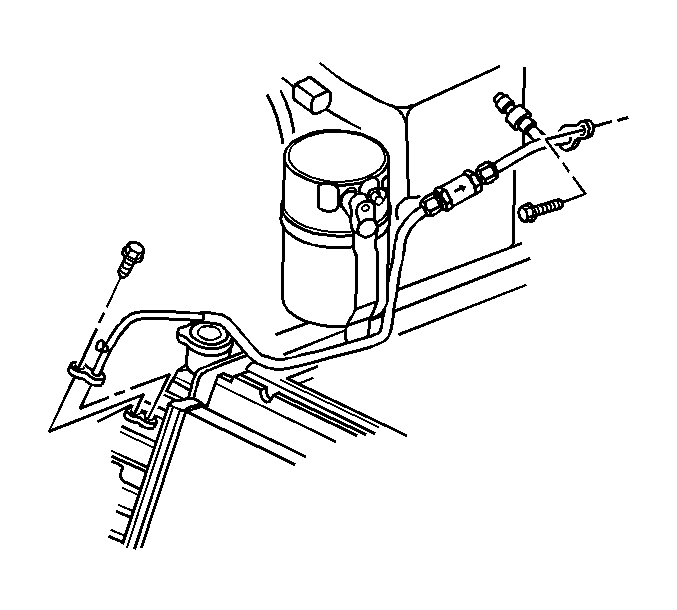
- Make 2 marks 50.8 mm (2 in) apart on the evaporator tube, approximately 50 mm (2 in) from the first line hanger and after the black foam line insulation.
- Remove the evaporator tube. Refer to Evaporator Tube Replacement
- Use a line cutter in order to cut the liquid line at the marked positions. Remove any burrs.
- Install the evaporator tube bolt.
- Remove the following components from the refrigerant filter filter:
- Install the nuts and the ferrules over each of the liquid line halves. Install the ferrules with the small end toward the nut.
- Install the liquid line into the refrigerant filter. Ensure to bottom out the liquid line.
- While holding the evaporator tube bottomed out the filter, tighten the nuts.
- Disassemble the filter from the evaporator tube.
- Lubricate the O-rings with clean 525 viscosity refrigerant oil.
- Install the O-rings onto the liquid line.
- Install the liquid line into the filter. Ensure to bottom out the liquid line.
- While holding the liquid line bottomed out the filter, tighten the nuts.
- Install the A/C Line.
- Lower the vehicle.
- Evacuate and charge the system. Refer to Refrigerant Recovery and Recharging .
Important: Do not allow metal burrs to drop into the liquid line.
Notice: Use the correct fastener in the correct location. Replacement fasteners must be the correct part number for that application. Fasteners requiring replacement or fasteners requiring the use of thread locking compound or sealant are identified in the service procedure. Do not use paints, lubricants, or corrosion inhibitors on fasteners or fastener joint surfaces unless specified. These coatings affect fastener torque and joint clamping force and may damage the fastener. Use the correct tightening sequence and specifications when installing fasteners in order to avoid damage to parts and systems.
Tighten
Tighten the evaporator tube bolt to 25 N·m (18 lb ft).
| • | The nuts |
| • | The ferrules |
| • | The O-rings |
Important: Do NOT install the O-rings at this step.
Tighten
Tighten the nuts to 15 N·m (11 lb ft).
