For 1990-2009 cars only
Instrument Panel Accessory Trim Plate Replacement Chevrolet
Removal Procedure
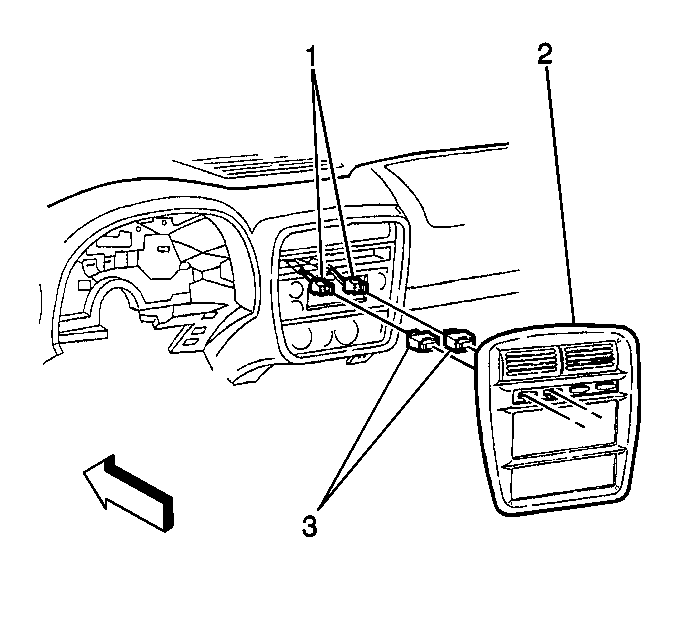
- Unsnap the instrument panel (IP) accessory trim plate (2).
- Remove the electrical connectors (1) from the switches (3), if equipped.
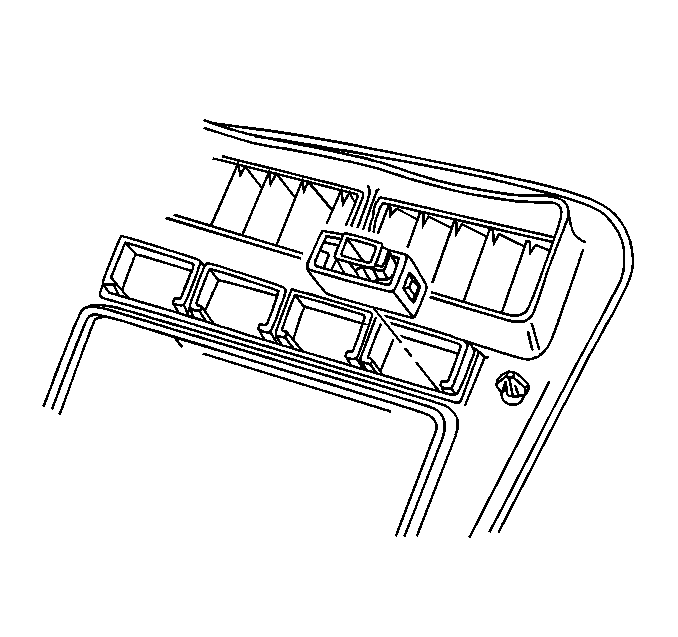
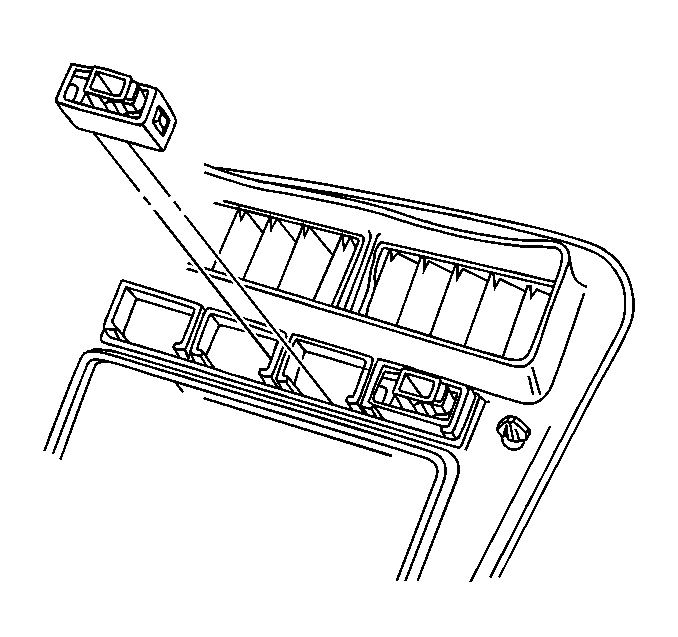
- Remove the fog lamp or second gear start switch located in position 1, if equipped.
- Remove the second gear start, rear fog lamp, or traction control switch located in position 2, if equipped.
- Remove the rear fog lamp switch located in position 3, if equipped.


Installation Procedure
- Install the rear fog lamp switch located in position 3, if equipped.
- Install the second gear start, rear fog lamp, or traction control switch located in position 2, if equipped.
- Install the fog lamp or second gear start switch located in position 1, if equipped.
- Install the electrical connectors (1) to the switches (3), if equipped.
- Snap the IP accessory trim plate (2) to the IP.


Instrument Panel Accessory Trim Plate Replacement Pontiac
Removal Procedure
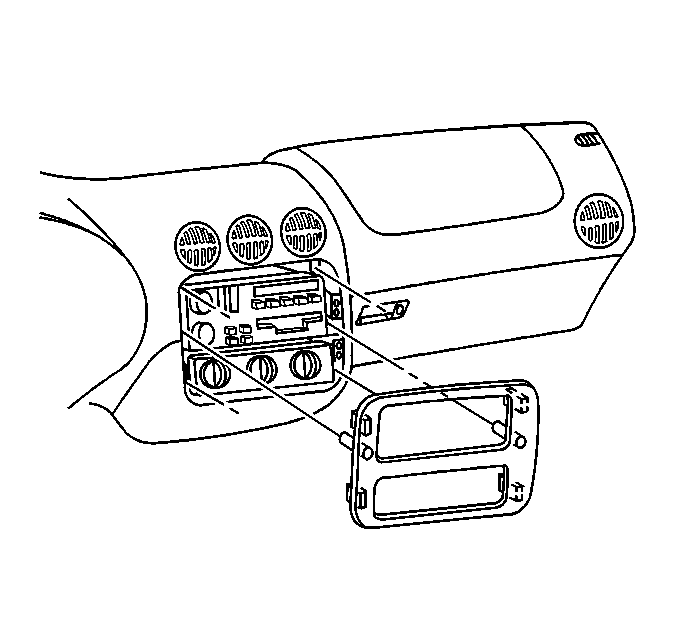
- Gently pull the upper corners of the instrument panel (IP) accessory trim plate.
- Unsnap the lower corners of the IP trim plate from the IP.
- Remove the IP accessory trim plate from the vehicle.

Installation Procedure
- Align the IP trim plate to the IP.
- Insert the locating pins on the IP trim plate to the holes in the IP.
- Apply pressure to the IP trim plate in order to snap the IP trim plate in place and secure.

