Removal Procedure
- Remove the transaxle from the vehicle. Refer to Manual Transaxle Removal in Manual Transaxle.
- Remove the pressure plate assembly and the clutch disc. Refer to Clutch Pilot Bearing Replacement in Clutch.
- Mark the flywheel-to-engine position.
- Remove the following components from the crankshaft:
- Remove the following components from the engine:
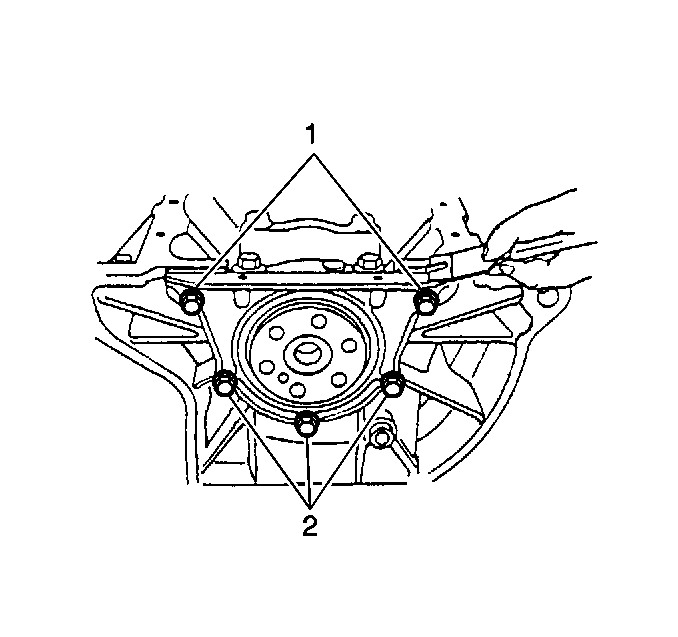
- Remove the five rear main seal housing bolts.
- Remove the rear main seal housing.
- Using a hammer and a drift, carefully remove the rear main seal from the rear main seal housing.
- Carefully install the new rear main seal into the rear main seal housing with a hammer. Tap the rear main oil seal into place so that the end face is flush with the housing seal end face.
| • | Six flywheel retaining bolts |
| • | The flywheel |
| • | Fourteen bolts |
| • | Two nuts |
| • | Crankshaft position sensor |
| • | The engine oil pan |


Installation Procedure
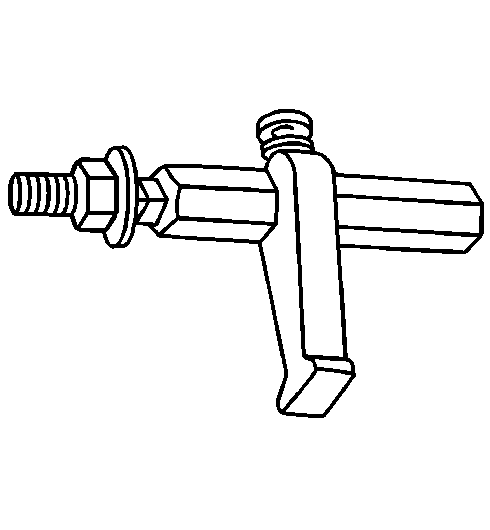
Tool Required
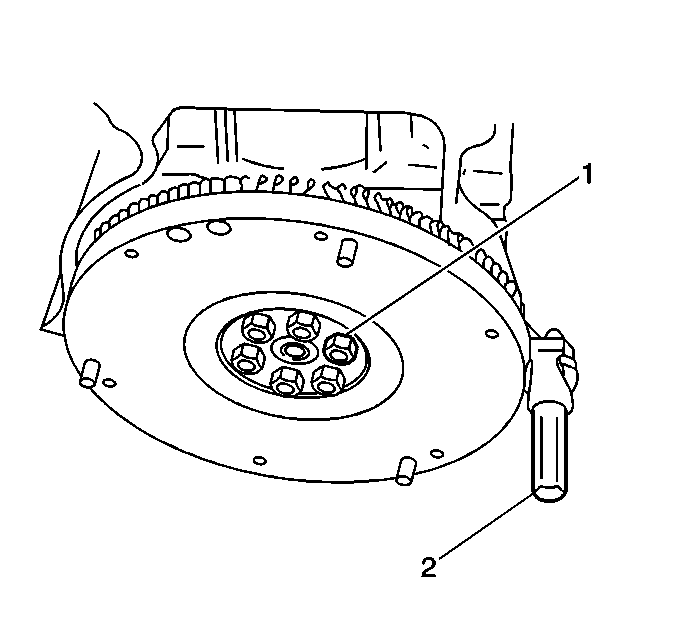
J 35271 Flywheel Holder
- Install the rear main seal housing onto the cylinder block with a new gasket.
- Secure the rear main seal housing with five bolts.
- After the rear main seal housing has been torqued to specifications, trim any excess gasket material from the oil pan rail.
- Apply a continuous bead of GM P/N 12346240 or equivalent, to the engine oil pan mating surface.
- Install the engine oil pan to the cylinder block and secure the engine oil pan with fourteen bolts and two nuts starting at the center and working outward.
- Install the gasket and the engine oil pan drain plug.
- Install the crankshaft position sensor.
- Install the flywheel to the engine crankshaft.
- Install the J 35271 Flywheel Holder to the cylinder block and flywheel.
- Apply GM P/N 12345493 or equivalent, to the flywheel retaining bolt threads.
- Install the flywheel and secure the flywheel with six flywheel retaining bolts.
- Install the pressure plate assembly and the clutch disc. Refer to Clutch Pilot Bearing Replacement in Clutch.
- Install the transaxle to the engine. Refer to Transaxle Assembly Installation in Manual Transmission.
Tighten
Tighten the five rear main seal housing bolts to 11 N·m
(97 lb in).
Tighten
Tighten the engine oil pan bolts and nuts to 11 N·m (97 lb in).
Tighten
Tighten the engine oil drain plug to 35 N·m (26 lb ft).
Tighten
Tighten the crankshaft positon sensor bolt to 11 N·m (97 lb in).
Notice: Apply the proper amount of the sealant to the fastener when assembling this component. Excessive use of the sealant can prohibit the component from being assembled properly or allow the fastener to loosen. A component or fastener that is not assembled properly can loosen or fall off leading to extensive engine damage.
Notice: Use the correct fastener in the correct location. Replacement fasteners must be the correct part number for that application. Fasteners requiring replacement or fasteners requiring the use of thread locking compound or sealant are identified in the service procedure. Do not use paints, lubricants, or corrosion inhibitors on fasteners or fastener joint surfaces unless specified. These coatings affect fastener torque and joint clamping force and may damage the fastener. Use the correct tightening sequence and specifications when installing fasteners in order to avoid damage to parts and systems.
Tighten
Tighten the six flywheel retaining bolts to 75 N·m (55 lb ft).
