For 1990-2009 cars only
Removal Procedure
- Disconnect the negative (-) battery cable.
- Disconnect the antenna connector from the back of the radio. Access through the instrument panel compartment.
- Remove the antenna cable from the clips under the instrument panel.
- Remove 2 clips and the left hinge pillar trim panel from the vehicle.
- Remove the left windshield side garnish molding.
- Remove the antenna cable from the clips on the left windshield side pillar.
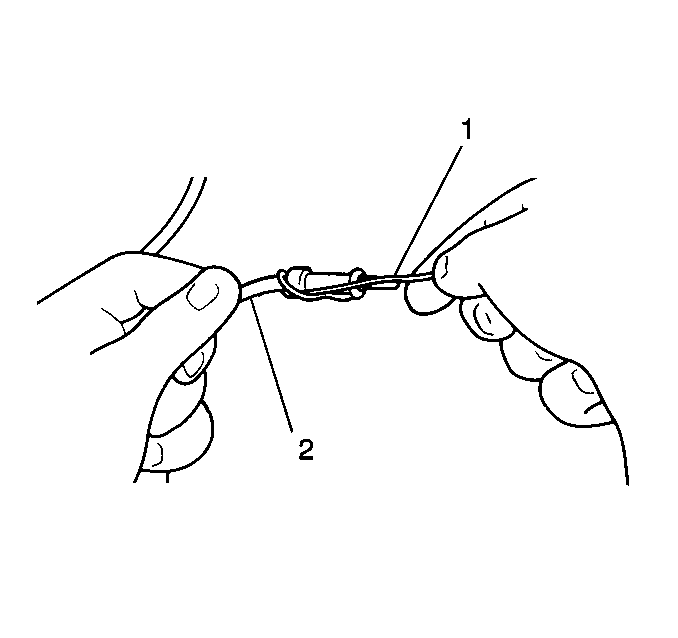
- Attach a piece of rigid wire (1) to the antenna cable (2). This will aid in the removal and the installation of the cable through the windshield side pillar.
- Remove the following components from the roof of the vehicle:
- Remove the rigid wire (1) from the antenna cable (2). Leave the rigid wire in the windshield pillar in order to aid in antenna installation.
Caution: Unless directed otherwise, the ignition and start switch must be in the OFF or LOCK position, and all electrical loads must be OFF before servicing any electrical component. Disconnect the negative battery cable to prevent an electrical spark should a tool or equipment come in contact with an exposed electrical terminal. Failure to follow these precautions may result in personal injury and/or damage to the vehicle or its components.

| 8.1. | 2 antenna mast screws |
| 8.2. | The antenna mast (1) |
Installation Procedure
- Attach the rigid wire (1) to the antenna cable (2).
- Guide the antenna cable and the antenna mast (1) through the windshield side pillar with the aid of the rigid wire.
- Install the antenna mast screws.
- Remove the rigid wire (1) from the antenna cable (2).
- Install the antenna cable to the clips on the left windshield side pillar.
- Install the left windshield side garnish molding.
- Install the left hinge pillar trim panel to the vehicle. Secure the trim panel with the 2 clips.
- Install the antenna cable to the clips under the instrument panel.
- Connect the antenna connector to the radio. Access through the instrument panel compartment.
- Connect the negative (-) battery cable.
