GM Service Manual Online
For 1990-2009 cars only

Tail Lamp Replacement Chevrolet Coupe
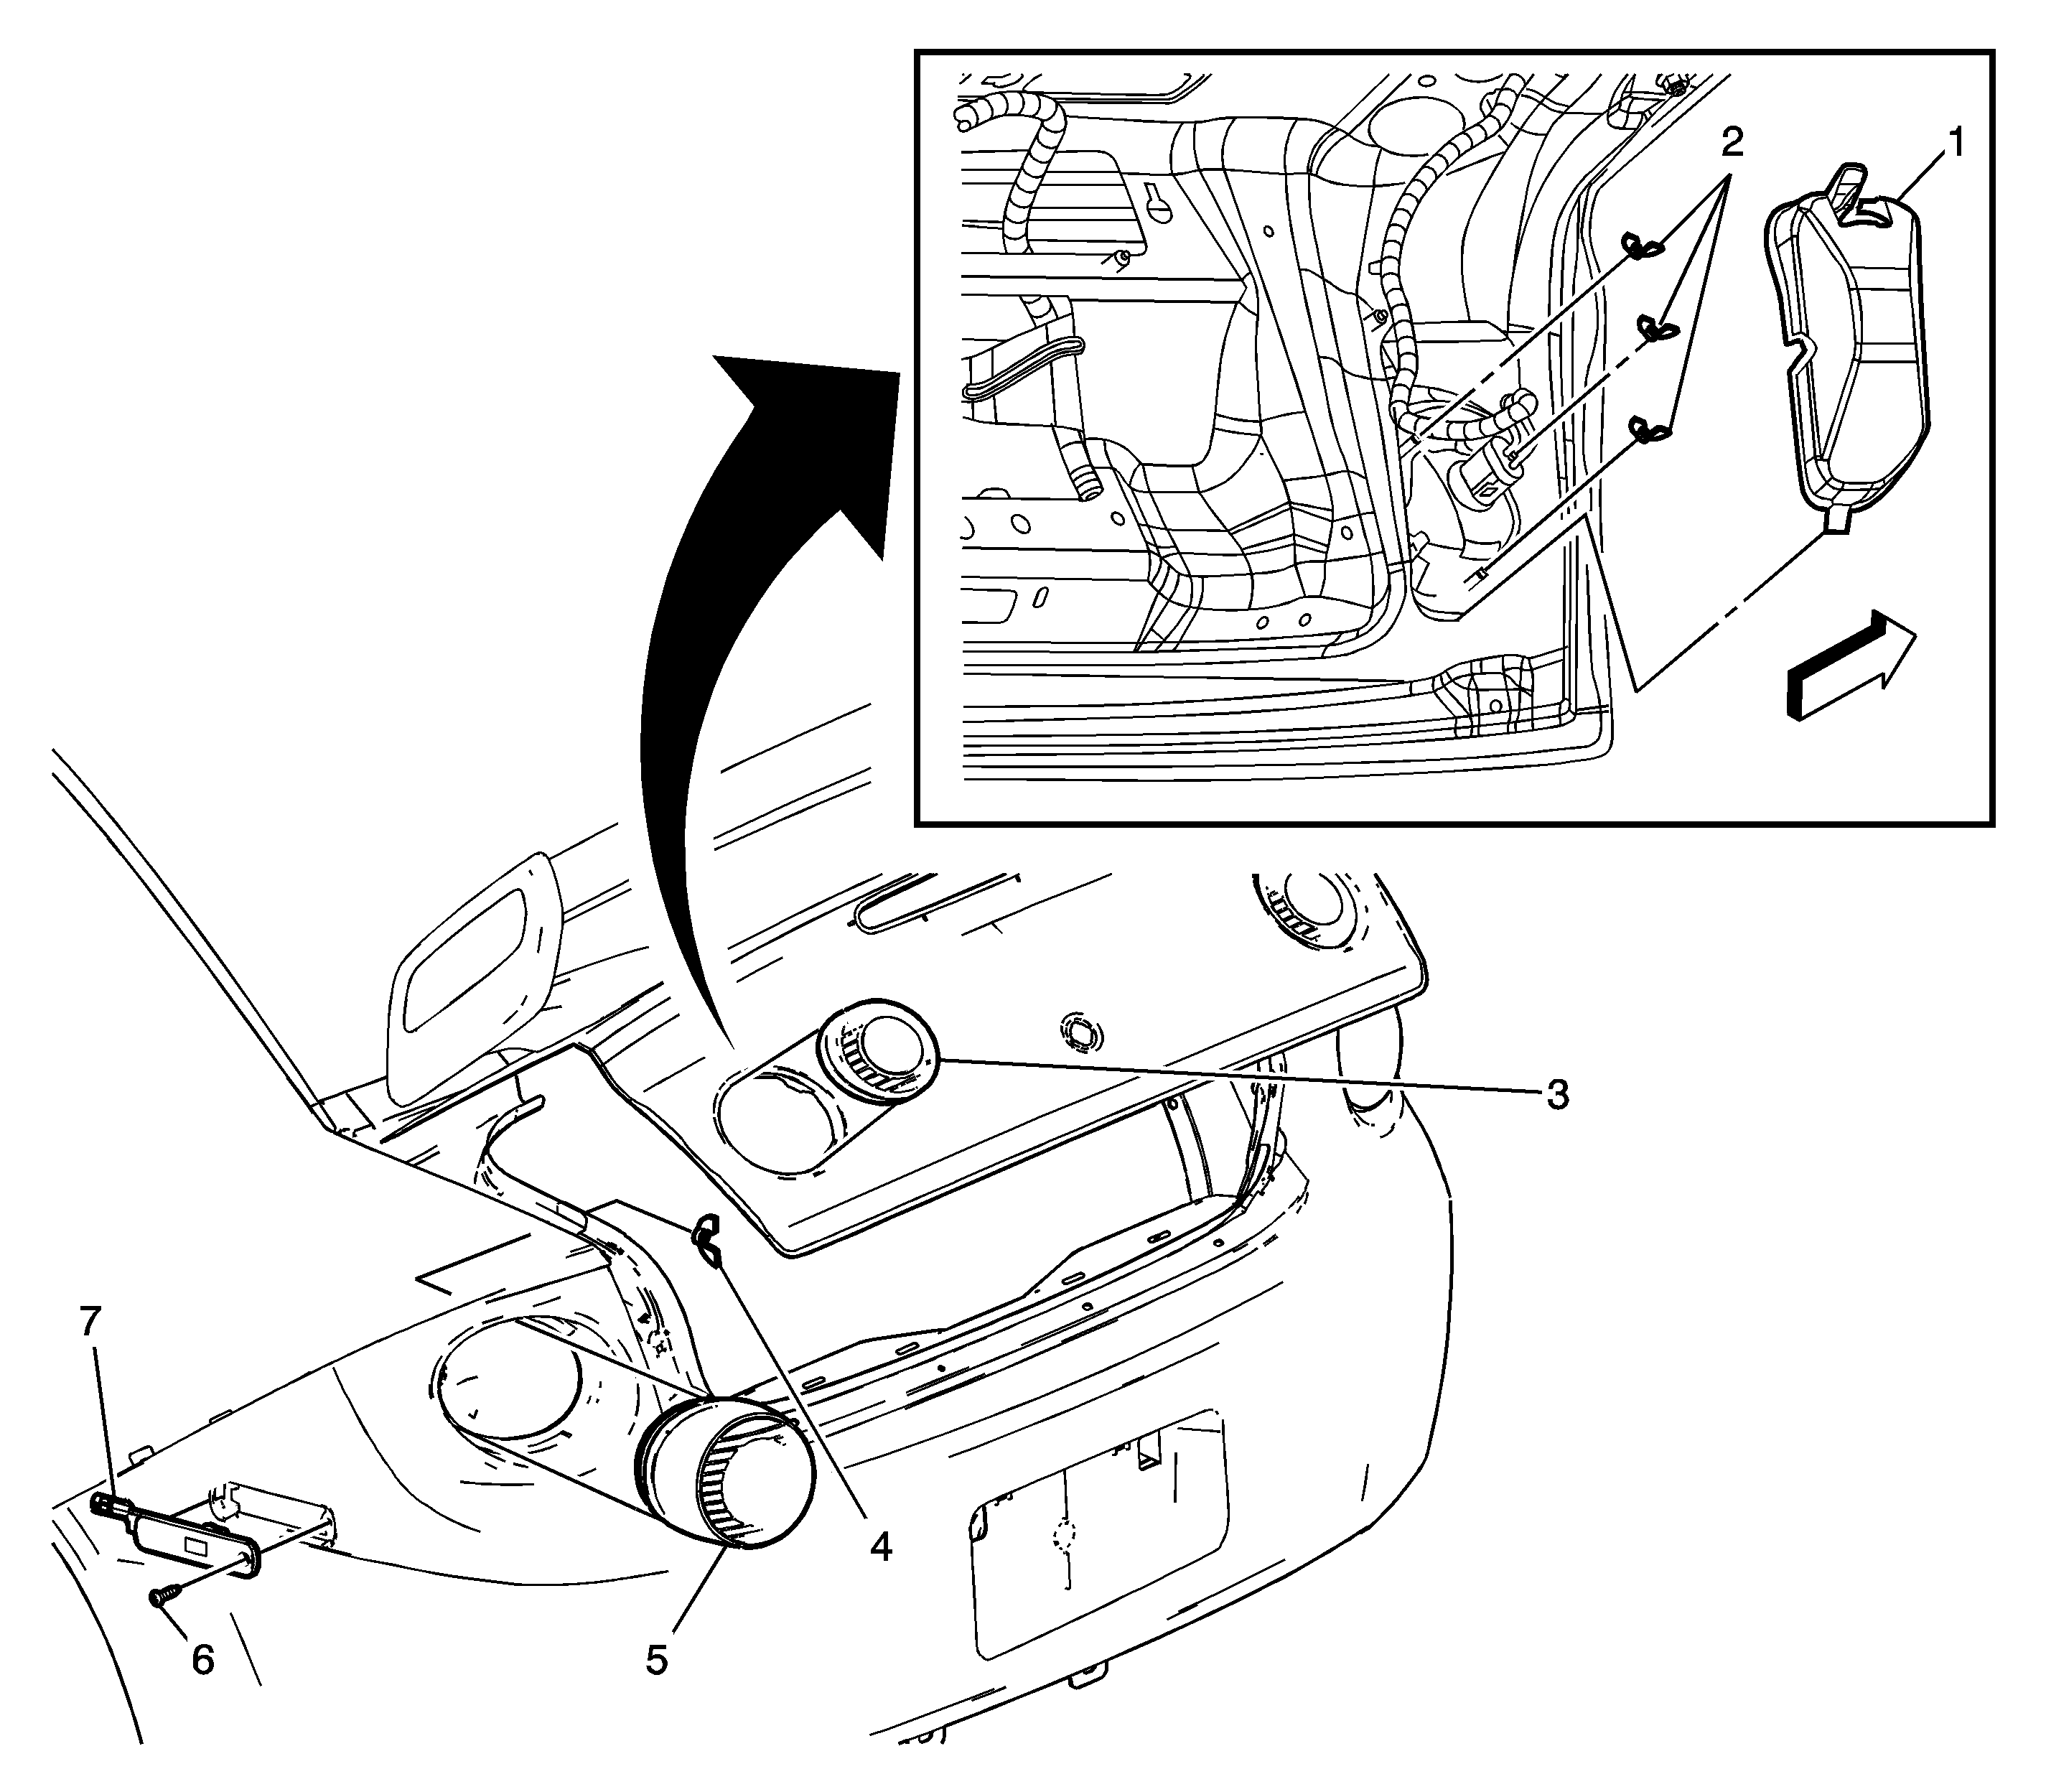

Object Number: 1549240  Size: LF

Callout

Component Name

Backup Lamp Assembly Replacement

1

Backup Lamp Cover

Tip
Press the tab on the cover to remove from the decklid.

2

Backup Lamp Nut (Qty: 3)

Notice: Refer to Fastener Notice in the Preface section.

Tip
If only replacing the bulb, turn the bulb socket assembly and pull out of the lamp assembly. This can be done from inside of the rear compartment lid, without removing the lamp from the vehicle.

Tighten
10 N·m (89 lb in)

3

Backup Lamp Assembly

Tip
Disconnect the electrical connector.

Tail Lamp Assembly Replacement

4

Tail Lamp Nut (Qty: 3)

Tip
If only replacing the bulb, turn the bulb socket assembly and pull out of the lamp assembly. This can be done from inside of the rear compartment, without removing the lamp assembly.

Tighten
10 N·m (89 lb in)

5

Tail Lamp

Tip
Disconnect the electrical connector to remove the lamp from the quarter panel.

Side Marker Lamp Assembly Replacement

6

Side Marker Screw (Qty: 1)

Tighten
2 N·m (18 lb in)

7

Side Marker Lamp

Tip
Disconnect the electrical connector to remove the lamp from the fascia.

Tail Lamp Replacement Chevrolet, Pontiac Sedan
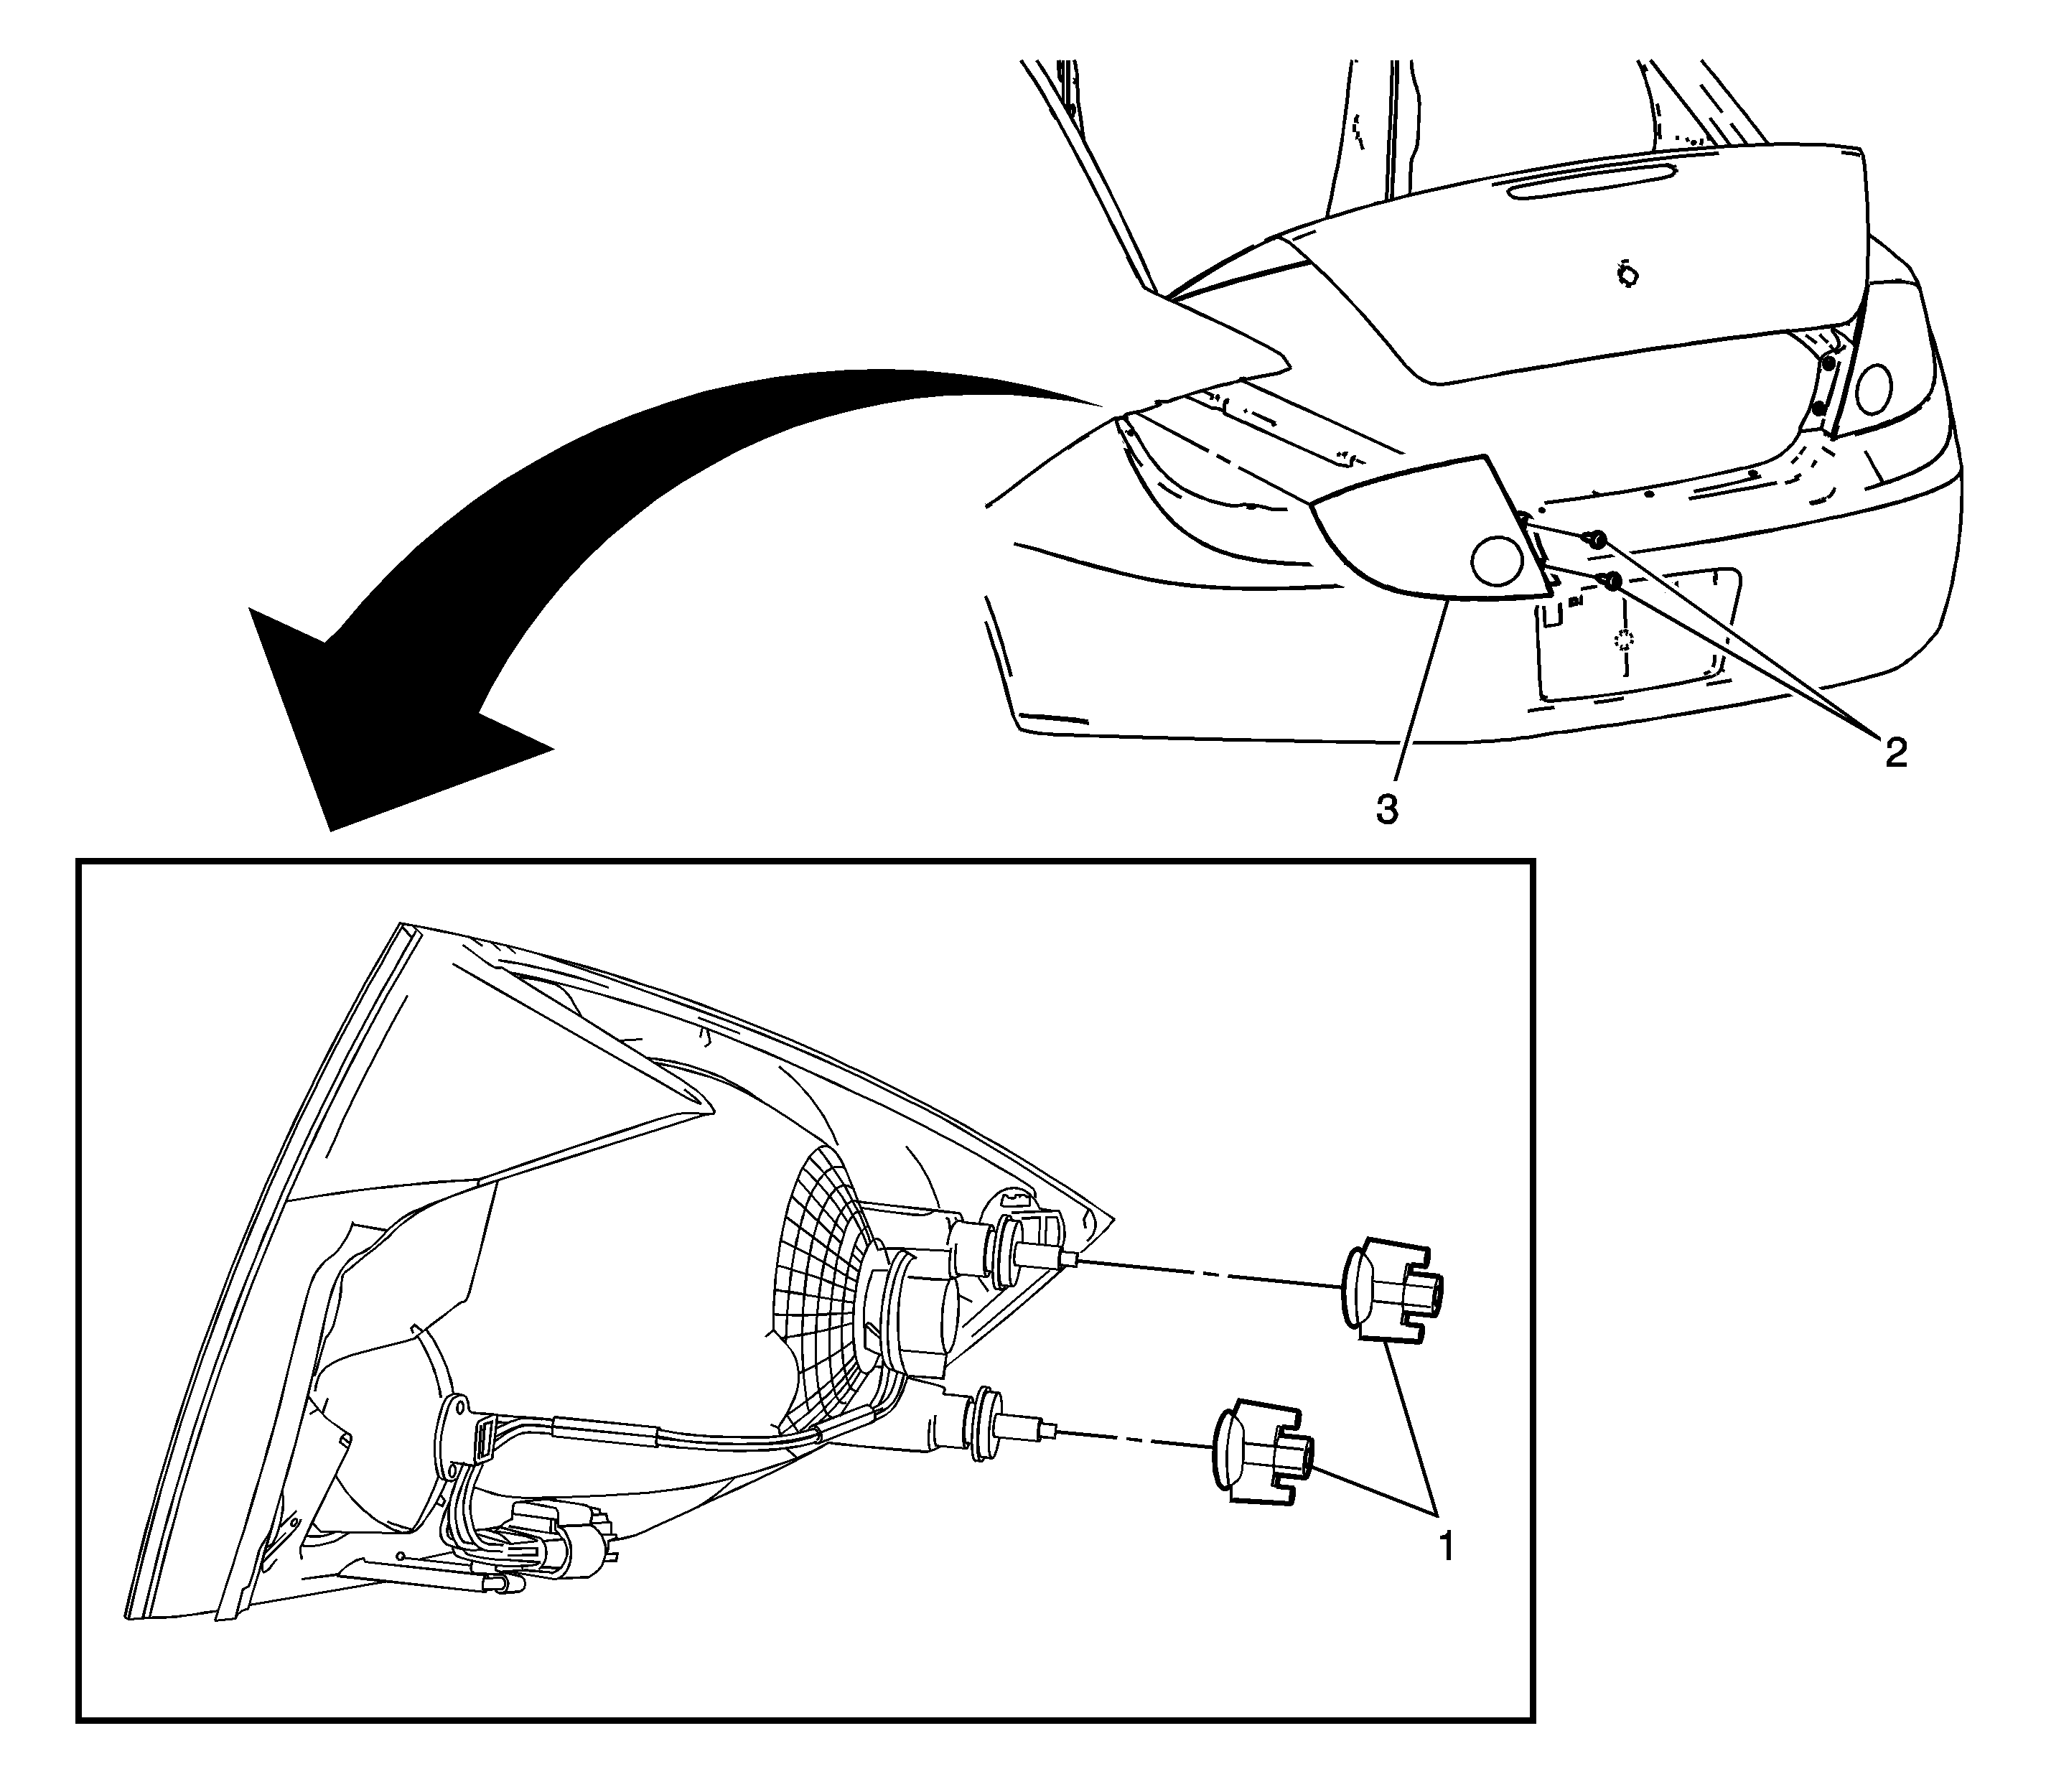

Object Number: 1549227  Size: LF

Callout

Component Name

1

Tail Lamp Nut (Qty: 2)

Hand tighten the tail lamp nut only.

2

Tail Lamp Bolt (Qty: 2)

Notice: Refer to Fastener Notice in the Preface section.

Tighten
1.5 N·m (13 lb in)

3

Tail Lamp Assembly

Procedure

  1. Pull the lamp rearward from the rear end panel extension.
  2. Disconnect the electrical connector.
  3. Remove the tail lamp assembly from the rear end panel extension.

Tail Lamp Replacement Chevrolet European
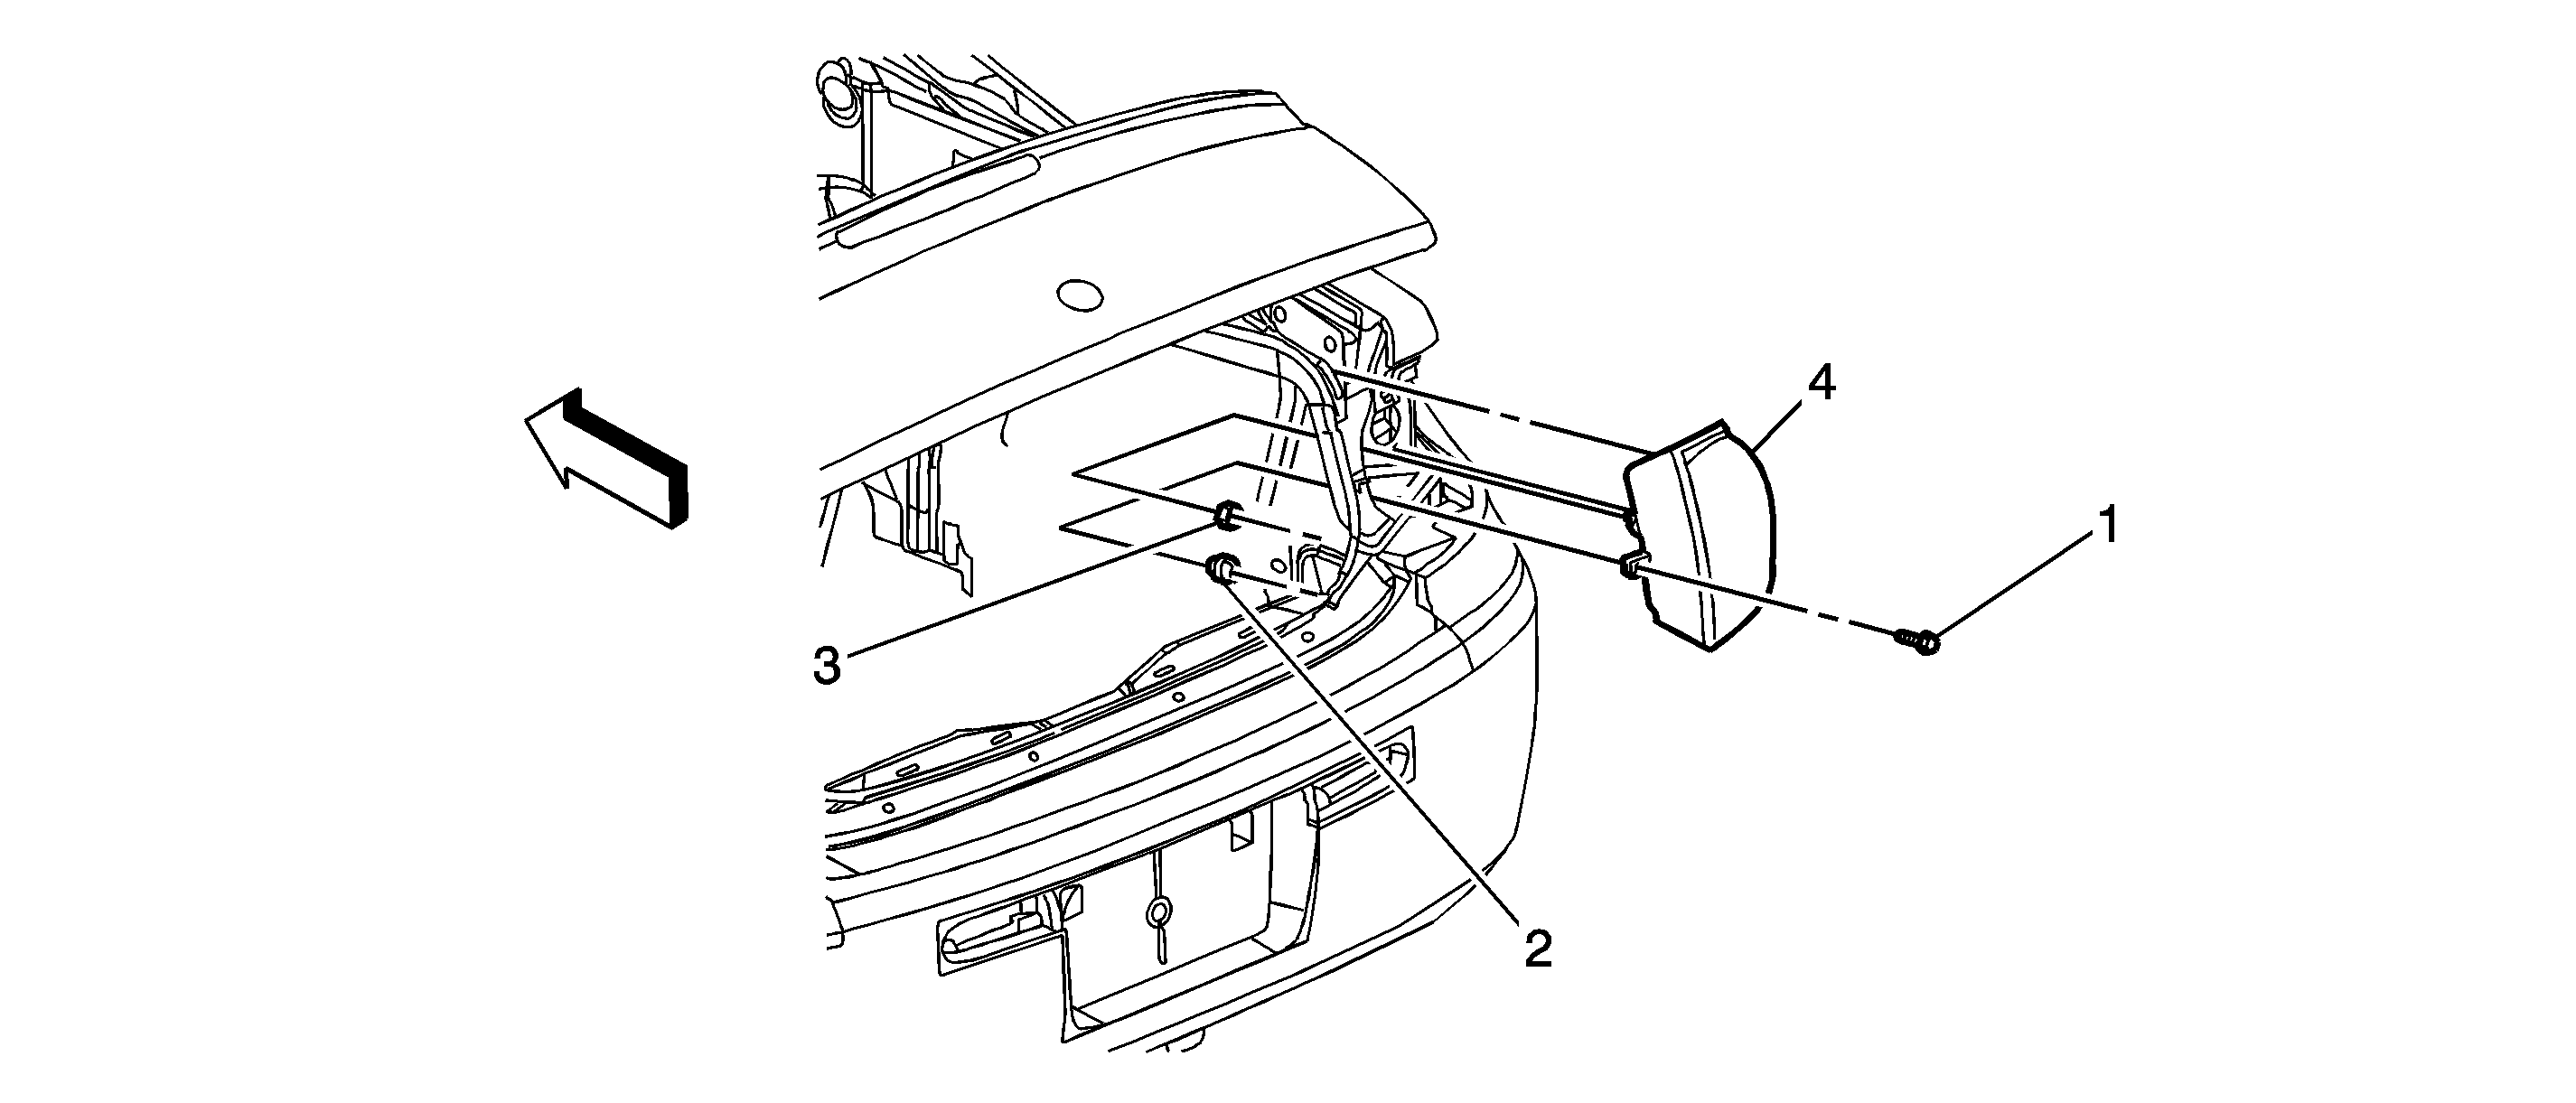

Object Number: 1655516  Size: SF

Callout

Component Name

1

Tail Lamp Screw

Notice: Refer to Fastener Notice in the Preface section.

Tighten
1.5 N·m (13 lb in)

Procedure

    • Remove the nut from inside the rear compartment.
    • If only servicing the bulbs, turn the bulb/socket and pull out of the lamp assembly. This can be done from inside of the rear compartment, without removing the lamp from the vehicle.

2

Tail Lamp Nut

Hand tighten only, no torque required

3

Tail Lamp Nut

Tighten
4.5 N·m (40 lb in)

4

Tail Lamp Assembly

Procedure

  1. Pull the lamp from the pocket.
  2. Disconnect the electrical connector.
  3. Upon installation, align pin on the lamp to the hole in the tail lamp pocket.
  4. Insert the lamp into the pocket and hold while securing the nuts.