Removal Procedure
- Install the engine support fixture. Refer to Engine Support Fixture .
- Raise and support the vehicle. Refer to Lifting and Jacking the Vehicle .
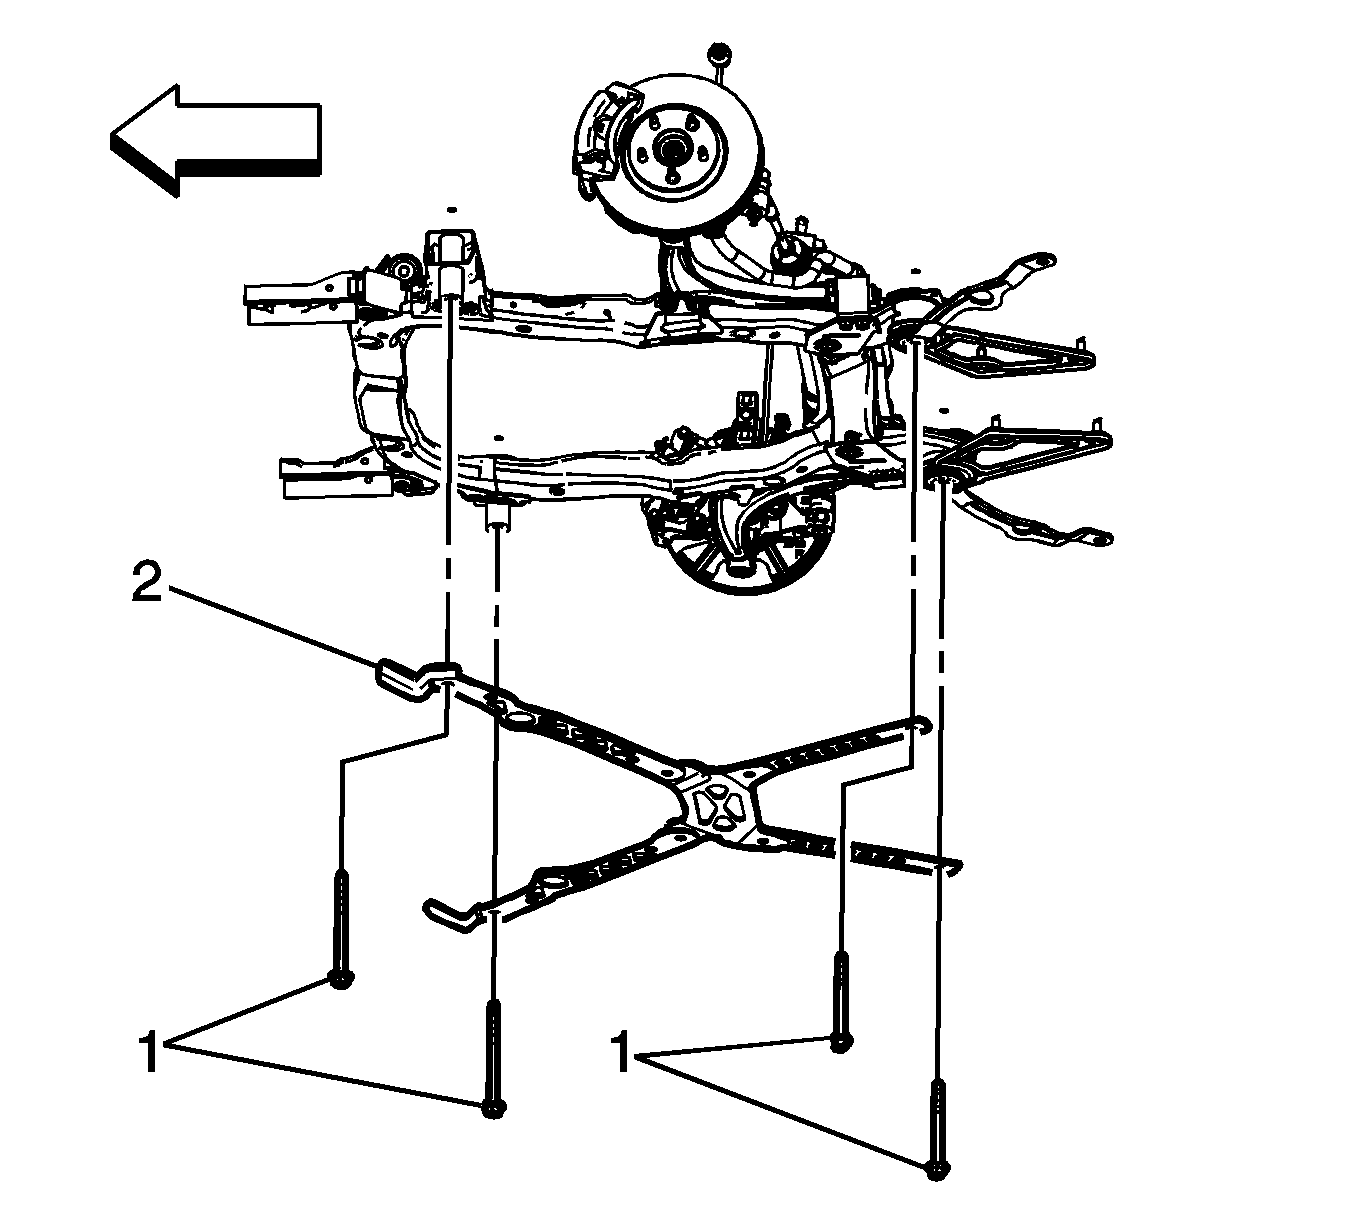
- Remove the support brace mounting bolts (1), for vehicles equipped with the 3.5L (LZ4) or 3.9L (LZ9) engines.
- Remove the support brace (2), for vehicles equipped with the 3.5L (LZ4) or 3.9L (LZ9) engines.
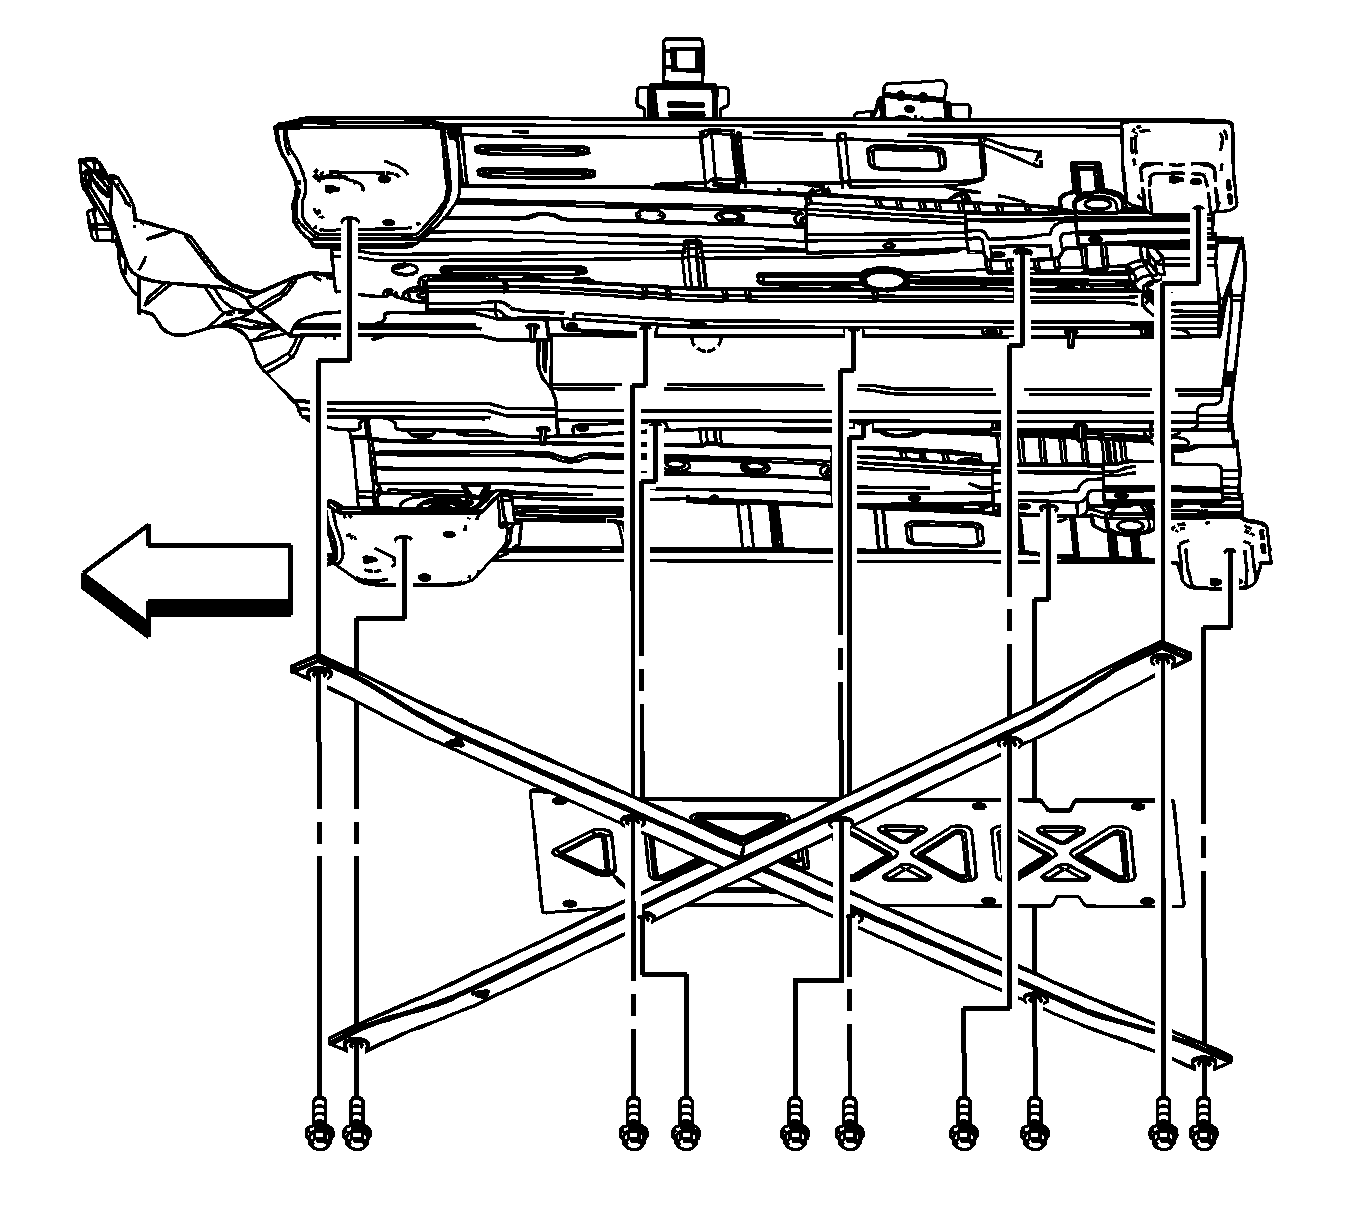
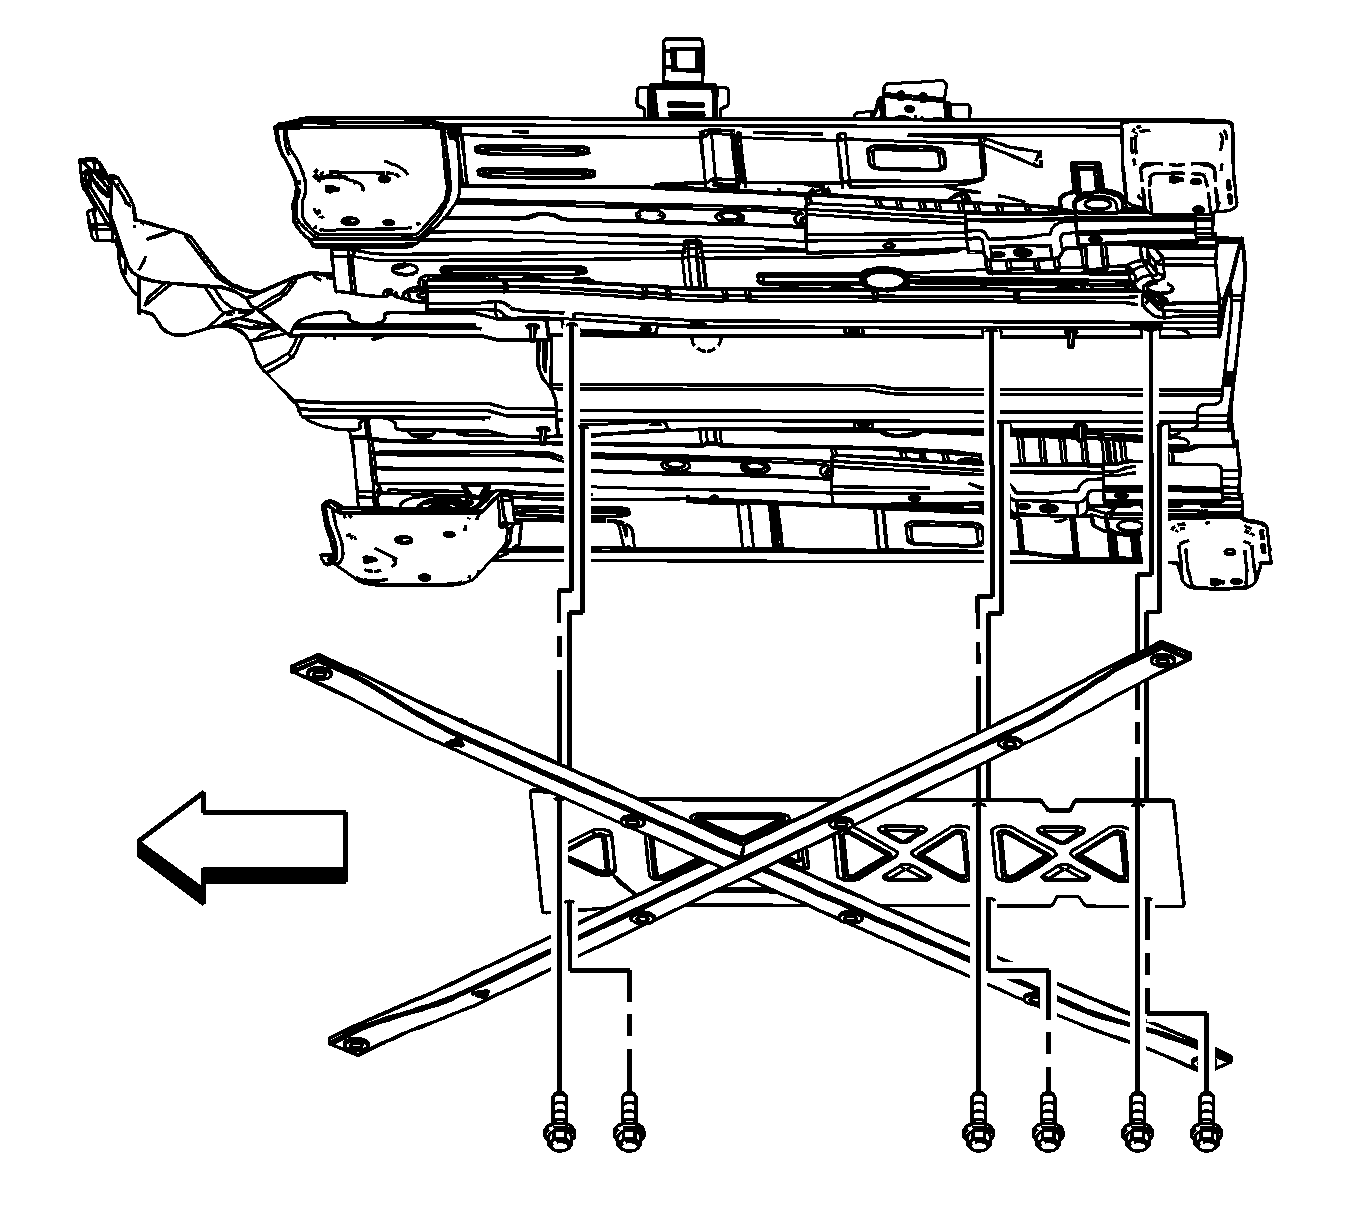
- Remove the floor tunnel panel brace mounting bolts.
- Remove the mounting bolts for the exhaust shield.
- Remove the floor tunnel panel brace.
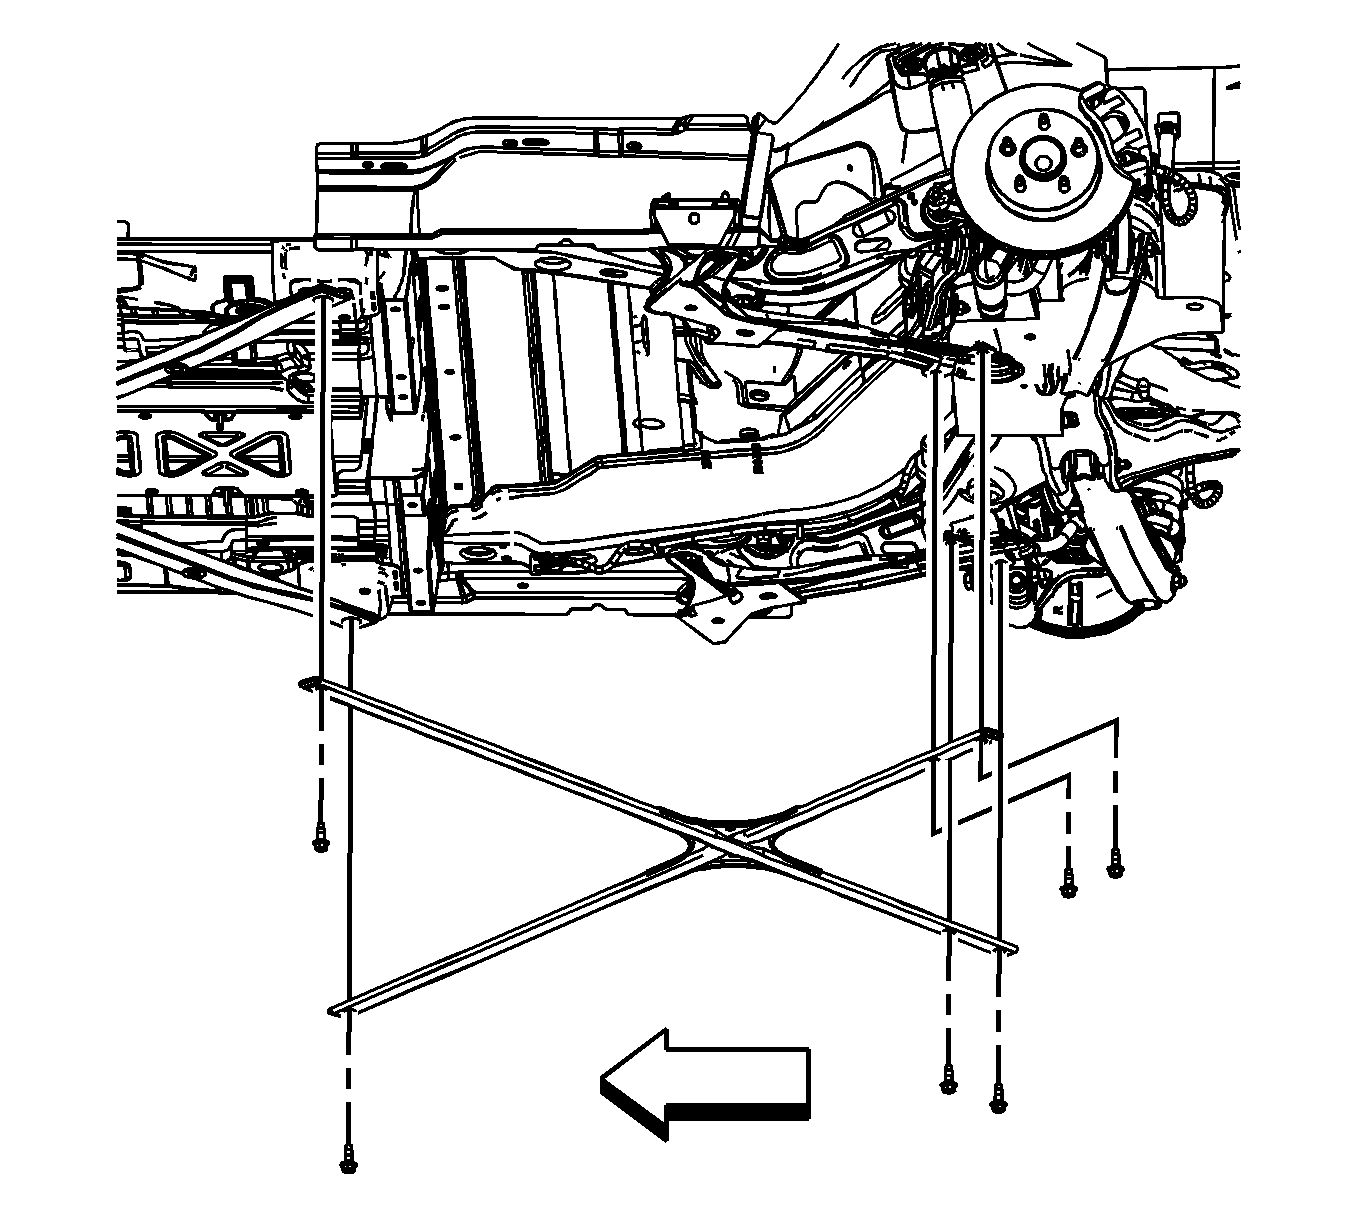
- Remove the mounting bolts for the rear crossmember brace.
- Remove the rear crossmember brace.
Important: The following service procedures (steps 1 and 2) are for the removal and or replacement of the support brace from the cradle.
Important: In steps 2-9, use a transmission jack or the help of an assistant to remove the support brace, floor tunnel brace, and the rear crossmember brace from the vehicle.


Installation Procedure
- Position the support brace (2) on the cradle, for vehicles equipped with the 3.5L (LZ4) or 3.9L (LZ9) engines.
- Install the support brace bolts (1).
- Position the floor tunnel panel brace on the vehicle.
- Hand tighten the mounting bolts.
- Install the tunnel panel brace mounting bolts.
- Install the remaining tunnel panel mounting bolts.
- Position the rear crossmember brace on the vehicle.
- Install the crossmember brace mounting bolts.
- Lower the vehicle.
- Remove the engine support fixture. Refer to Engine Support Fixture .
Important: In steps 1-8, use a transmission jack or the help of an assistant to install the support brace, floor tunnel brace, and the rear crossmember brace in the vehicle.

Notice: Refer to Fastener Notice in the Preface section.
Tighten
Tighten the bolts to 100 N·m (73 lb ft) plus 180 degrees rotation.

Important: Tighten all the tunnel panel mounting bolts at the same time.
Tighten
Tighten the bolts to 50 N·m (37 lb ft).

Tighten
Tighten the bolts to 50 N·m (37 lb ft).

Tighten
Tighten the bolts to 50 N·m (37 lb ft).
