For 1990-2009 cars only
Removal Procedure
- Remove the engine cover. Refer to Engine Cover Replacement.
- Depressurize the fuel system. Refer to Fuel Pressure Relief.
- Disconnect the battery ground cable. Refer to Battery Negative Cable Disconnection and Connection .
- Drain the cooling system. Refer to Cooling System Draining and Filling.
- Remove the air intake duct. Refer to Air Cleaner Inlet Duct Replacement .
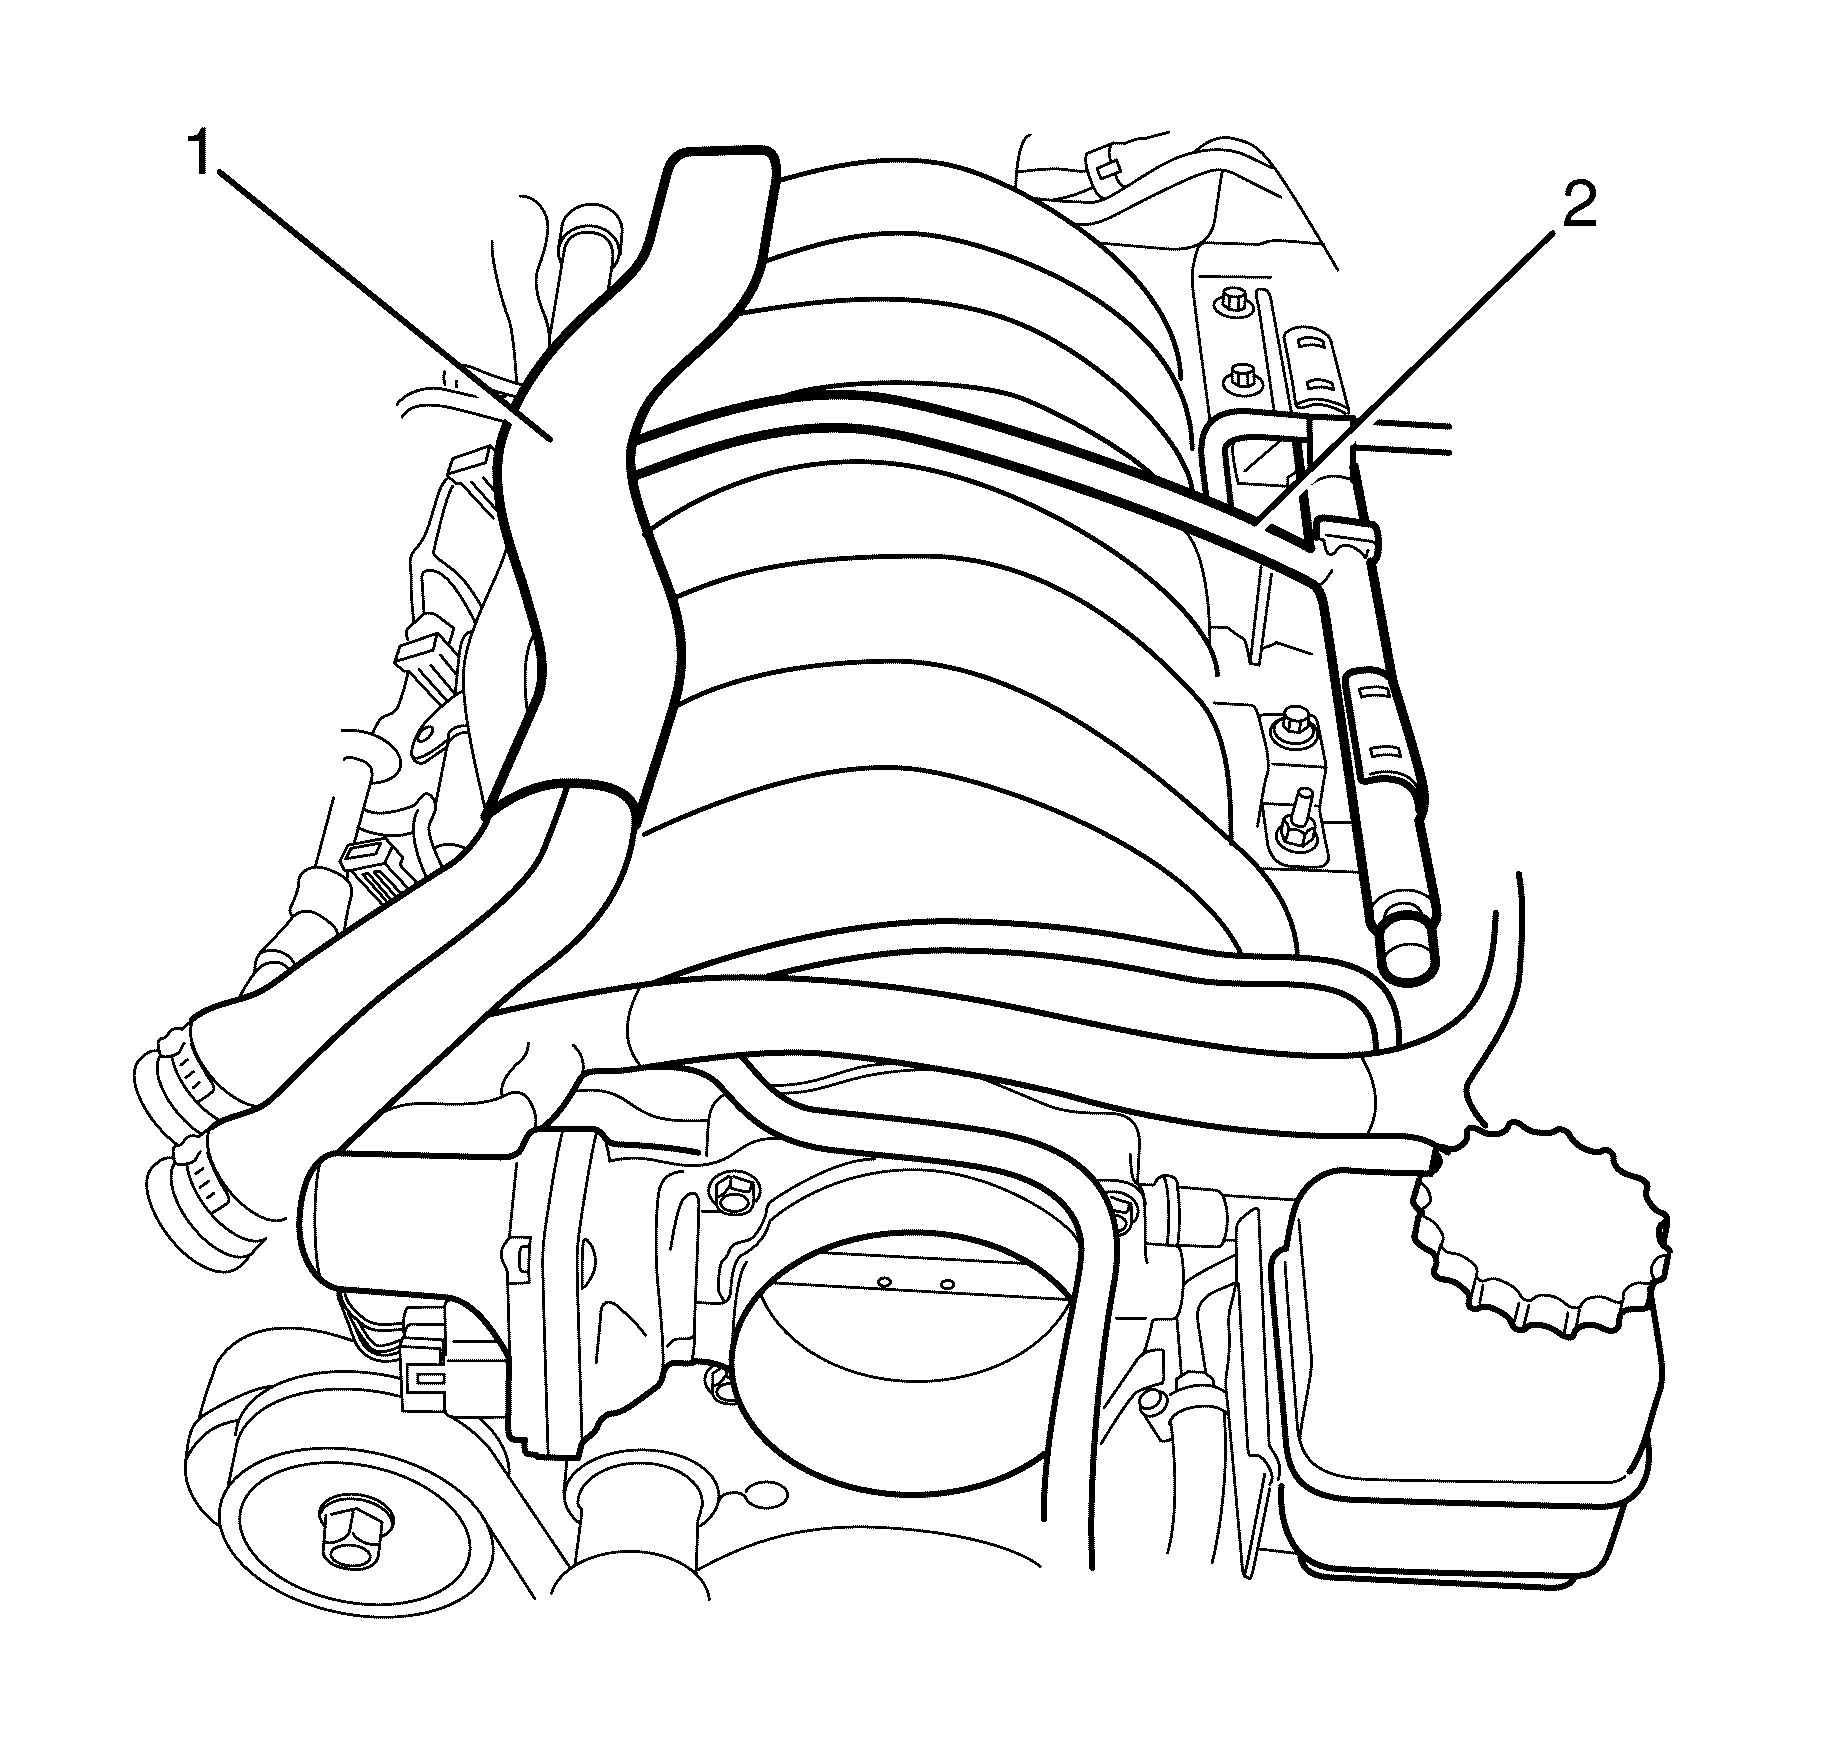
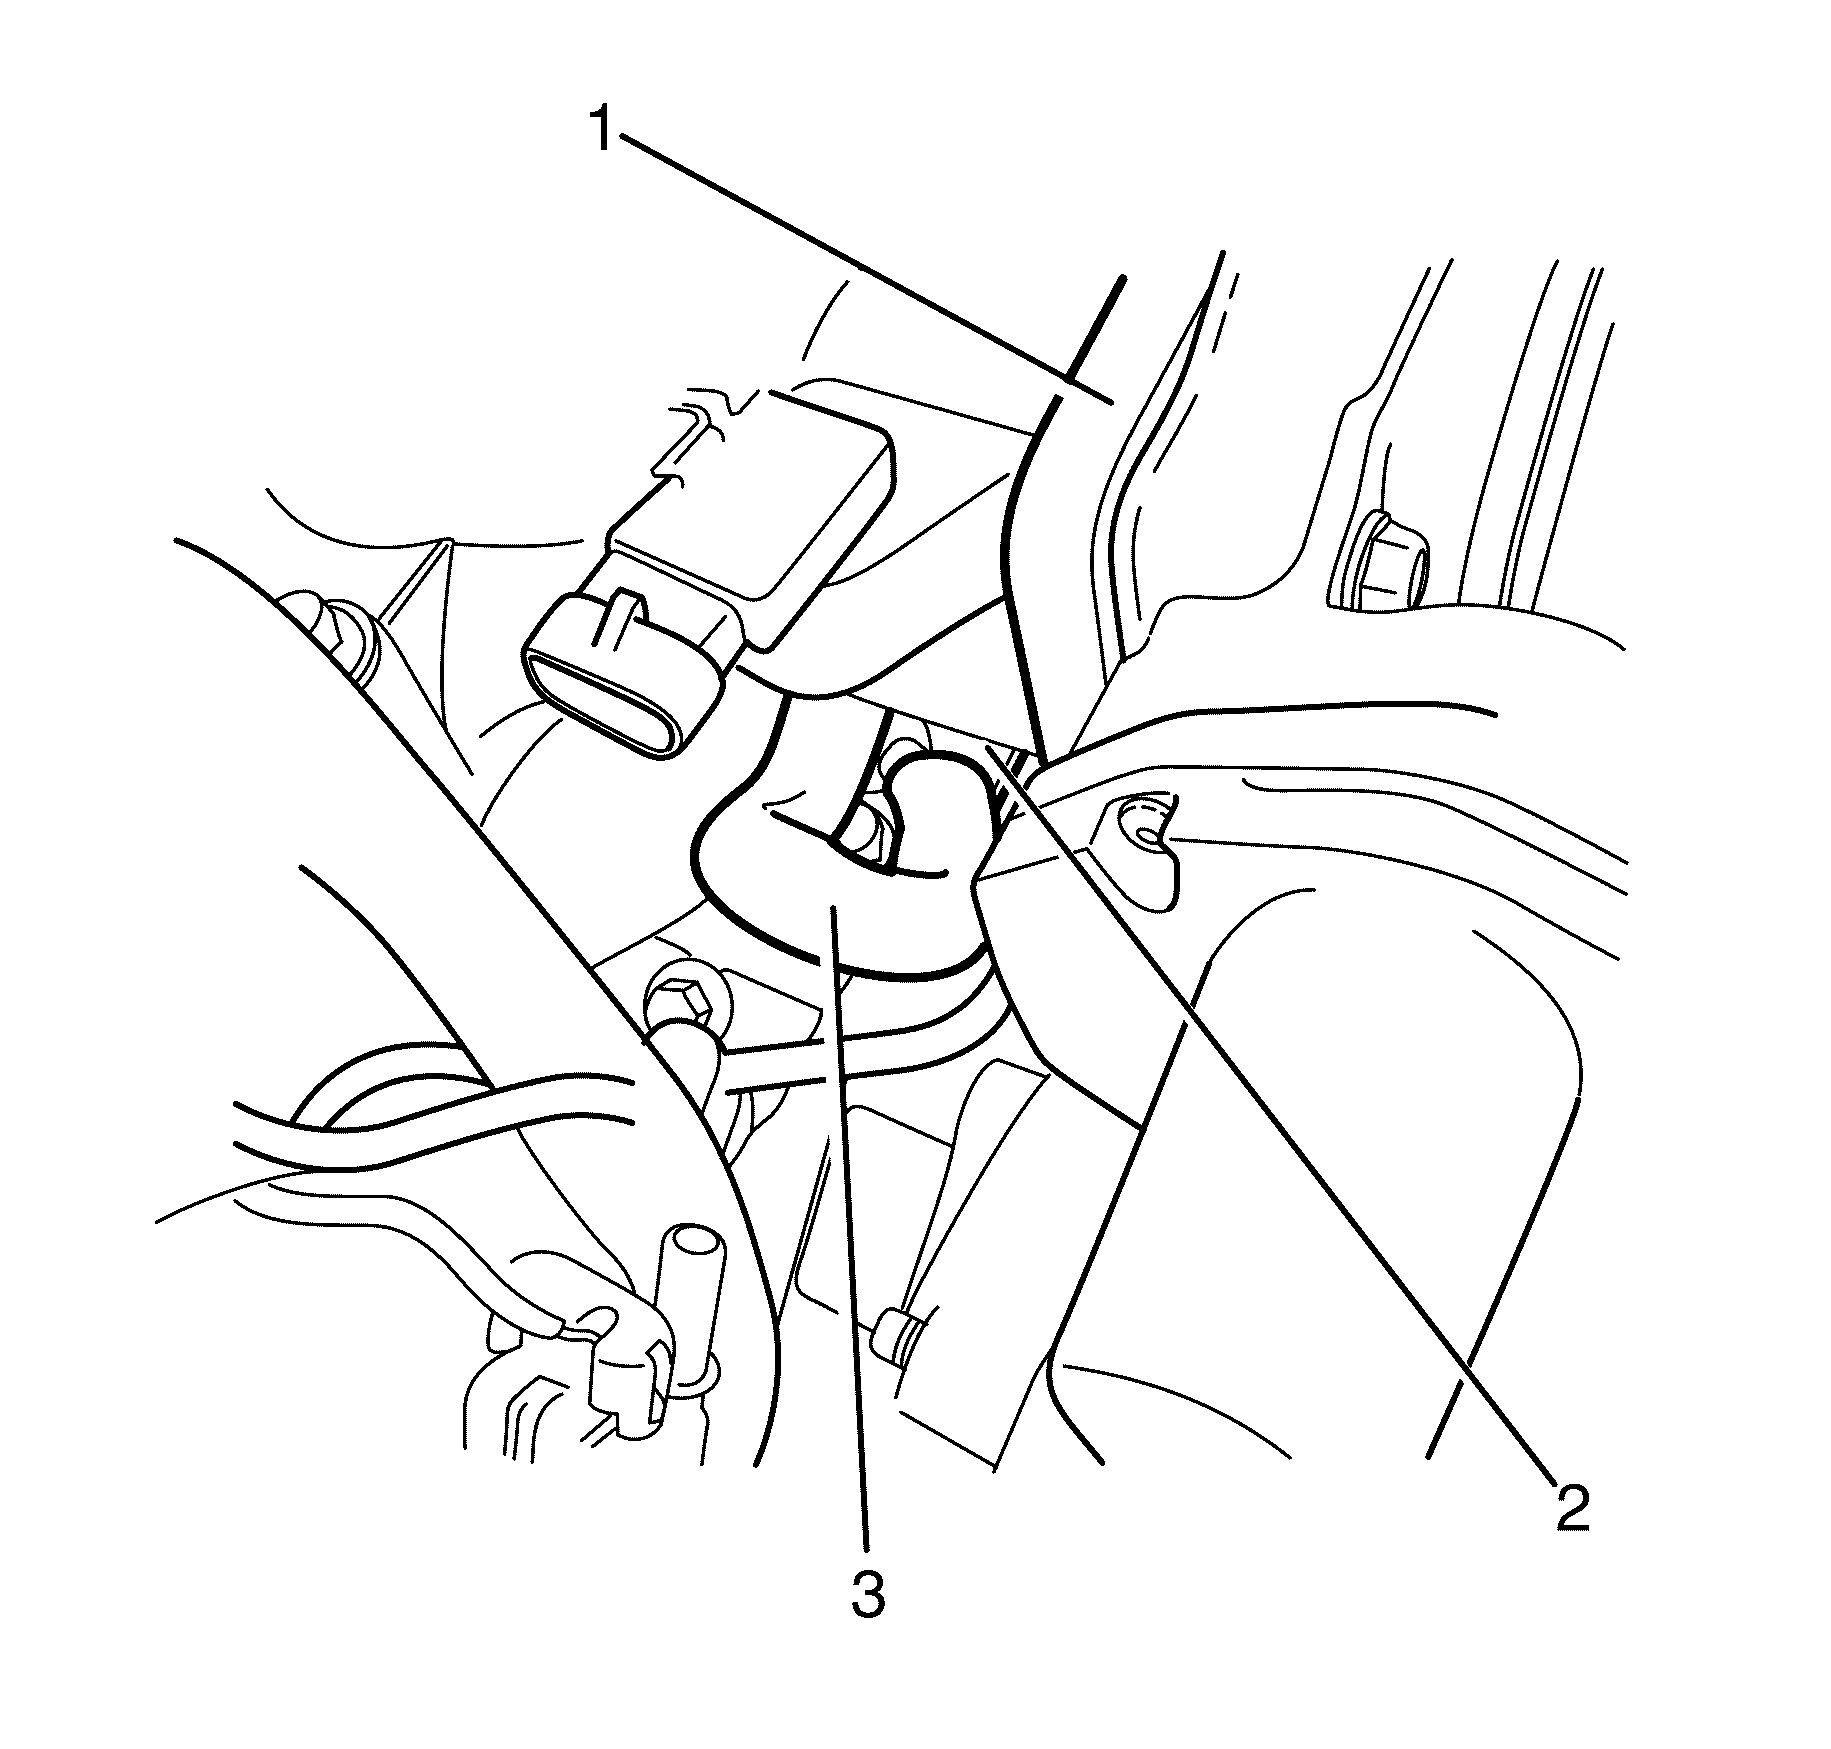
- Reposition and secure the heater hoses (1) away from the intake manifold (2).
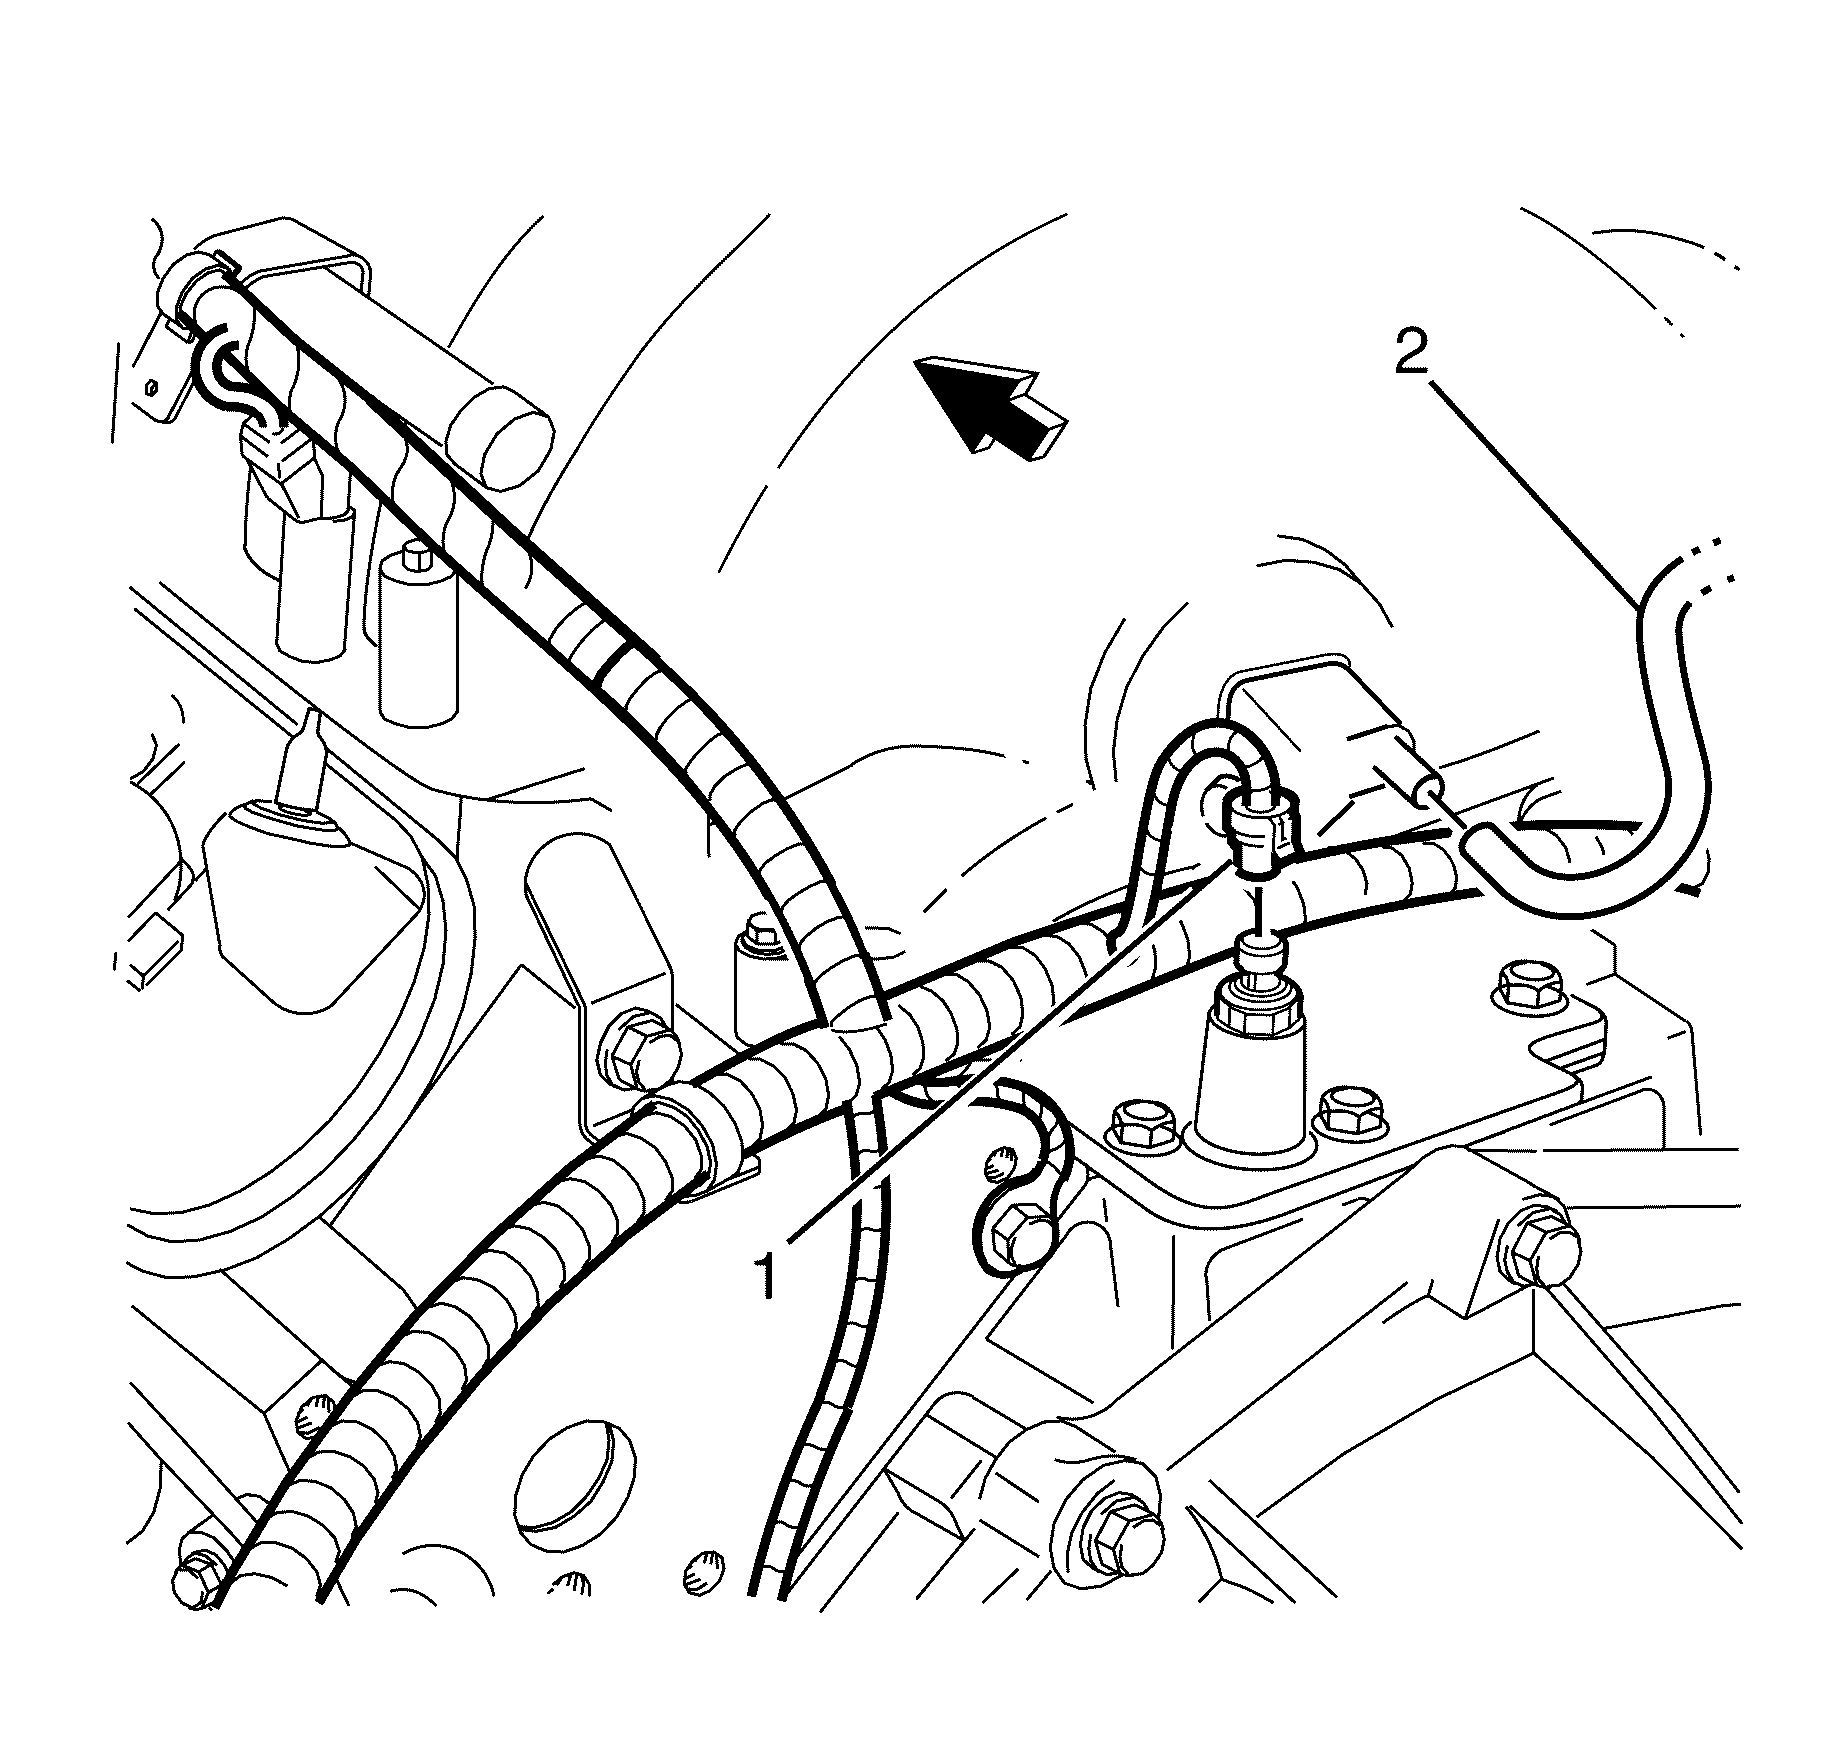
- Disconnect the fuel rail feed pipe (2) quick connect fitting. Refer to Metal Collar Quick Connect Fitting Service or Plastic Collar Quick Connect Fitting Service.
- Disconnect the throttle body to EVAP purge valve hose (3) from the EVAP purge valve (1).
- Disconnect the EVAP purge valve to fuel tank hose (2) from the EVAP purge valve (1).
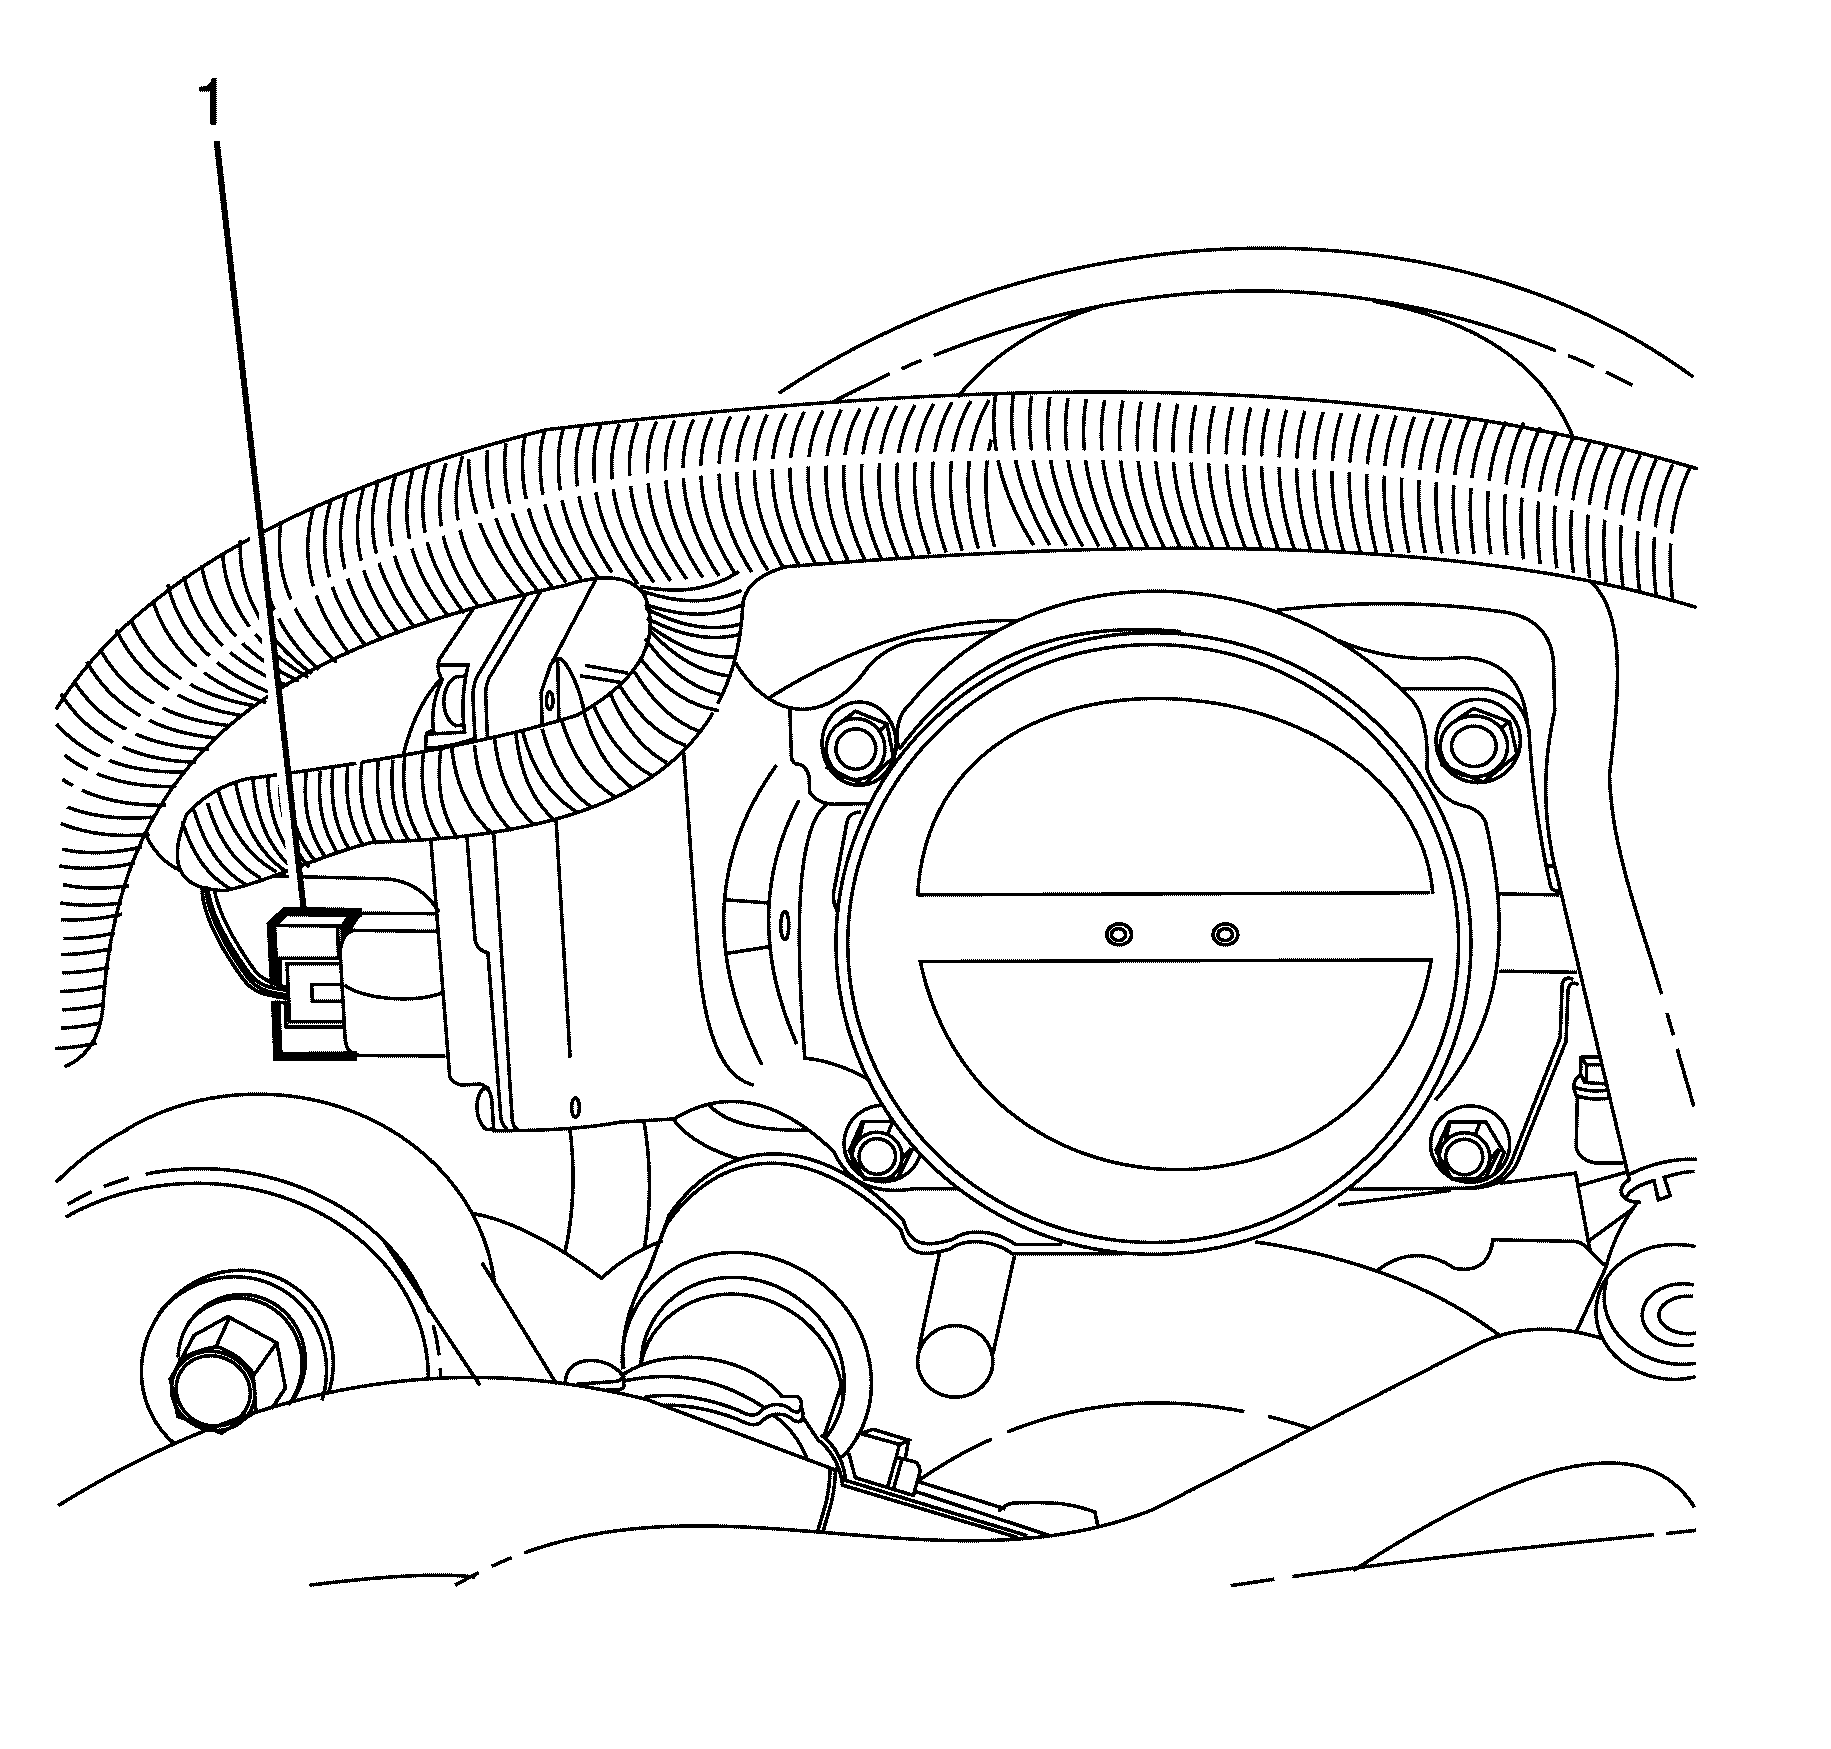
- Disconnect the electronic throttle body wiring harness connector (1).
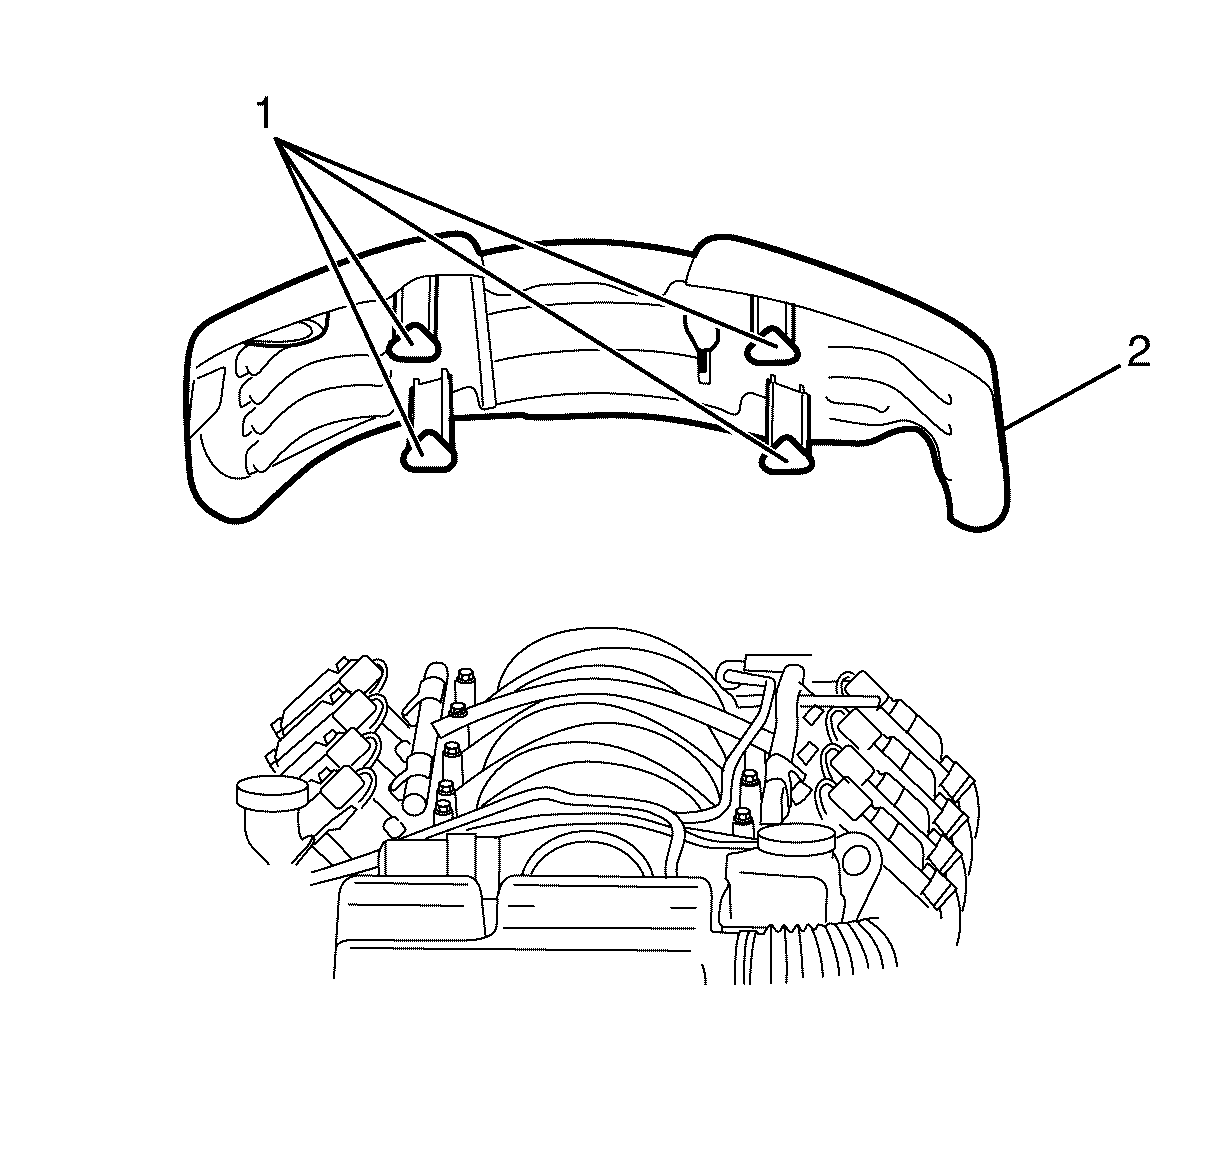
- Disconnect the (PCV) Positive Crankcase Ventilation hose (3) from the intake manifold (1) and the valley cover (2).
- Disconnect the alternator wiring harness connector (1) from the alternator.
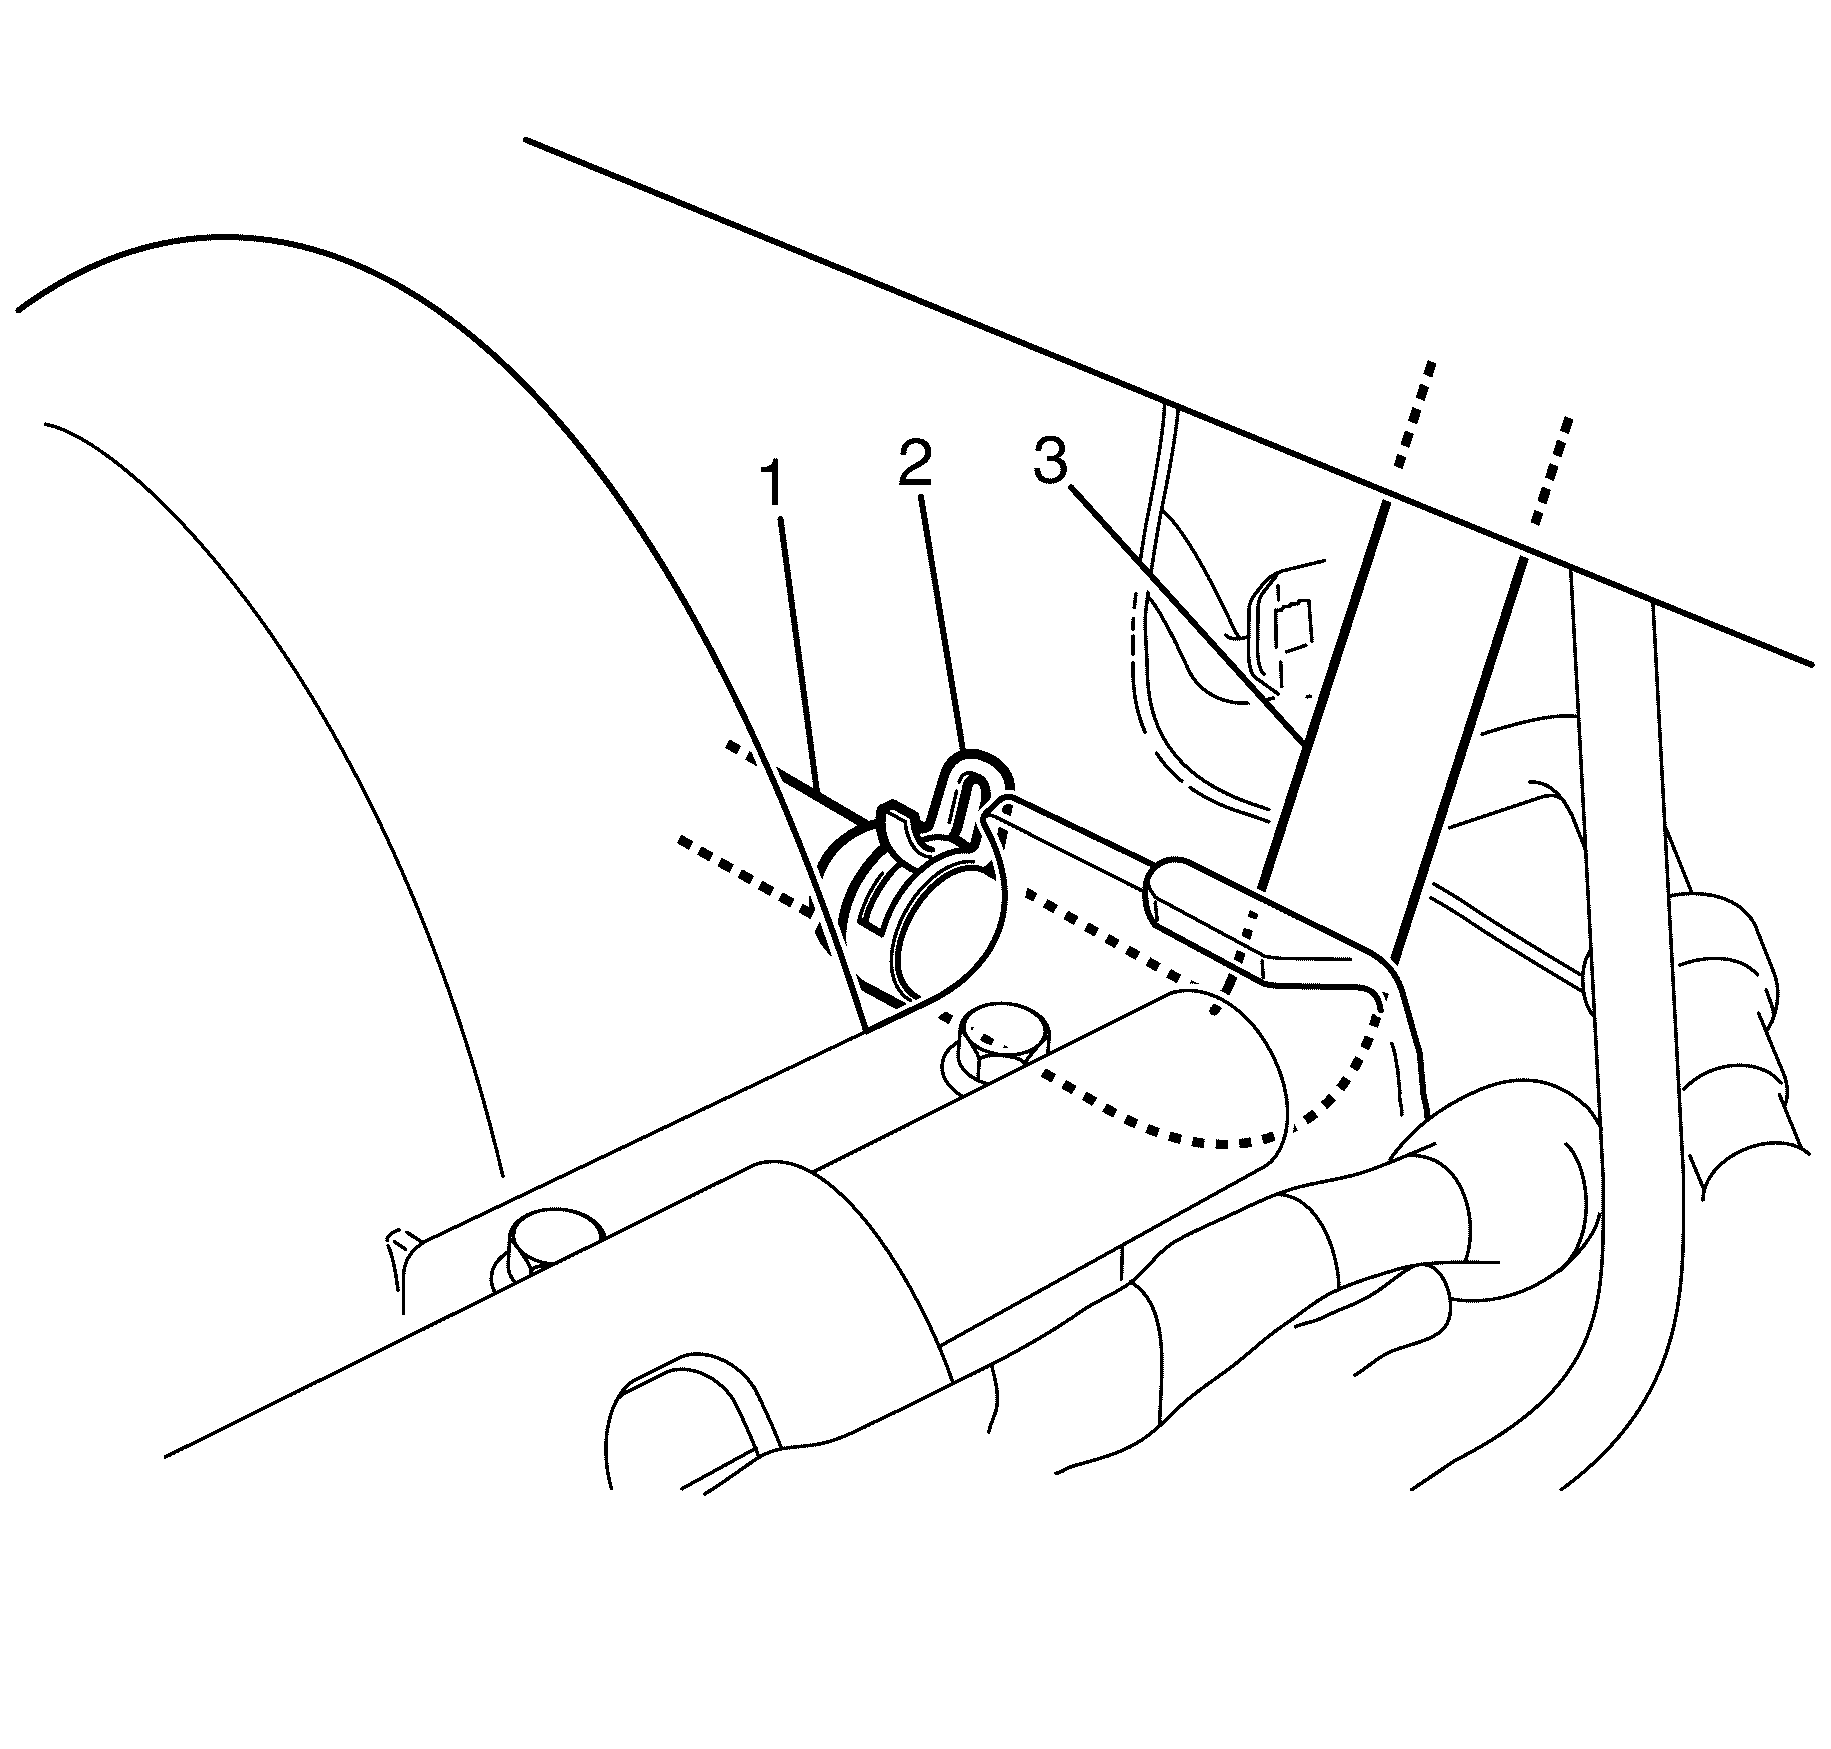
- Compress the vacuum hose retaining clamp (2) at the intake manifold vacuum port (1) and slide 50 mm (2 in) back along the vacuum hose (3).
- Disconnect the vacuum hose (3) from the intake manifold vacuum port (1).
- Disconnect the oil pressure sensor wiring harness connector (1) from the oil pressure sensor.
- Disconnect the HVAC vacuum hose (2) from the intake manifold.
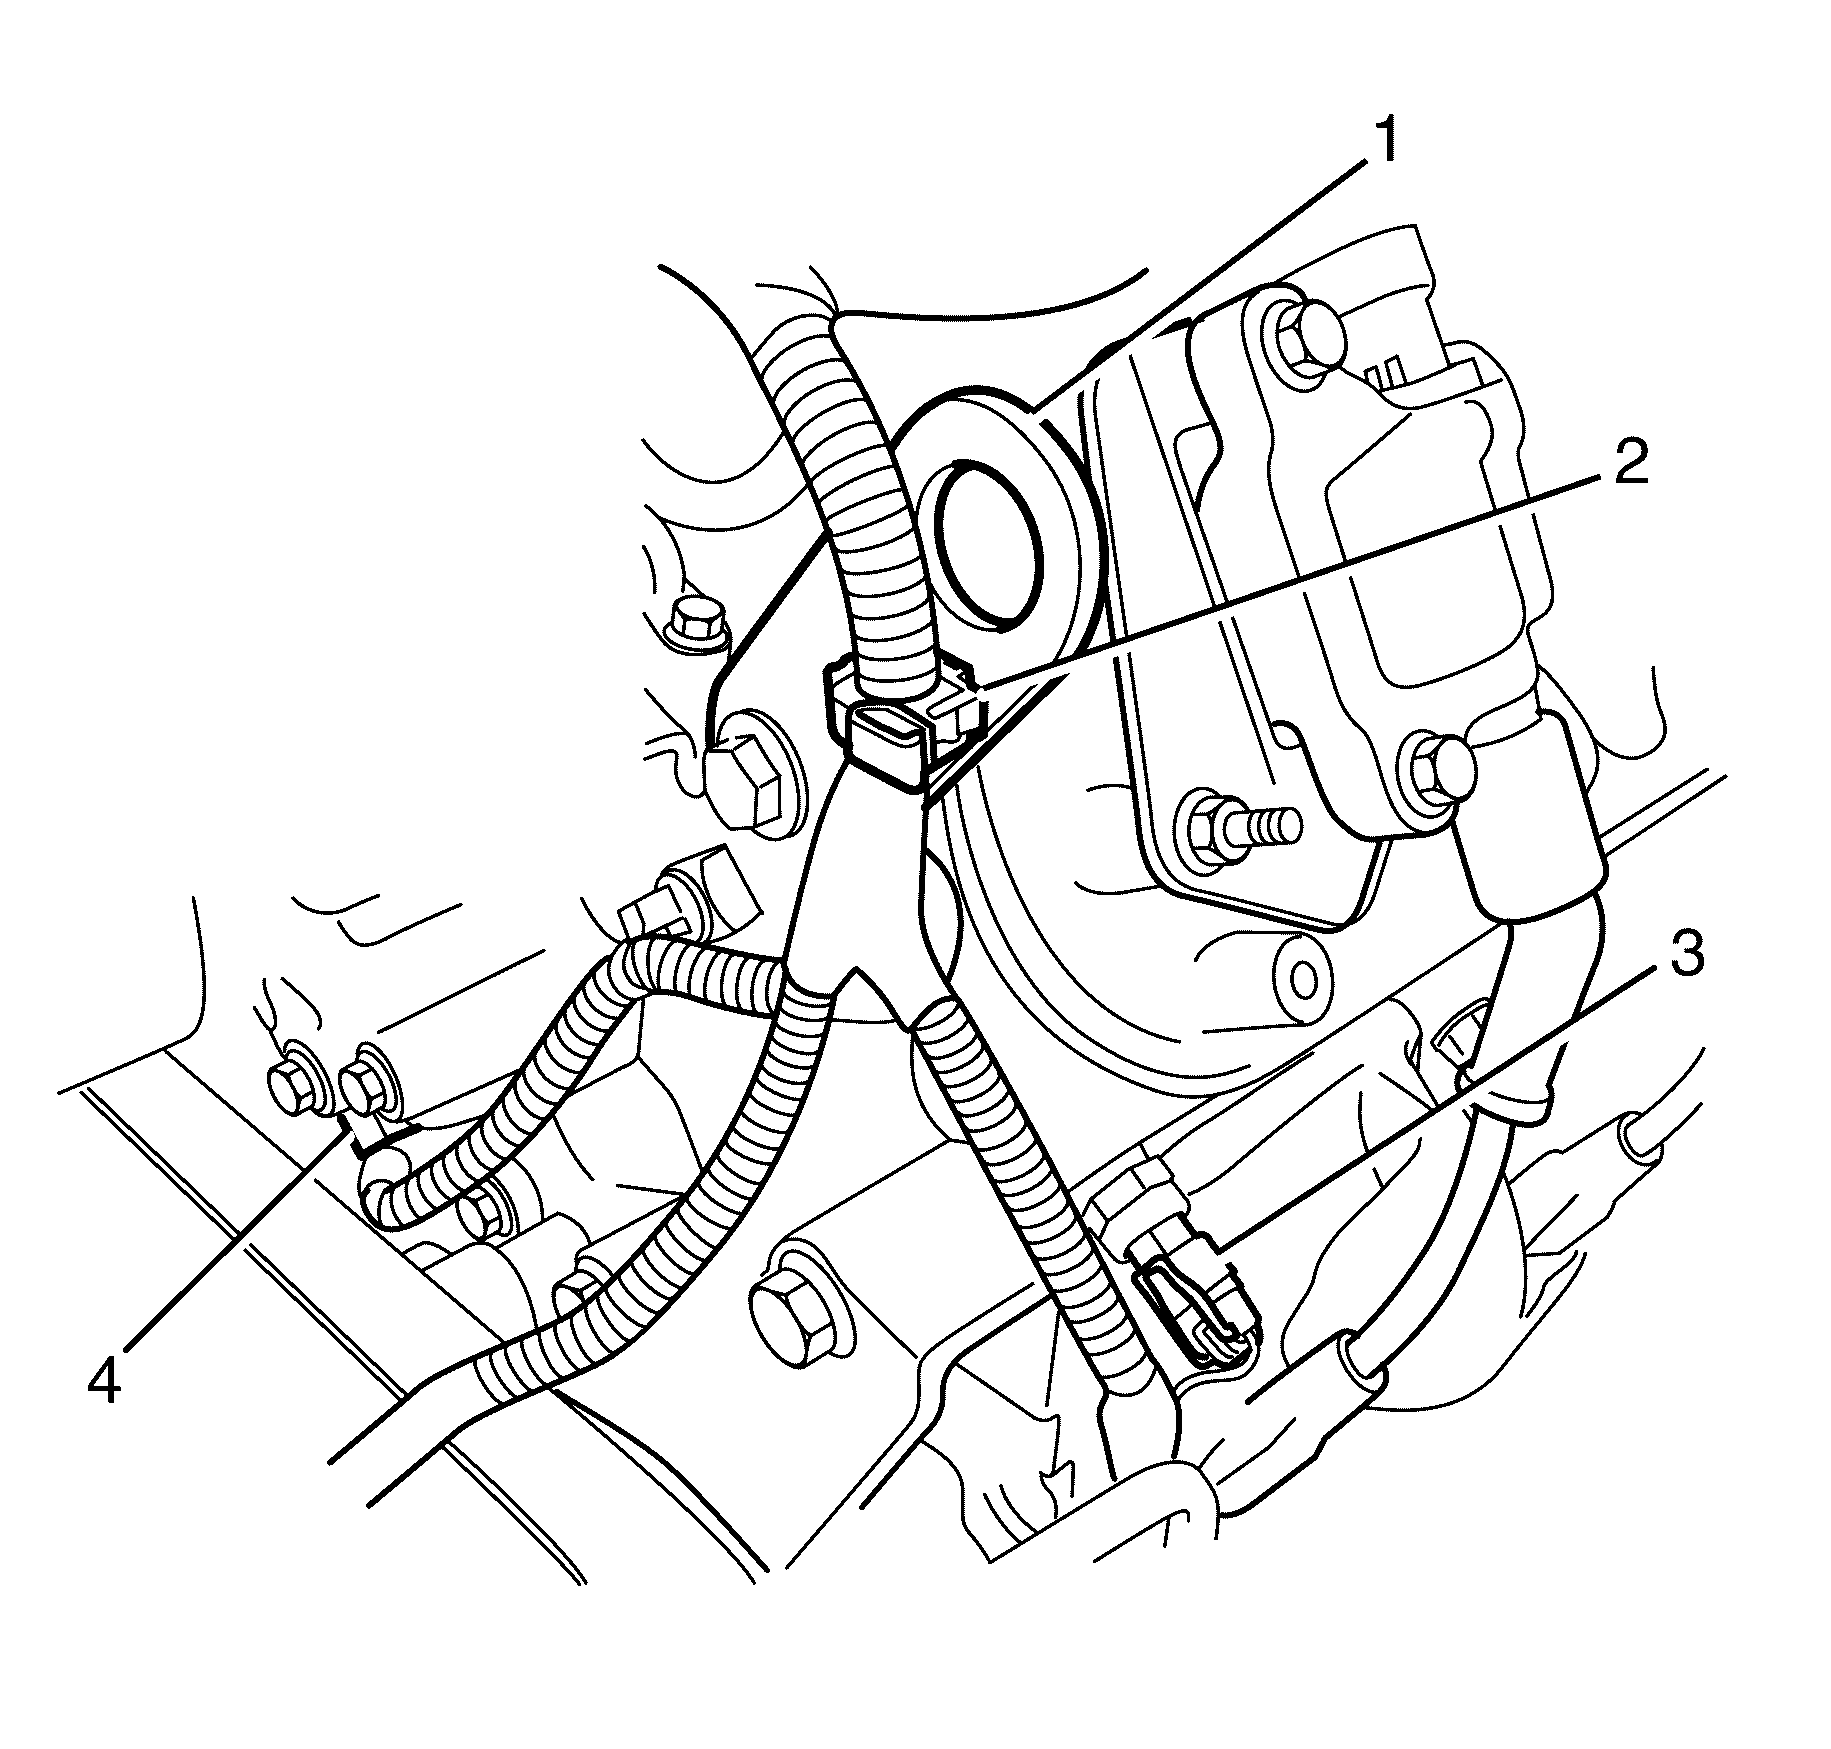
- Disconnect the camshaft position sensor connector (4) from the camshaft position sensor.
- Disconnect the coolant temperature sensor connector (3) from the coolant temperature sensor.
- Detach the wiring harness retaining clip (2) from the engine lifting bracket (1).
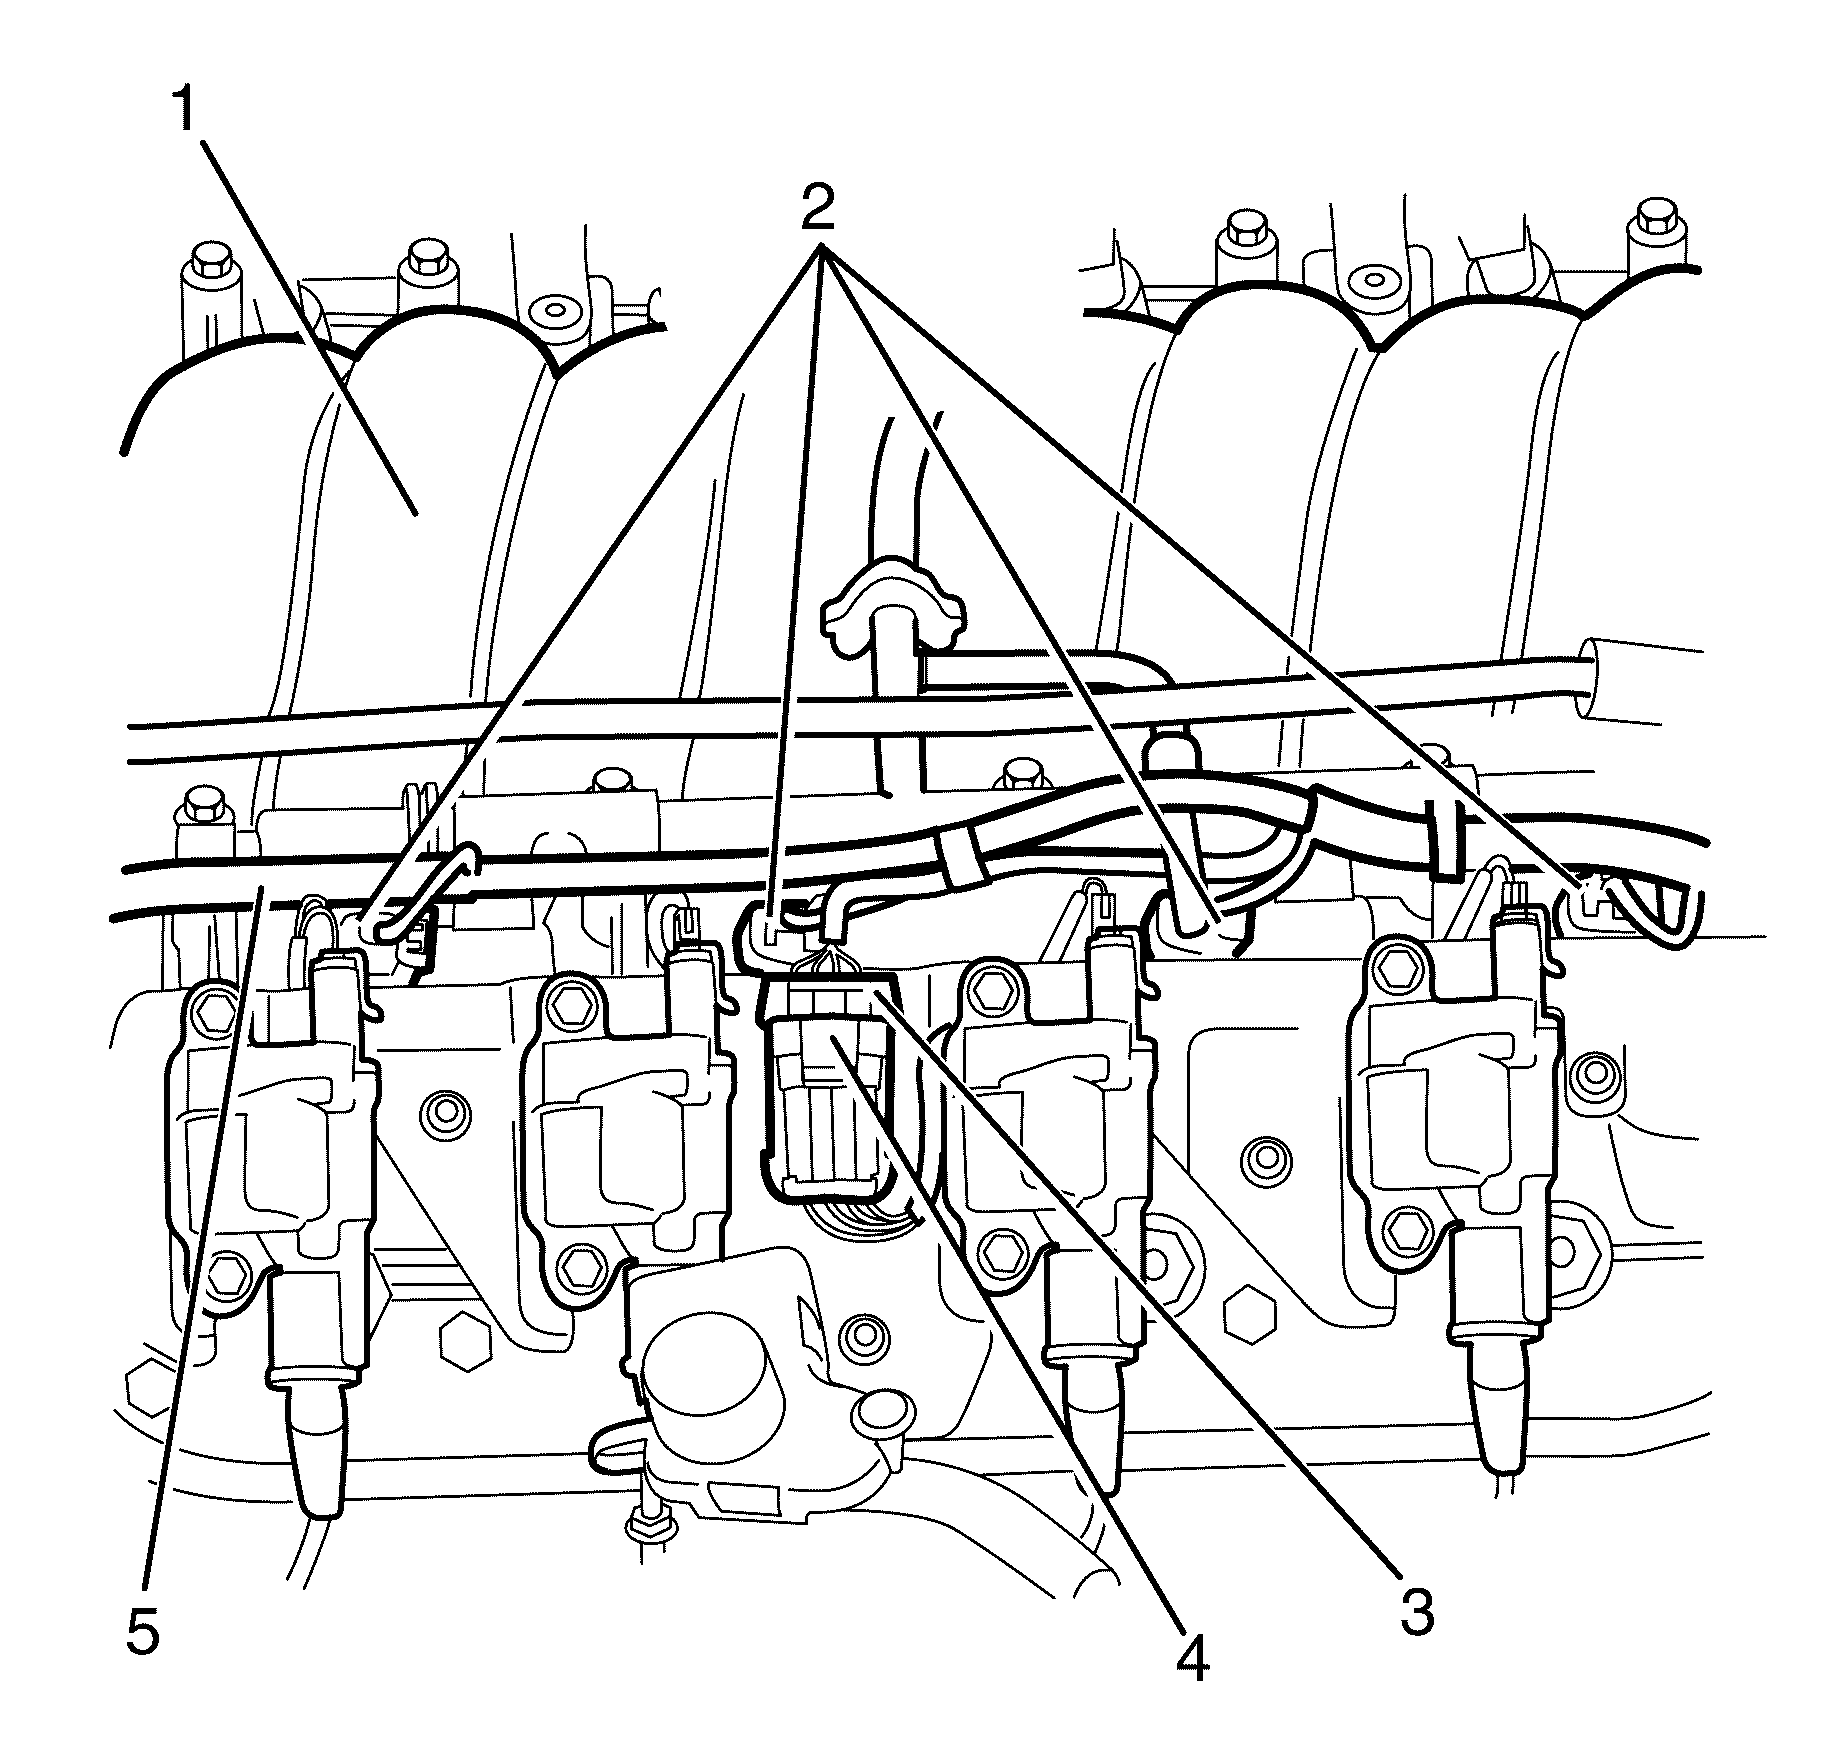
- Disconnect the left side fuel injector wiring harness connectors (2) from the fuel injectors.
- Remove the Connector Position Assurance (CPA) lock (4) from the left side ignition coil main connector (3).
- Disconnect the left side ignition coil main connector (3) from the ignition coil wiring harness.
- Reposition and secure the left side fuel injector wiring harness (5) away from the intake manifold (1).
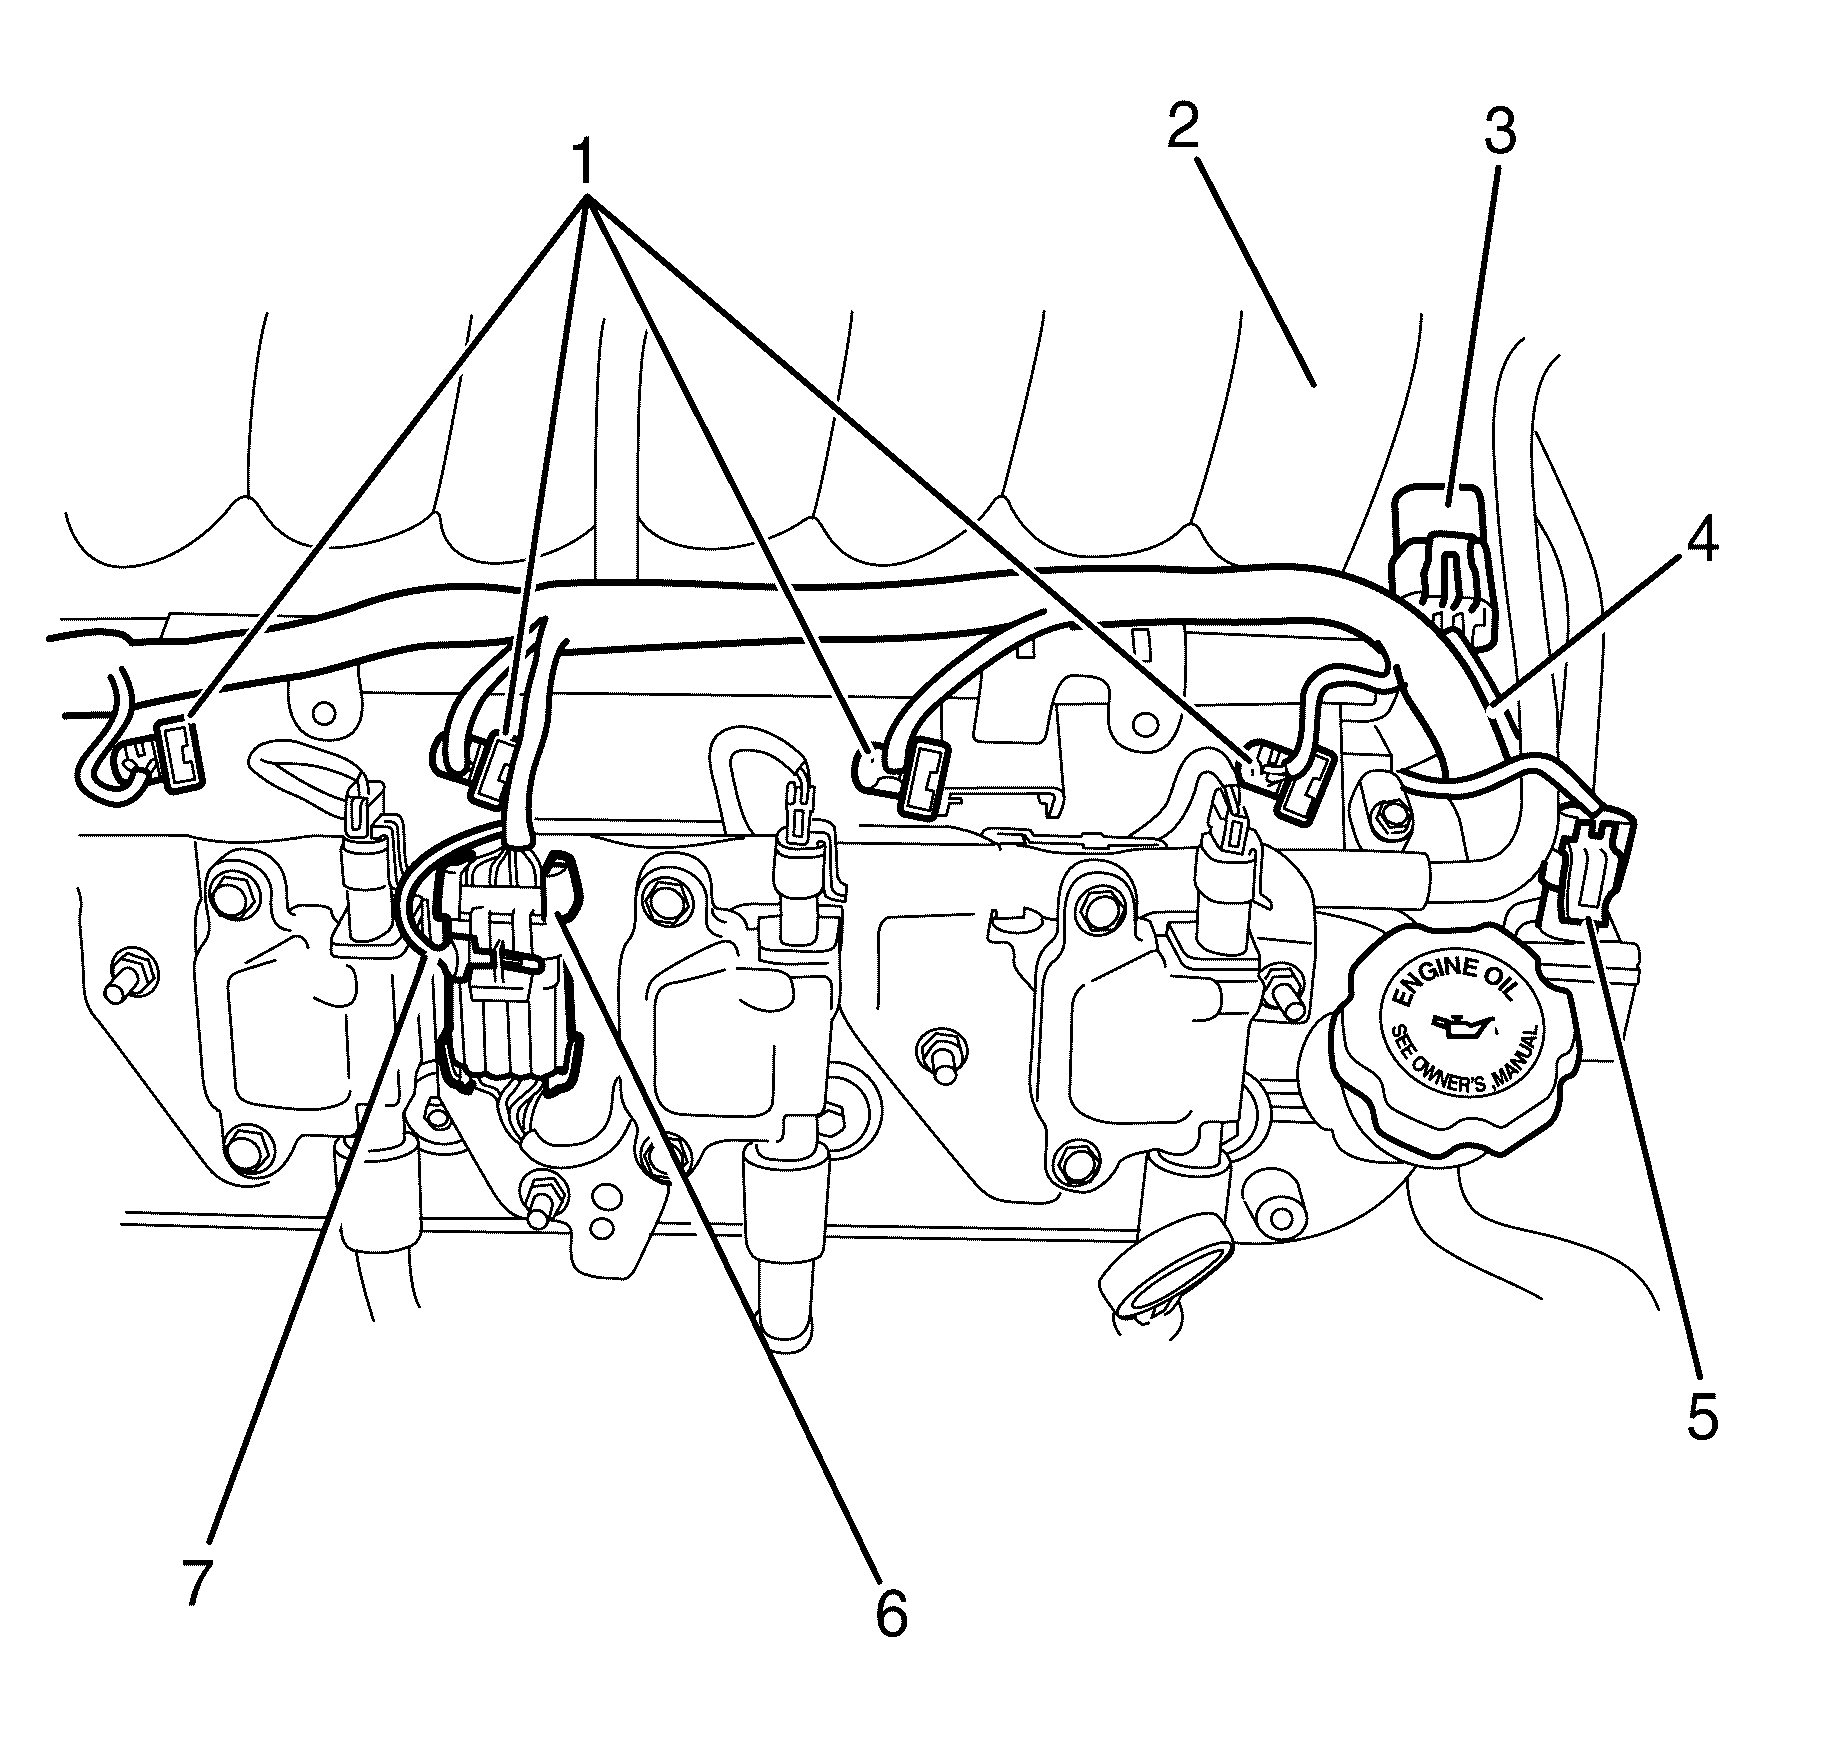
- Disconnect the right side fuel injector wiring harness connectors (1) from the fuel injectors.
- Remove the CPA lock (7) from the right side ignition coil main connector (6).
- Disconnect the right side ignition coil main connector (6) from the ignition coil wiring harness.
- Disconnect the canister purge valve (5) wiring harness connector.
- Disconnect the manifold absolute pressure (MAP) sensor wiring harness connector (3) from the MAP sensor.
- Reposition and secure the right side fuel injector wiring harness (4) away from the intake manifold (2).
- Remove the intake manifold. Refer to Intake Manifold Removal.
- Clean and inspect the intake manifold. Refer to Intake Manifold Cleaning and Inspection.
Important: The intake manifold, throttle body, fuel injection rail, and injectors may be removed as an assembly. If not servicing the individual components, remove the manifold as a complete assembly.
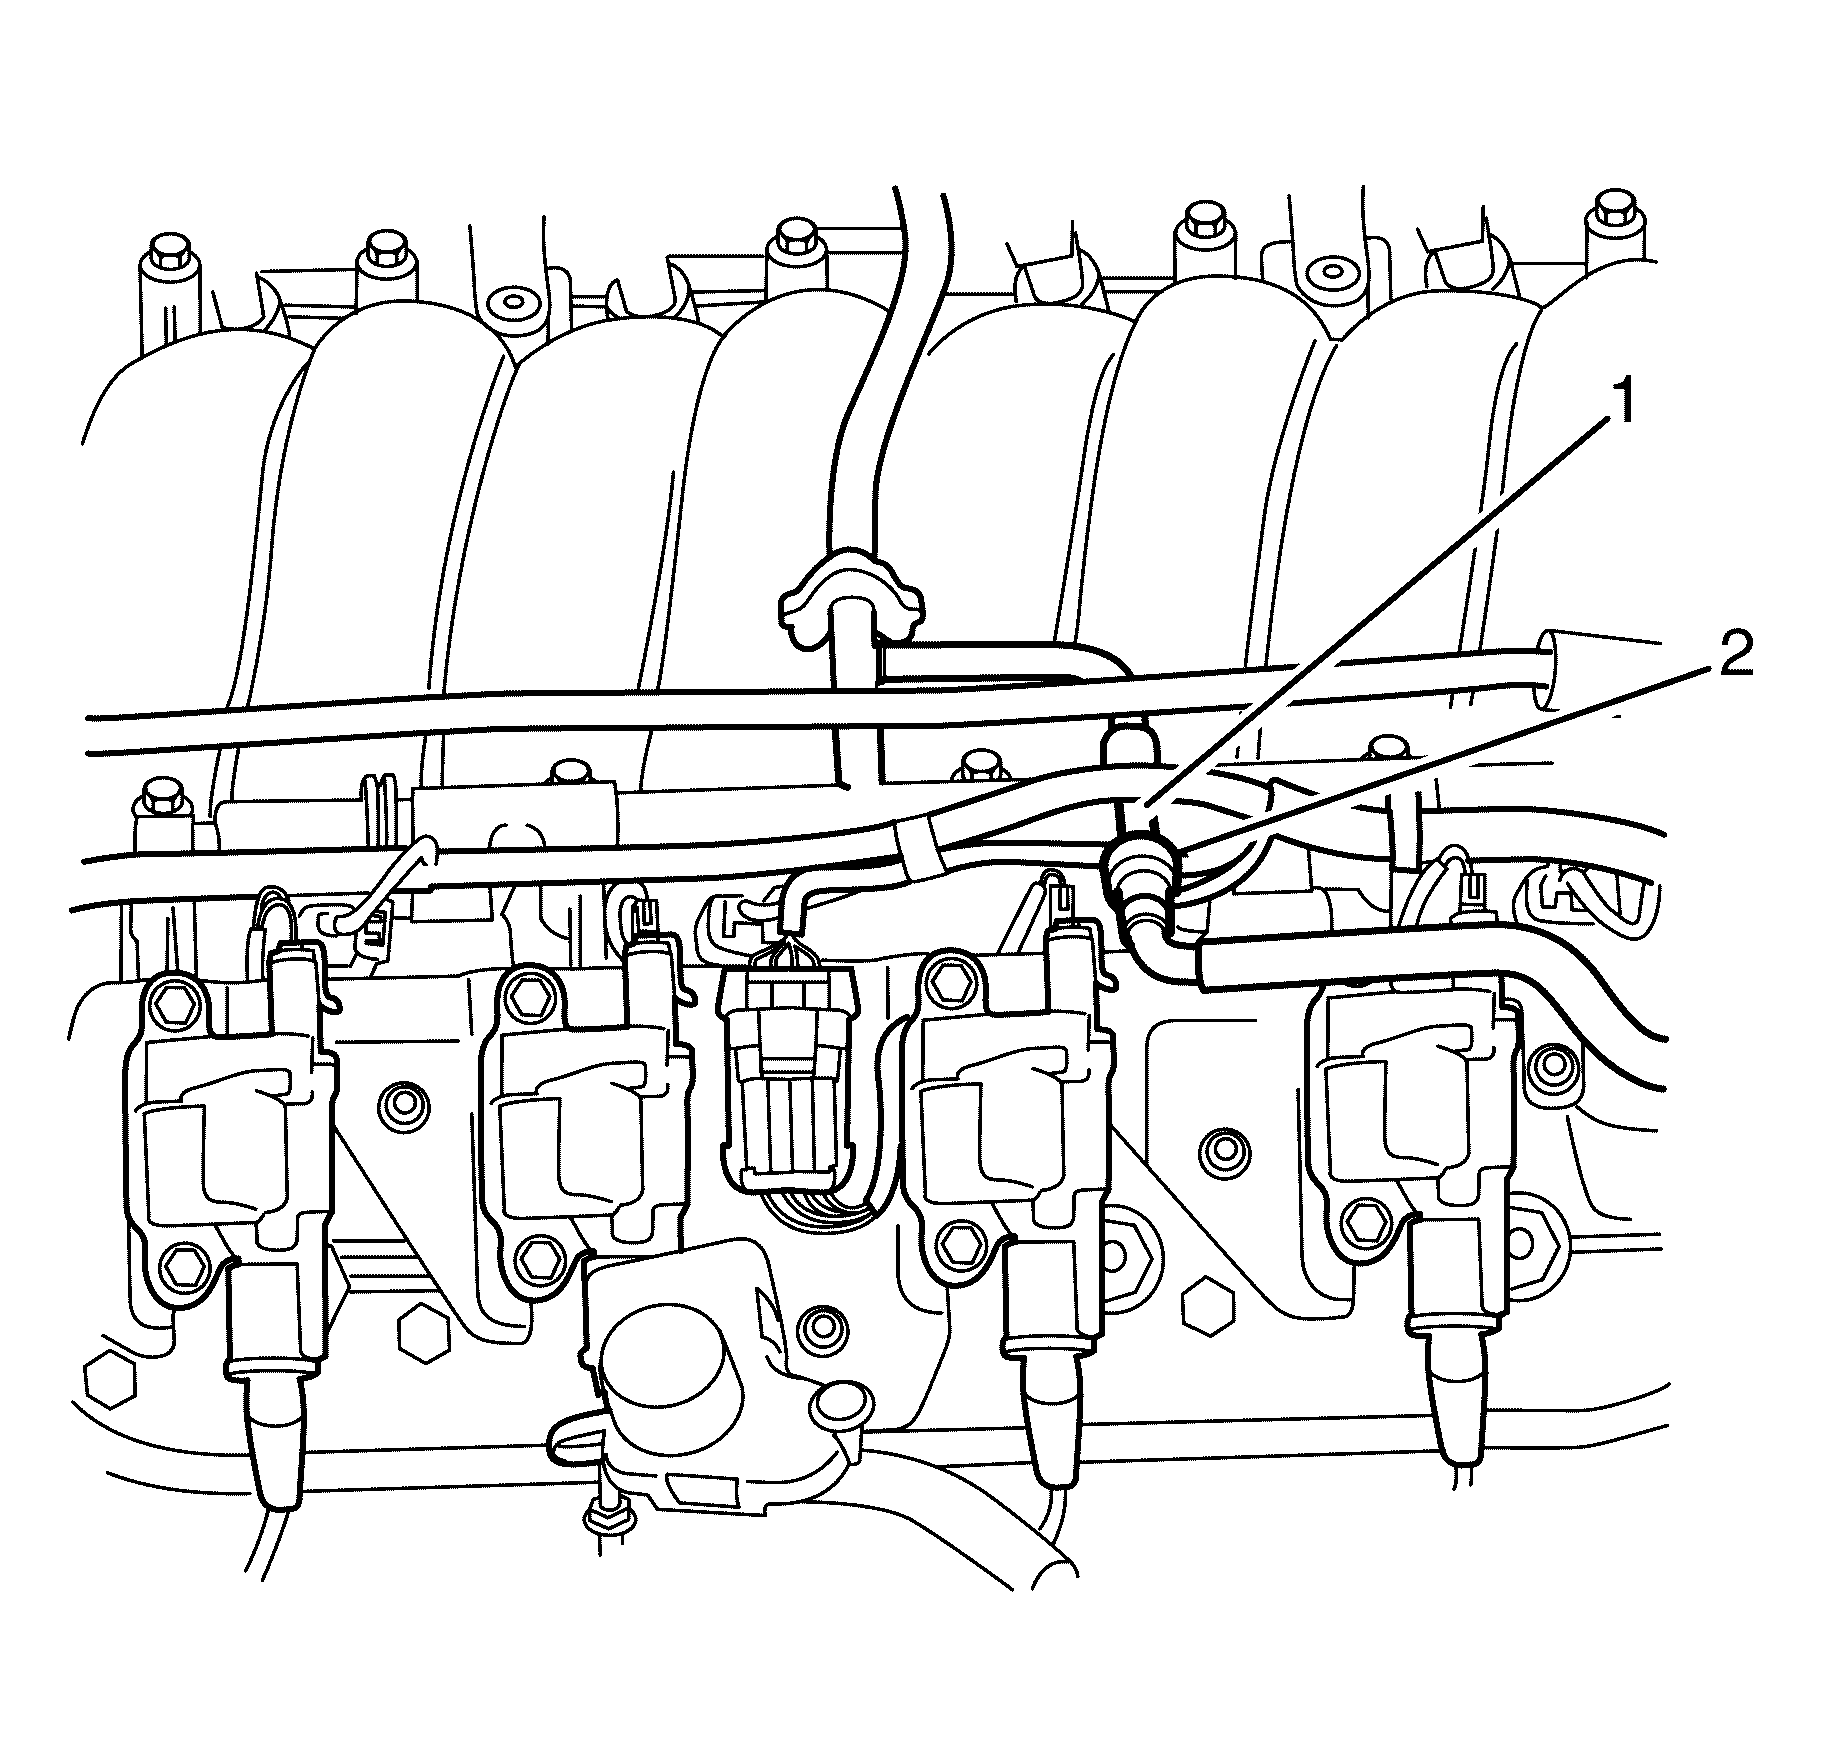
Important: Plug or cap the fuel feed pipe (2) and fuel rail tube (1) ends to prevent fuel leaks and/or contamination.
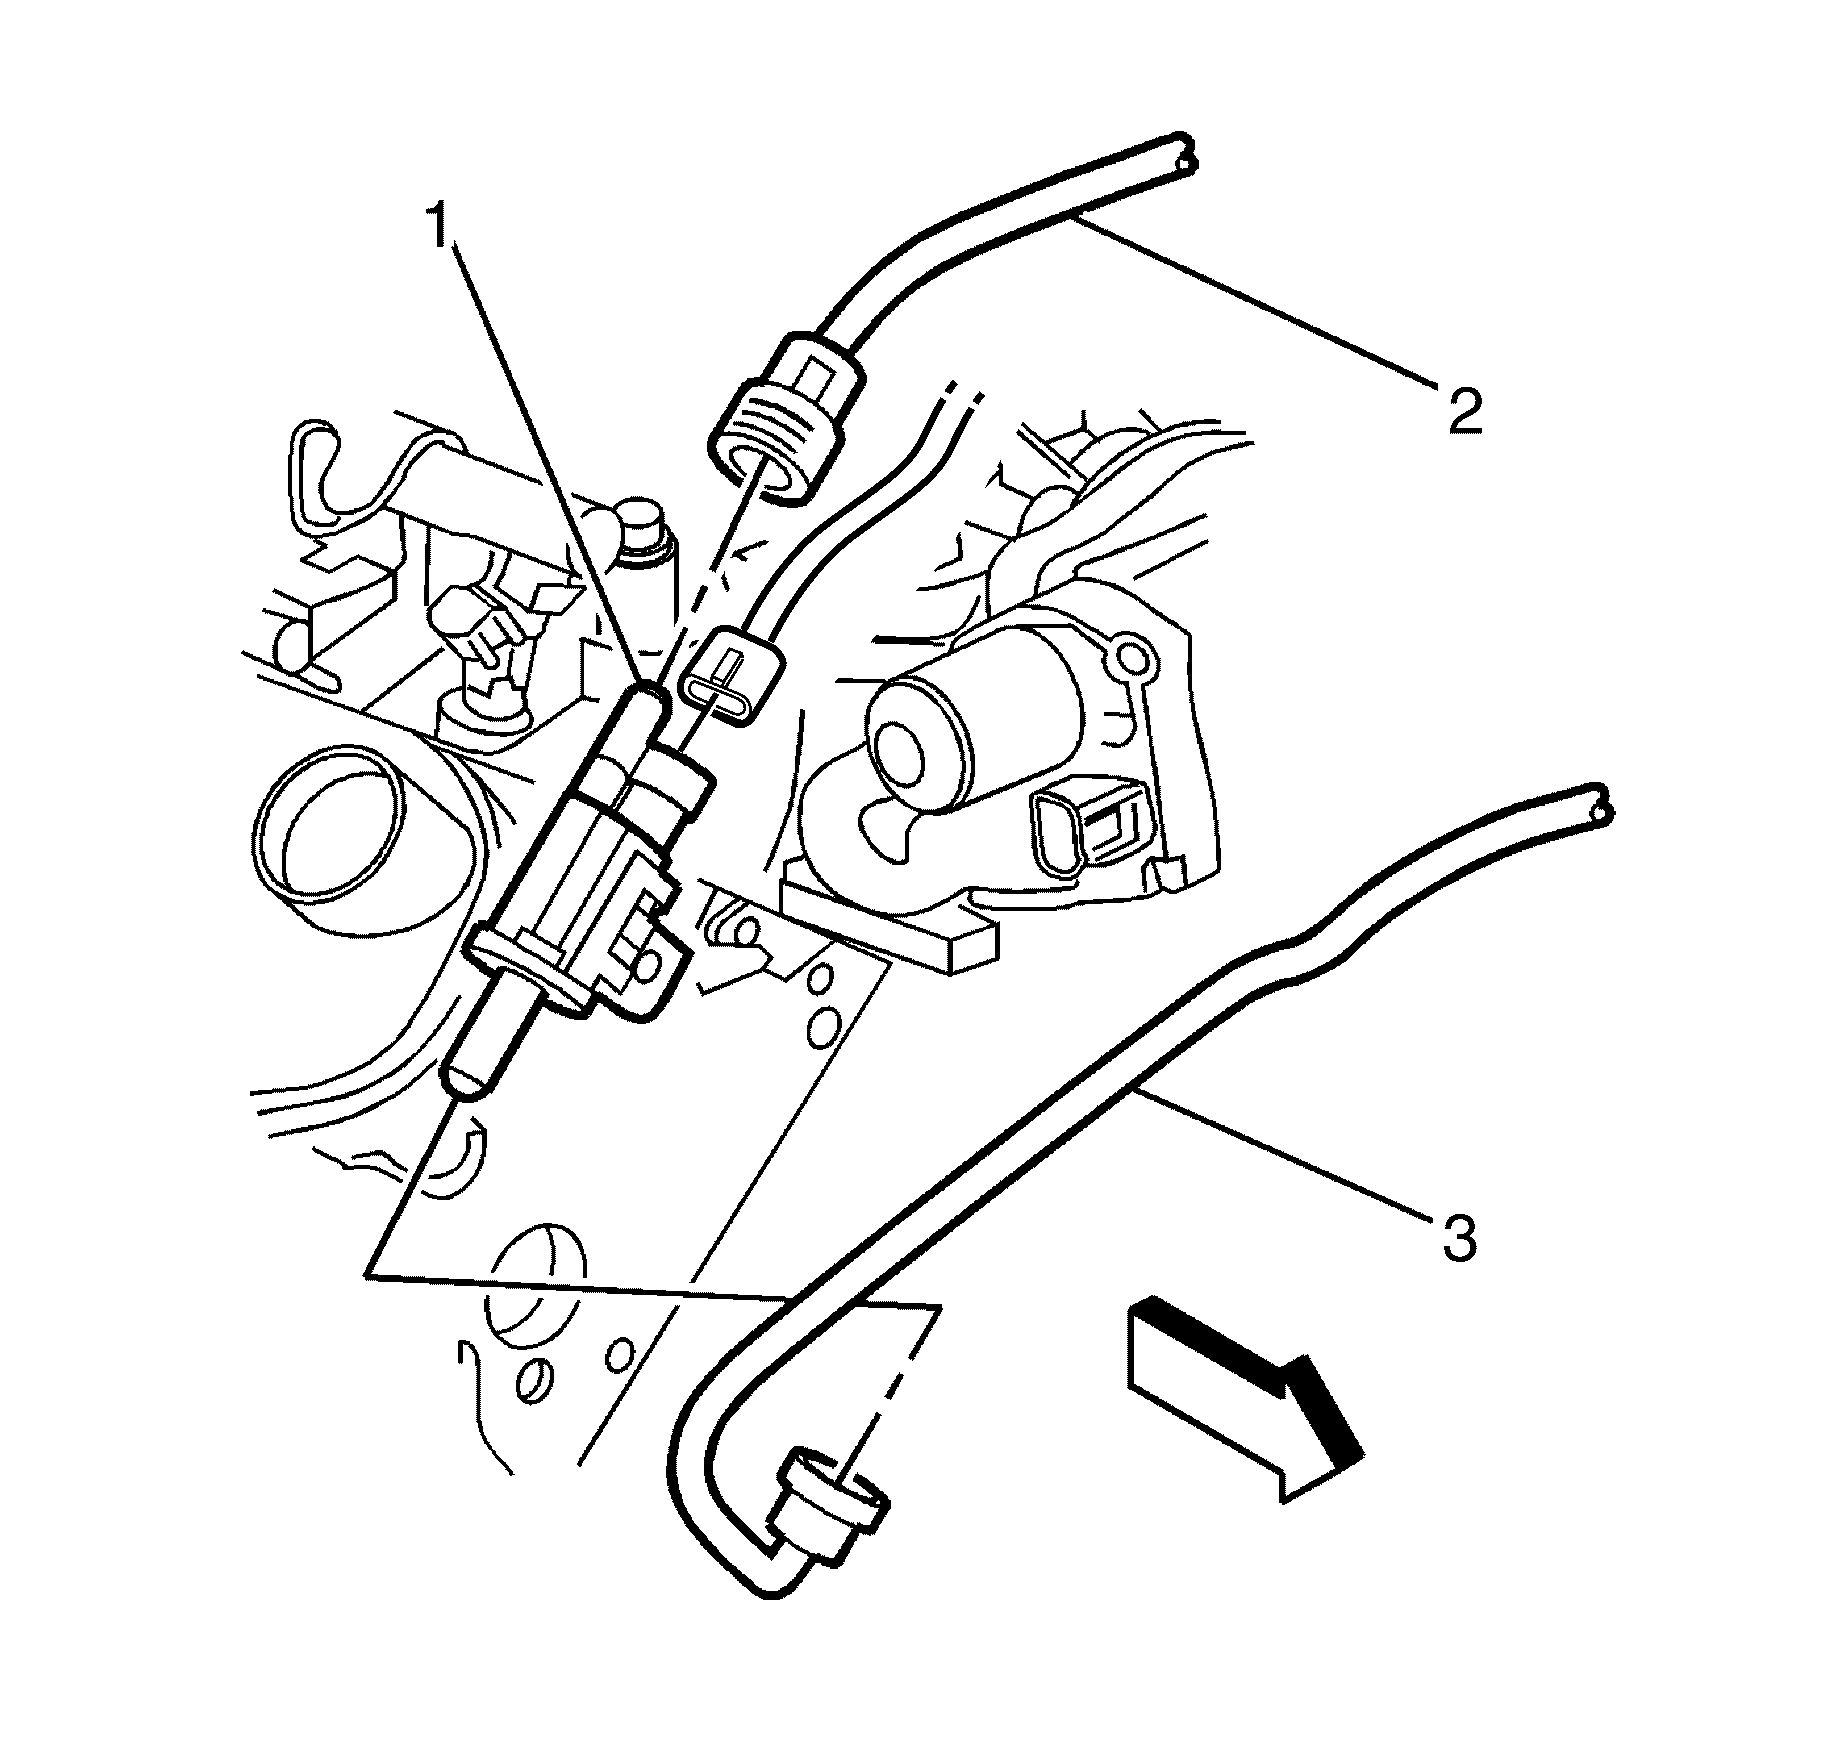
Important: Plug or cap the throttle body to EVAP purge valve hose (3) and EVAP purge valve (1) ends to prevent fuel leaks and/or contamination.
Important: Plug or cap the EVAP purge valve to fuel tank hose (2) and EVAP purge valve (1) ends to prevent fuel leaks and/or contamination.
Installation Procedure
- Install the intake manifold. Refer to Intake Manifold Installation.
- Position the right side fuel injector wiring harness (4) on the intake manifold (2).
- Connect the Manifold Absolute Pressure (MAP) sensor wiring harness connector (3) to the MAP sensor.
- Connect the canister purge valve wiring harness connector (5).
- Connect the right side ignition coil main connector (6) to the ignition coil wiring harness.
- Install the Connector Position Assurance (CPA) lock (7) from the right side ignition coil main connector (6).
- Connect the right side fuel injector wiring harness connectors (1) to the fuel injectors.
- Position the left side fuel injector wiring harness (5) back to its original location the intake manifold (1).
- Connect the left side ignition coil main connector (3) ignition coil wiring harness.
- Install the CPA lock (4) from the left side ignition coil main connector (3).
- Connect the left side fuel injector wiring harness connectors (2) to the fuel injectors.
- Connect the camshaft position sensor connector (4) to the camshaft sensor.
- Connect the coolant temperature sensor connector (3) to the coolant sensor.
- Attach the wiring harness retaining clip (2) to the engine lifting bracket (1).
- Connect the oil pressure sensor wiring harness connector (1) to the oil pressure sensor.
- Connect the HVAC vacuum hose (2) to the intake manifold.
- Compress the vacuum hose retaining clamp (2) at the intake manifold vacuum port (1) and slide 50 mm (2 in) back along the vacuum hose (3).
- Connect the vacuum hose (3) to the intake manifold vacuum port (1).
- Connect the alternator wiring harness connector (1) to the alternator.
- Connect the PCV hose (3) to the intake manifold (1) and the valley cover (2).
- Connect the electronic throttle body wiring harness connector (1) to the throttle body.
- Remove the plug on the throttle body to EVAP purge valve hose (3) and EVAP purge valve (1) ends.
- Connect the throttle body to EVAP purge valve hose (3) to the EVAP purge valve (1).
- Remove the plug on the throttle body to the EVAP purge valve to fuel tank hose (2) and EVAP purge valve (1) ends.
- Connect the EVAP purge valve to fuel tank hose (2) to the EVAP purge valve (1).
- Remove the plug on the fuel feed pipe (2) and fuel rail tube (1) end.
- Connect the fuel rail feed pipe (2) quick connect fitting. Refer to Metal Collar Quick Connect Fitting Service or Plastic Collar Quick Connect Fitting Service.
- Position the heater hoses (1) correctly on the intake manifold (2).
- Install the air intake duct. Refer to Air Cleaner Inlet Duct Replacement.
- Fill the cooling system. Refer to Cooling System Draining and Filling.
- Connect the battery ground cable. Refer to Battery Negative Cable Disconnection and Connection.
- Run engine and check for leaks.
- Install the engine cover. Refer to Engine Cover Replacement.


