For 1990-2009 cars only
Removal Procedure
- Disconnect the battery ground cable from the battery. Refer to Battery Negative Cable Disconnection and Connection.
- Remove the trim pad - (I/P) Upper. Refer to Instrument Panel Upper Trim Pad Replacement in Instrument Panel, Gages, and Console.
- Remove the floor console. Refer to Front Floor Console Replacement.
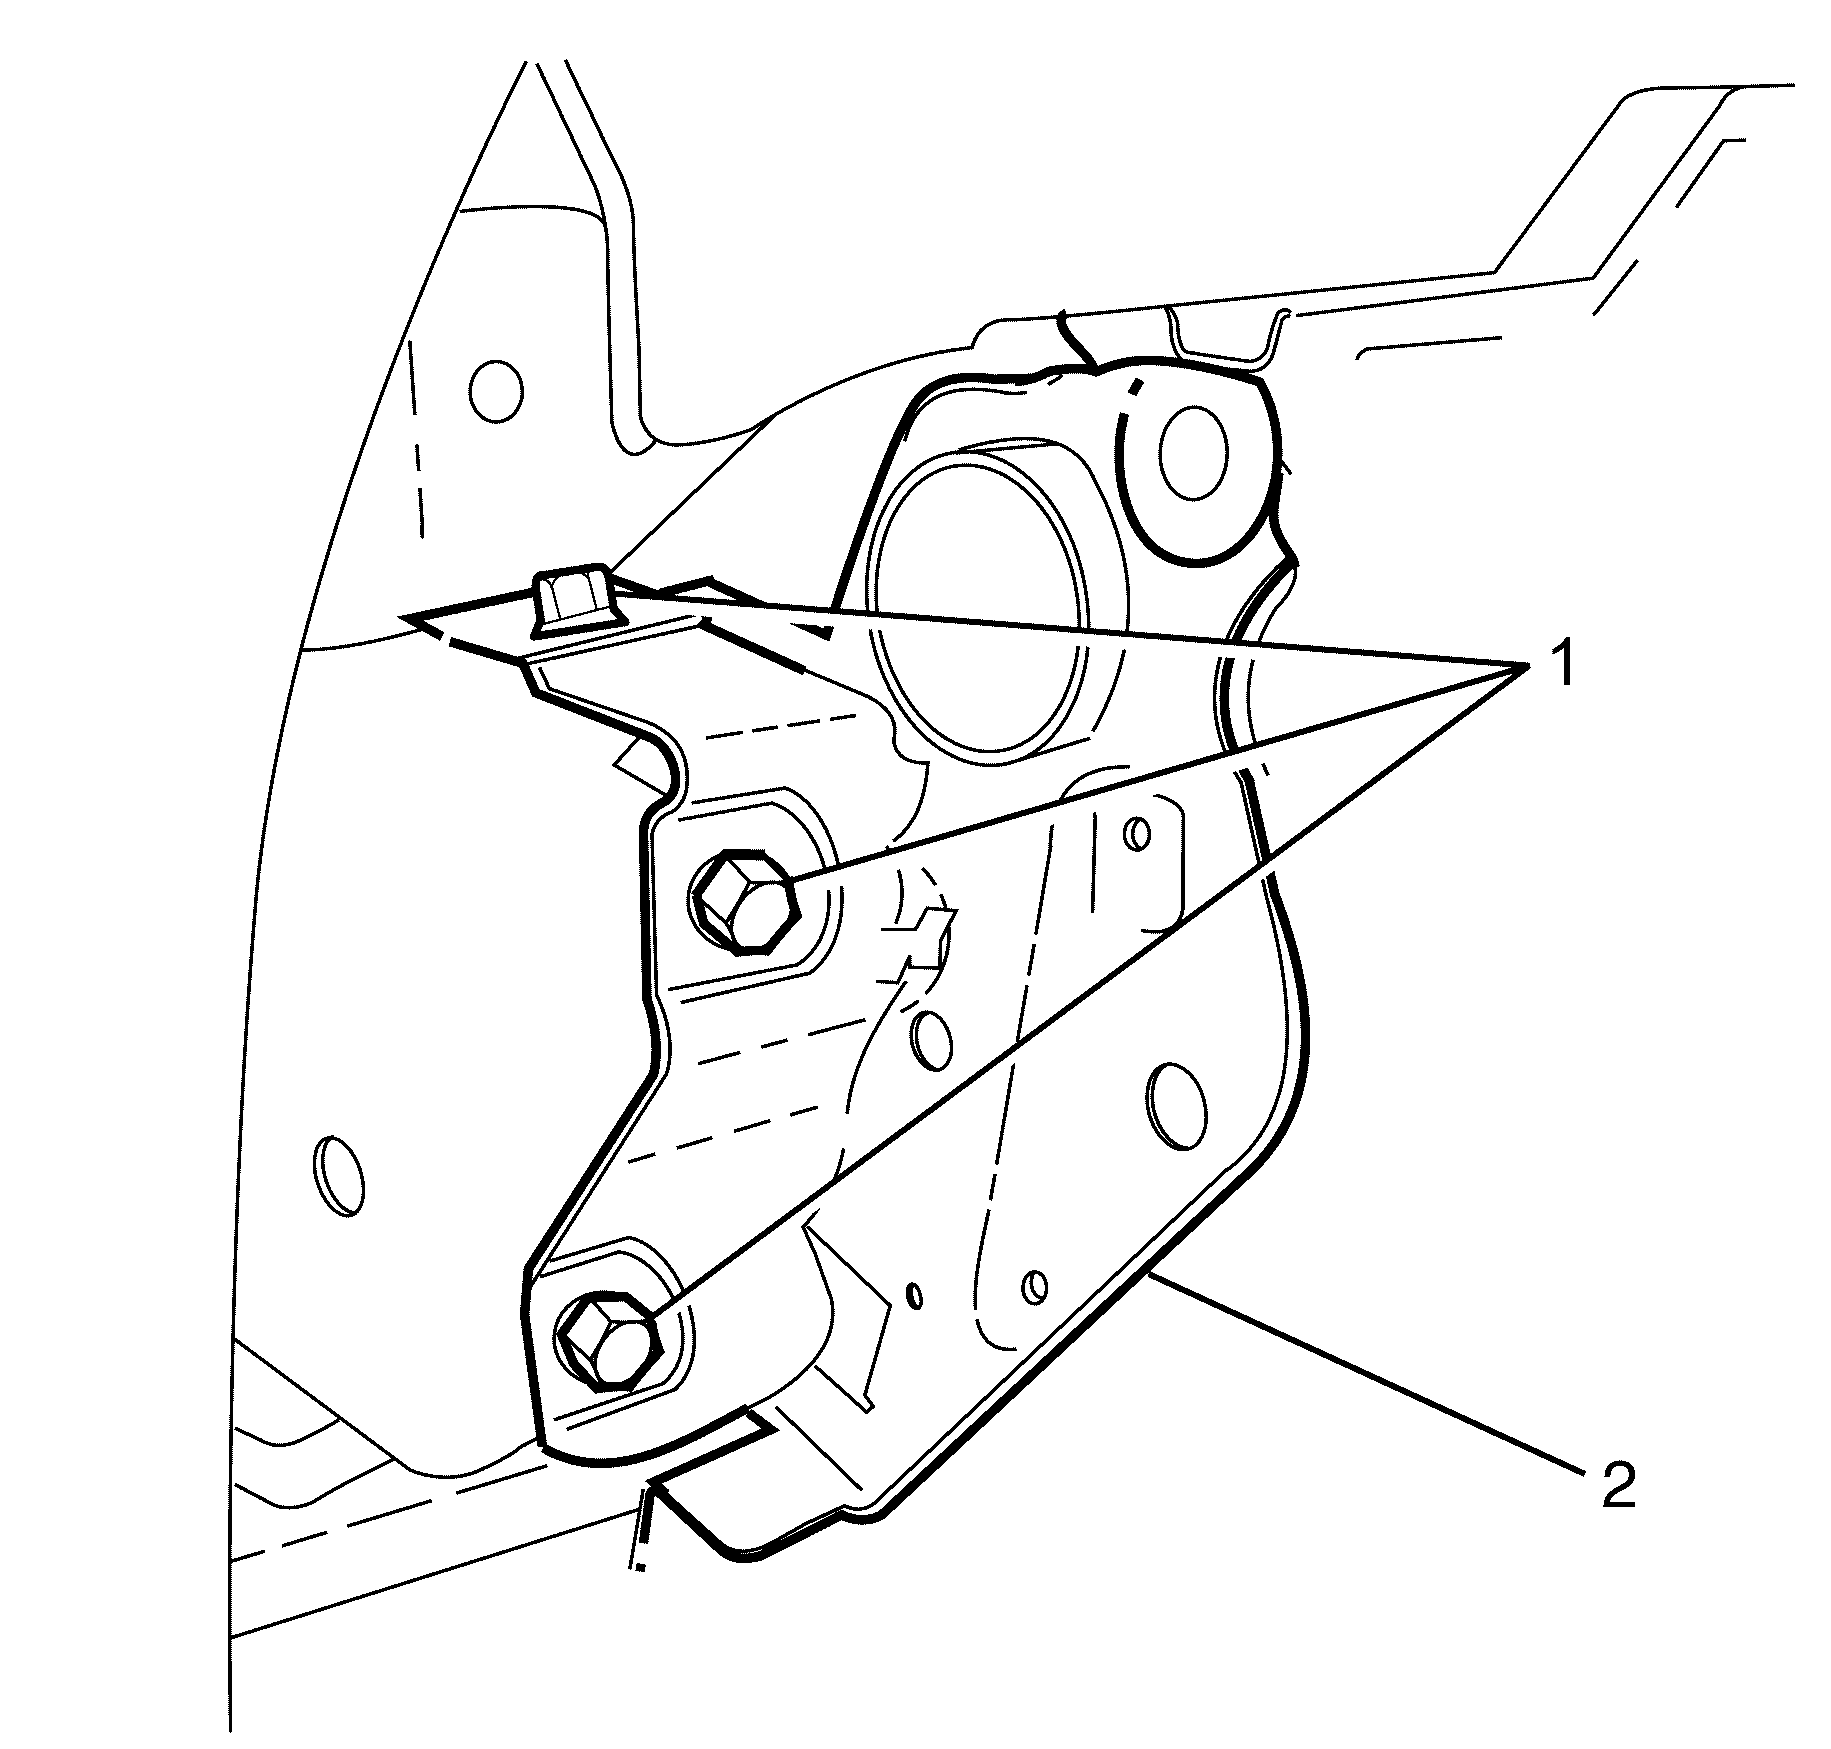
- Remove the I/P carrier (2) to A - pillar retaining bolts (1) the left side is shown the right side is the same.
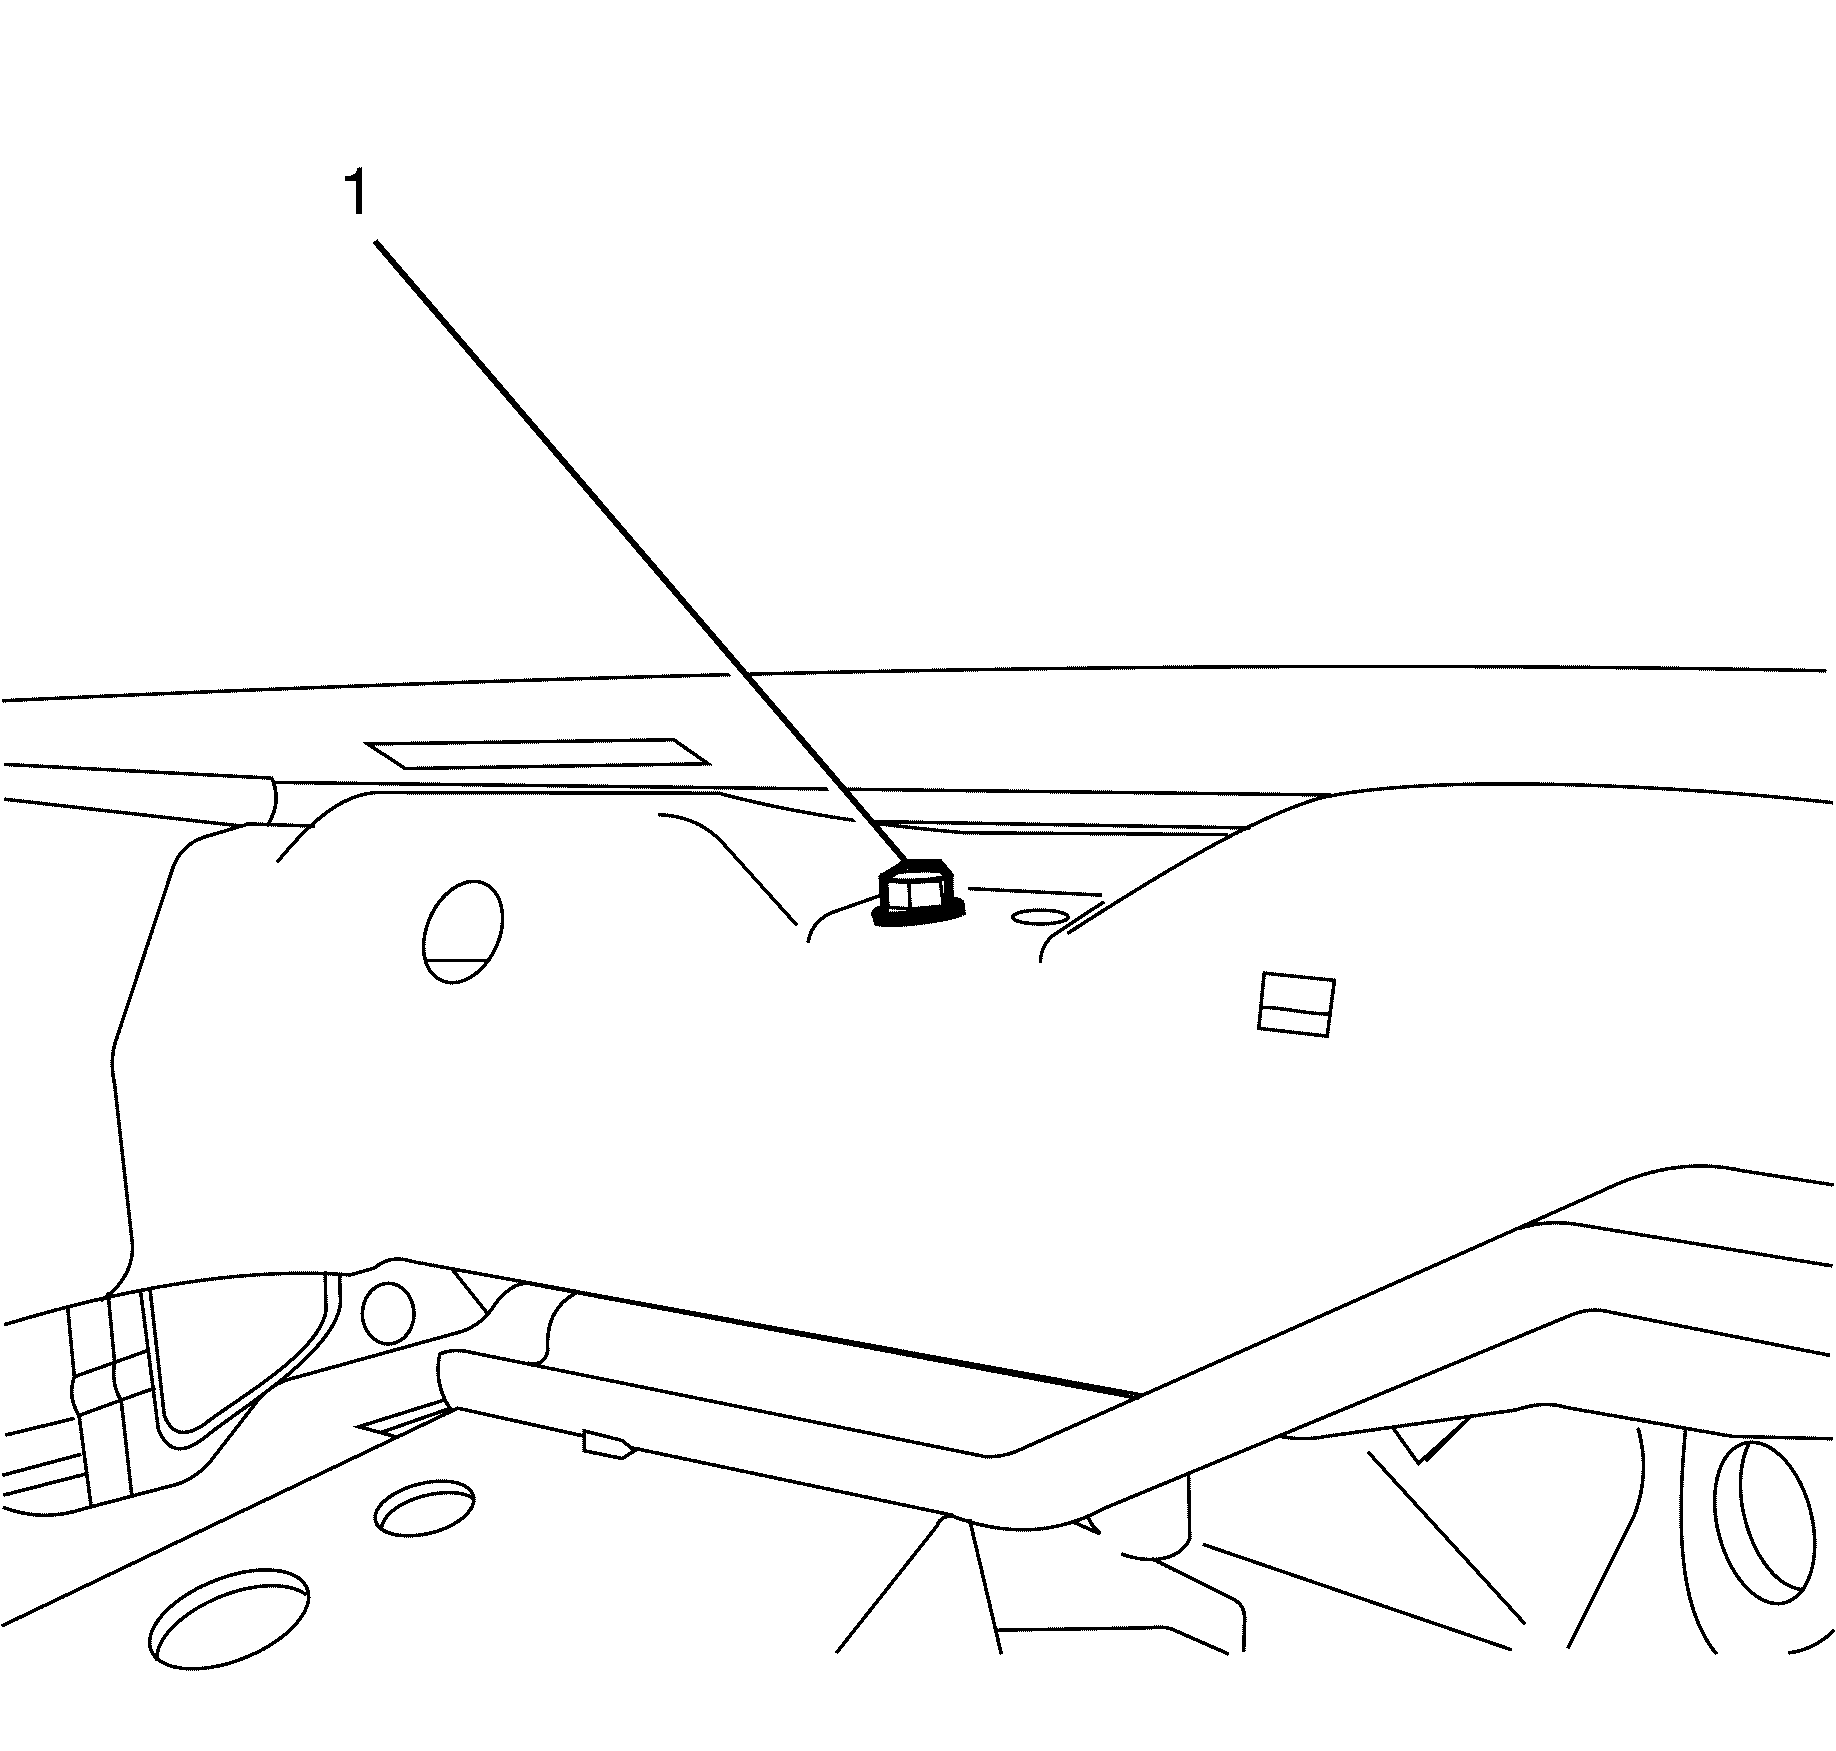
- Remove the upper I/P carrier to body panel retaining bolts (1) located at the top of the I/P carrier under the windshield.
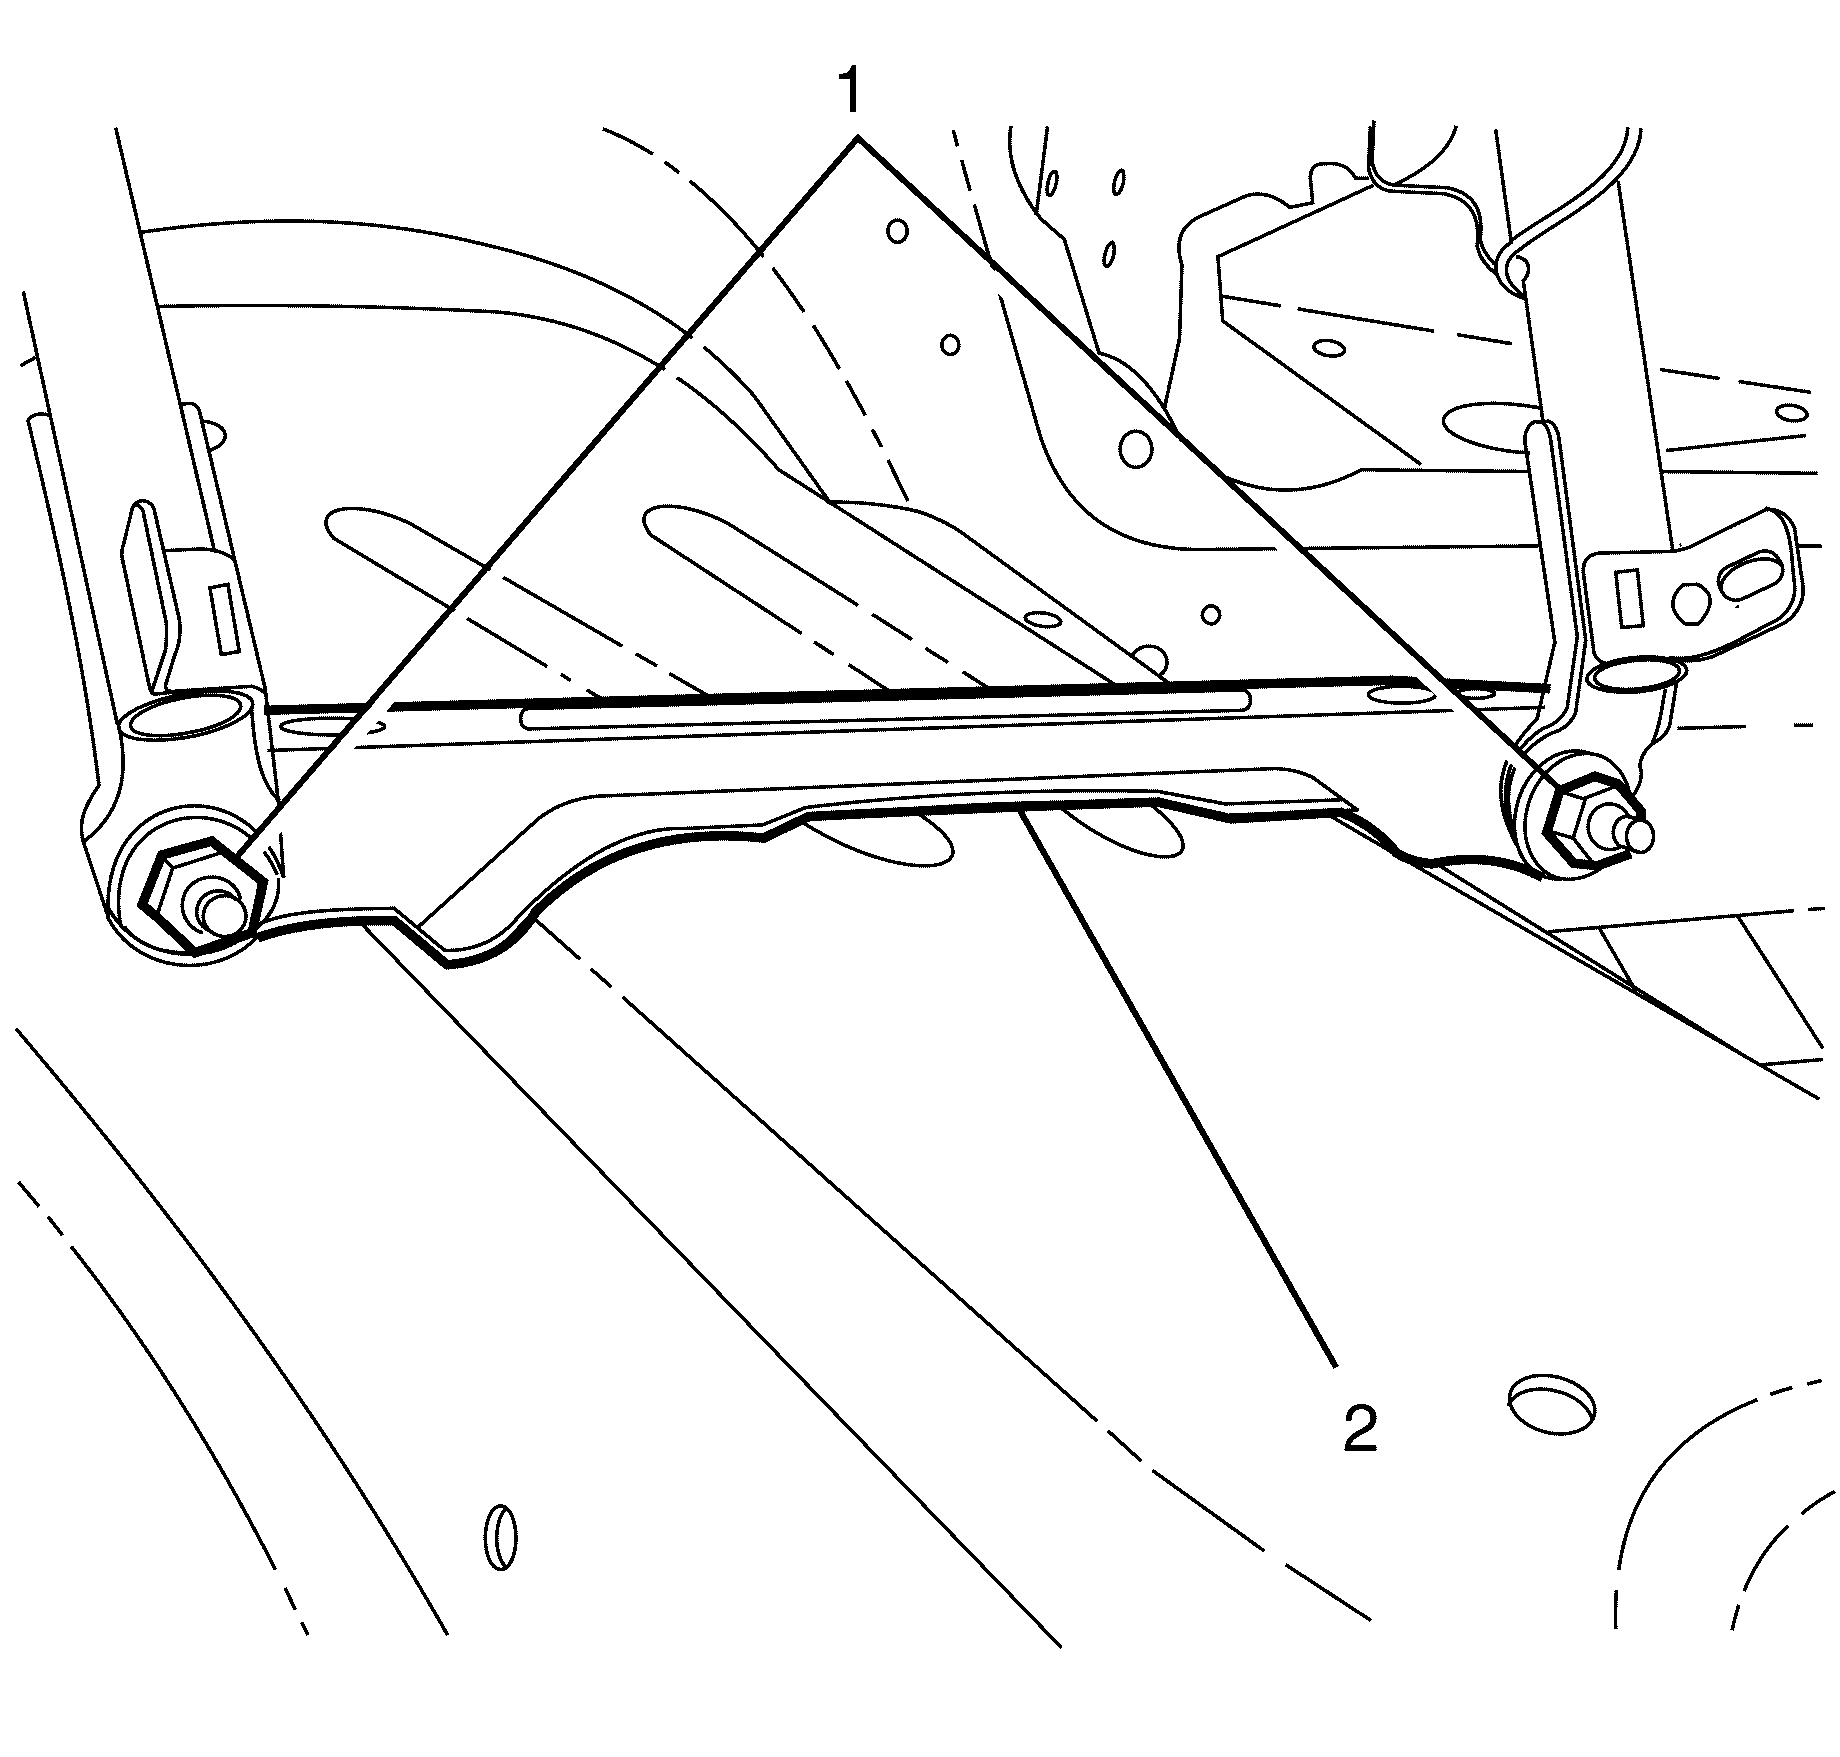
- Remove the lower I/P carrier (2) to transmission tunnel bracket retaining bolts (1).
- Detach the I/P electrical wiring harness.
- Carefully remove the I/P carrier from the vehicle.
Caution: Refer to Battery Disconnect Caution in the Preface section.


Important: When detaching the I/P wiring harness, make sure the I/P harness is attached as removed.
Installation Procedure
- Carefully install the I/P carrier to the vehicle.
- Attach the I/P electrical wiring harness the I/P carrier.
- Install the lower I/P carrier (2) to transmission tunnel bracket retaining bolts (1).
- Install the upper I/P carrier to body panel retaining bolts (1).
- Install the I/P carrier (2) to A - pillar retaining bolts (1).
- Install the centre console. Refer to Front Floor Console Replacement.
- Install the trim pad - (I/P) Upper. Refer to Instrument Panel Upper Trim Pad Replacement in Instrument Panel, Gages, and Console.
- Connect the battery ground cable to the battery. Refer to Battery Negative Cable Disconnection and Connection.
- Test all electrical components for correct operation.
Notice: Refer to Fastener Notice in the Preface section.

Tighten
Tighten the nuts to 30 N·m (22 lb ft).
Notice: Refer to Fastener Notice in the Preface section.

Tighten
Tighten the bolts to 32 N·m (24 lb ft).
Notice: Refer to Fastener Notice in the Preface section.

Tighten
Tighten the bolts to 37 N·m (27 lb ft).
