For 1990-2009 cars only
Removal Procedure
- Remove the knee bolster. Refer to Knee Bolster Replacement.
- Remove the instrument panel (I/P) compartment. Refer to Instrument Panel Compartment Replacement.
- Remove the radio fascia. Refer to Driver Information Display Replacement.
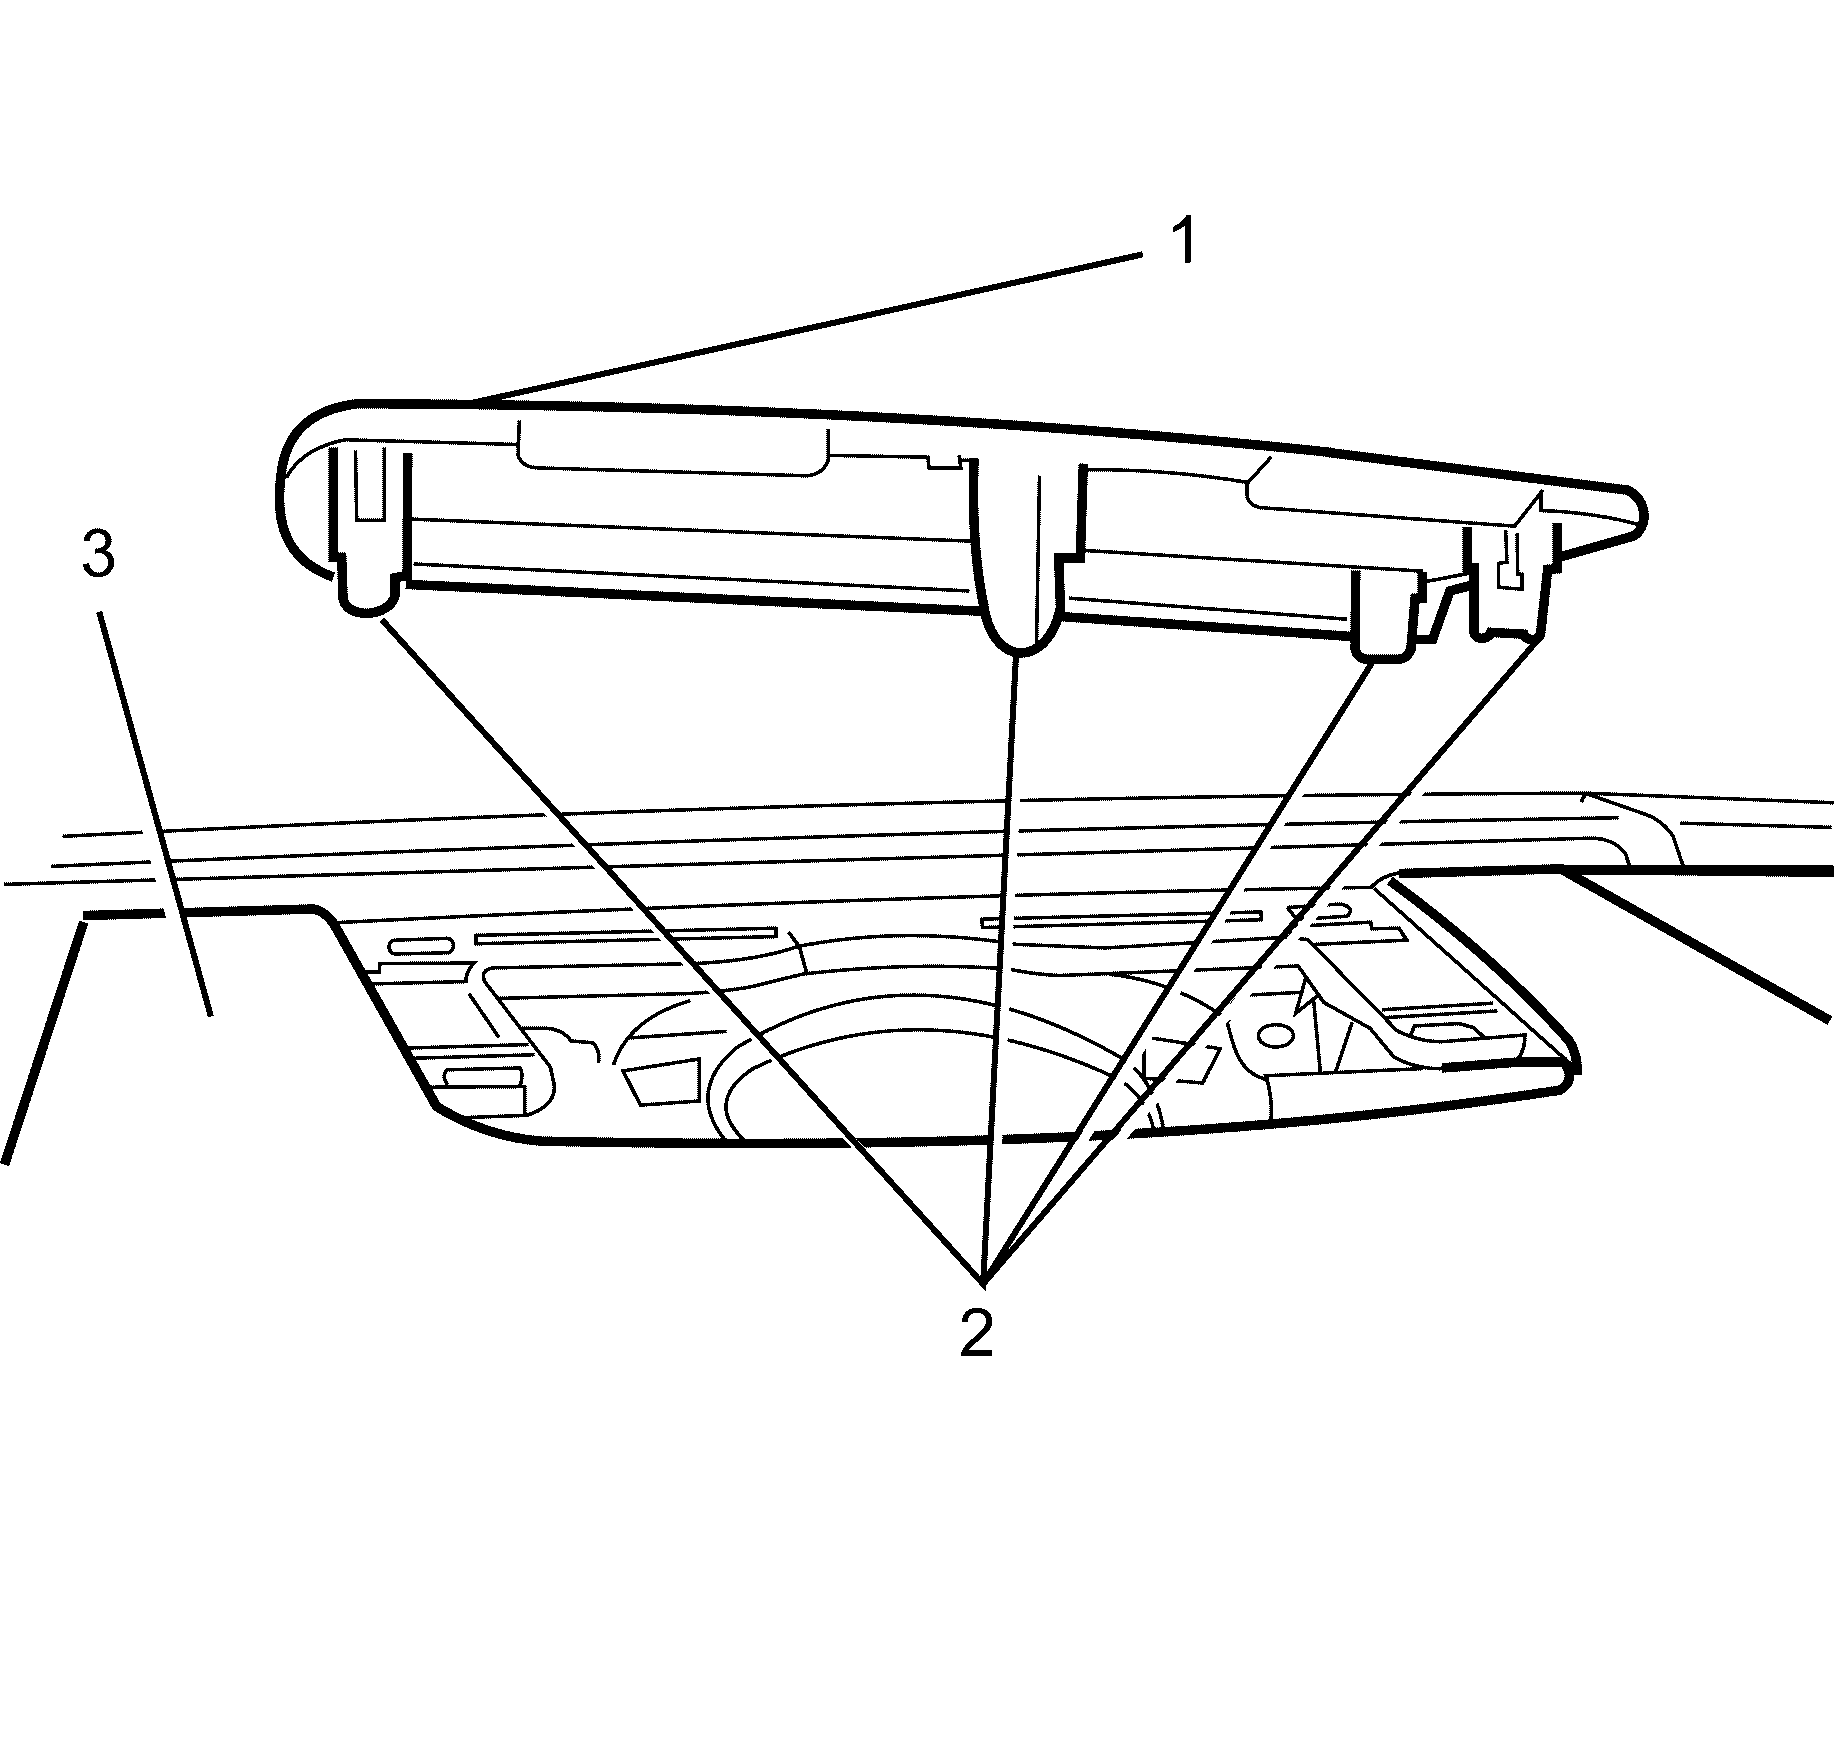
- Disengage the I/P upper trim panel to I/P pad retainers (2) and remove the I/P upper trim panel (1) from the I/P pad (3).
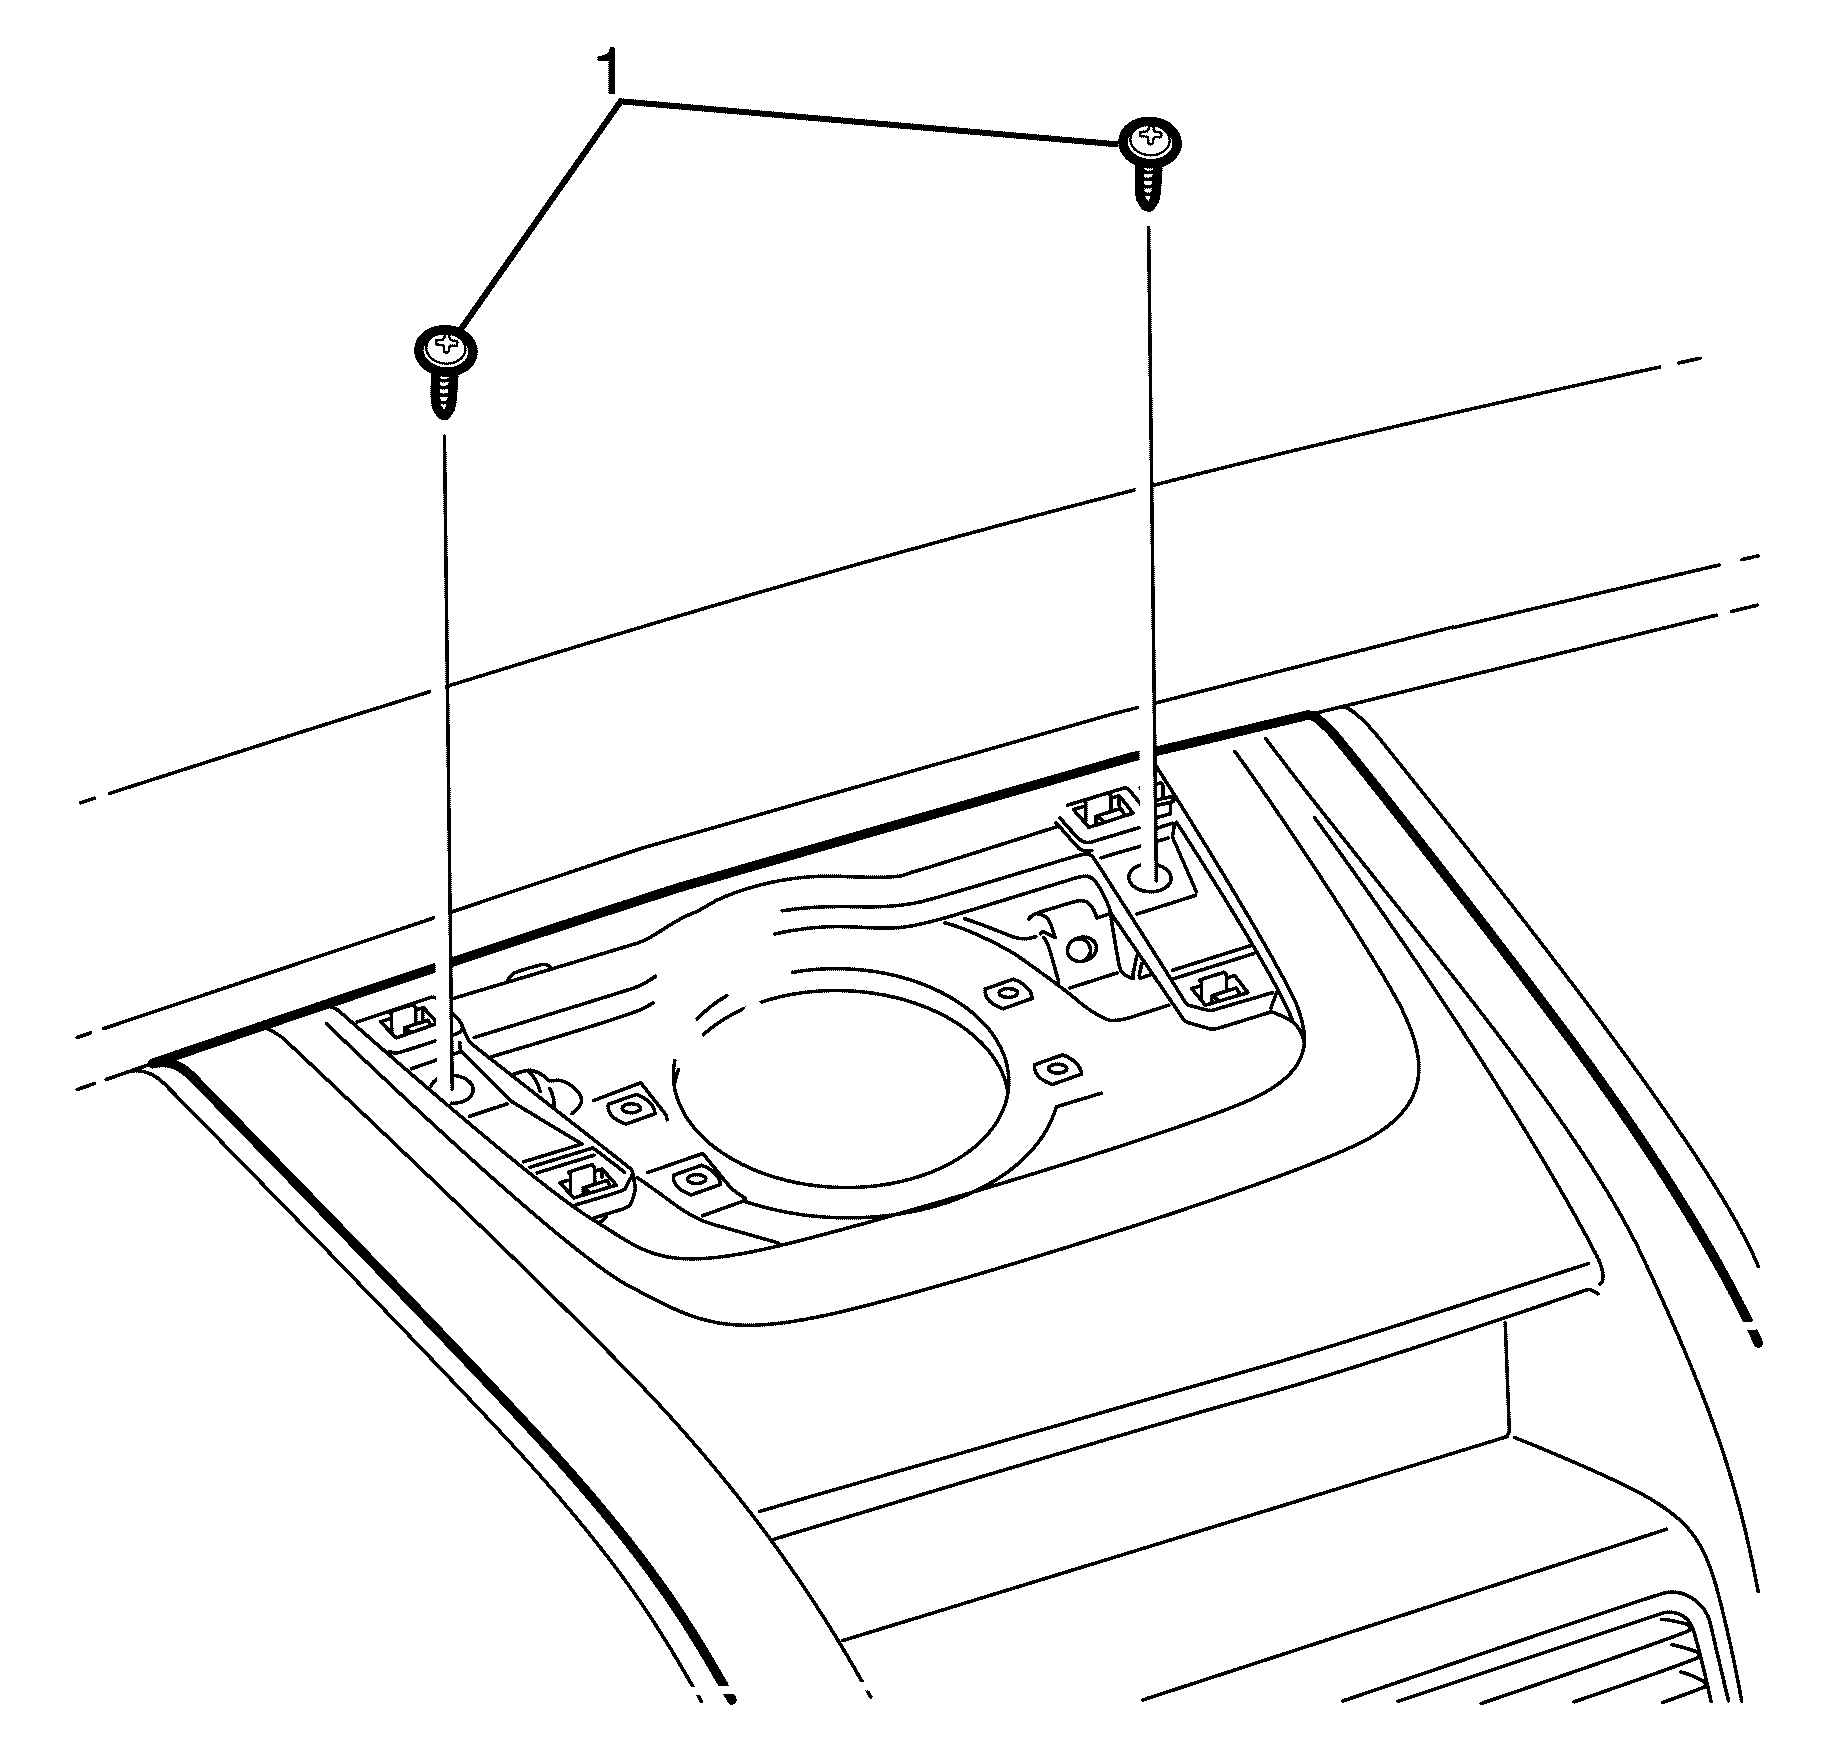
- Remove the instrument panel center trim panel to I/P pad retaining screws (1).
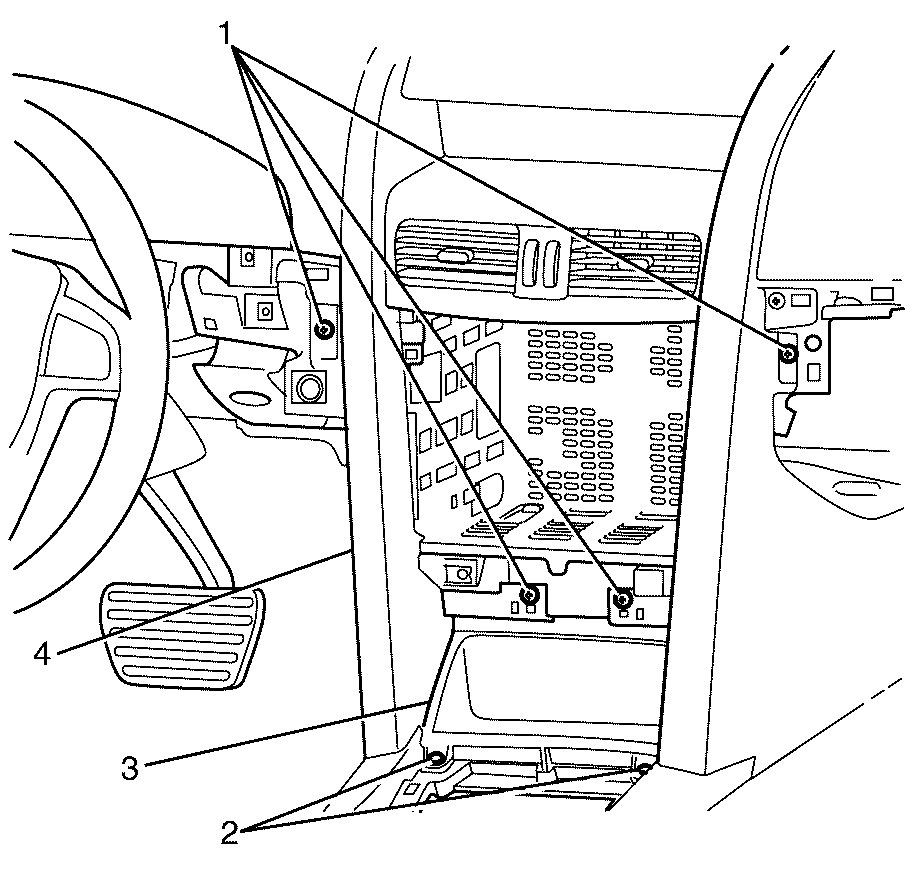
- Remove the instrument panel center trim panel to I/P retaining screws (1).
- Remove the instrument panel center trim panel storage bin to console retaining screws (2).
- Remove the instrument panel center trim panel storage bin (3).
- Disengage the instrument panel center trim panel to I/P pad retaining clips, located at the top of the center trim panel (4).
- Lift the instrument panel center trim panel (4) upward and forward to gain access to the multi function display unit electrical connector.
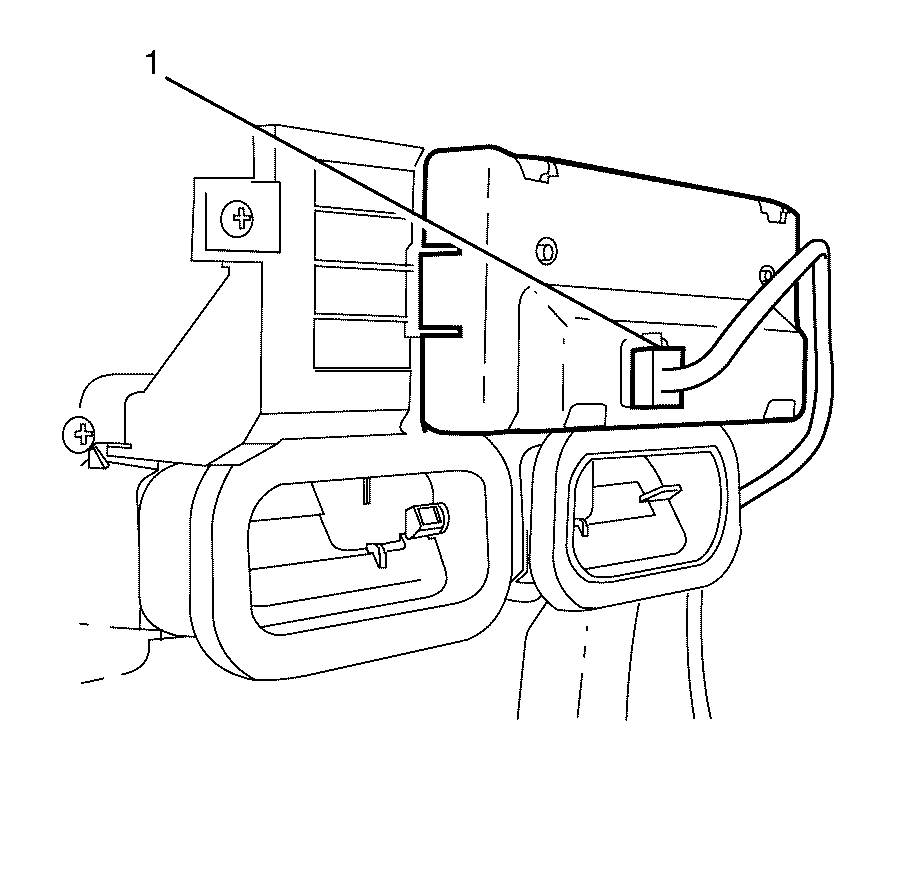
- Disconnect the multi function display unit electrical connector (1) from the multi function display unit.
- Remove the instrument panel center trim panel from the vehicle.


Installation Procedure
- Install the instrument panel center trim panel to the vehicle.
- Connect the multi function display unit electrical connector (1) to the multi function unit.
- Align the instrument panel center trim panel (4) with the I/P fascia.
- Engage the instrument panel center trim panel to I/P pad retaining clips, located at the top of the center trim panel (4).
- Install the instrument panel center trim panel to I/P retaining screws (1).
- Install the instrument panel storage bin (3).
- Install the instrument panel storage bin to console retaining screws (2).
- Install the instrument panel center trim panel to I/P pad retaining screws (1).
- Engage the I/P upper trim panel to I/P pad retainers (2) and install the I/P upper trim panel (1) to the I/P pad (3).
- Install the radio fascia. Refer to Driver Information Display Replacement.
- Install the I/P compartment. Refer to Instrument Panel Compartment Replacement
- Install the knee bolster. Refer to Knee Bolster Replacement.


Notice: Refer to Fastener Notice in the Preface section.
Tighten
Tighten the screws (1) to 2 N·m (18 lb in).
Tighten
Tighten the screws (1) to 2 N·m (18 lb in).

Tighten
Tighten the screws (1) to 2 N·m (18 lb in).

Important: Make sure that the I/P upper trim panel (1) seats flush with the I/P pad.
