For 1990-2009 cars only
Removal Procedure
- Disable the SIR system. Refer to SIR Disabling and Enabling .
- Remove the front seat. Refer to Front Seat Replacement - Bucket .
- Place the seat on a clean and suitable work surface.
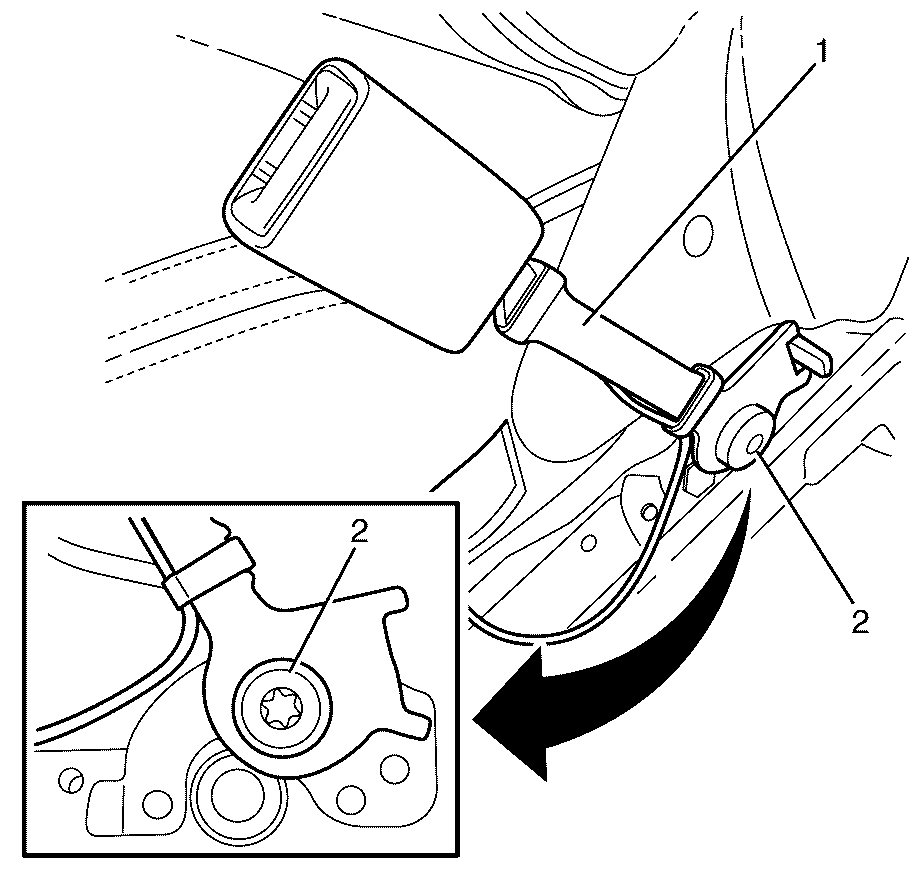
- Remove the seat belt buckle (1) to seat adjuster retaining torx bolt (2).
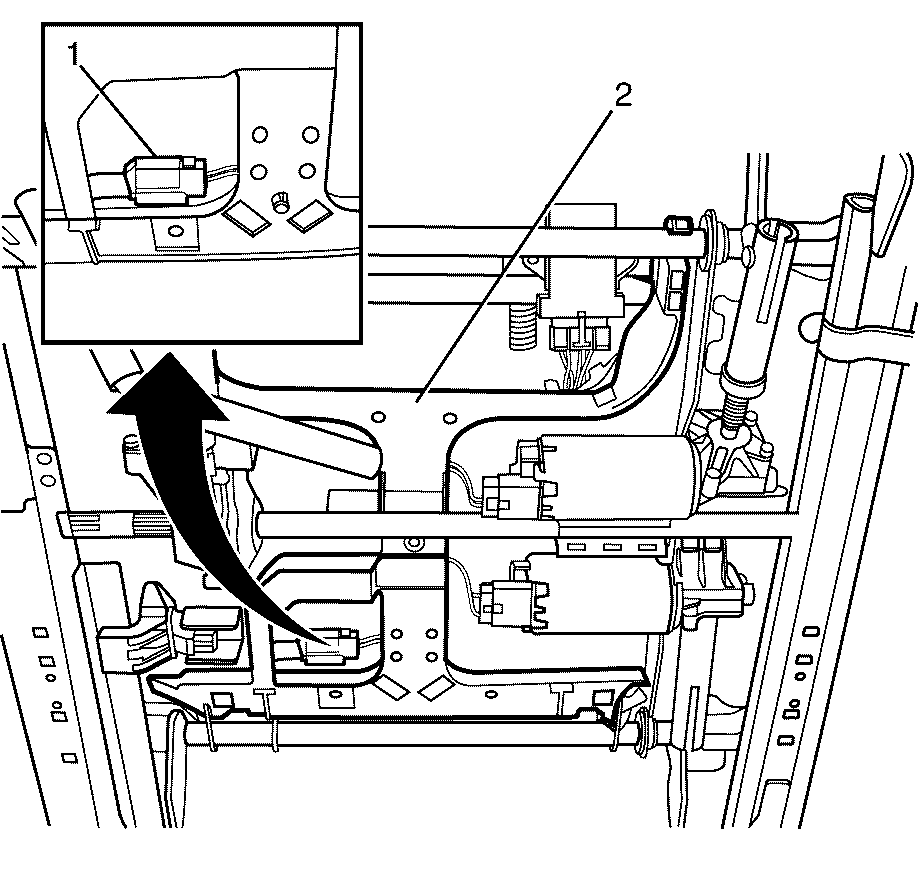
- Detach the cable tray (2) from the seat adjuster.
- Detach the seat belt buckle electrical connector from the cable tray (2).
- Disconnect the seat belt buckle electrical connector.
- Remove the seat belt buckle from the seat adjuster.
Caution: Refer to SIR Caution in the Preface section.
Caution: Refer to SIR Inflator Module Handling and Storage Caution in the Preface section.


Important: Remove the electrical tape from around the seat belt buckle electrical connector.
Important: Note the wiring harness and connector routing during the removal, in order to route the wiring correctly during assembly.
Installation Procedure
- Connect the seat belt buckle electrical connector (1).
- Attach the seat belt buckle electrical connector to the cable tray (2).
- Attach the cable tray (2) to the seat adjuster. Listen for an audible click to confirm fitting.
- Install the seat belt buckle (1) to the seat adjuster.
- Install the seat belt buckle to seat adjuster retaining torx bolt (2).
- Install the front seat. Refer to Front Seat Replacement - Bucket .
- Enable the SIR system. Refer to SIR Disabling and Enabling .

Important: Make sure the seat belt buckle wiring harness is attached and routed as per removal.

Notice: Refer to Fastener Notice in the Preface section.
Tighten
Tighten the torx bolt to 42 N·m (31 lb ft).
