Special Tools
J 39400 Halogen Leak Tester
Removal Procedure
- Raise and support the vehicle. Refer to Lifting and Jacking the Vehicle.
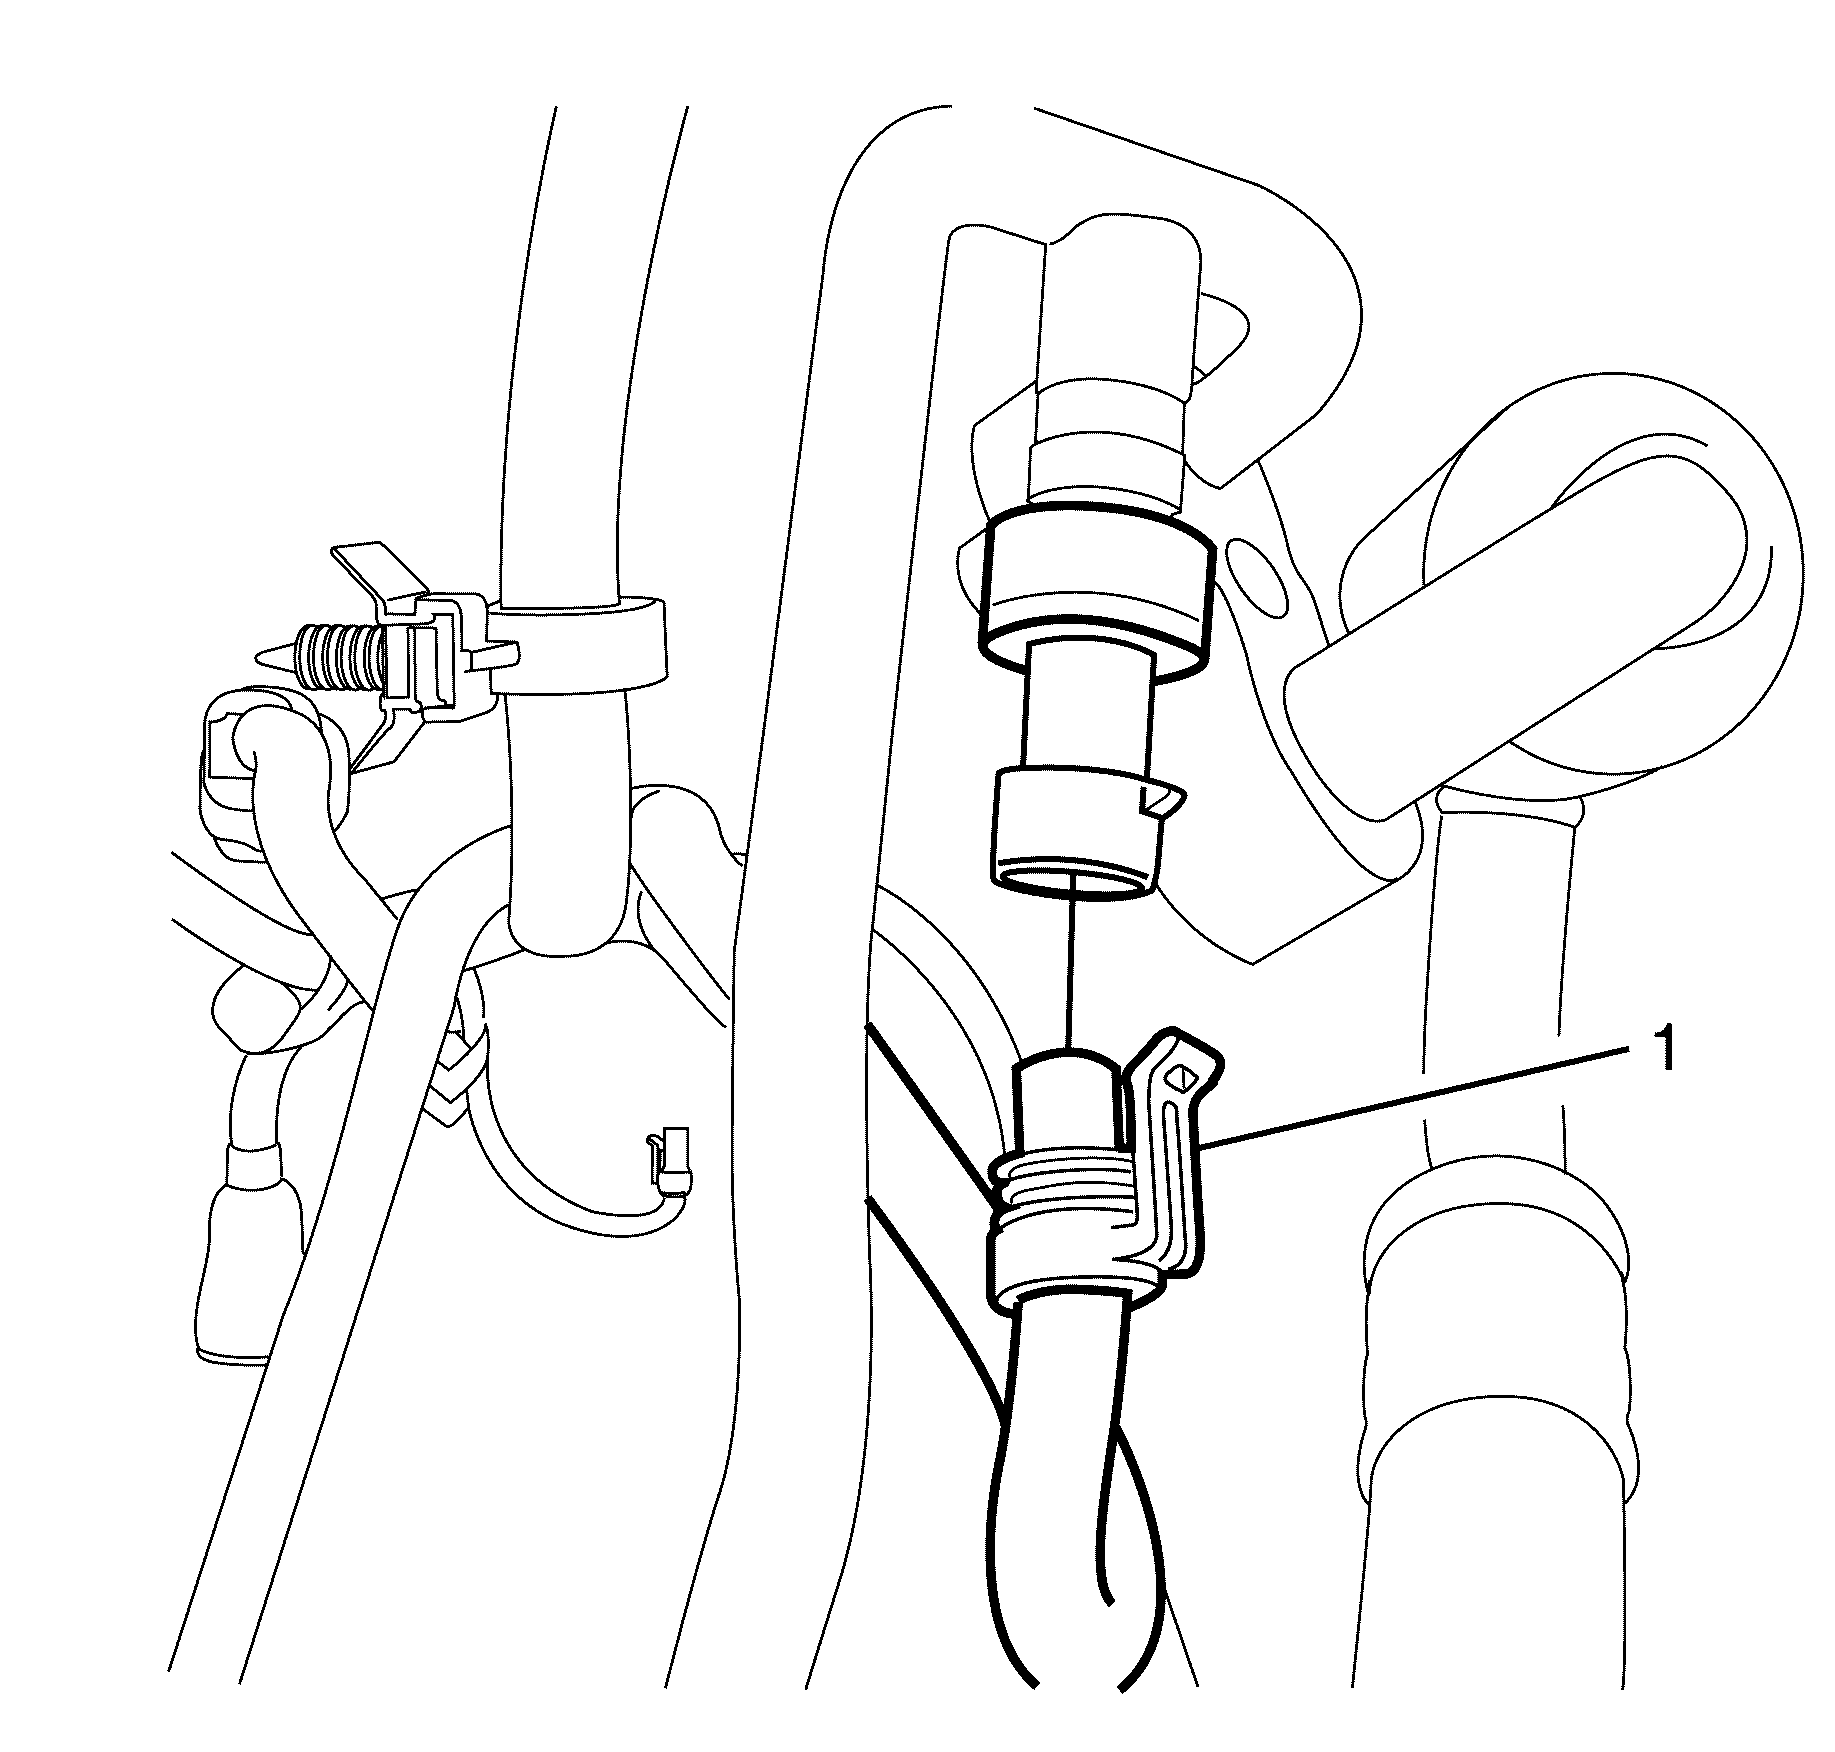
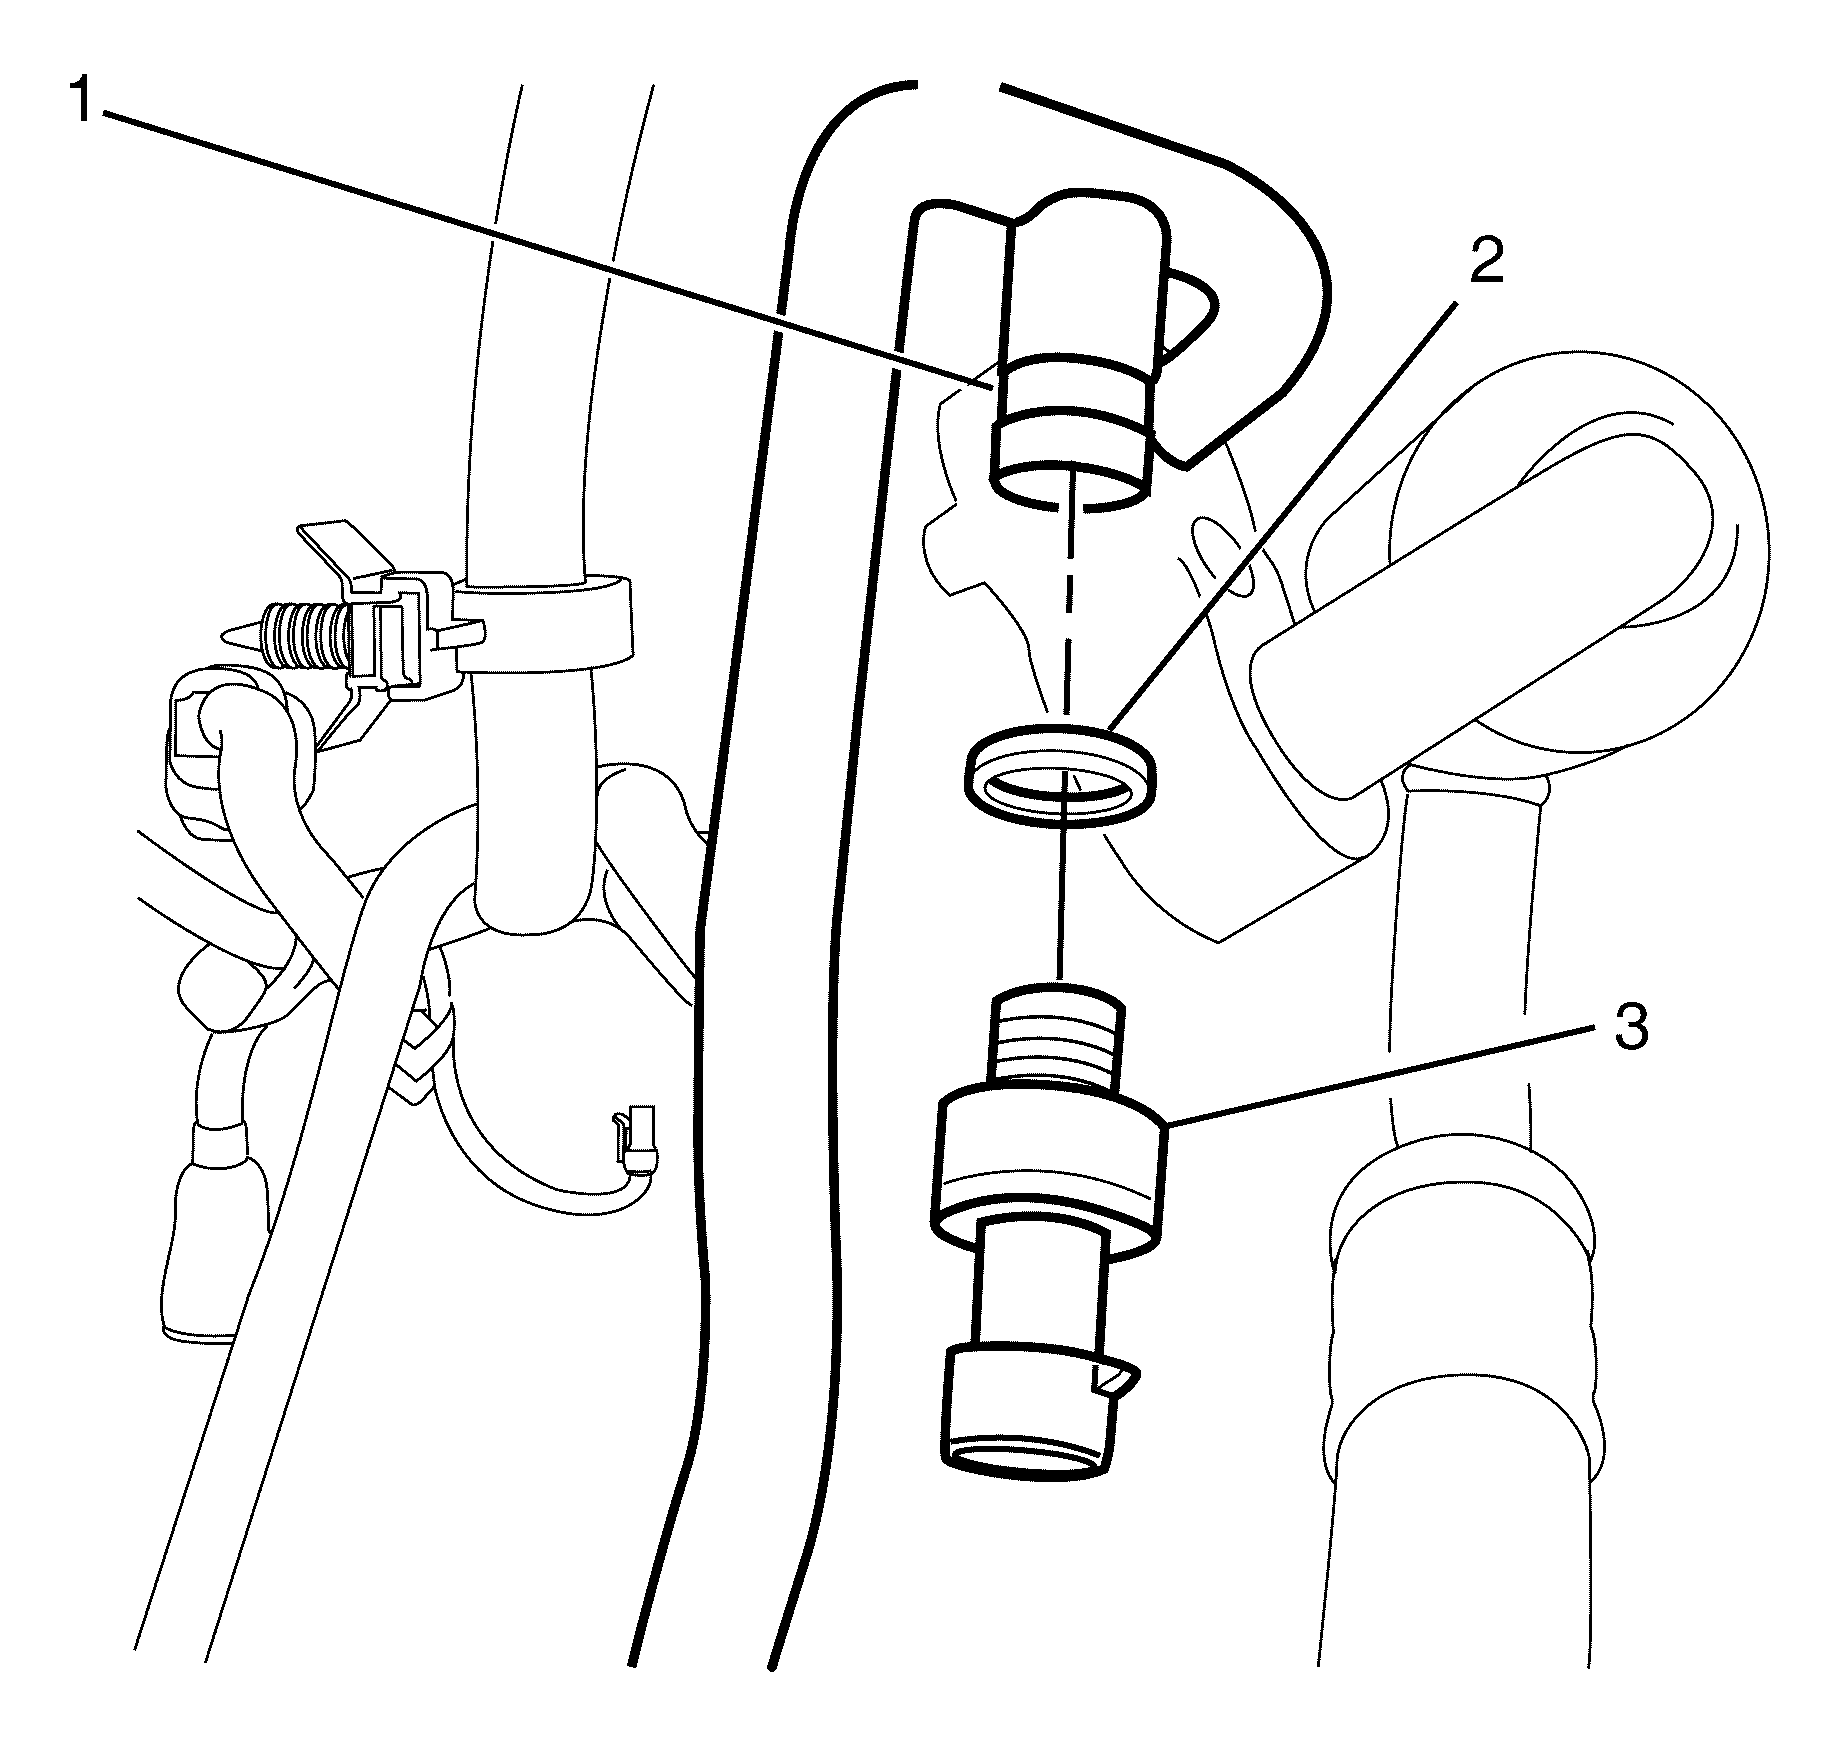
- Disconnect the A/C refrigerant pressure sensor electrical connector (2).
- Remove the A/C refrigerant pressure sensor (3) from the A/C refrigerant pressure sensor port (1).
- Remove the O-ring seal (2). Refer to O-Ring Replacement.
Warning: Refer to Safety Glasses Warning in the Preface section.
Danger: To avoid any vehicle damage, serious personal injury or death when major components are removed from the vehicle and the vehicle is supported by a hoist, support the vehicle with jack stands at the opposite end from which the components are being removed and strap the vehicle to the hoist.
Note: A Schrader valve is fitted to the A/C refrigerant pressure sensor port (1). Upon removal of the A/C refrigerant pressure sensor (3) you will, for a very short period, hear refrigerant escape until the Schrader valve reseats. If refrigerant continues to escape while removing the A/C refrigerant pressure sensor (3) STOP IMMEDIATELY. The Schrader valve has a fault and the refrigerant will have to be recovered.
Note: The O-ring seal (2) is a single use item and must be discarded after use.
Discard the O-ring seal.
Installation Procedure
- Install the NEW O-ring seal (2). Refer to O-Ring Replacement.
- Install the A/C refrigerant pressure sensor to the A/C refrigerant pressure sensor port (1) and tighten to 6 N·m (53 lb ft).
- Connect the A/C refrigerant pressure sensor electrical connector (1).
- Lower the vehicle to the ground.
- Leak test the fittings of the component using the J 39400 .
Caution: Refer to Fastener Caution in the Preface section.
