For 1990-2009 cars only
Removal Procedure
- Disconnect the battery ground cable from the battery. Refer to Battery Negative Cable Disconnection and Connection.
- Remove the following components if required :
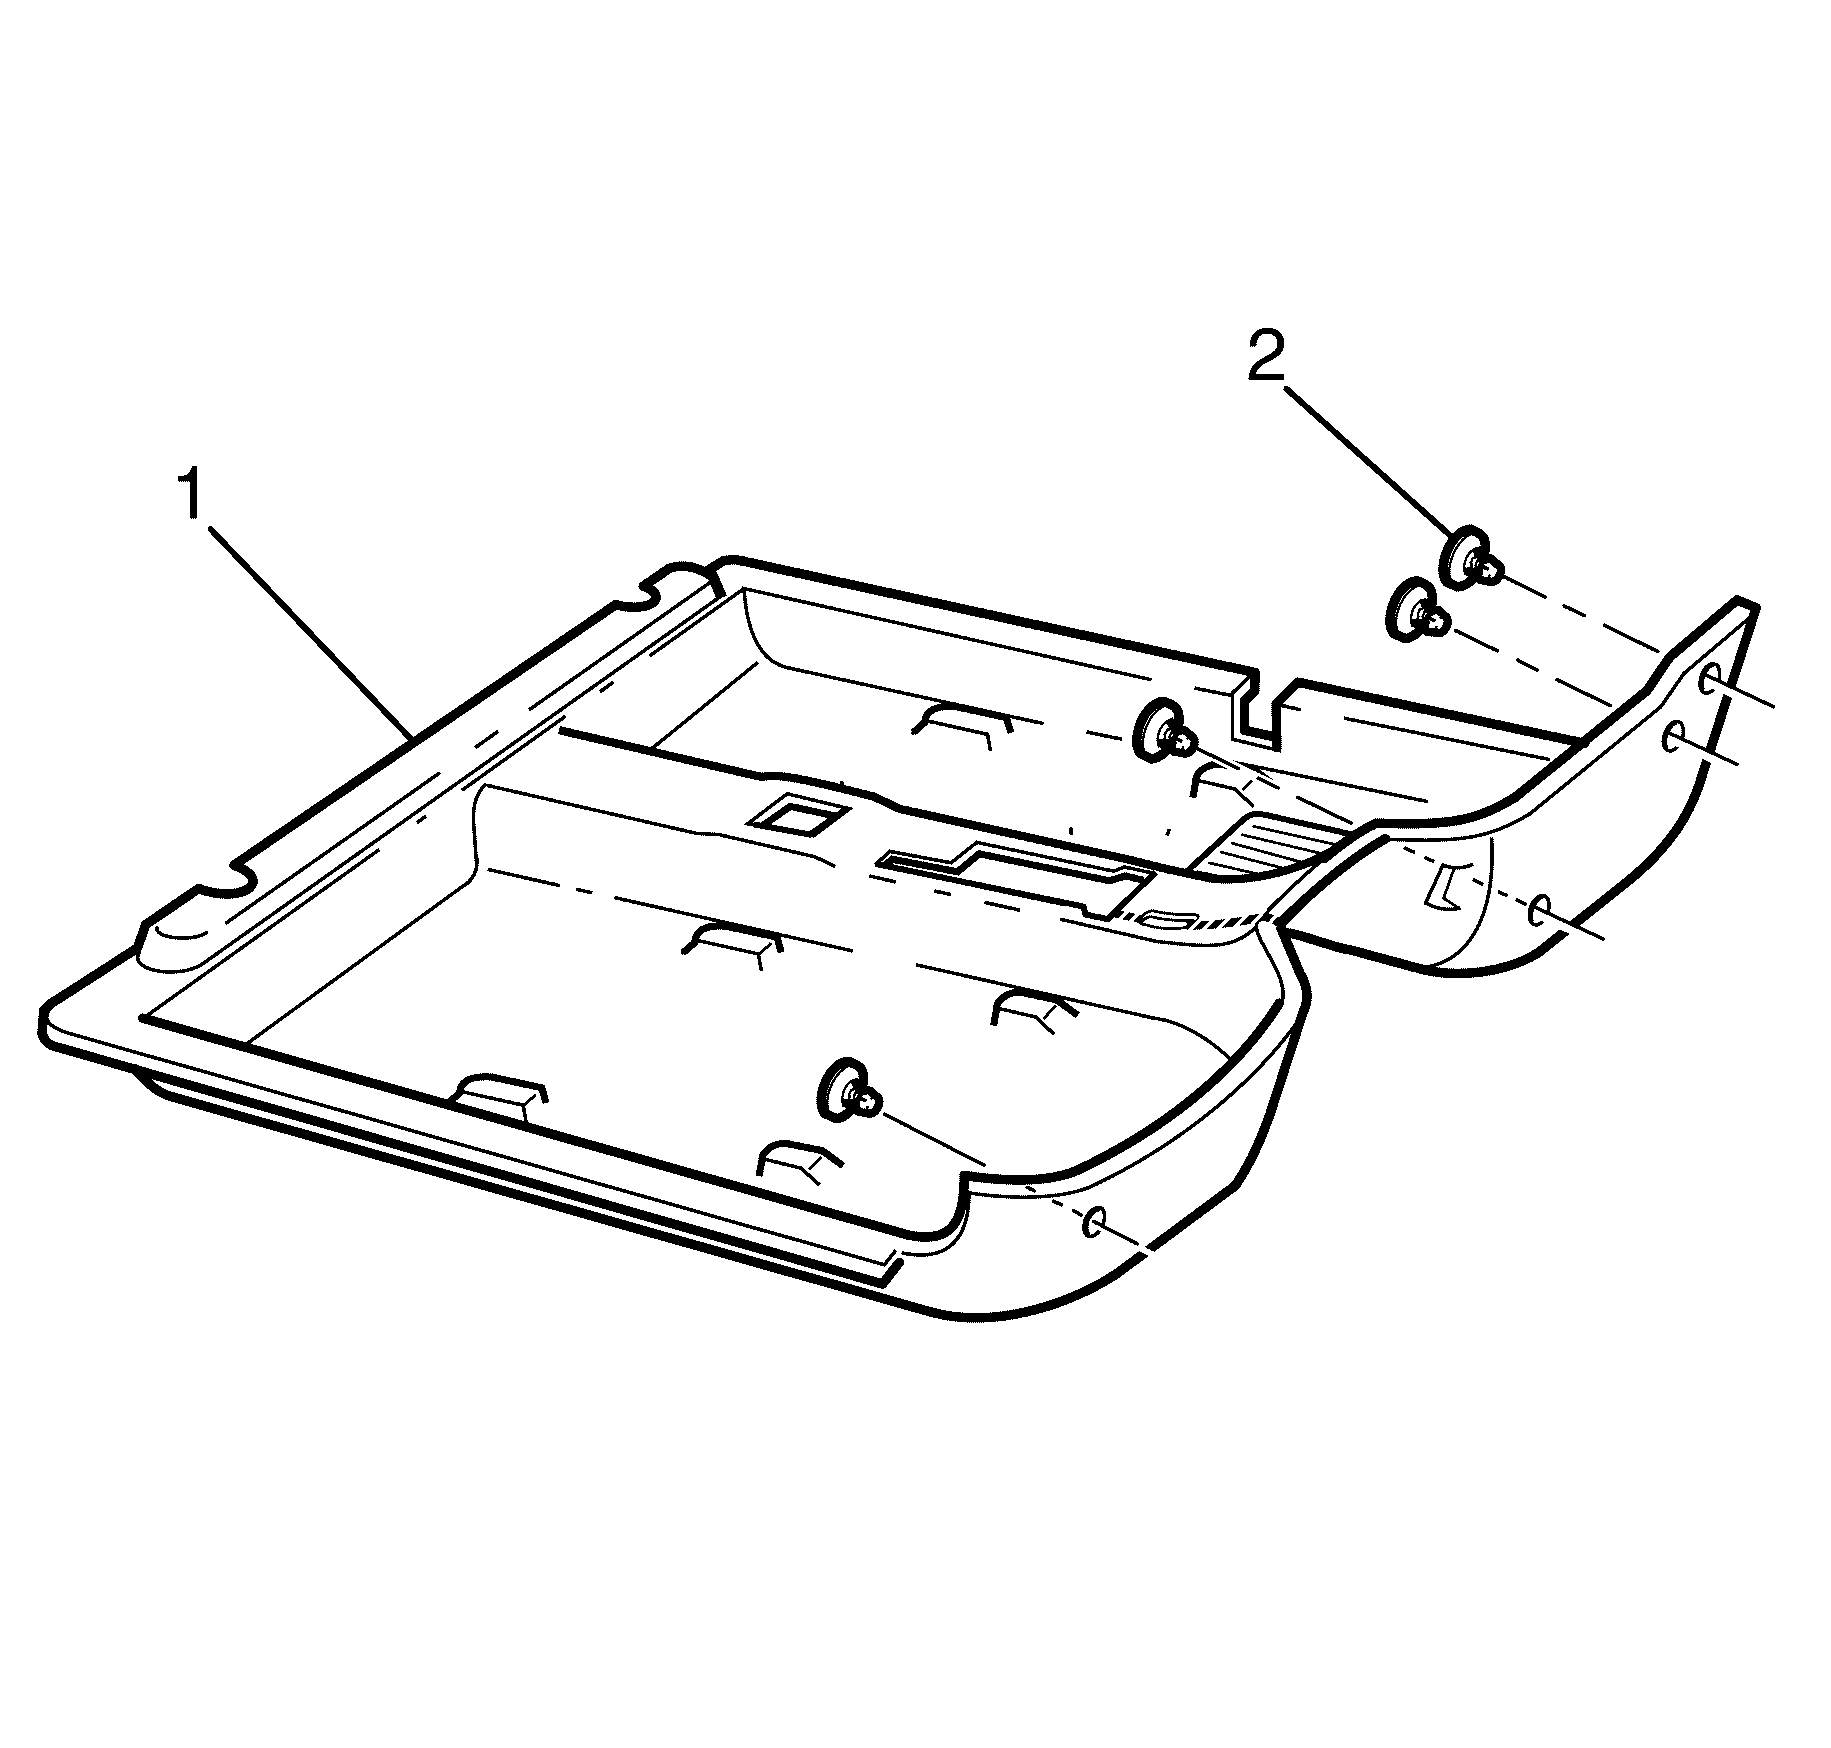
- Remove the retaining clips (2) from the front floor carpet assembly (1).
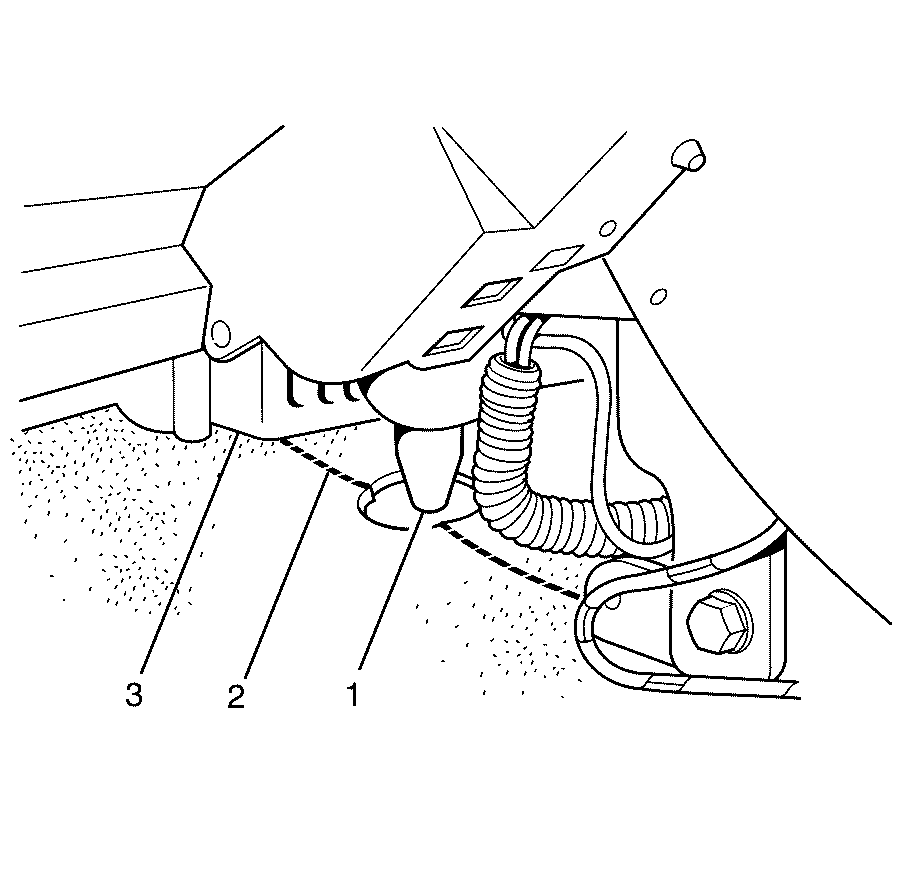
- From inside the left-hand footwell, grasp the edge of the hole in the front carpet assembly around the evaporator drain hose (1) and carefully tear open along the perforated line (2).
- Slide the remaining flap of carpet out from under the (HVAC) unit (3).
- Carefully remove the front floor carpet.
Warning: Refer to Battery Disconnect Warning in the Preface section.
| • | Front sill trim plate. Refer to Front Side Door Sill Plate Replacement. |
| • | Sill panel trim. Refer to Door Sill Plate Replacement. |
| • | Rear panel trim plate. Refer to Rear Side Door Sill Plate Replacement. |
| • | Rear seat cushion. Refer to Rear Seat Cushion Replacement. |
| • | Front seat belt retaining bolts. Refer to Front Seat Belt Replacement. |
| • | Body hinge pillar trim assembly on both sides. Refer to Body Hinge Pillar Trim Panel Replacement. |
| • | Both front seat assemblies. Refer to Front Seat Replacement - Bucket. |
| • | Park brake assembly. Refer to Parking Brake Release Handle Assembly Replacement. |
| • | Instrument panel lower trim plate assembly both sides. Refer to Console Trim Plate Replacement. |
| • | Instrument panel compartment. Refer to Instrument Panel Compartment Replacement. |
| • | Floor console assembly. Refer to Front Floor Console Replacement. |


Note: If the carpet is being replaced, tearing along the perforated line is not necessary.
Installation Procedure
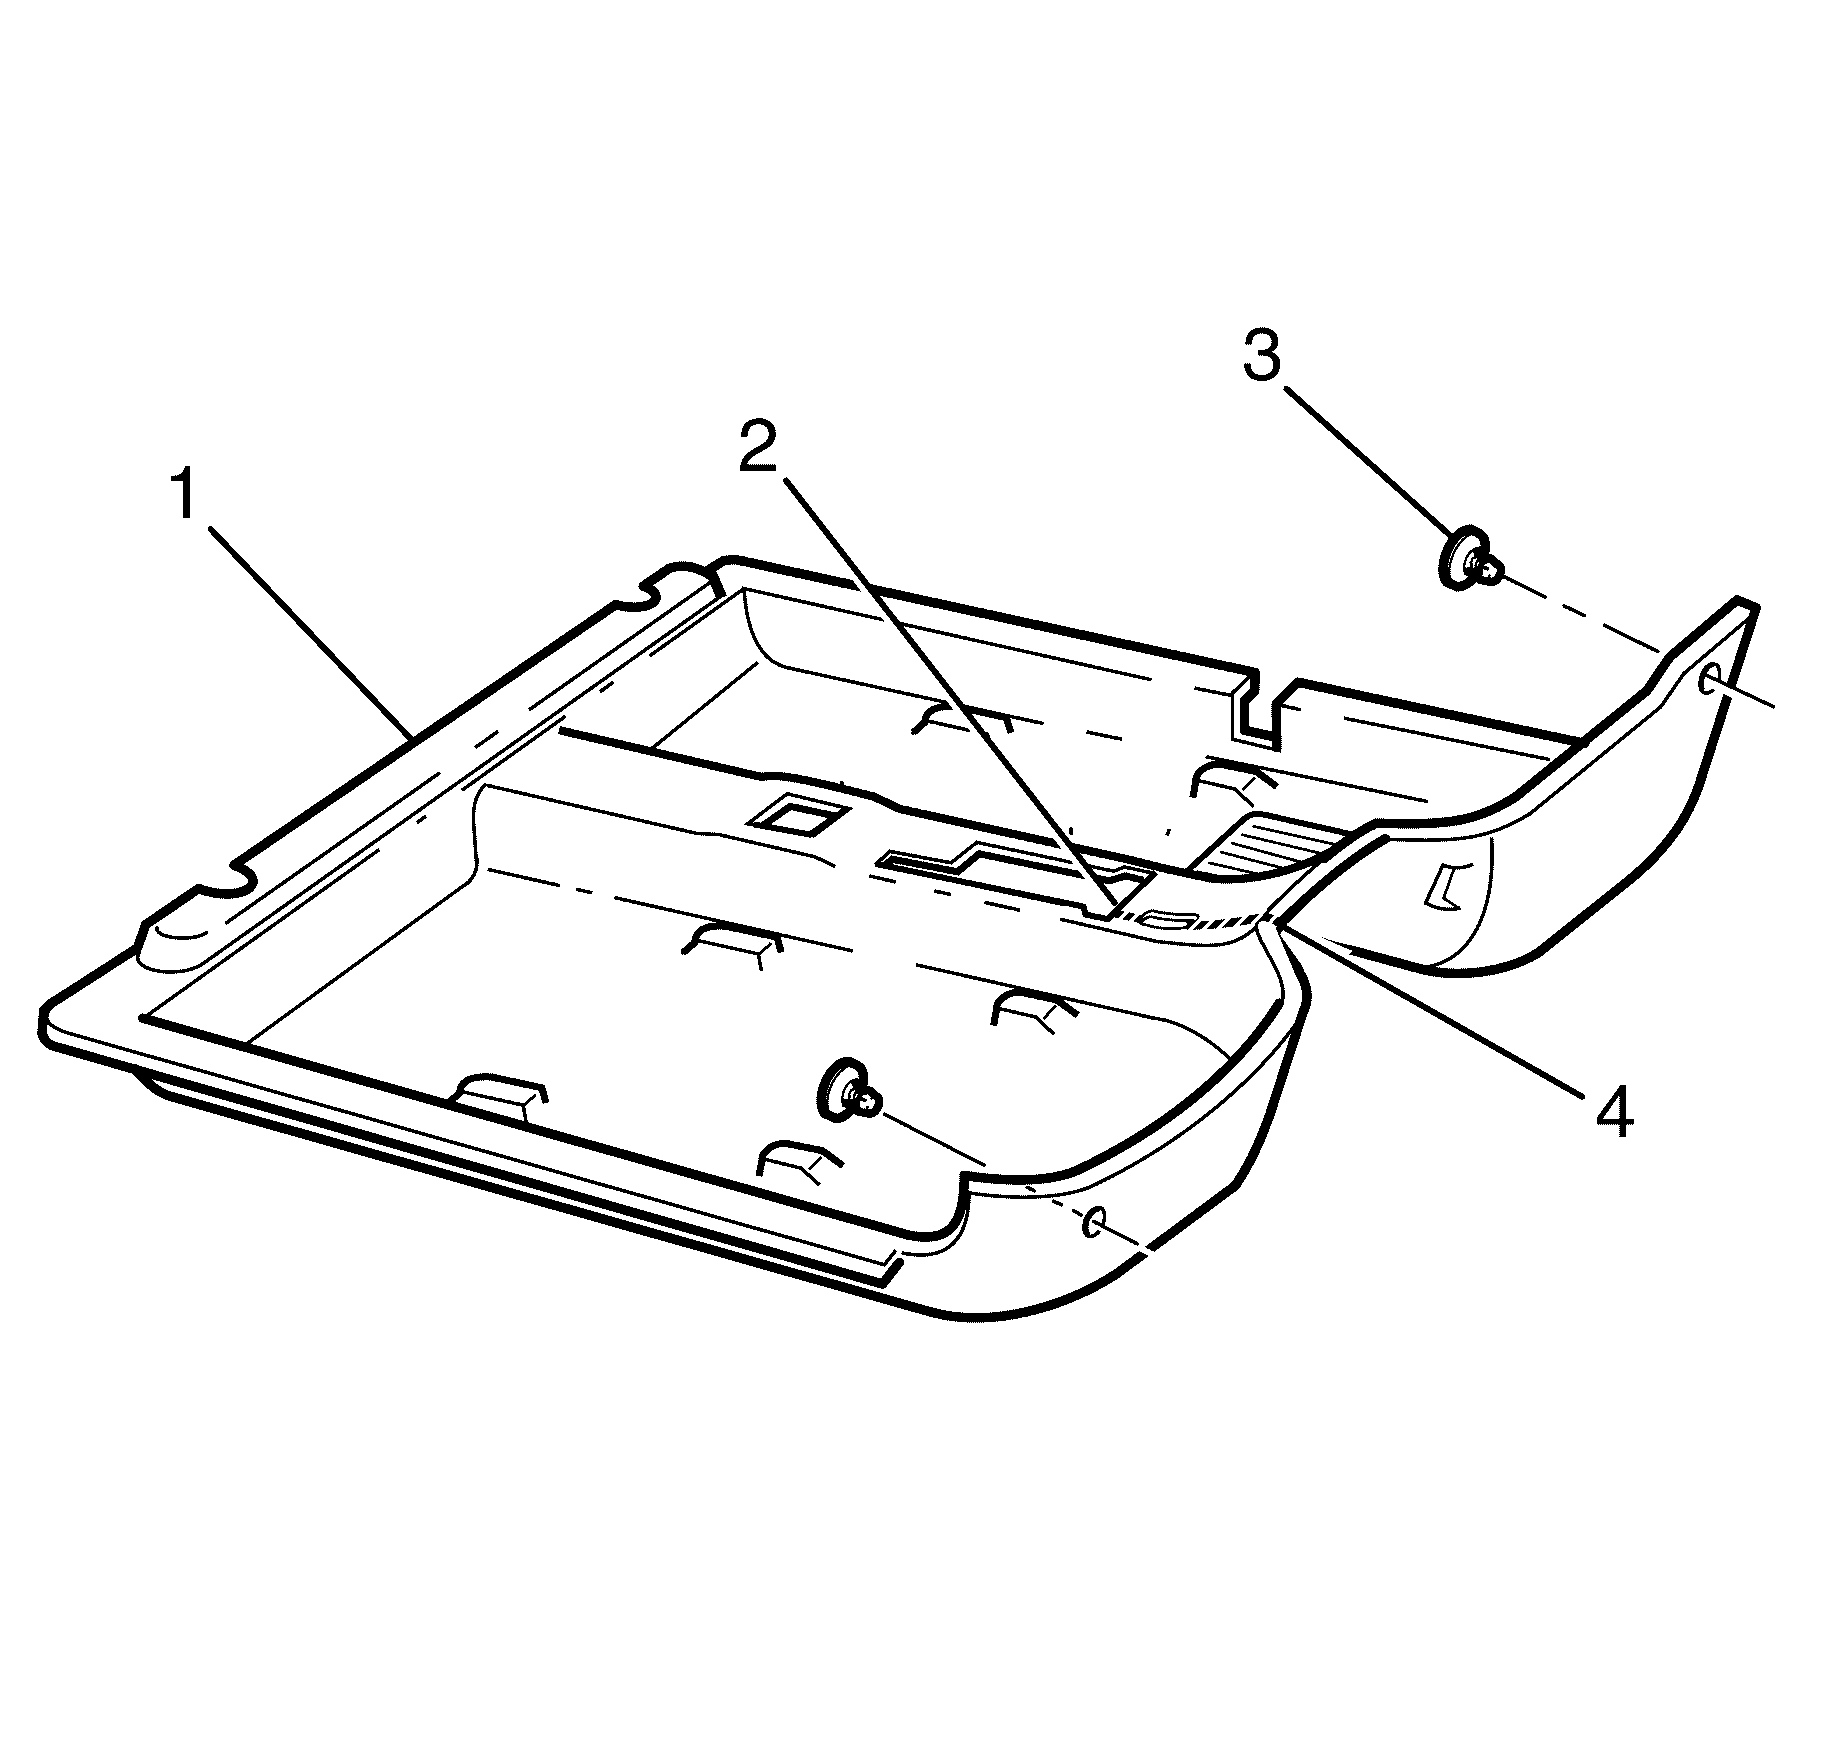
- Carefully install the front carpet (1) ensuring the cut-outs (2) and (4) are correctly aligned.
- Install the retaining clips (3) to the front of the carpet.
- Install the following components as per removal:
- Connect the battery ground lead to the vehicle. Refer to Battery Negative Cable Disconnection and Connection.
- Carry out testing of all electrical components removed, to ensure correct operation.

Note: If a new carpet is being installed, prior to installation, cut along the perforated line that runs from the carpet forward edge to the forward edge of the radio bracket cut-out.
| • | Floor console assembly. Refer to Front Floor Console Replacement. |
| • | Instrument panel compartment. Refer to Instrument Panel Compartment Replacement. |
| • | Instrument panel lower trim plate assembly both sides. Refer to Console Trim Plate Replacement. |
| • | Park brake assembly. Refer to Parking Brake Release Handle Assembly Replacement. |
| • | Both front seat assemblies. Refer to Front Seat Replacement - Bucket. |
| • | Body hinge pillar trim assembly on both sides. Refer to Body Hinge Pillar Trim Panel Replacement. |
| • | Front seat belt retaining bolts. Refer to Front Seat Belt Replacement. |
| • | Rear panel trim plate. Refer to Rear Side Door Sill Plate Replacement. |
| • | Sill panel trim. Refer to Door Sill Plate Replacement. |
| • | Rear seat cushion. Refer to Rear Seat Cushion Replacement. |
| • | Front sill trim plate. Refer to Front Side Door Sill Plate Replacement. |
