For 1990-2009 cars only
Removal Procedure
- Disconnect the battery negative cable. Refer to Battery Negative Cable Disconnection and Connection.
- Remove the windscreen wiper arms. Refer to Windshield Wiper Arm Replacement.
- Remove the plenum chamber cover panel. Refer to Air Inlet Grille Panel Replacement.
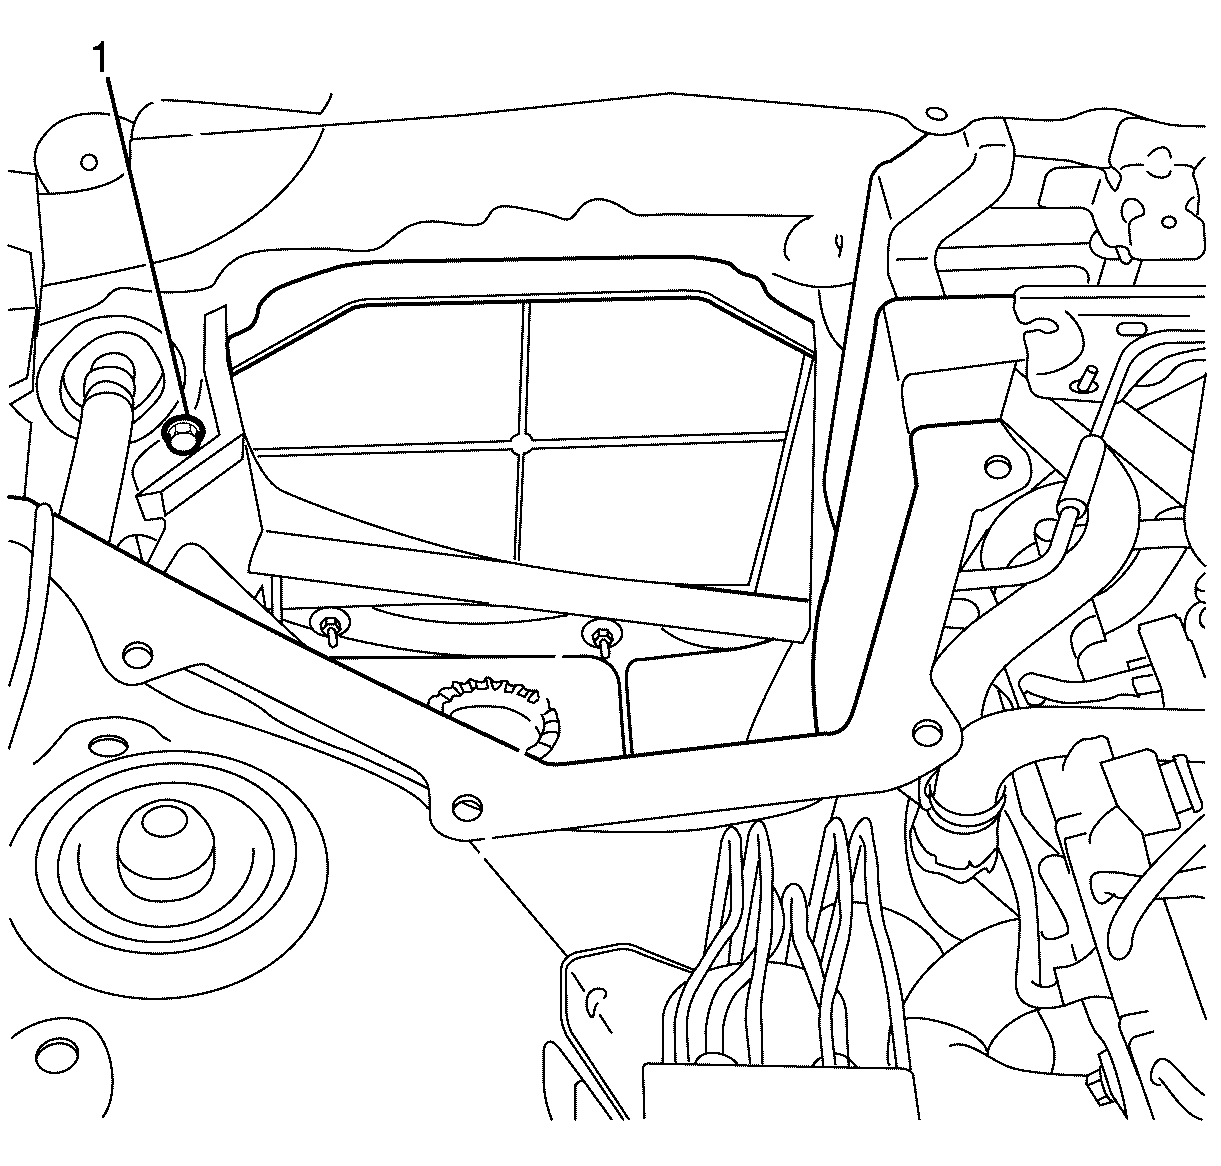
- Remove the HVAC to bulkhead retaining bolt (1).
- Remove the instrument panel (I/P) compartment. Refer to Instrument Panel Storage Compartment Replacement.
- Remove the close out panel. Refer to Instrument Panel Insulator Panel Replacement - Right Side.
- Remove the right side floor air outlet duct. Refer to Floor Air Outlet Duct Replacement - Right Side.
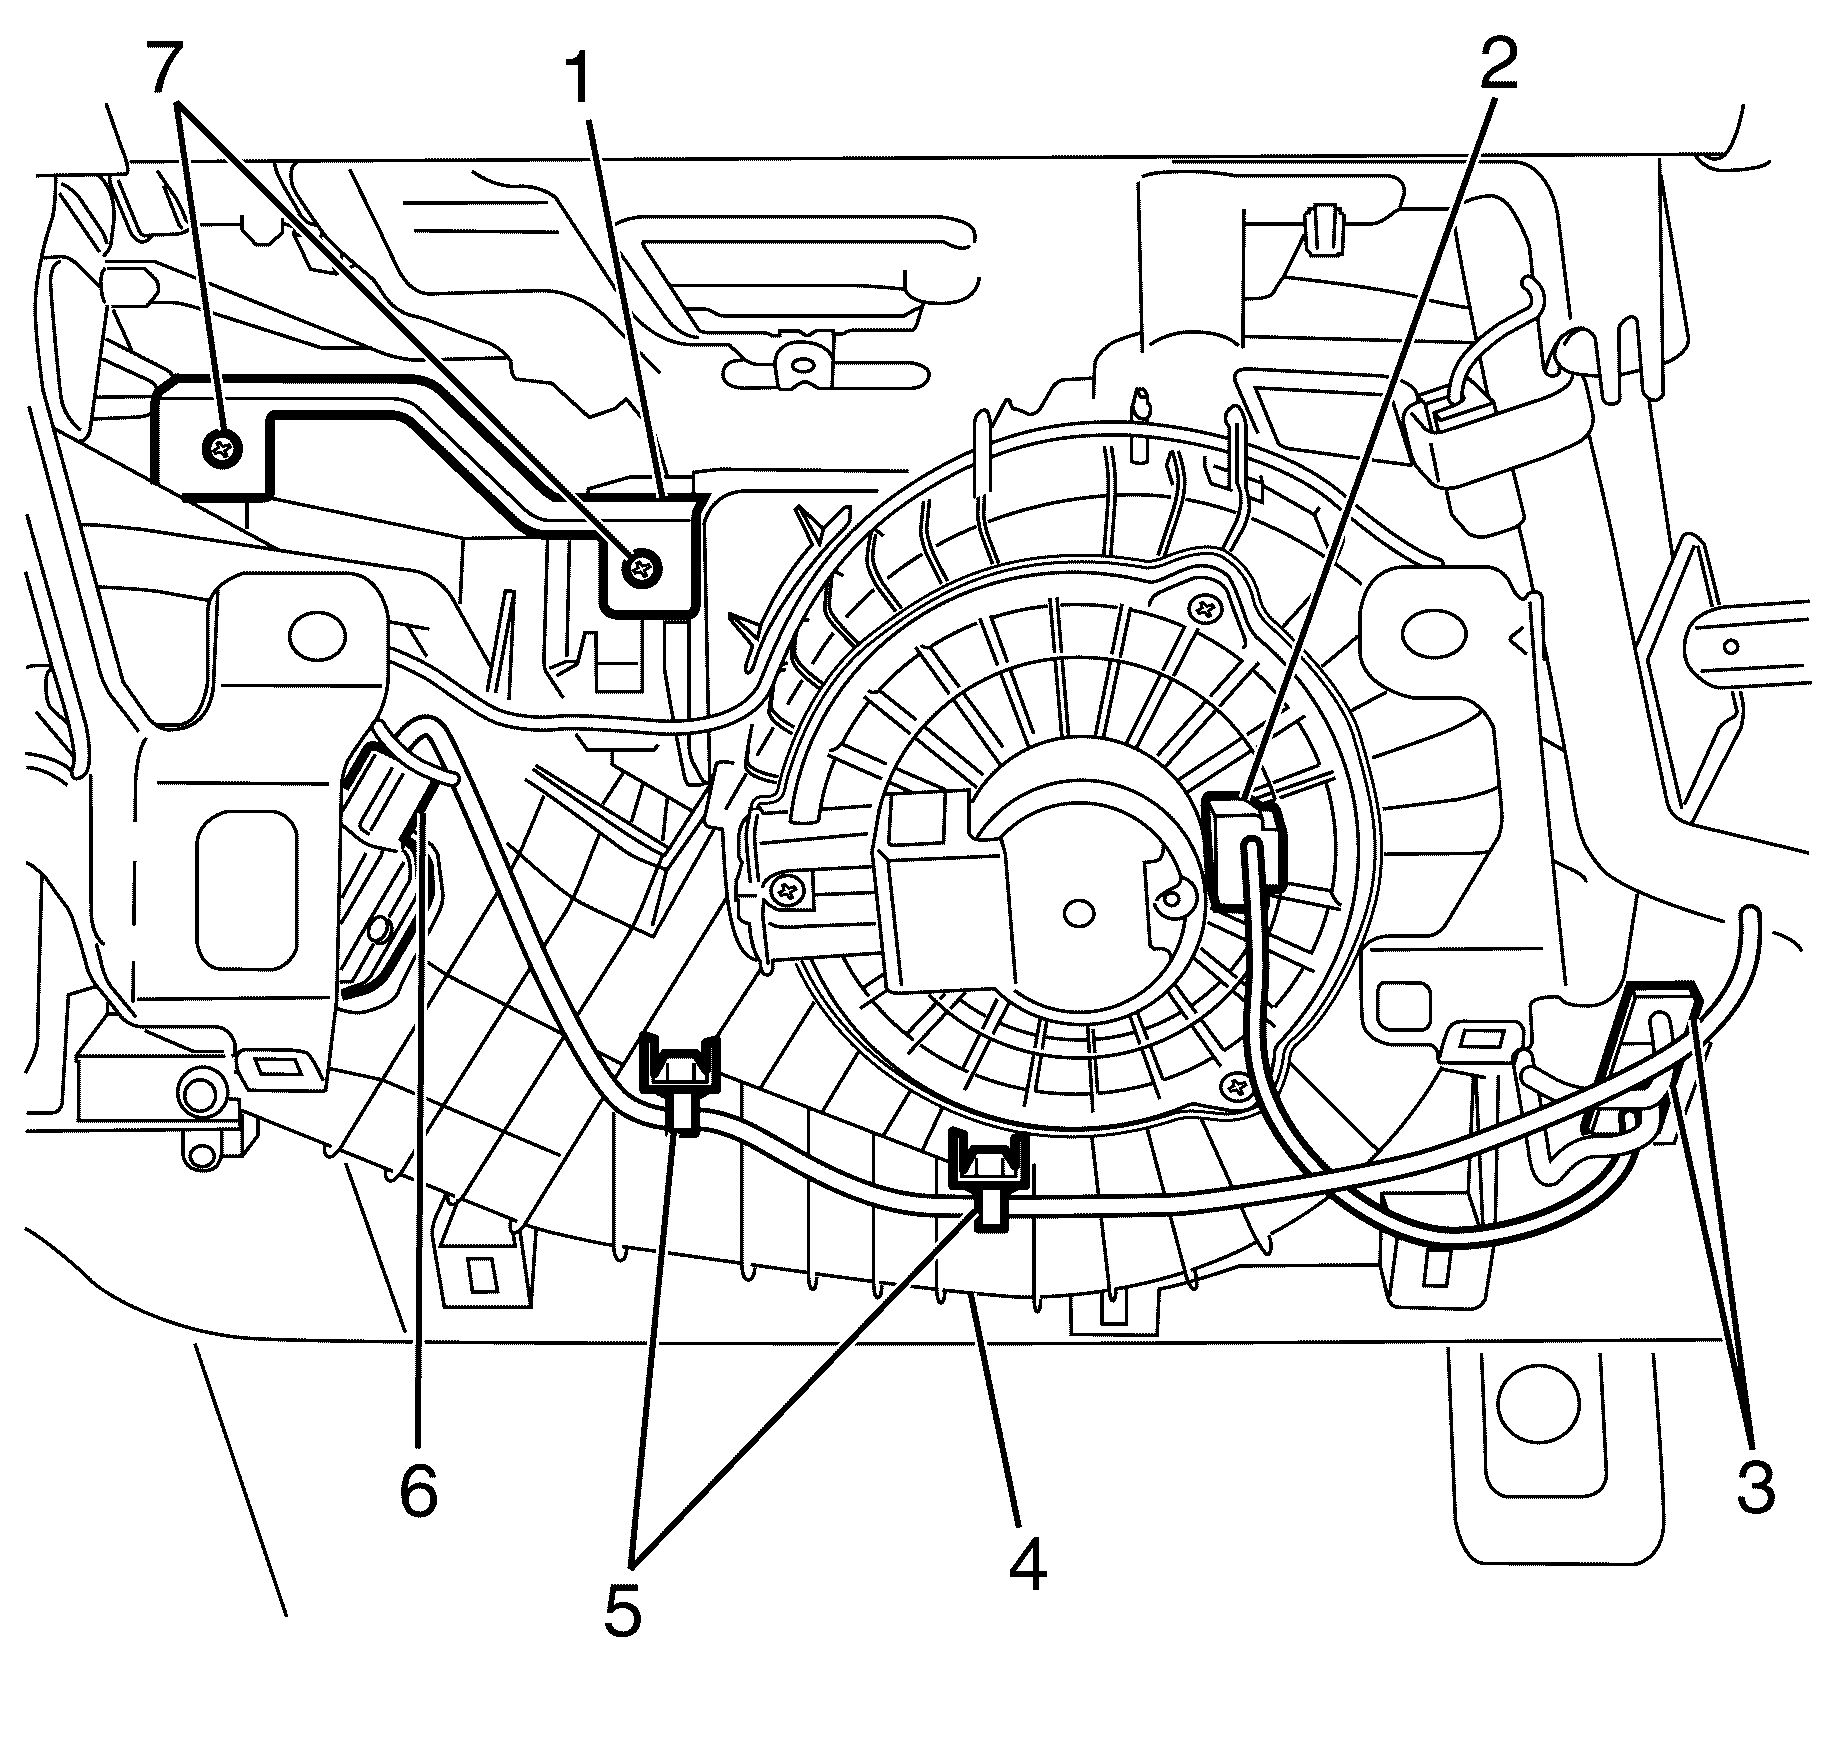
- Disconnect the blower motor electrical connector (2).
- Disconnect the HVAC module electrical connector (3).
- Disconnect the blower motor control processor electrical connector (6).
- Detach the I/P wiring harness to HVAC module assembly retaining clips (5).
- Remove the HVAC support brace to HVAC module assembly retaining screws (7).
- Remove the HVAC support brace (1) from the HVAC module assembly (4).
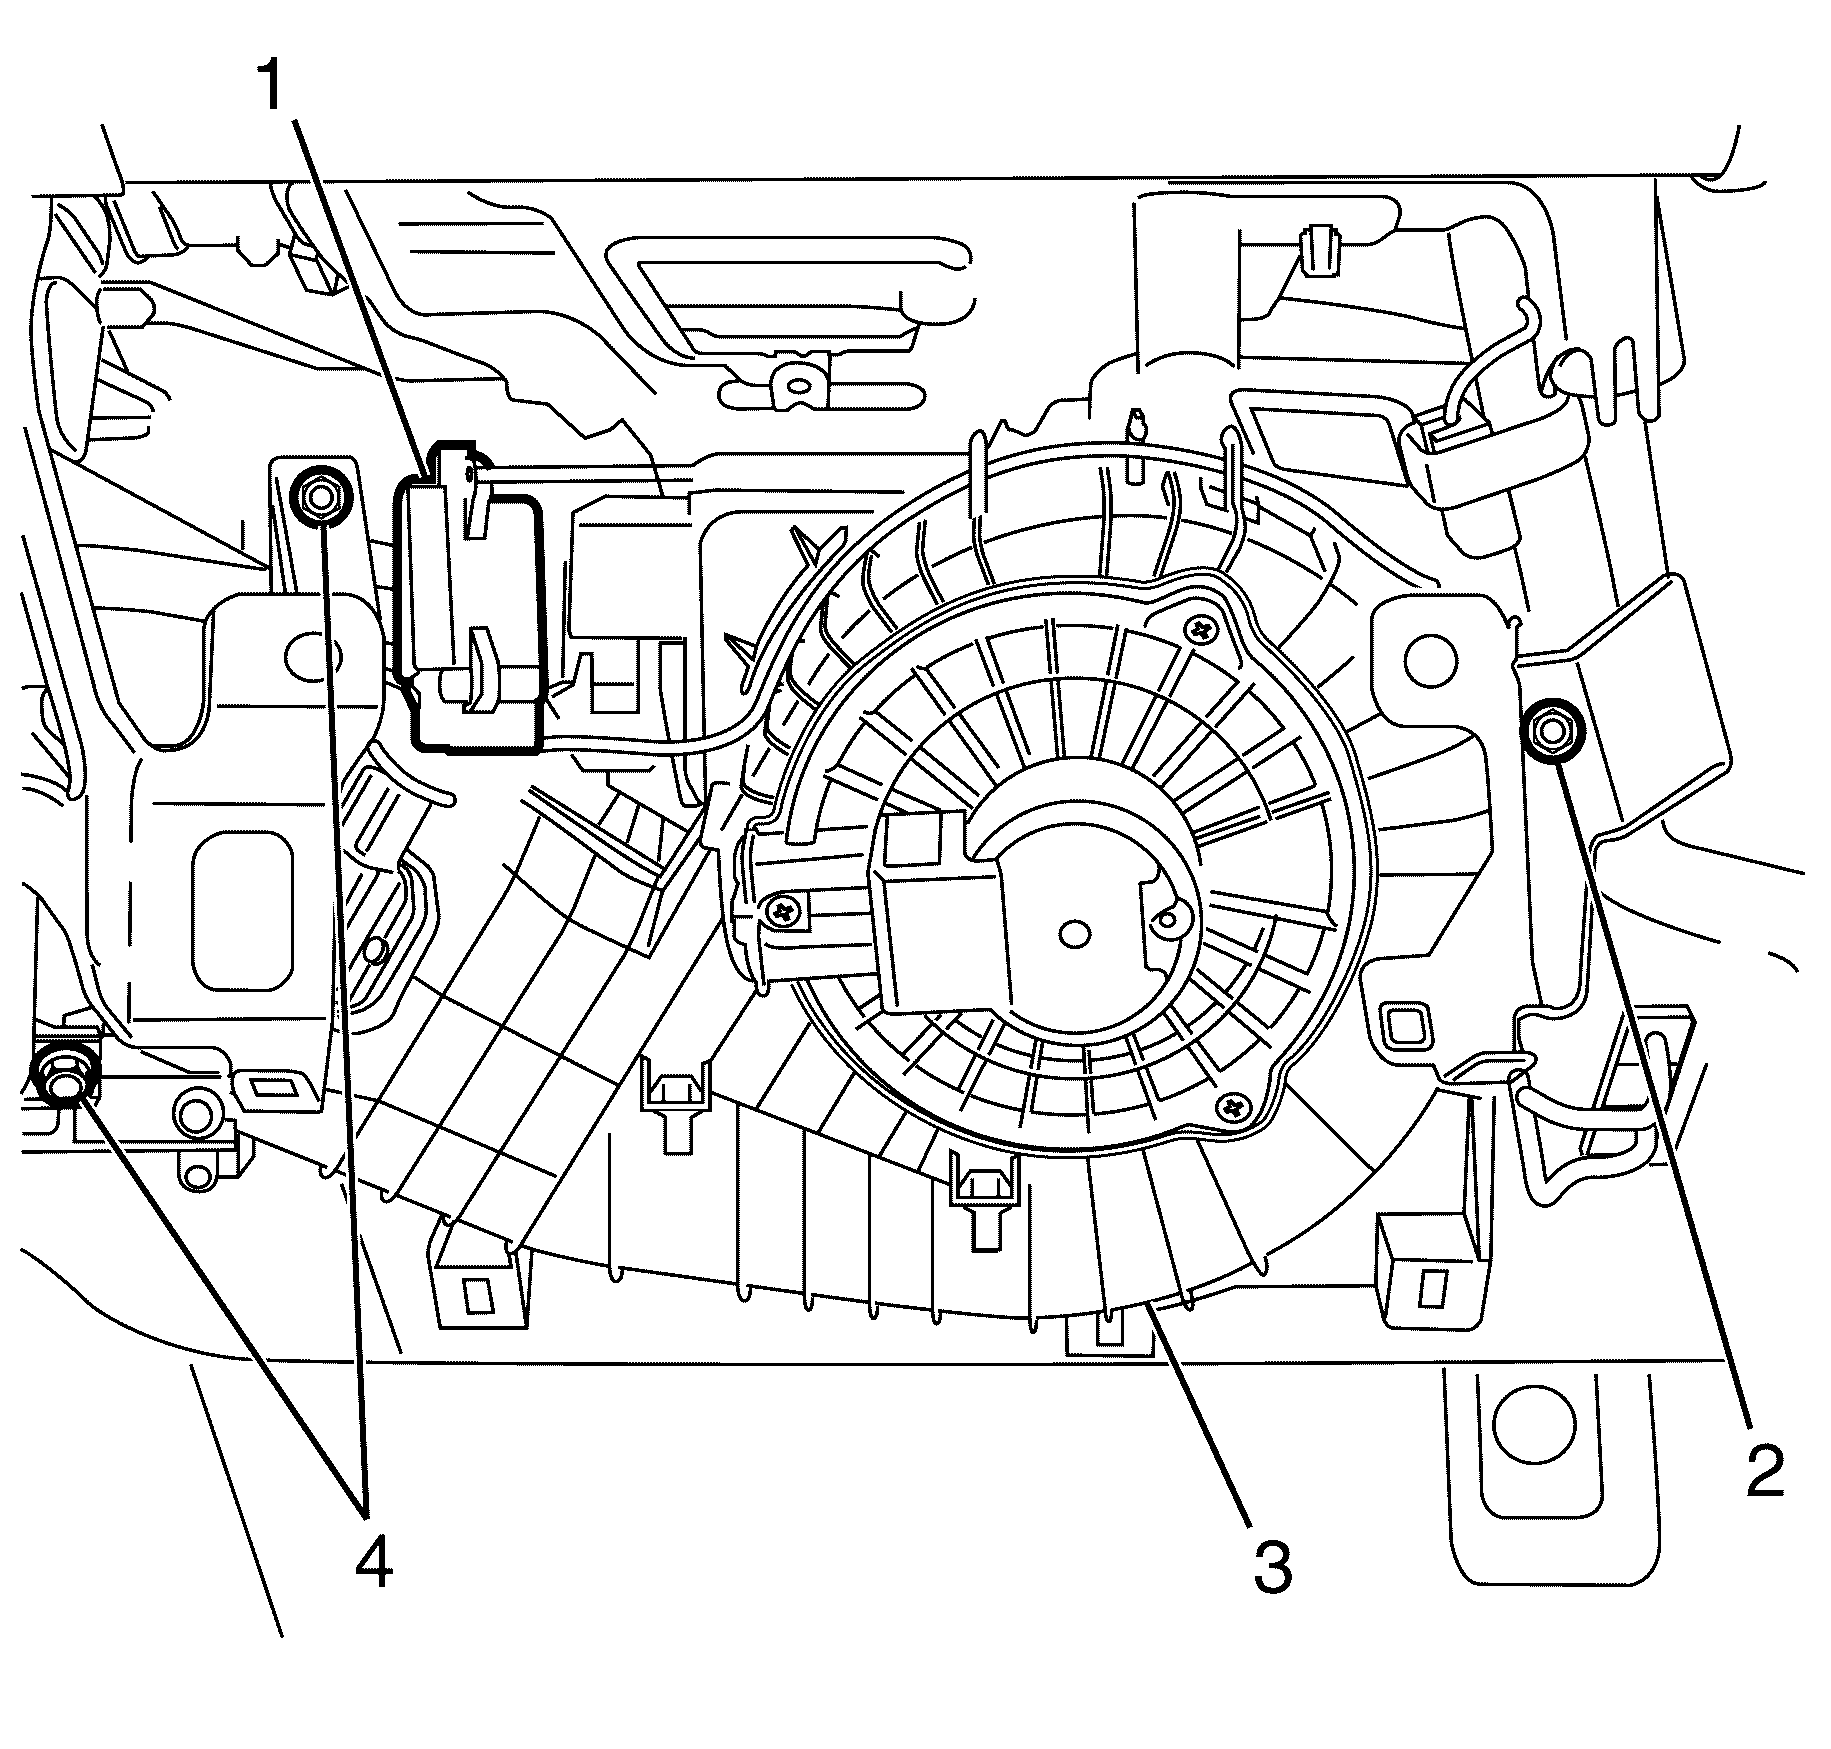
- Disconnect the air intake fresh/recirculation actuator electrical connector (1).
- Detach the wiring harness (2) from the air inlet assembly (4).
- Remove the air inlet assembly to I/P carrier retaining bolt (3)
- Remove the air inlet assembly to HVAC module assembly retaining bolts (5).
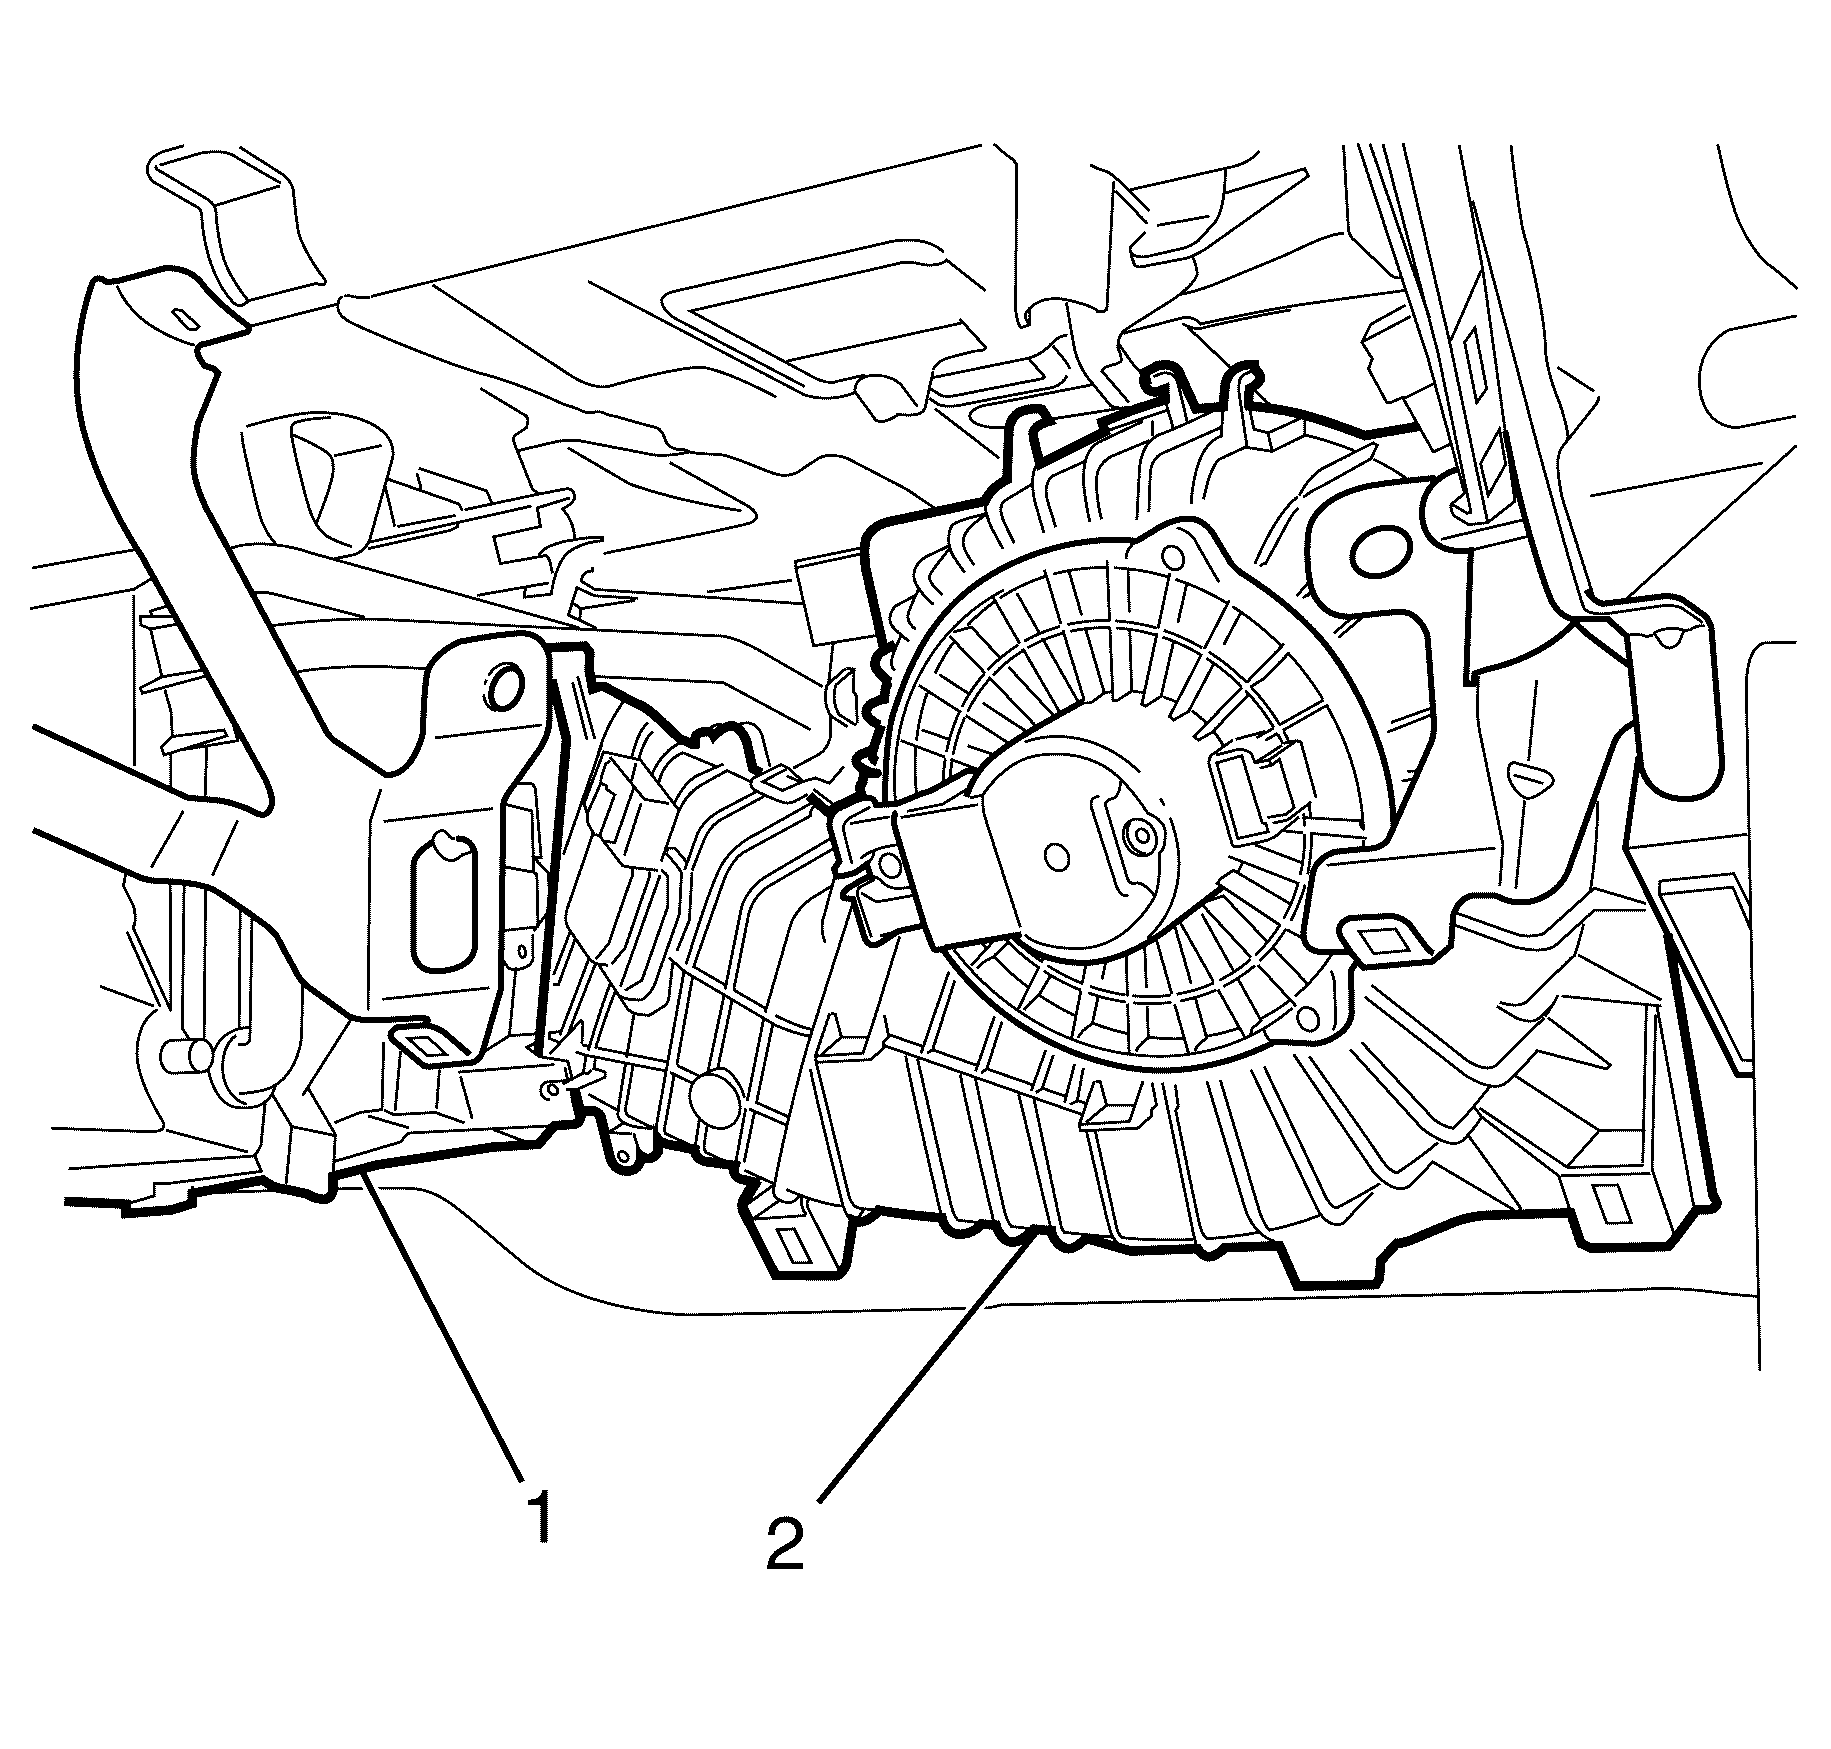
- Detach the air inlet assembly (2) from the HVAC module assembly (1).
- Remove the air inlet assembly (1) from the vehicle.


Note: Slide the air inlet assembly (2) to the right to detach the air inlet assembly (2) from the HVAC module assembly (1).
Note: Lower and rotate the air inlet assembly (1) clockwise to remove the air inlet assembly (1) from the vehicle.
Installation Procedure
- Install the air inlet assembly (1) to the vehicle.
- Attach the air inlet assembly (2) to the HVAC module assembly (1).
- Install the air inlet assembly to HVAC module assembly retaining bolts (5) and tighten to 9 N·m (80 lb in)
- Install the air inlet assembly to I/P carrier retaining bolt (3) and tighten to 9 N·m (80 lb in).
- Connect the air intake fresh/recirculation actuator electrical connector (1).
- Attach the wiring harness (2) to the air inlet assembly (4).
- Install the HVAC support brace (1) to the HVAC module assembly (4).
- Install the HVAC support brace to HVAC module assembly retaining screws (7) and tighten to 2 N·m (18 lb in).
- Connect the blower motor control processor electrical connector (6).
- Connect the HVAC module electrical connector (3).
- Connect the blower motor electrical connector (2).
- Attach the I/P wiring harness to HVAC module assembly retaining clips (5).
- Install the HVAC module assembly to bulkhead retaining bolt (1) and tighten to 7 N·m (62 lb in).
- Install the right side floor air outlet duct. Refer to Floor Air Outlet Duct Replacement - Right Side.
- Install the I/P compartment. Refer to Instrument Panel Storage Compartment Replacement.
- Install the closeout panel. Refer to Instrument Panel Insulator Panel Replacement - Right Side.
- Remove the plenum chamber cover panel. Refer to Air Inlet Grille Panel Replacement.
- Install the windscreen wiper arms. Refer to Windshield Wiper Arm Replacement.
- Connect the battery negative cable. Refer to Battery Negative Cable Disconnection and Connection.

Note: Rotate the air inlet assembly (1) counter-clockwise and raise to install the air inlet assembly (1) to the vehicle.
Caution: Refer to Fastener Caution in the Preface section.


