For 1990-2009 cars only
- Raise and support the vehicle. Refer to Lifting and Jacking the Vehicle in General Information.
- Remove the wheels. Refer to Tire and Wheel Removal and Installation in Tires and Wheels.
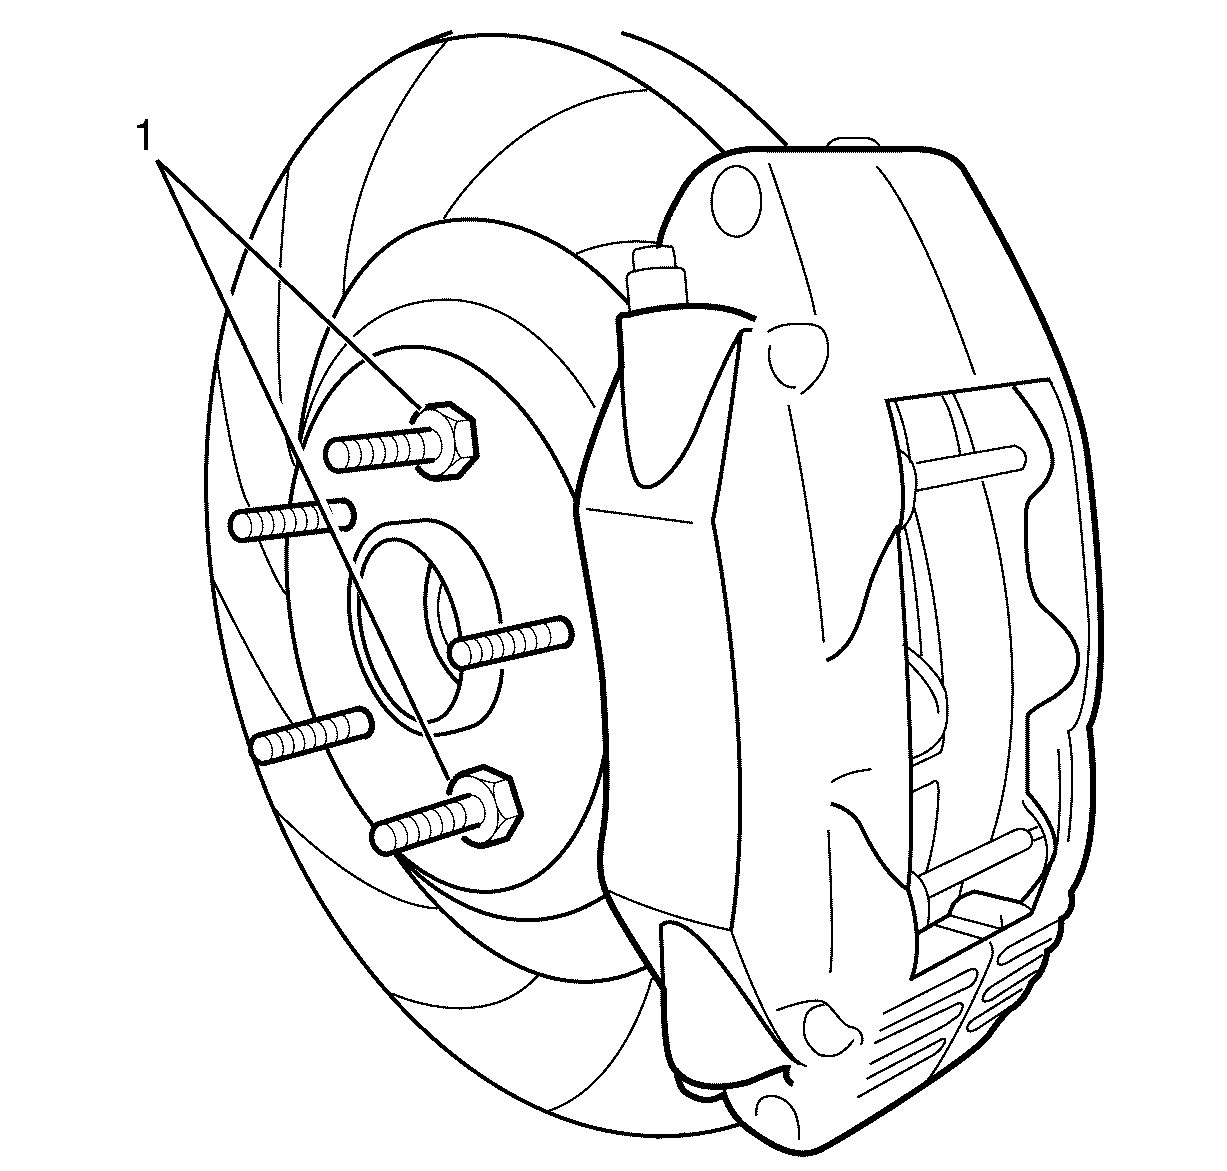
- Install 2 opposite wheel nuts (1), with the flat side of the wheel nut against the brake rotor to retain the brake rotor to the wheel hub.
- Clean the friction surfaces of the brake disc with denatured alcohol, or an equivalent approved brake cleaner.
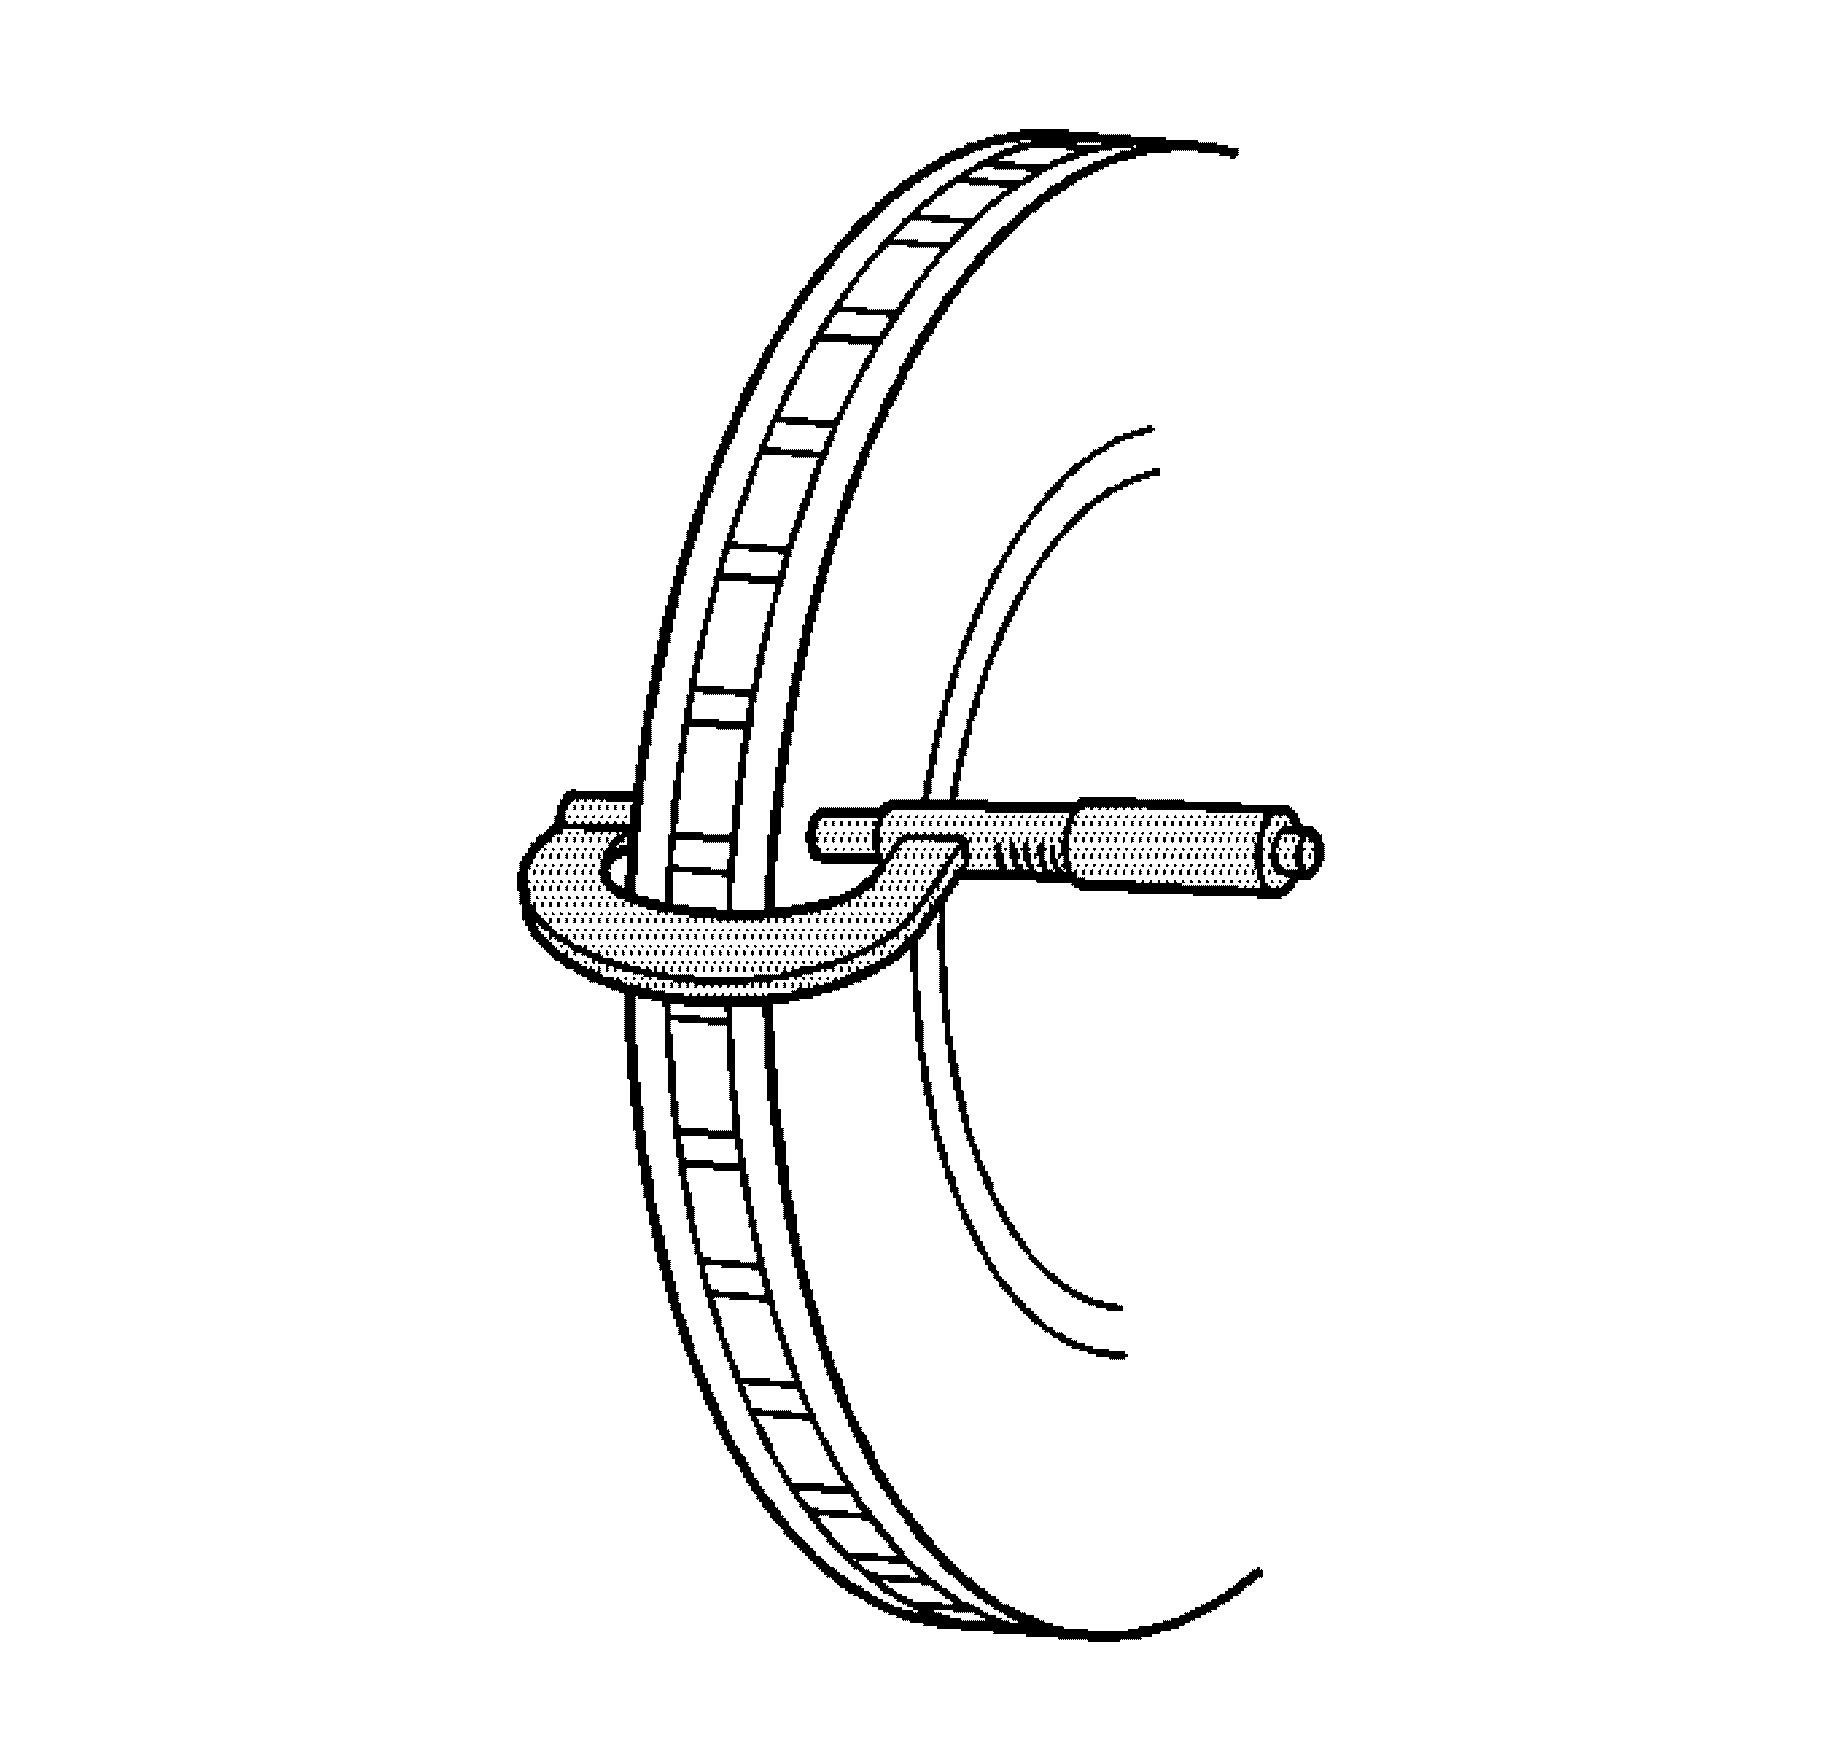
- Using a micrometer calibrated in thousandths-of-a-millimeter, or ten-thousandths-of-an-inch, measure and record the thickness at 4 evenly spaced points around the brake disc.
- Make sure that the measurements are only taken of the friction surfaces and that the micrometer is positioned the same distance from the outer edge of the brake disc, about 13 mm (½ in), for each measurement.
- Calculate the difference between the highest and lowest thickness measurements recorded to obtain the amount of thickness variation.
- Compare the thickness variation measurement with the following specification:
- If the brake disc thickness variation measurement exceeds the specification, the brake disc requires refinishing or replacement. Refer to:
- Remove the 2 opposite wheel nuts (1), from the wheel studs.
- Install the wheels. Refer to Tire and Wheel Removal and Installation.
- Lower the vehicle to the ground.
Danger: To avoid any vehicle damage, serious personal injury or death when major components are removed from the vehicle and the vehicle is supported by a hoist, support the vehicle with jack stands at the opposite end from which the components are being removed and strap the vehicle to the hoist.

Warning: Refer to Brake Dust Warning in the Preface section.
Warning: Refer to Safety Glasses Warning in the Preface section.

Specification
Brake disc maximum allowable thickness variation:
0.025 mm (0.001 in).
Note: Whenever a brake disc is refinished or replaced, the assembled lateral runout (LRO) of the brake disc must be measured to make sure optimum performance of the disc brakes.

