Removal Procedure
Caution: Brake fluid may irritate eyes and skin. In case of contact, take the
following actions:
• Eye contact--rinse thoroughly with water. • Skin contact--wash with soap and water. • If ingested--consult a physician immediately.
Notice: Brake fluid will damage electrical connections and painted surfaces. Use shop cloths, suitable containers, and fender covers to prevent brake fluid from contacting these areas. Always re-seal and wipe off brake fluid containers to prevent spills.
- Remove the rear tire and wheel assembly. Refer to Tire and Wheel Removal and Installation in Tires and Wheels.
- Clean the following components:
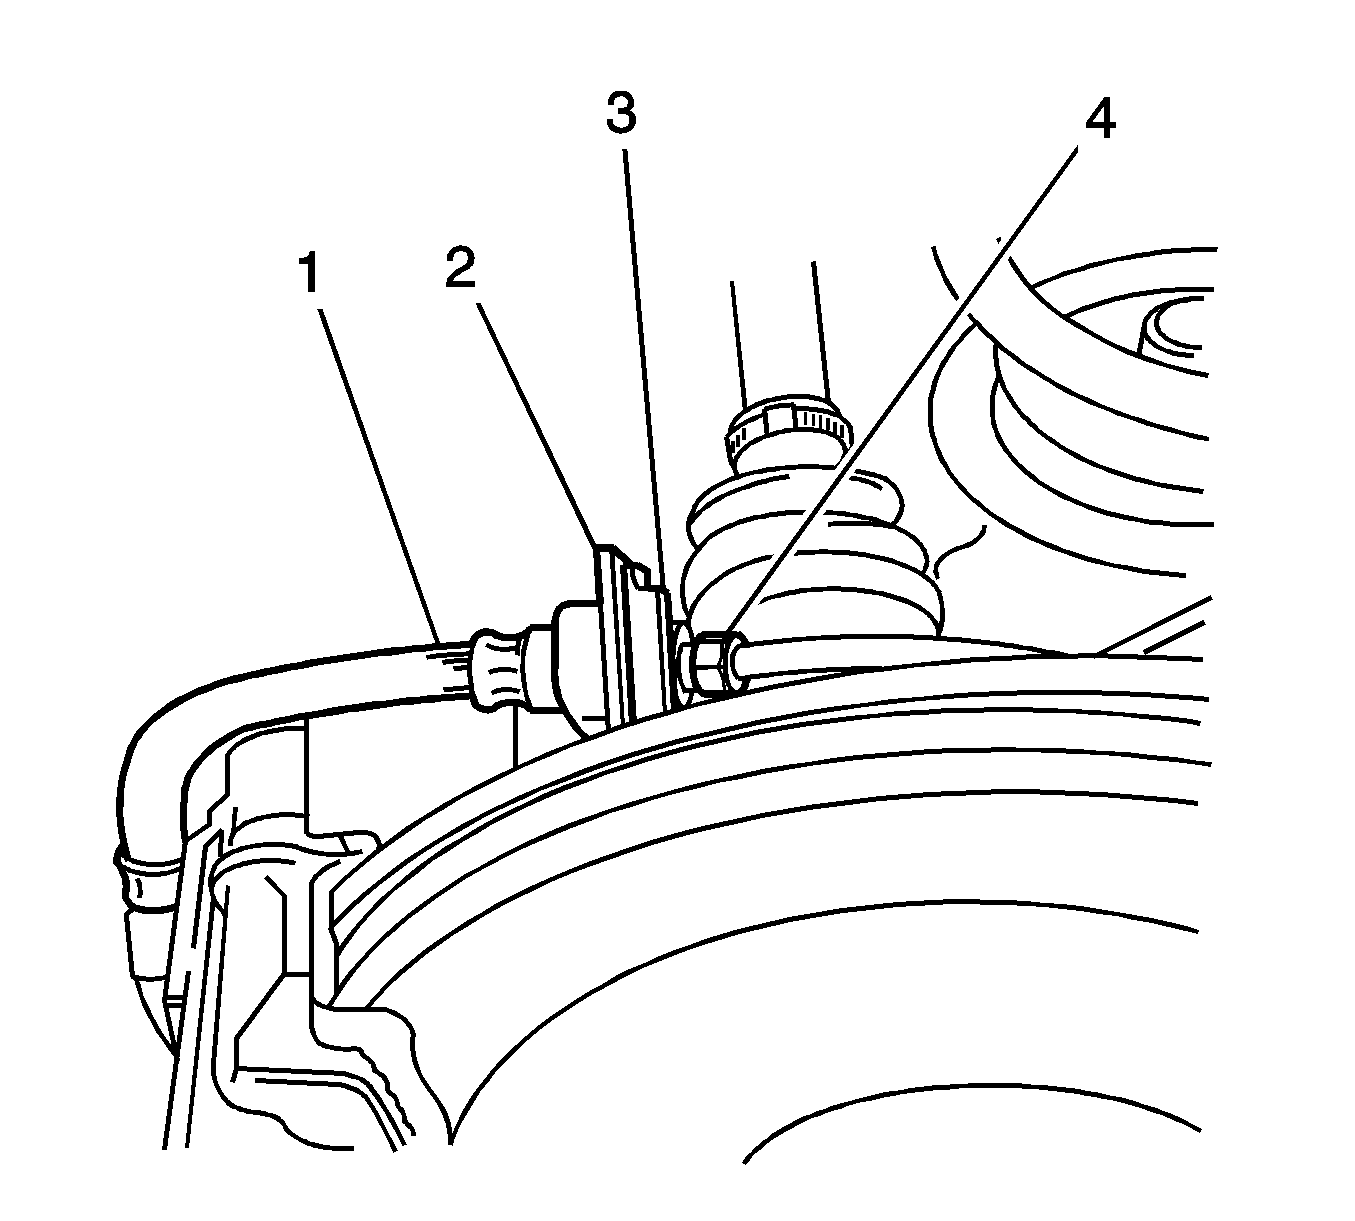
- Remove the brake pipe clip.
- Remove the brake hose from the brake pipe.
- Install a cap or a plug to the fittings in order to prevent brake fluid loss and contamination.
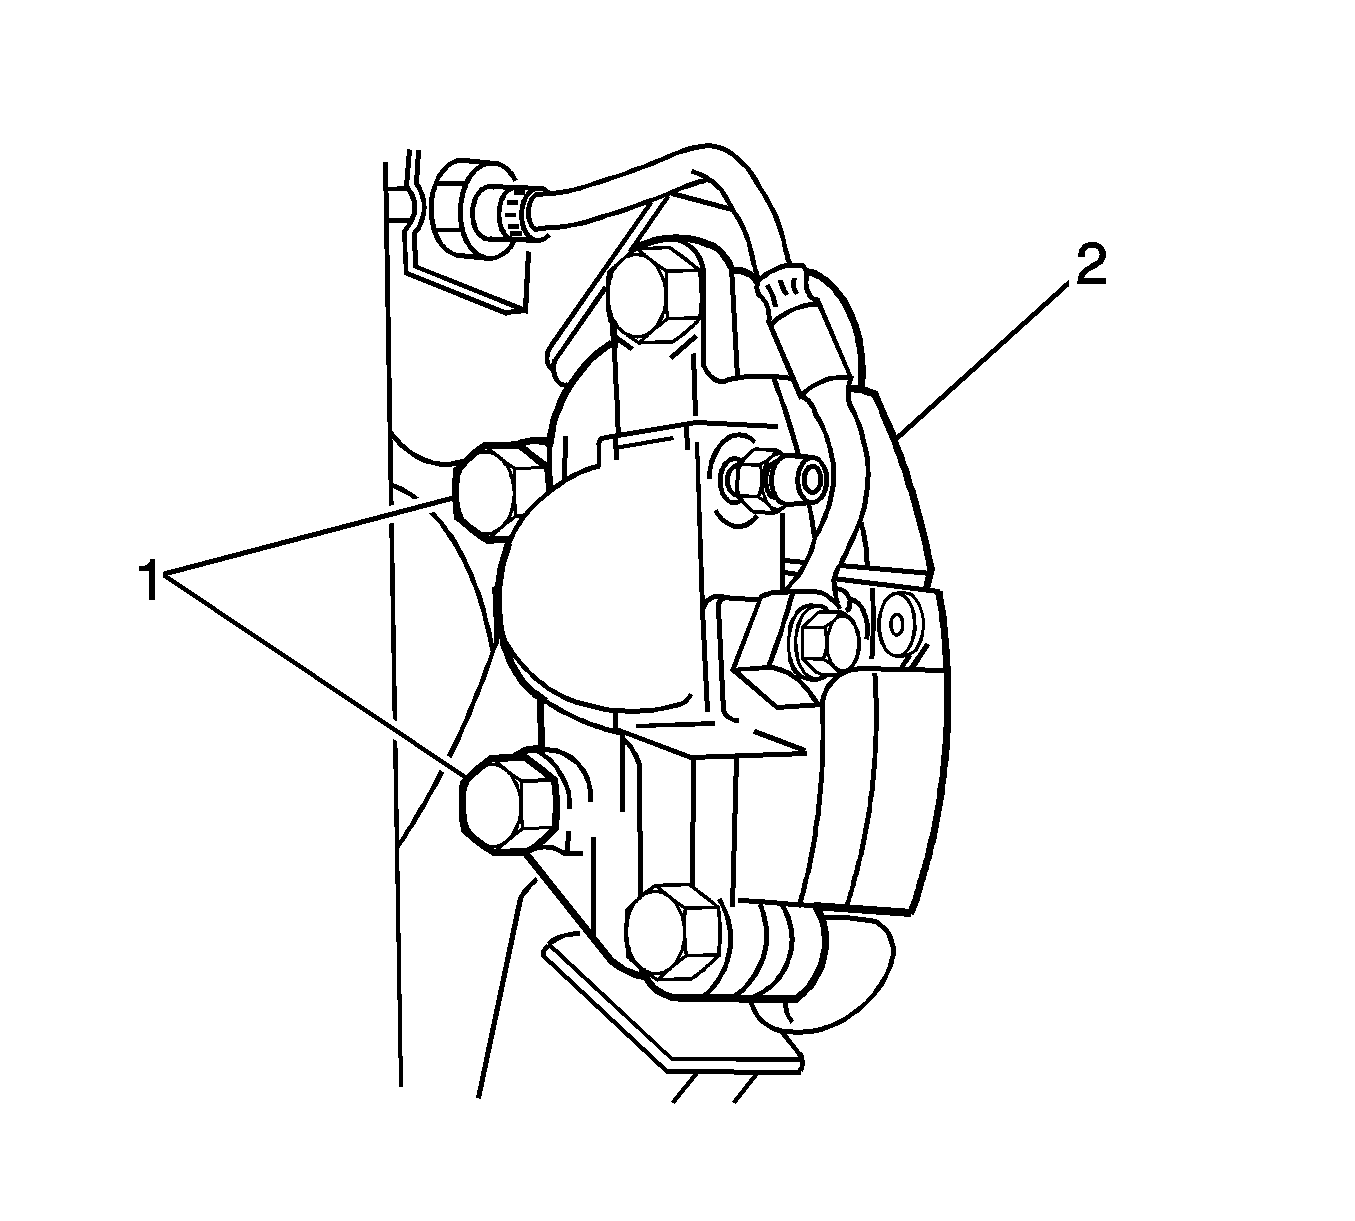
- Remove the 2 bolts (1) from the rear caliper bracket.
- Remove the caliper (2) and the bracket as an assembly from the brake rotor.
- Remove the brake rotor. Refer to Rear Brake Rotor Replacement .
- Remove the park brake shoe. Refer to Parking Brake Shoe Replacement in Park Brake.
- Remove the park brake hardware. Refer to Park Brake Hardware Replacement in Park Brake.
- Remove the rear hub and the wheel bearing. Discard the wheel bearing. Refer to Rear Wheel Bearing and Hub Replacement in Rear Suspension.
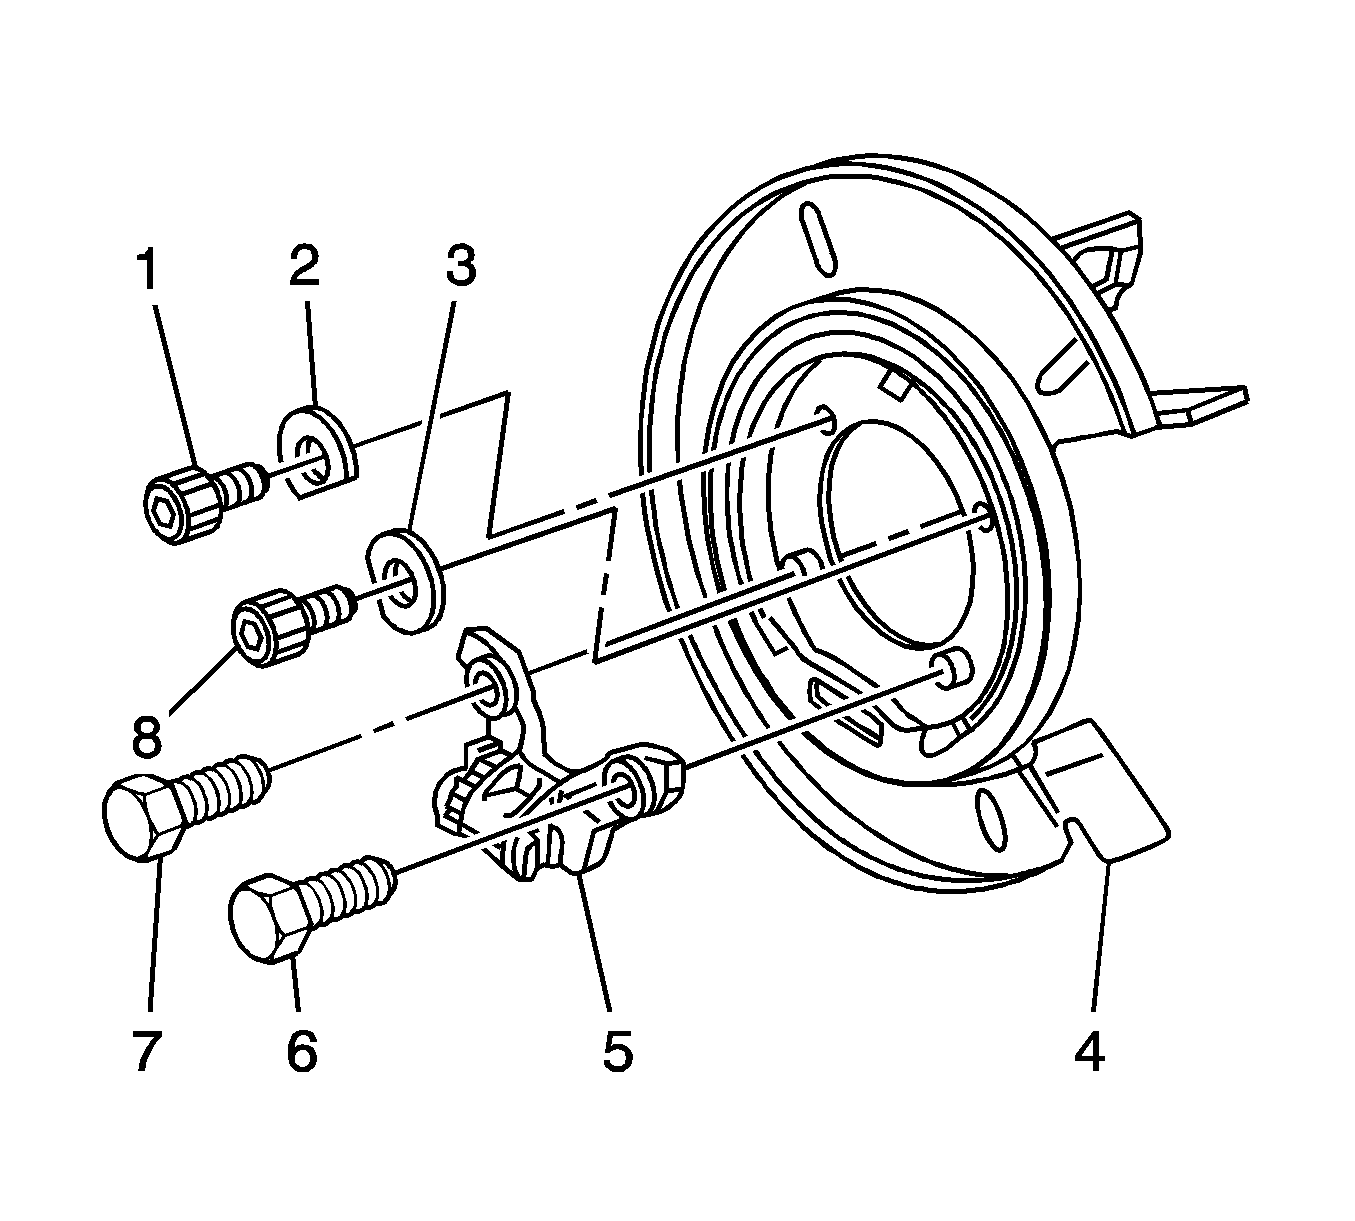
- Remove the 2 bolts (6,7) from the anchor bracket (5).
- Remove the 2 TORX bolts (1,8) and the 2 washers (2,3) from the shield (4).
- Remove the shield and anchor bracket as an assembly from the lower control arm.
- Support the shield on a bench.
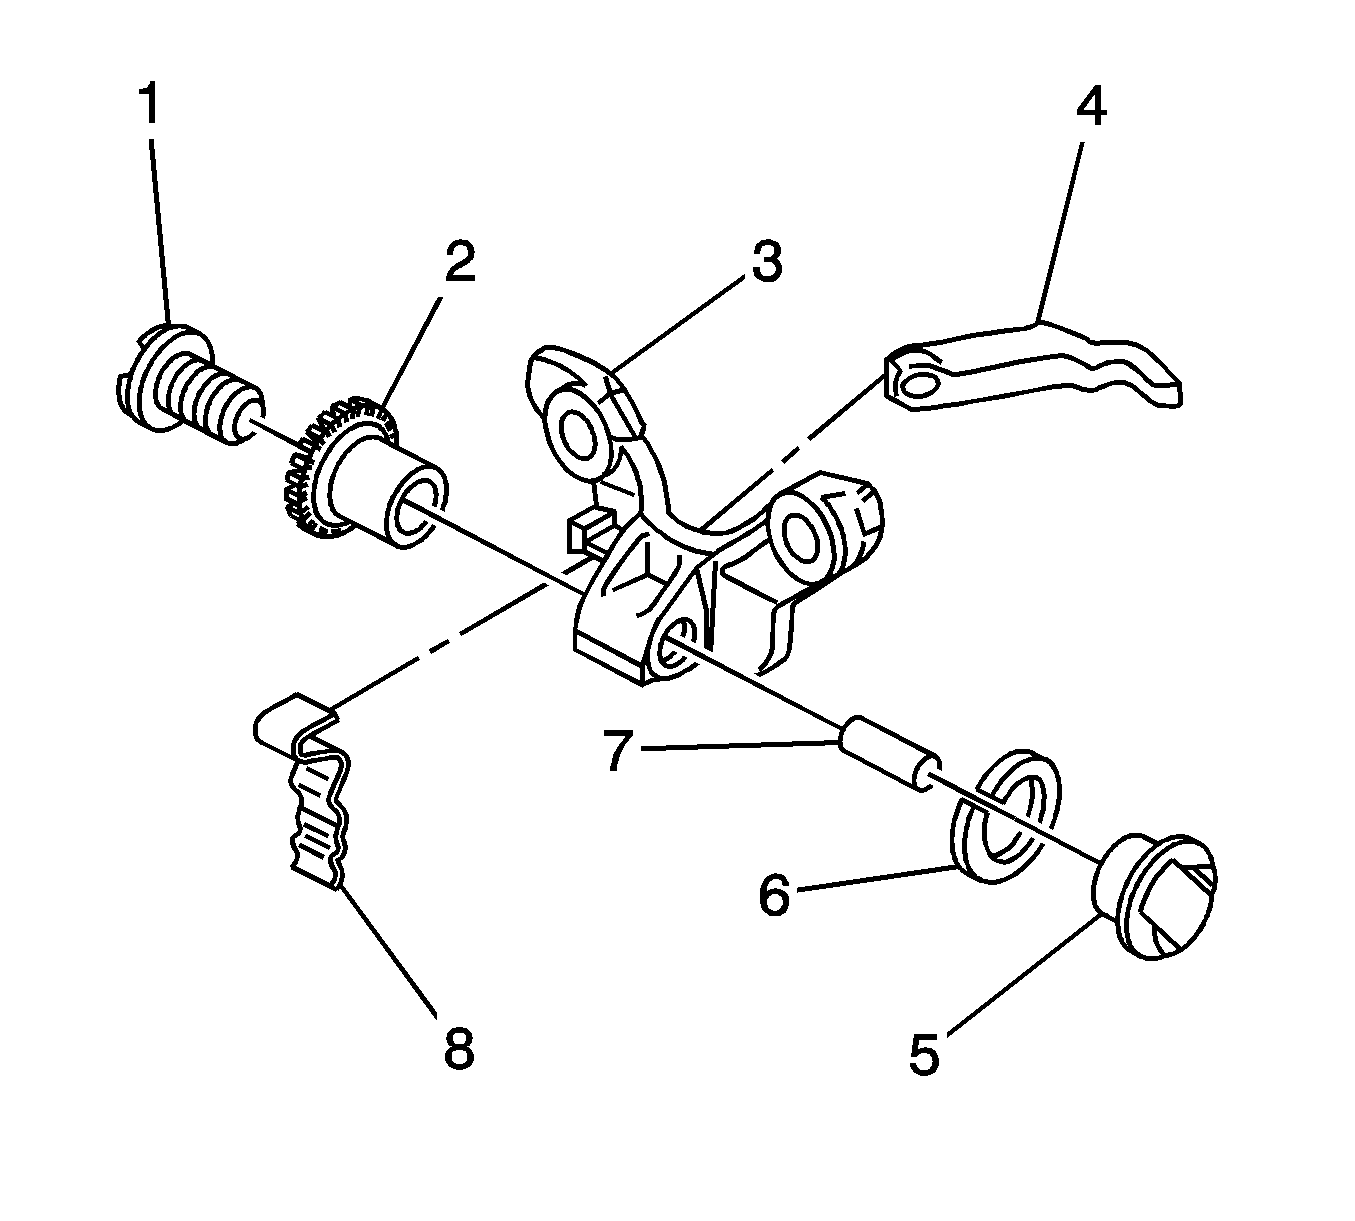
- Remove the shoe actuating lever (4).
- Remove the pawl adjuster (8).
- Carefully remove the anchor bracket (3) from the lower extruded bolt hole sections of the shield.

| • | The rear brake hose (1) |
| • | The shield bracket (2) |
| • | The rear brake pipe clip (3) |
| • | The rear brake pipe (4) |


Installation Procedure
- Lubricate and assemble the park brake hardware (1,2,5,6,7) to the anchor bracket (3). Refer to Park Brake Hardware Replacement in Park Brake.
- Support the brake shield on a bench.
- Install the pawl adjuster (8) to the shield.
- Install the shoe actuating lever (4) to the shield.
- Carefully install the anchor bracket (5) to the lower extruded bolt hole sections of the shield (4).
- Install the shield and the anchor bracket assembly to the lower control arm.
- Install the 2 TORX bolts (1,8) and the 2 washers (2,3) to the shield.
- Install the 2 bolts (6,7) to the anchor bracket.
- Install the hub and a NEW wheel bearing. Refer to Rear Wheel Bearing and Hub Replacement in Rear Suspension.
- Install the park brake shoe and the shoe spring. Refer to Parking Brake Shoe Replacement in Park Brake.
- Install the rear brake rotor. Refer to Rear Brake Rotor Replacement .
- Position the caliper assembly (2) on the rotor.
- Install the 2 bolts (1) to the rear caliper bracket.
- Remove the caps or the plugs from the brake pipe (4) and the brake hose (1).
- Install the brake hose to the shield bracket (2).
- Install the clip (3) in order to retain the brake hose to the bracket.
- Install the brake pipe to the brake hose.
- Install the tire and wheel assembly. Refer to Tire and Wheel Removal and Installation in Tires and Wheels.
- Lower the vehicle.
- Bleed the hydraulic brake system. Refer to Hydraulic Brake System Bleeding .


Notice: Refer to Fastener Notice in the Preface section.
Align the cut edge of the washers with the surface of the hub.
Tighten
Tighten the bolts to 75 N·m (55 lb ft).
Tighten
Tighten the bolts to 88 N·m (65 lb ft).

Tighten
Tighten the bolts to 85 N·m (63 lb ft).

Tighten
Tighten the fitting to 16 N·m (12 lb ft).
