For 1990-2009 cars only
Removal Procedure
- Remove the instrument panel compartment door. Refer to Instrument Panel Compartment Door Replacement .
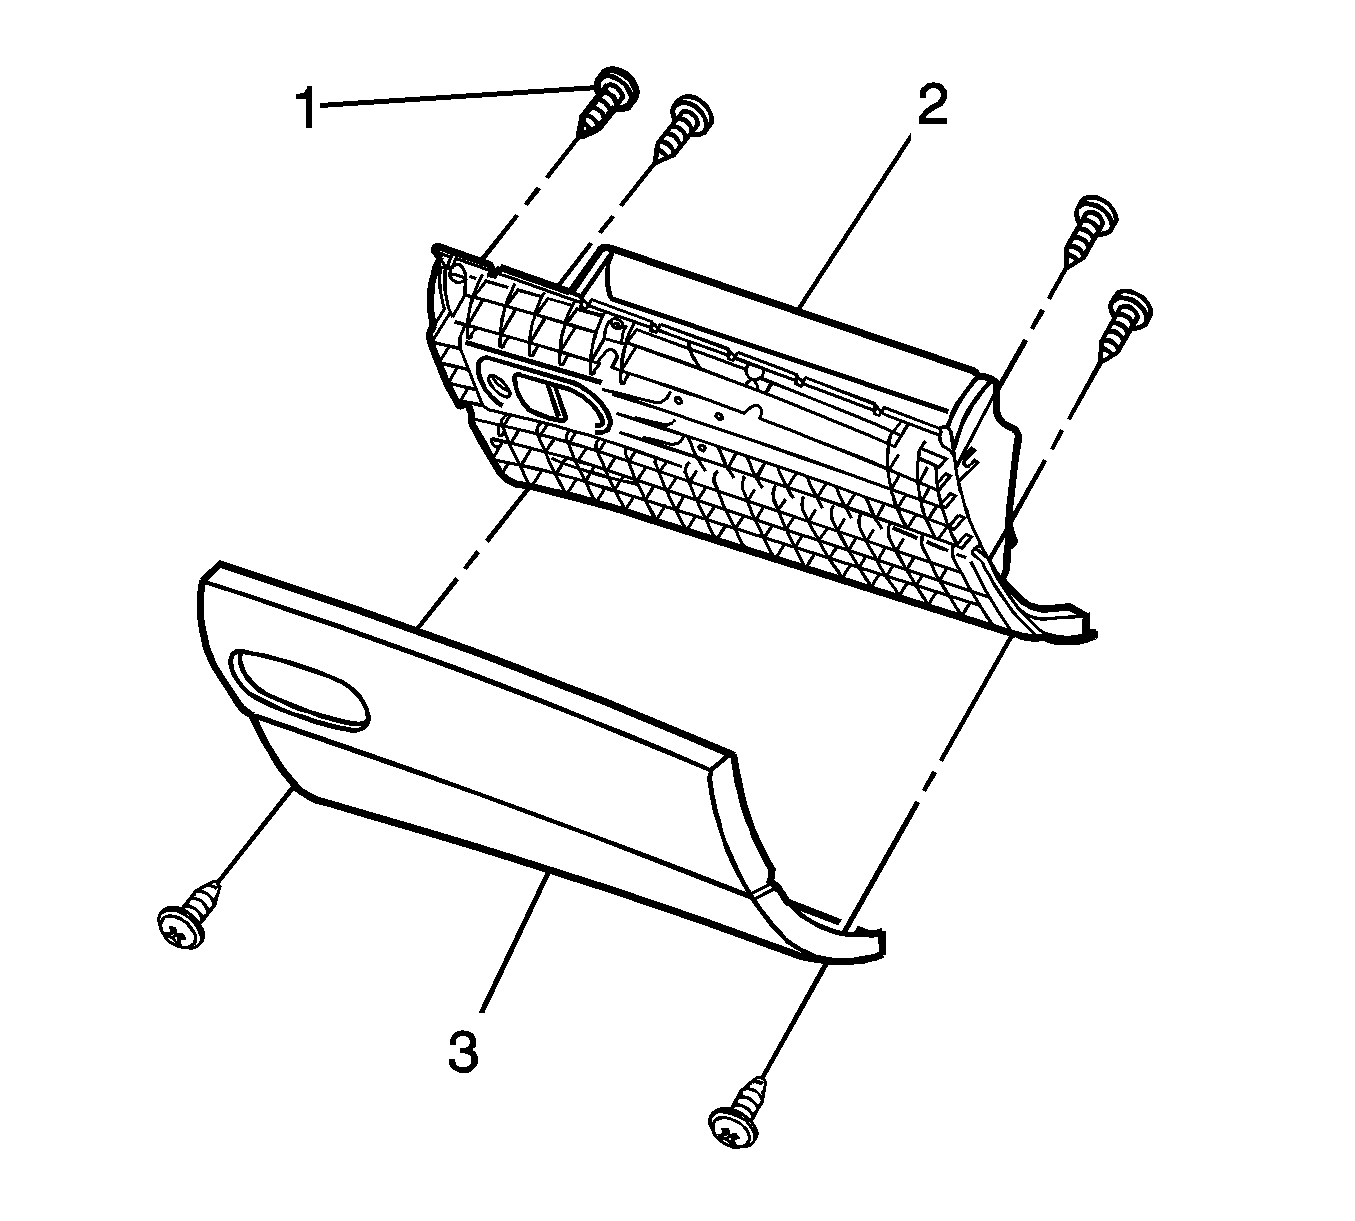
- Remove the 6 screws (1) attaching the instrument panel compartment door trim (3) to the instrument panel compartment door (2).
- Lift up the upper edge of the trim panel (3) from the compartment door (2) and unclip the retaining tabs securing the lower edges of the trim panel (3) and the compartment door (2) together.
- Remove the trim panel (3) from the instrument compartment panel door (2).
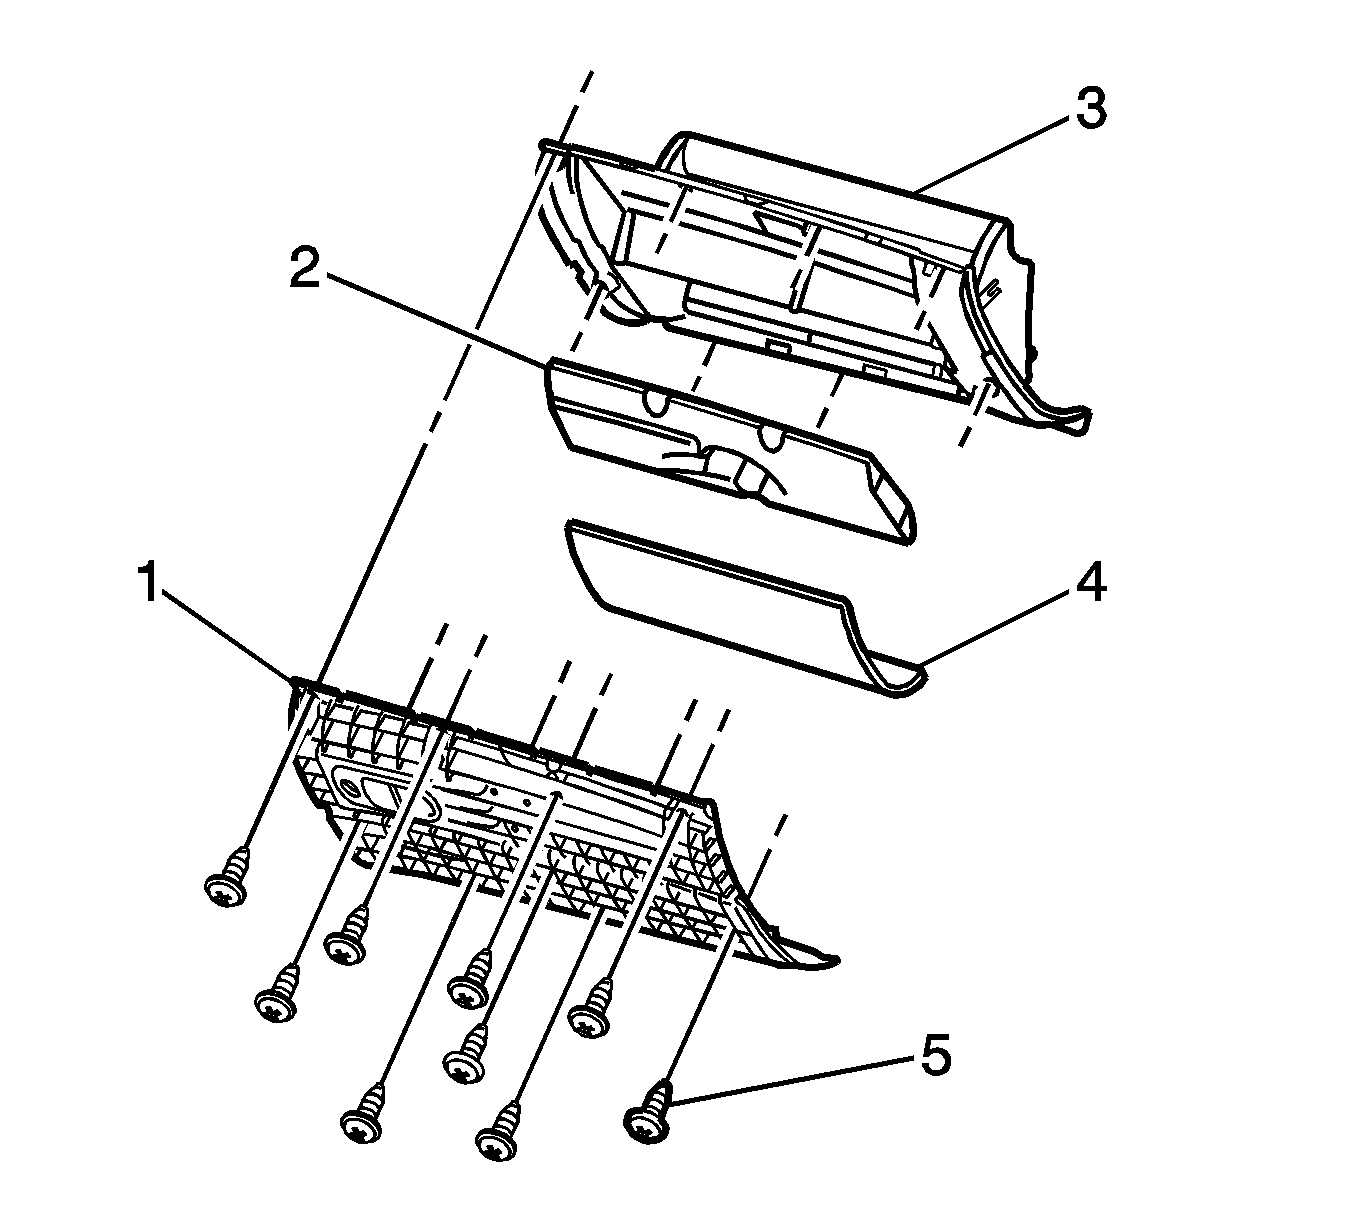
- Remove the nine screws (5) securing the reinforcement (1) to the instrument panel compartment door (3) and remove the reinforcement (1).
- Remove the absorber (2) from the reinforcement (1).
- Remove any remaining absorber material from the reinforcement surface.
- Remove the liner (4) from the reinforcement (1).
- Remove any remaining liner material from the reinforcement surface.
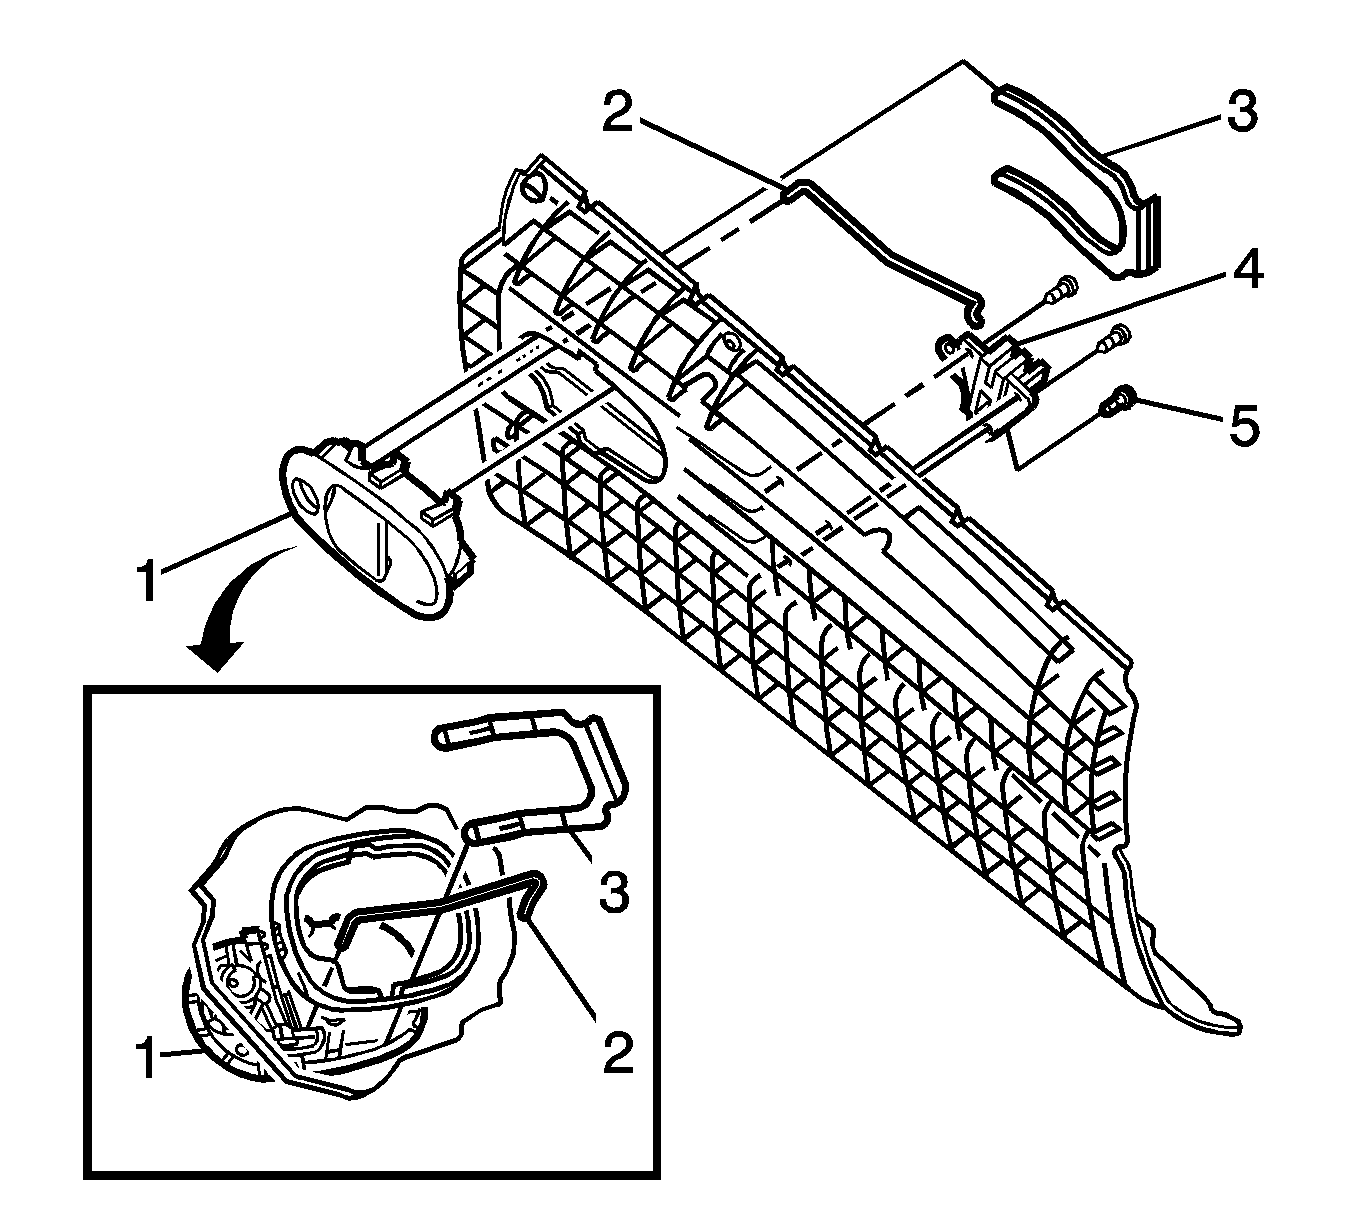
- Unclip the instrument panel compartment latch rod (2) from the instrument panel compartment door handle (1).
- Depress the two tabs on the retainer (3) and slide the retainer (3) from the instrument panel compartment door handle (1).
- Remove the instrument panel compartment door handle (1) from the reinforcement.
- Remove the lock cylinder from the compartment door handle (1), if necessary. Refer to Instrument Panel Compartment Door Lock Cylinder Replacement .


Important: The absorber (2) and the liner (4) are adhered to the reinforcement (1). If either are removed a new item will have to be fitted as damage will occur during the removal process.

Installation Procedure
- Install the lock cylinder to the compartment door handle, if removed. Refer to Instrument Panel Compartment Door Lock Cylinder Replacement .
- Install the instrument panel compartment door handle (1) to the reinforcement.
- Install the retainer (3) to the back of the instrument compartment door handle (1).
- Install the instrument panel compartment latch rod (2) to the instrument panel compartment latch handle (1).
- Clean the surface of the reinforcement (1) to remove all residual liner material and adhesive.
- Remove protective film from the new liner (4) and adhere the liner (4) to the reinforcement (1).
- Clean the surface of the reinforcement (1) to remove all residual absorber material and adhesive.
- Remove protective film from the new absorber (2) and adhere the liner (2) to the reinforcement (1).
- Install the reinforcement (1) to the instrument panel compartment door (3).
- Install the 9 screws (5) securing the reinforcement (1) to the instrument panel compartment door (3).
- Install the trim panel (3) to the instrument panel compartment door (2), making sure the retaining tabs that fasten the trim panel (3) to the instrument panel compartment door (2) are engaged.
- Install the 6 screws (1) attaching the trim panel (3) to the instrument panel compartment door (2).
- Install the instrument panel compartment door. Refer to Instrument Panel Compartment Door Replacement .


Notice: Refer to Fastener Notice in the Preface section.
Tighten
Tighten the 9 screws to 2 N·m (18 lb in).

Tighten
Tighten the 6 screws to 2 N·m (18 lb in).
