Removal Procedure
- Raise the hood.
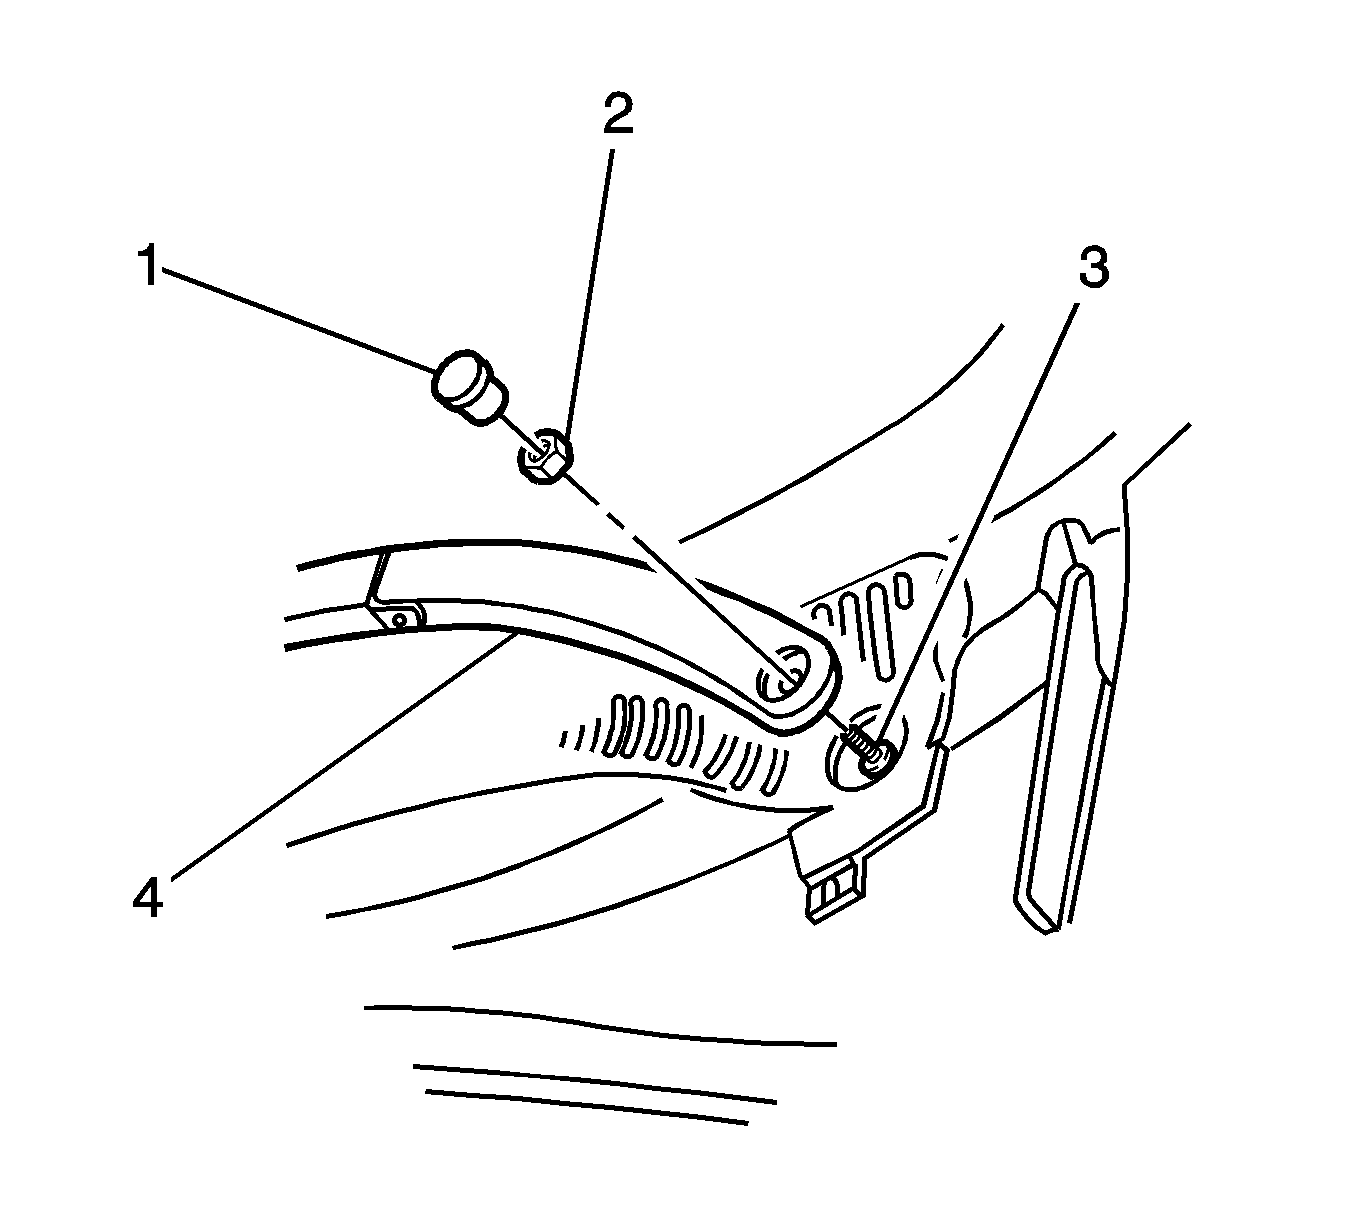
- Using a flat-bladed tool, gently pry the cap (1) from the front wiper arm (4).
- Remove the nut (2) securing the front wiper arm to the drive spindle (3).
- Remove the wiper arm (4) from the drive spindle (3), taking care not to allow the wiper arm (4) to contact the rear edge of the hood.
- Remove the wiper blade assembly from the wiper arm, if required. Refer to Windshield Wiper Blade Replacement .

Installation Procedure
- Install the wiper blade assembly to the wiper arm, if removed. Refer to Windshield Wiper Blade Replacement .
- Ensure the wiper motor linkages are in the parked position.
- Install the wiper arm assembly (2) onto the drive spindle (1).
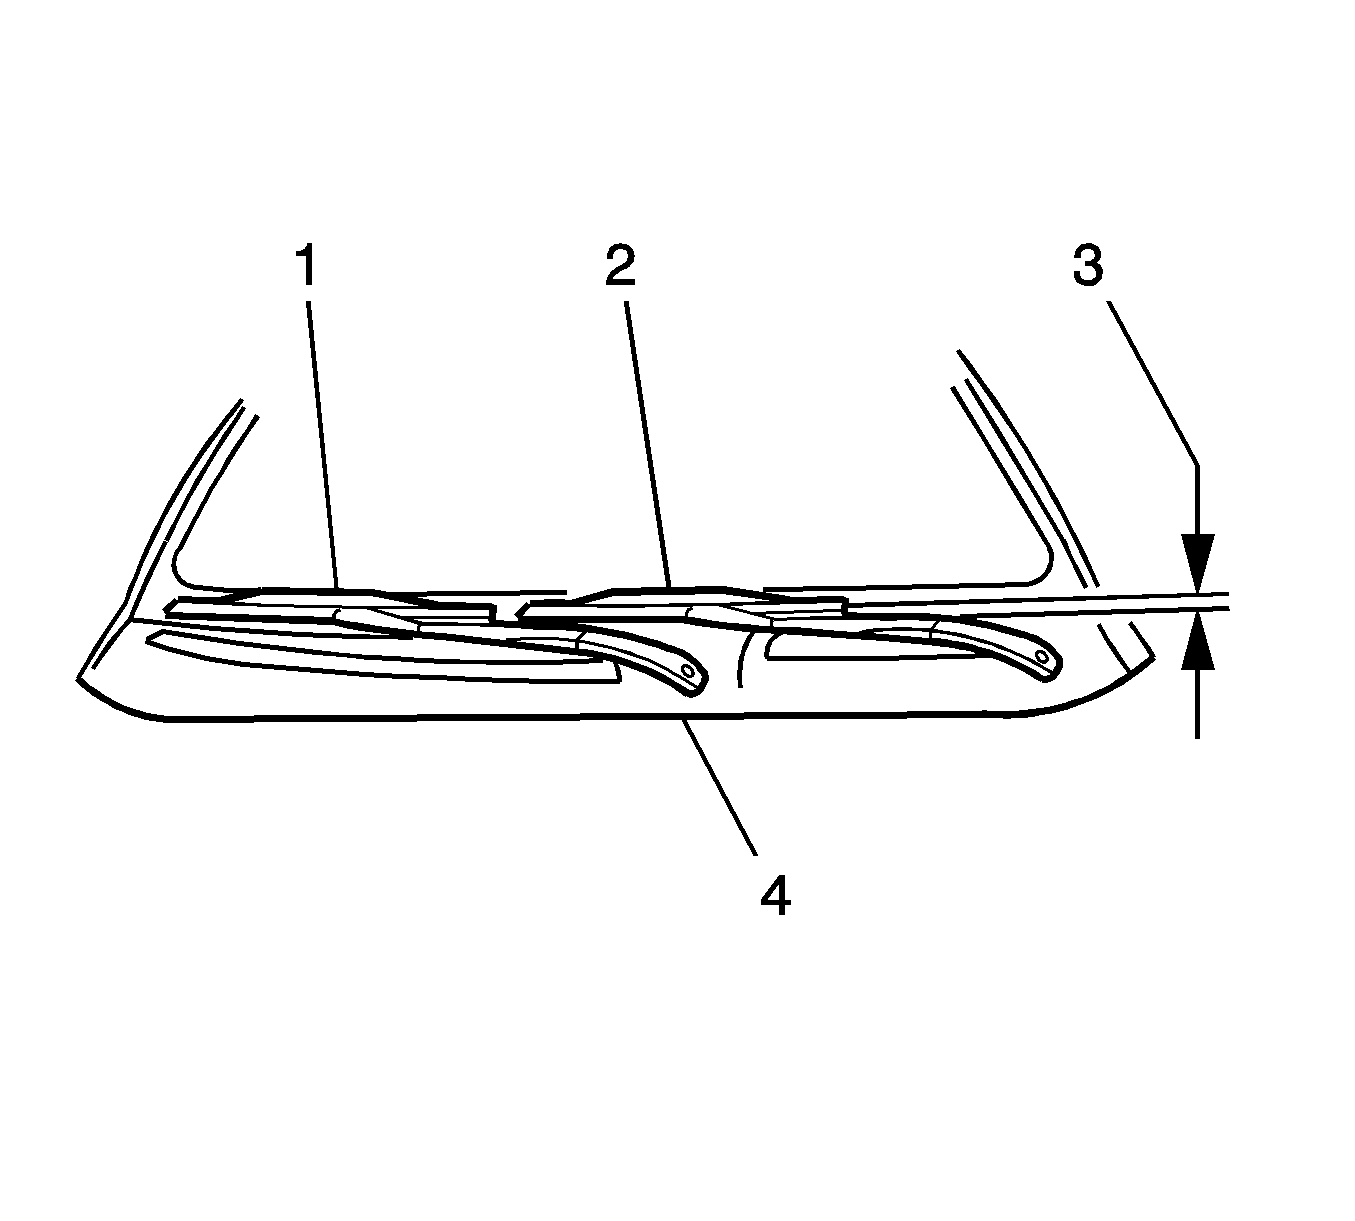
- Hold the measuring device at a 90 degree angle to the wiper blade while maintaining the following distances:
- Install the wiper arm nut (2) to the drive spindle (3).
- Install the wiper arm nut cover (1).
- Lower the hood.
- Operate the windshield wipers and inspect for proper operation.

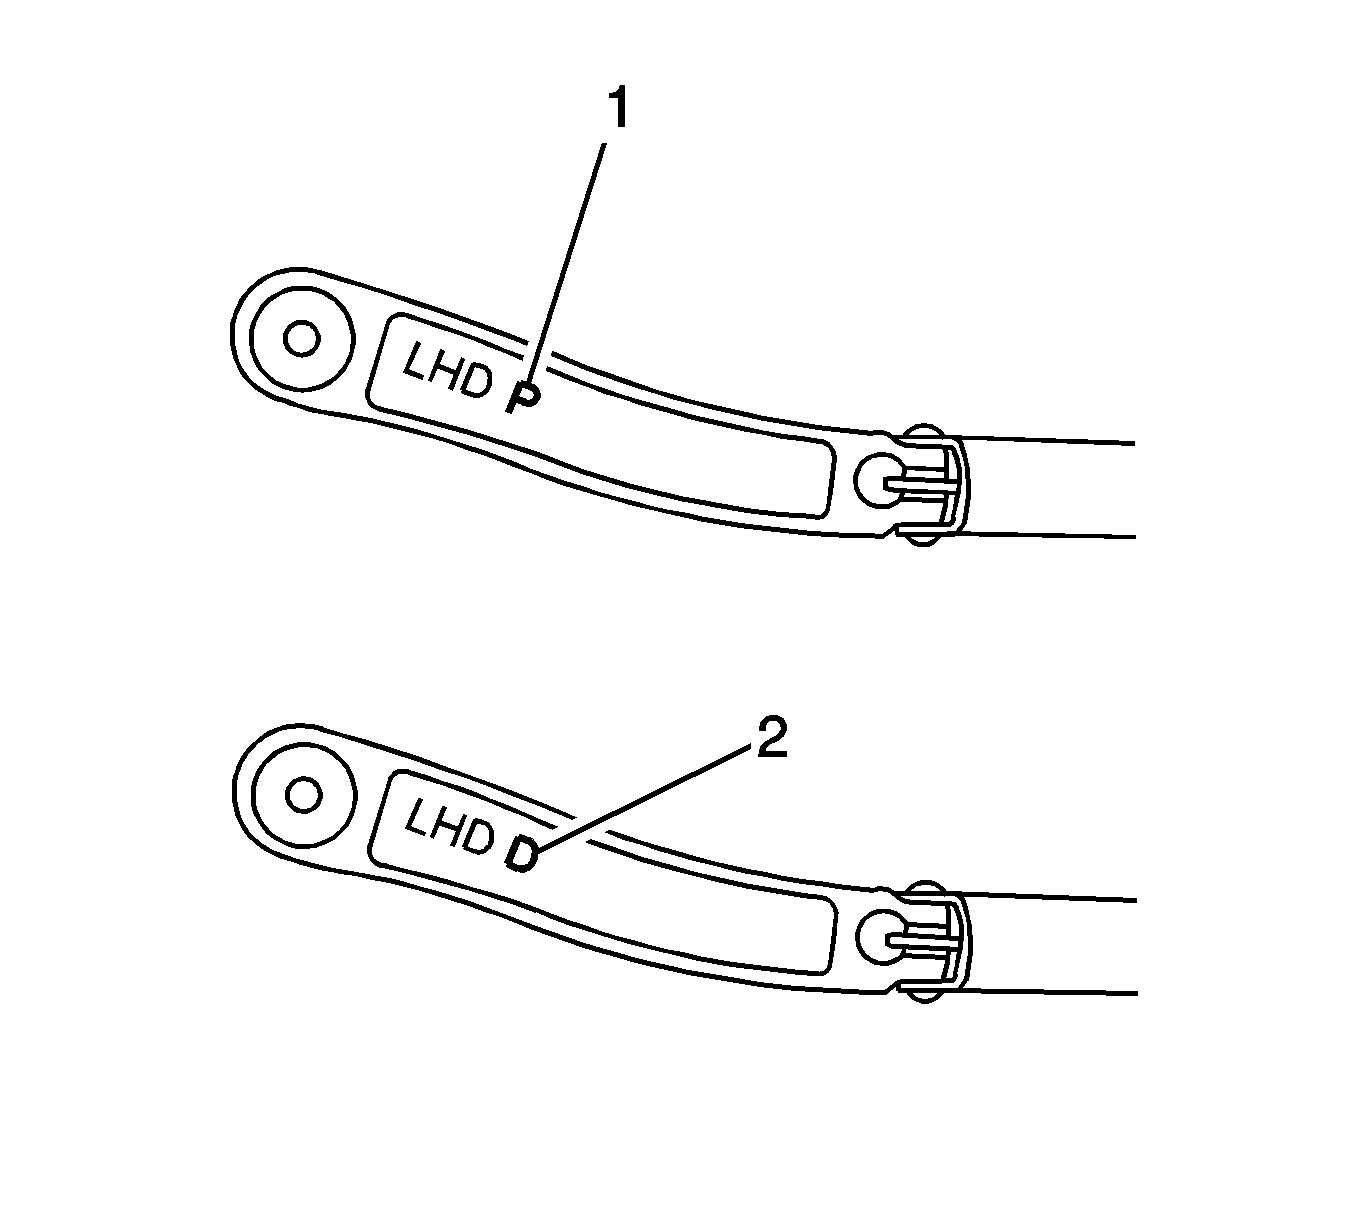
Important: There is a specific wiper arm for each side of the vehicle. The arms are identified by the letters LHD D for the drivers side (2), and letters LHD P for the passengers side (1), located on the underside of the arm.

| • | Install the right arm so that the blade is positioned with the tip: 30-40 mm (1.18-1.57 in) (3) above the edge of the air inlet screen (4). |
| • | Install the left arm so that the blade is positioned with the tip: 30-40 mm (1.18-1.57 in) (3) above the edge of the air inlet screen (4). |

Notice: Use the correct fastener in the correct location. Replacement fasteners must be the correct part number for that application. Fasteners requiring replacement or fasteners requiring the use of thread locking compound or sealant are identified in the service procedure. Do not use paints, lubricants, or corrosion inhibitors on fasteners or fastener joint surfaces unless specified. These coatings affect fastener torque and joint clamping force and may damage the fastener. Use the correct tightening sequence and specifications when installing fasteners in order to avoid damage to parts and systems.
Tighten
Tighten the nut to 22 N·m (16 lb ft).
