For 1990-2009 cars only
Tools Required
J 45059 Angle Meter
Removal Procedure
- Raise and support the vehicle. Refer to Lifting and Jacking the Vehicle .
- Remove the front tire and wheel assembly. Refer to Tire and Wheel Removal and Installation .
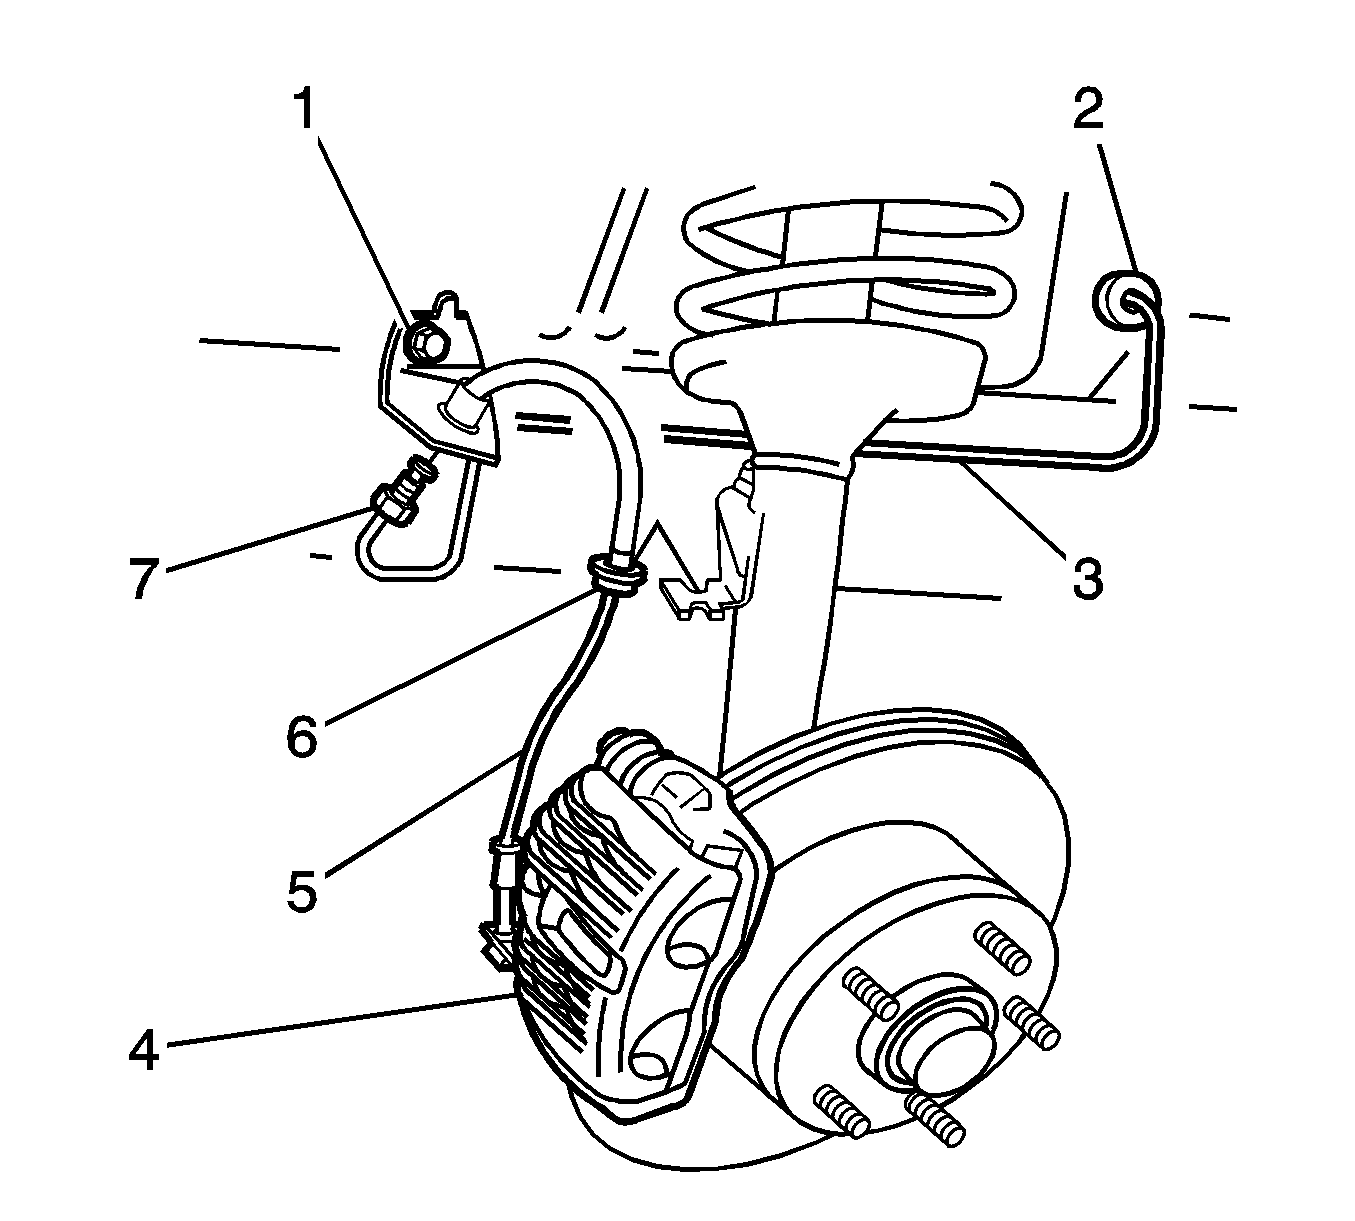
- Clean the brake hose (5) and the fittings.
- Loosen and disconnect the brake pipe flare nut (7).
- Install a cap or a plug to the brake pipe in order to prevent brake fluid loss and contamination.
- Remove the screw (1) from the brake hose bracket.
- Remove the hose and the grommet (6) from the strut.
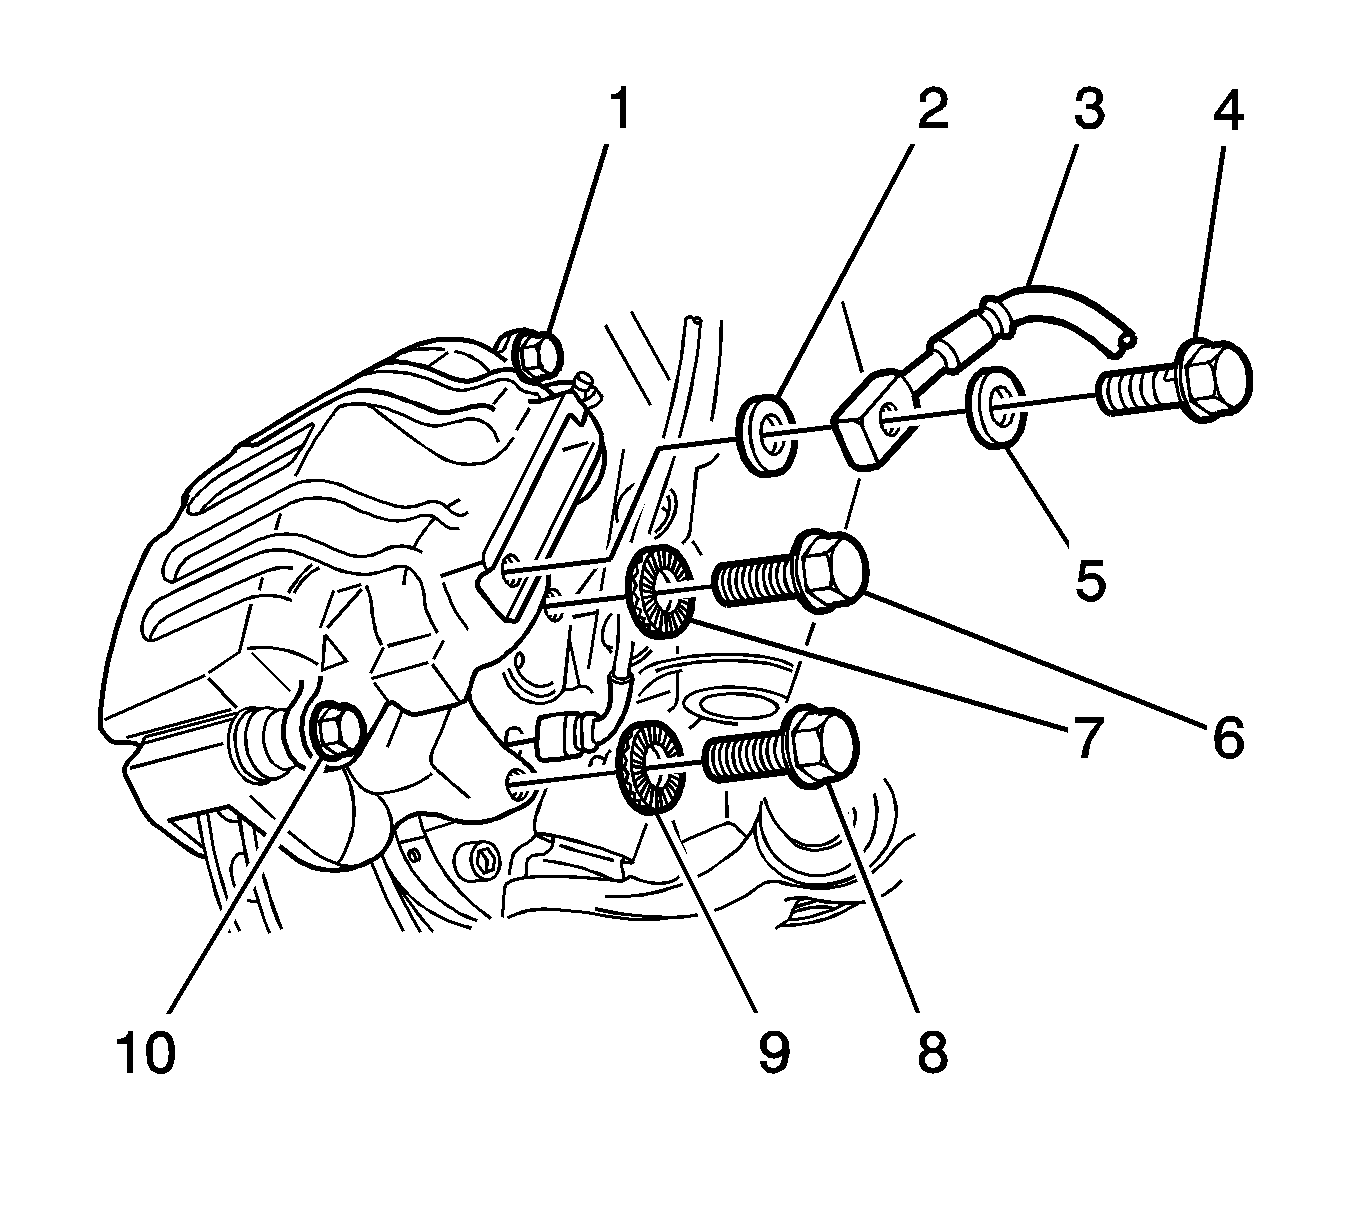
- Remove the fitting (4).
- Remove the brake hose (3).
- Remove and discard the 2 brake hose gaskets (2,5).
- Install a cap or a plug to the caliper in order to prevent brake fluid loss and contamination.

Caution: Refer to Brake Fluid Irritant Caution in the Preface section.
Notice: Refer to Brake Fluid Effects on Paint and Electrical Components Notice in the Preface section.

Installation Procedure
- Ensure the brake hose and the caliper mating surfaces are clean and free from burrs.
- Remove the cap or the plug from the caliper.
- Install the following components to the caliper:
- Tighten the fitting.
- Tighten the fitting to 13 N·m (115 lb in).
- Use the J 45059 in order to tighten the fitting an additional 90 degrees.
- Install the brake hose (5) and the grommet (6) to the bracket on the strut.
- Install the brake hose bracket and the screw (1).
- Remove the cap or the plug from the brake pipe.
- Install the brake pipe to the brake hose.
- Tighten the brake pipe flare nut (7).
- Verify the brake hose is not twisted.
- Bleed the hydraulic brake system at the front caliper bleeder valve. Refer to Hydraulic Brake System Bleeding .
- Install the front tire and wheel assembly. Refer to Tire and Wheel Removal and Installation .
- Lower the vehicle.

| • | 2 NEW brake hose gaskets (2,5) |
| • | The fitting (4) |
| • | The brake hose (3) |
Notice: Refer to Fastener Notice in the Preface section.
Tighten

Tighten
Tighten the flare nut to 16 N·m (12 lb ft).
