Tools Required
J 45400 Strut Spring Compressor
Removal Procedure
- Remove the strut assembly from the vehicle. Refer to Strut Assembly Replacement .
- Use the J 45400 , or equivalent, in order to compress the spring.
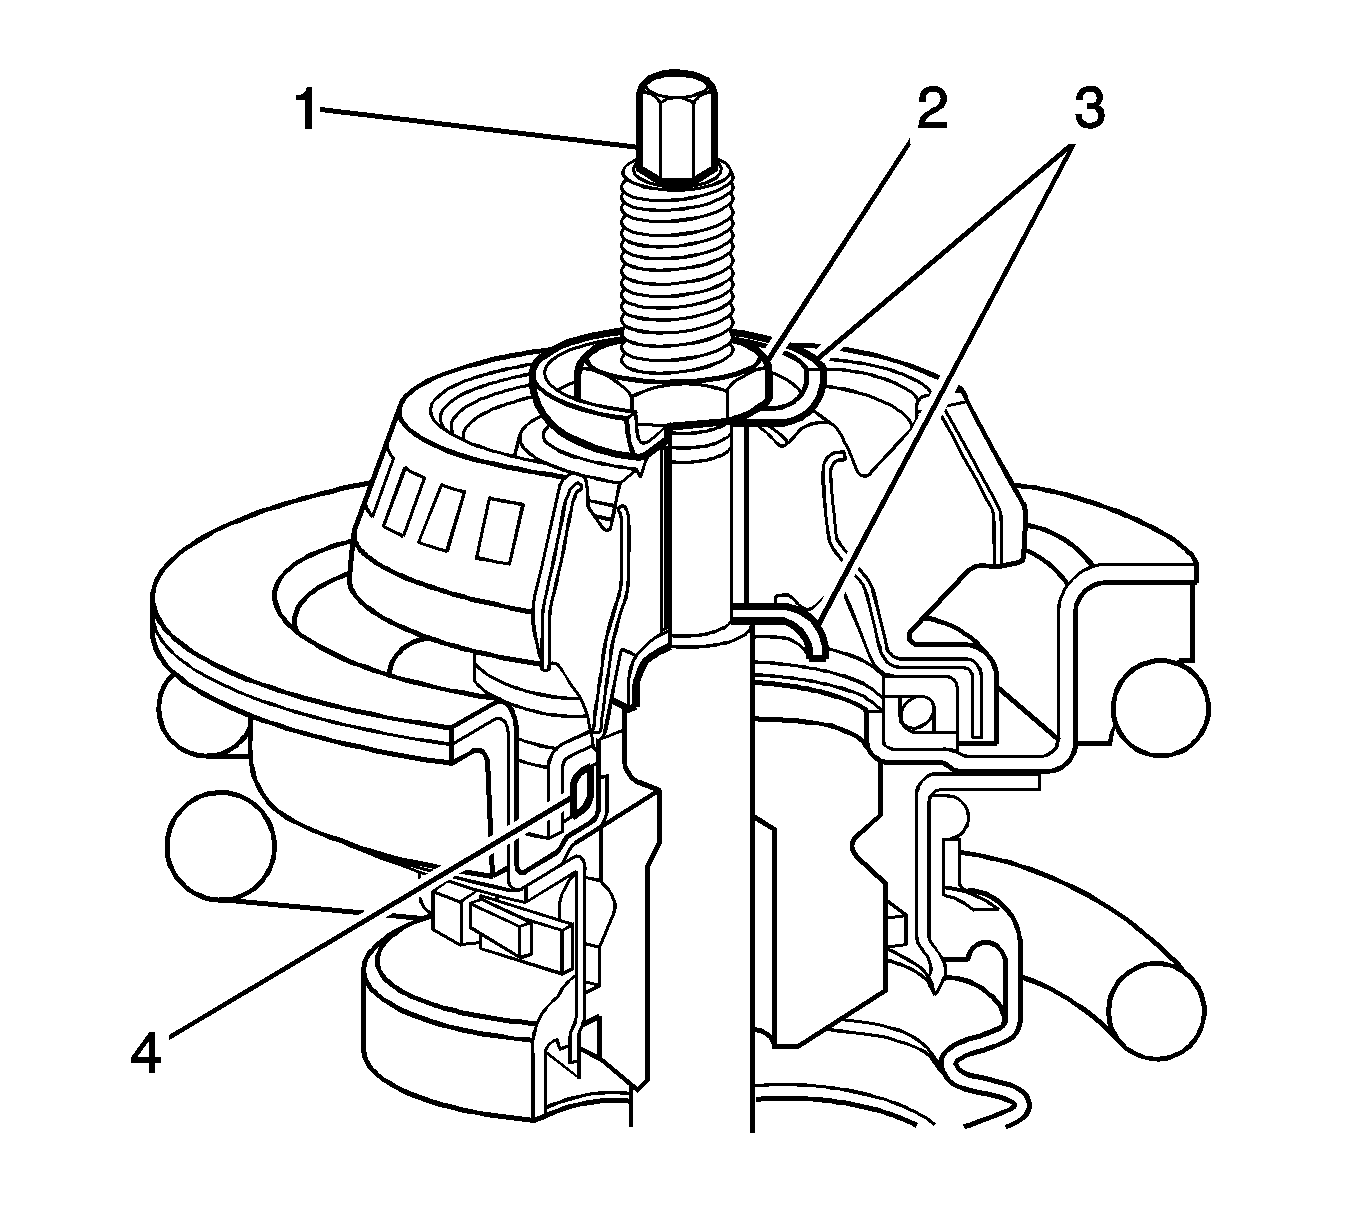
- Use a wrench in order to hold the end of the strut rod shaft (1).
- Remove the strut mount nut (2).
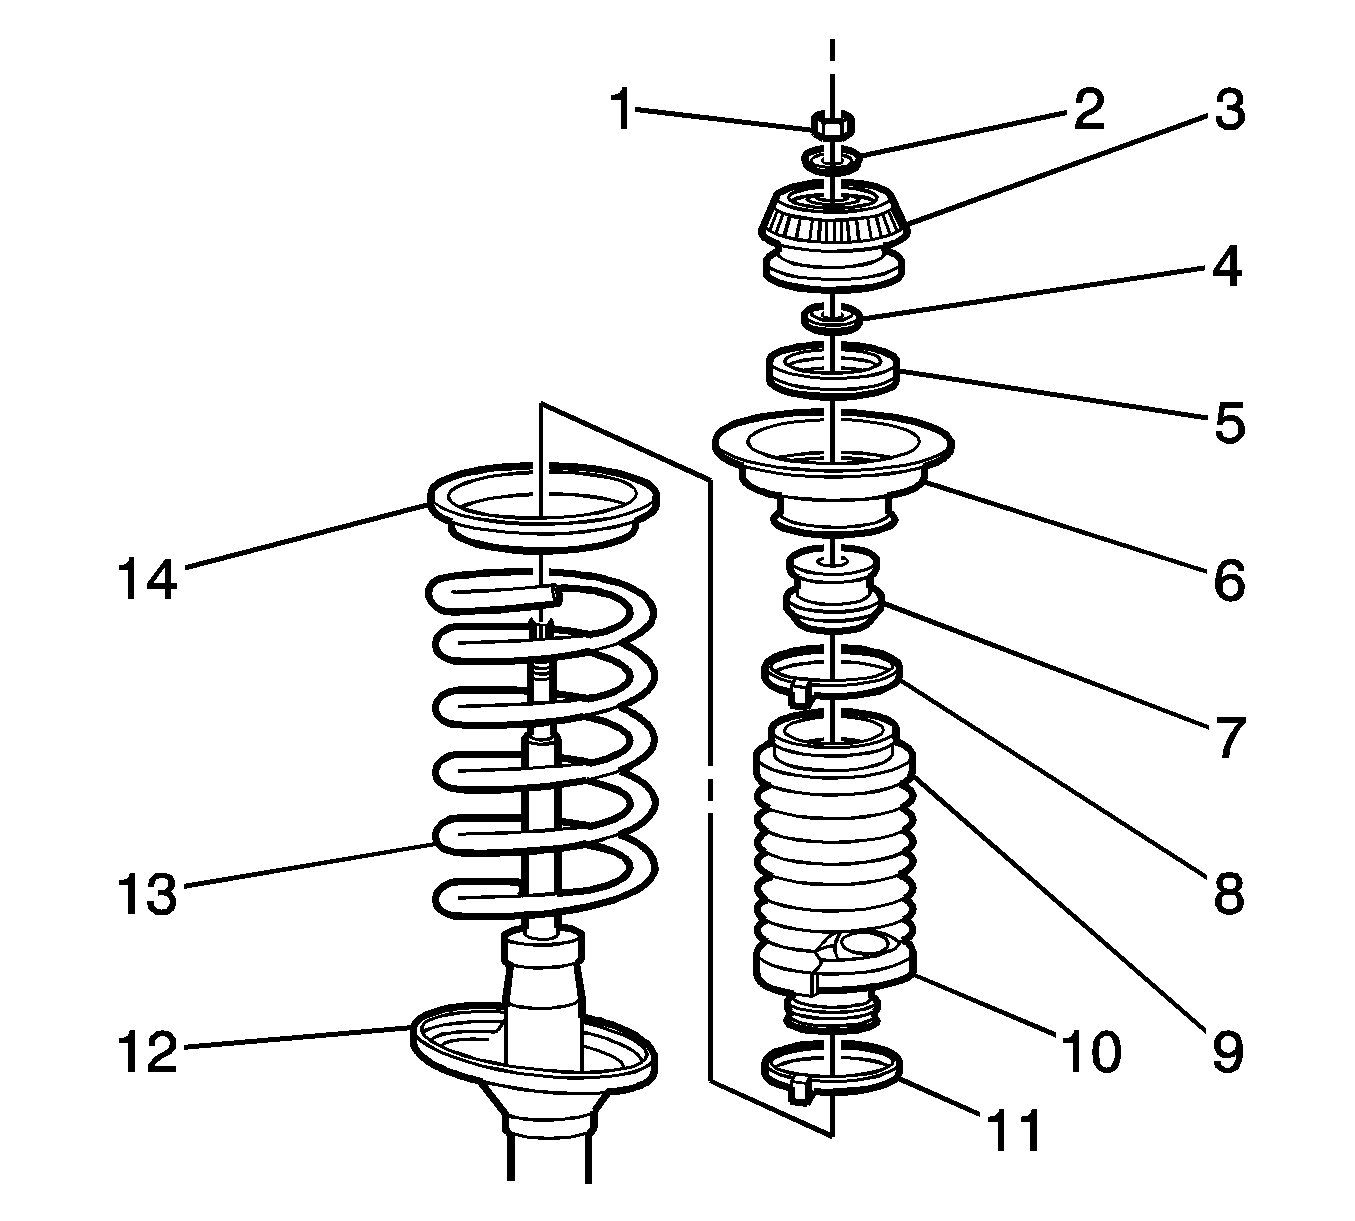
- Remove the strut mount and the 2 washers (3).
- Remove the 2 washers from the strut mount.
- Remove the strut bearing (4) from the upper spring seat.
- Remove and discard the strut shield strap (8).
- Remove the upper spring seat (6).
- Remove the spring upper insulator (14).
- Remove the strut bumper (7).
- Use the J 45400 , or equivalent, in order to release the compression on the spring.
- Remove the spring (13).
- Remove and discard the strut shield clamp (11).
- Remove the strut dust shield (9) and filter (10) assembly from the strut.

Important: Do not grip the strut rod with any tools below the hex shaped portion.
Important: Note the orientation of the strut bearing on the upper spring seat. The orientation of the strut bearing is important in the installation procedure.

Installation Procedure
- Hold the strut rod and the strut housing.
- Pull the strut rod to the maximum length.
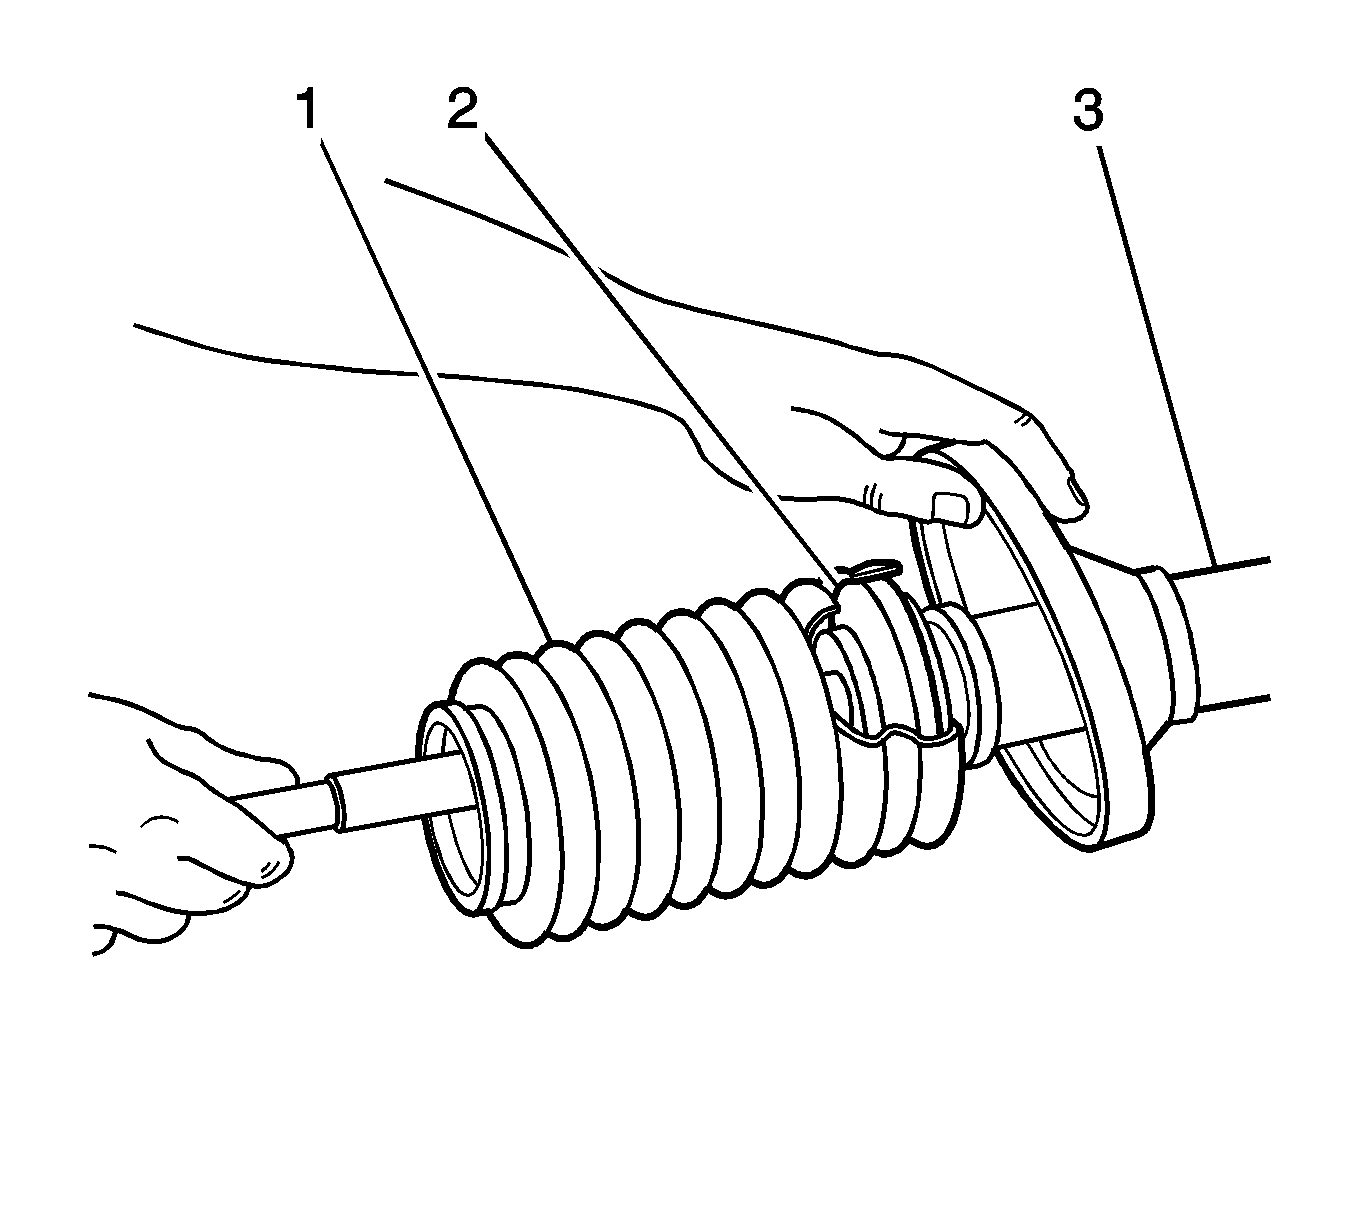
- Install the strut dust shield (1) assembly.
- Ensure the filter (2) remains seated inside the boot portion of the strut dust shield.
- Position the strut dust shield on the strut housing tube.
- Install a NEW clamp in order to retain the strut dust shield to the strut housing tube.
- Install the spring (13) to the strut housing (12).
- Use the J 45400 , or equivalent, in order to compress the spring.
- Install the strut bumper (7).
- Install the spring upper insulator (14).
- Install the upper spring seat (6).
- Pull the strut rod to the maximum length.
- If the strut rod nut is on the strut rod, remove the strut rod nut.
- Install the strut bearing (4) to the upper spring seat in the same orientation as in the removal procedure.
- Install the lower washer.
- Install the strut mount.
- Install the upper washer.
- Install the strut mount nut (2).
- Install the strut dust shield to the upper spring seat.
- Install a NEW strap in order to retain the strut dust shield to the upper spring seat.
- Remove the strut assembly from the J 45400 , or equivalent.
- Install the strut assembly to the vehicle. Refer to Strut Assembly Replacement .
Important: Do not grip the strut rod with any tools below the hex shaped portion.


Specification
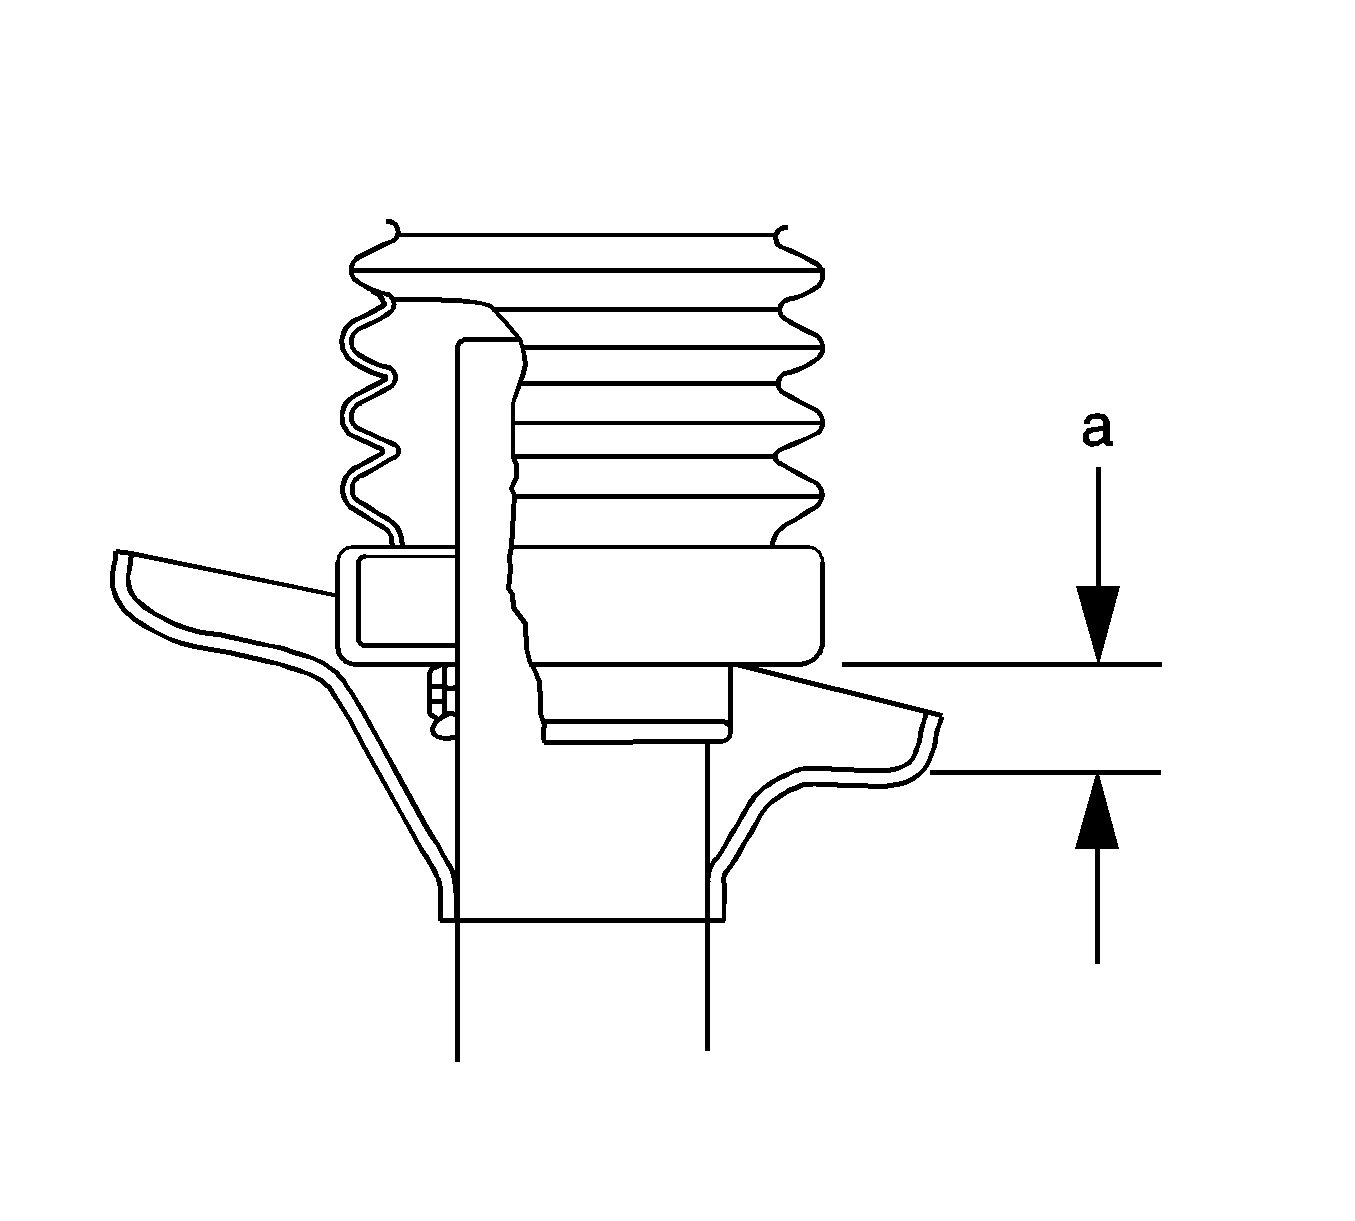
The distance (a) between the bottom of the strut dust shield and the
bottom of the lower spring seat is 30 mm to 35 mm.

Install the straight projecting lower end of the spring to the lower spring seat.
Install the step on the upper insulator to the straight projecting upper end of the spring.
Ensure the double notch in the upper flange of the upper spring seat is on the inboard side of the strut assembly.

Ensure the narrow outer section faces towards the upper spring seat collar.
Ensure the dish shape side of the lower washer faces downward.
Ensure the lower washer does not bind with the lower edge of the mount.
Ensure the dish shape side of the upper washer faces upward.
Notice: Refer to Fastener Notice in the Preface section.
Use a wrench in order to hold the end of the strut rod shaft (1).
Tighten
Tighten the nut to 78 N·m (58 lb ft).
Fit the upper end of the strut dust shield over the lower flange of the spring seat collar.
