For 1990-2009 cars only
Removal Procedure
- Remove the knee bolster panel. Refer to Driver Knee Bolster Replacement .
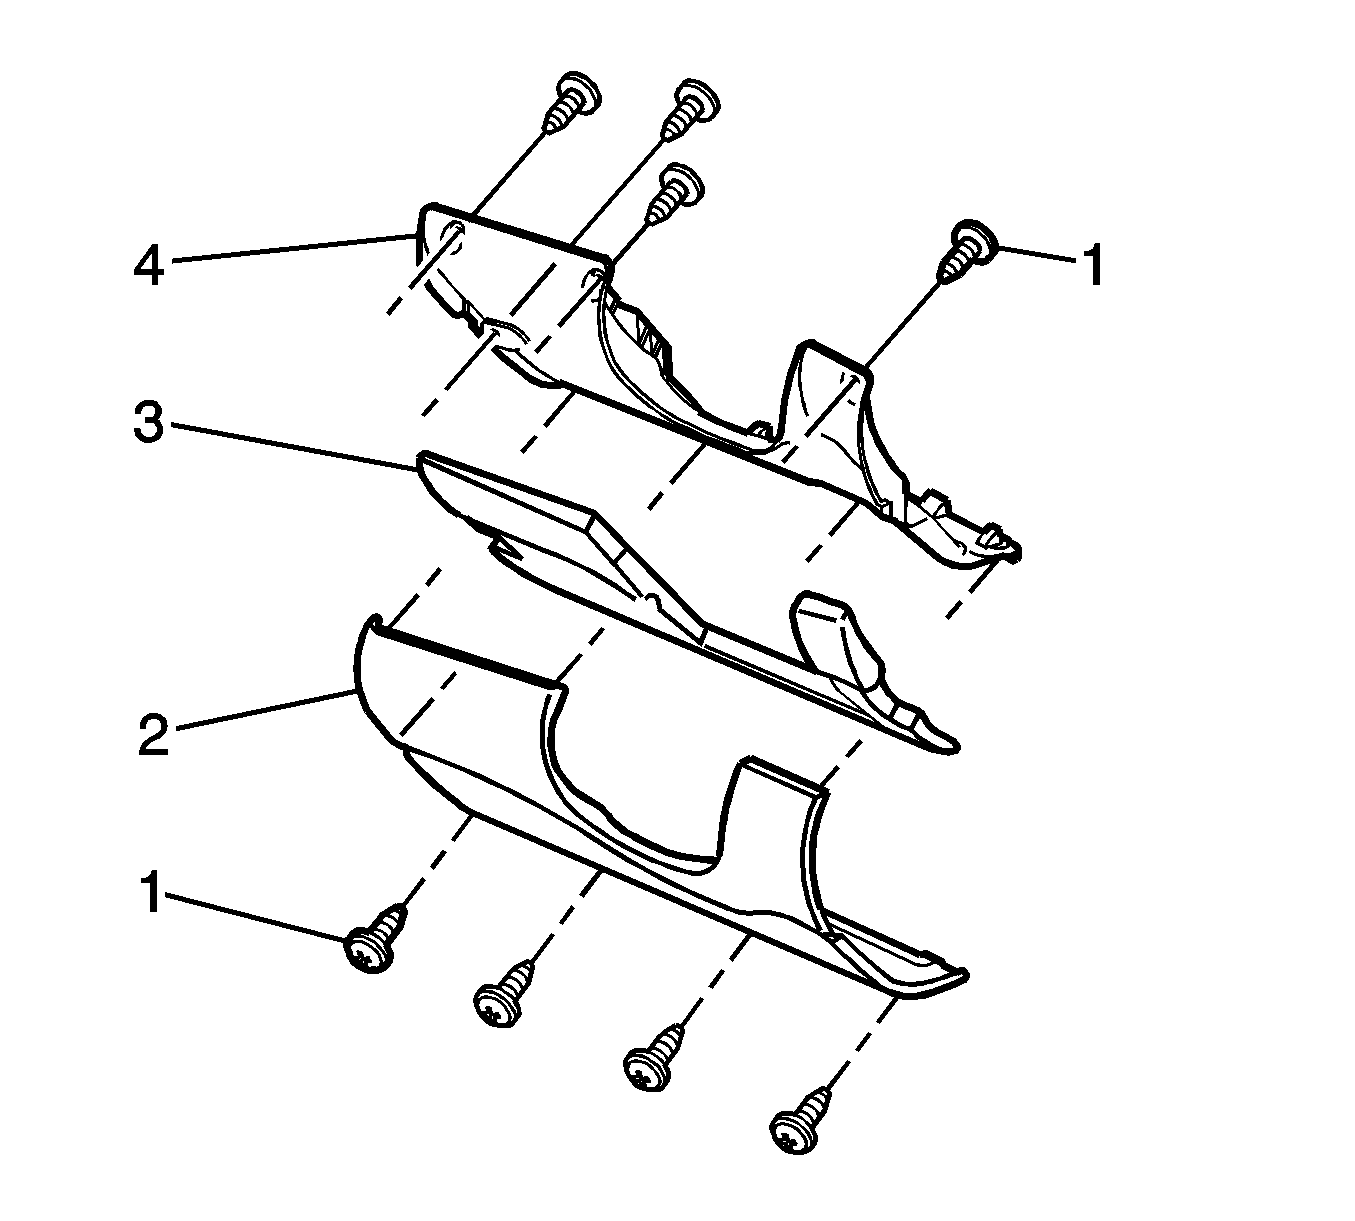
- Remove the eight screws (1) securing the knee bolster reinforcement (4) to the knee bolster outer panel (2).
- Starting at the top of the reinforcement (4) and the outer panel (2), pull them apart enough to disengage the three tabs along the hinge line that secure the two panels together.
- Separate the reinforcement (4) and the outer panel (2).
- Remove the absorber (3) from the knee bolster reinforcement (4), if necessary.
- Remove any remaining absorber material from the knee bolster reinforcement inner surface.

Important: The absorber (3) is adhered to the knee bolster reinforcement (4). If the absorber (3) is removed a new one will have to be fitted as damage will occur during the removal process.

Installation Procedure
- Clean the inner surface of the knee bolster reinforcement (4), to remove all absorber material and adhesive, if the absorber (3) has been removed
- Remove the protective film from the new absorber (3) and adhere to the knee bolster reinforcement inner (4).
- Install the knee bolster outer panel (2) to the knee bolster reinforcement (4), make sure that the three tabs along the hinge line that secure the two panels together are engaged.
- Install the reinforcement (1) to the instrument panel compartment door (3).
- Install the 8 screws (1) securing the knee bolster reinforcement (4) to the knee bolster outer panel (2).
- Install the knee bolster panel assembly. Refer to Driver Knee Bolster Replacement .

Notice: Refer to Fastener Notice in the Preface section.
Tighten
Tighten the 8 screws to 9 N·m (7 lb ft).
