For 1990-2009 cars only
Removal Procedure
- Remove the instrument panel compartment/ashtray. Refer to Ashtray Replacement .
- Remove the left knee bolster trim panel, if necessary. Refer to Driver Knee Bolster Replacement .
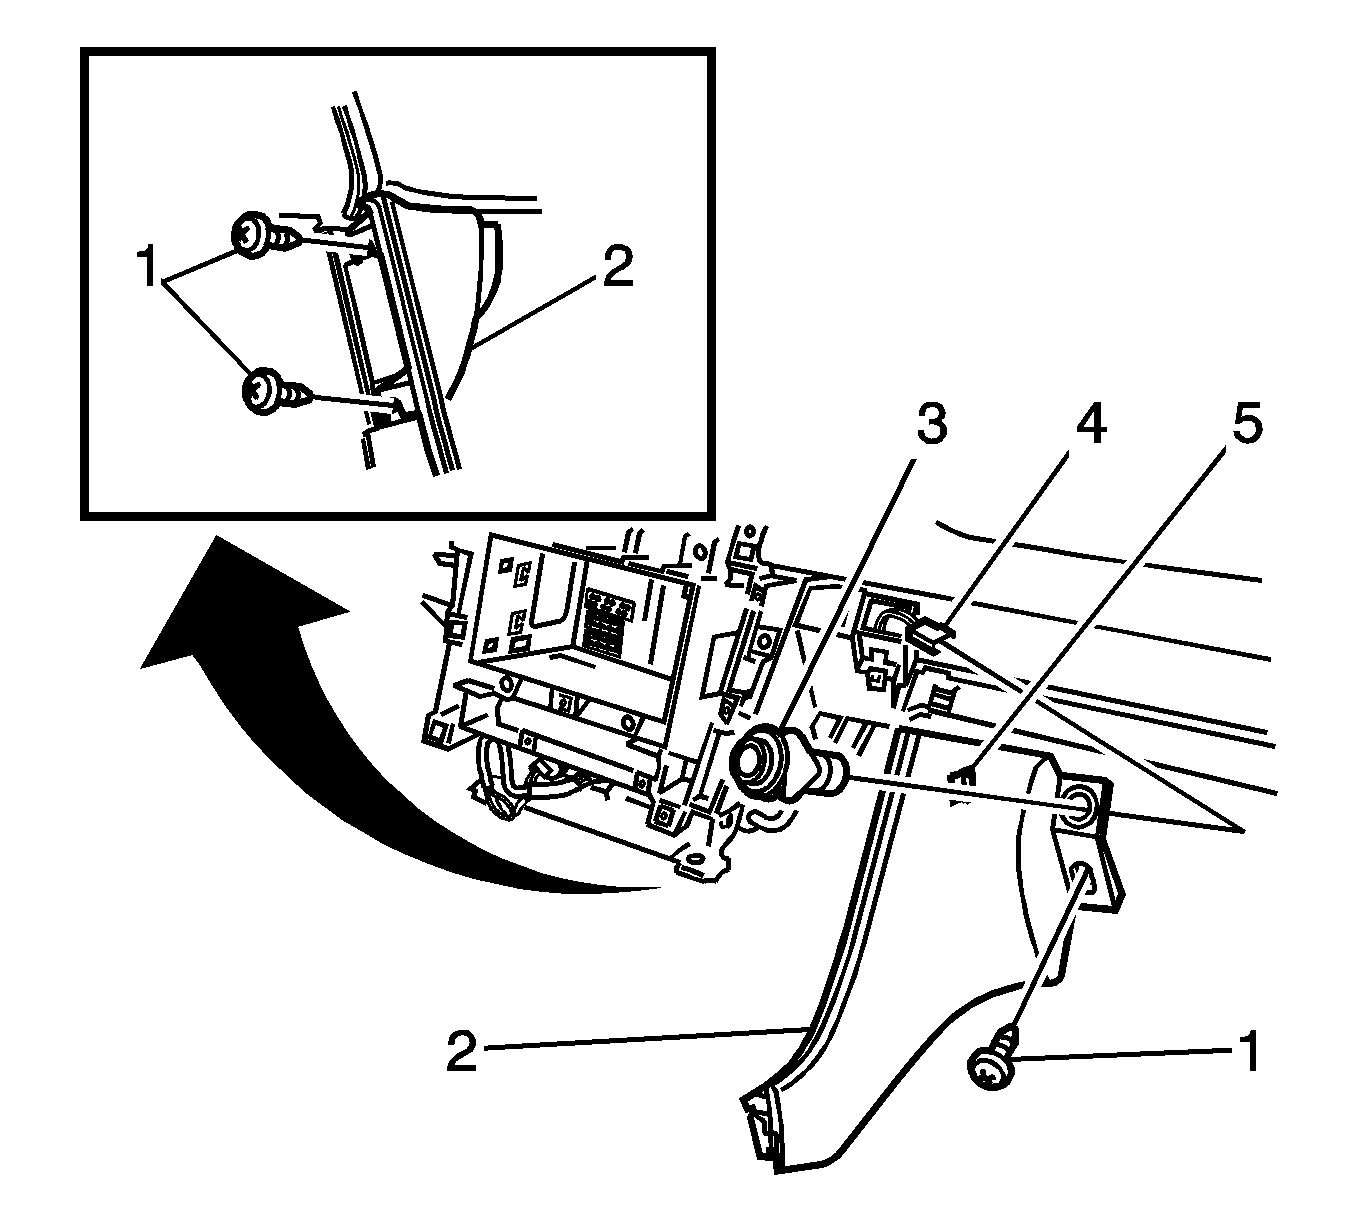
- Remove the three screws (1) attaching the instrument panel lower extension (2) to the instrument panel.
- Remove the screw attaching the floor console front duct, if necessary.
- Grip the top of the lower extension (2) and pull rearwards to release the retaining clip (5).
- Disconnect the wiring connector (4) from the rear compartment release switch (3).
- Remove the rear compartment release switch (3). Refer to Rear Compartment Lid Switch Replacement in Body Rear End.

Installation Procedure
- Install the rear compartment release switch (3). Refer to Rear Compartment Lid Switch Replacement in Body Rear End.
- Connect the wiring connector (4) to the rear compartment release switch (3).
- Install the extension (2) to the instrument panel, making sure the retaining clip (5) is engaged.
- Install the screw attaching the front floor console duct, if removed.
- Install the three screws (1) attaching the lower extension (2) to the instrument panel.
- Install the console trim plate. Refer to Console Trim Plate Replacement .
- Install the left knee bolster trim panel, if removed. Refer to Driver Knee Bolster Replacement .
- Install the instrument panel compartment/ashtray. Refer to Ashtray Replacement .

Notice: Refer to Fastener Notice in the Preface section.
Tighten
Tighten the screw to 2 N·m (18 lb in).
Tighten
Tighten the screws to 2 N·m (18 lb in).
