For 1990-2009 cars only
Removal Procedure
- Remove the ignition lock cylinder. Refer to Ignition Lock Cylinder Replacement .
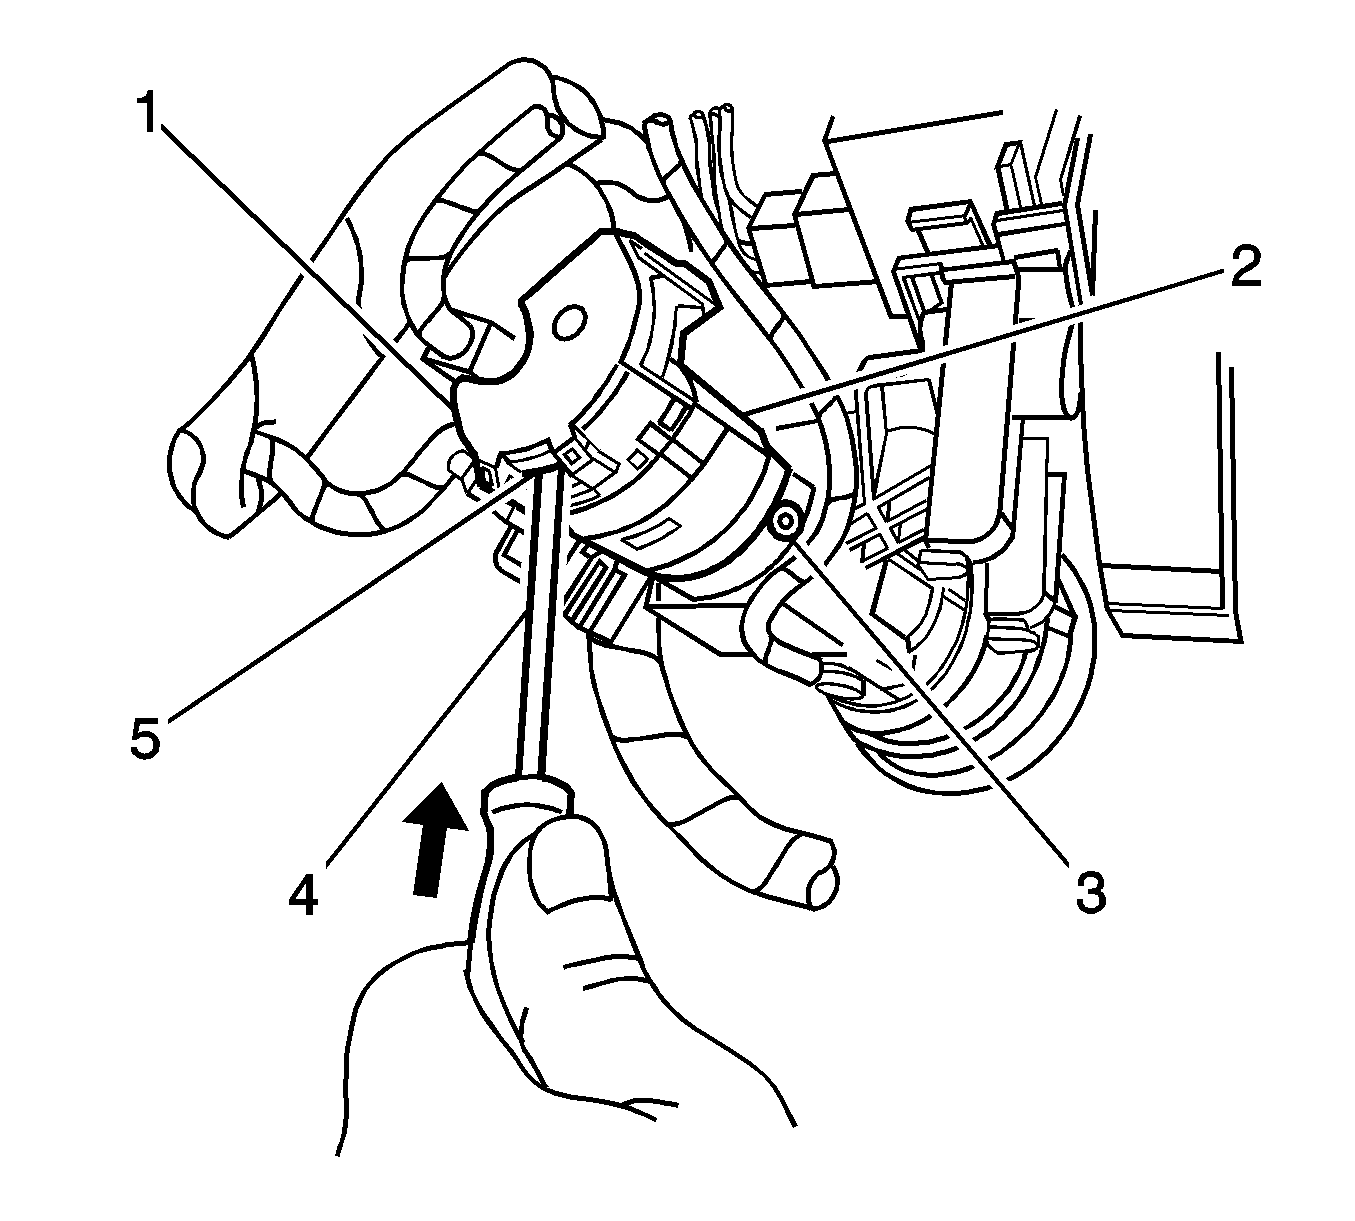
- Insert a small flat-bladed tool into the clip opening (5) on the ignition switch connector housing. Push the clip in order to disengage the clip. Disconnect the connector (1) from the ignition switch (2).
- Use a TTX8 bit in order to remove the bolt (3) that retains the ignition switch to the ignition housing.
- Disengage the ignition switch from the roll pin and remove the ignition switch from the ignition housing.
- If equipped, remove the washers from the ignition switch.
- If the vehicle has an automatic transmission, disengage the 2 clips and remove the ignition lock cylinder solenoid from the ignition switch.

Installation Procedure
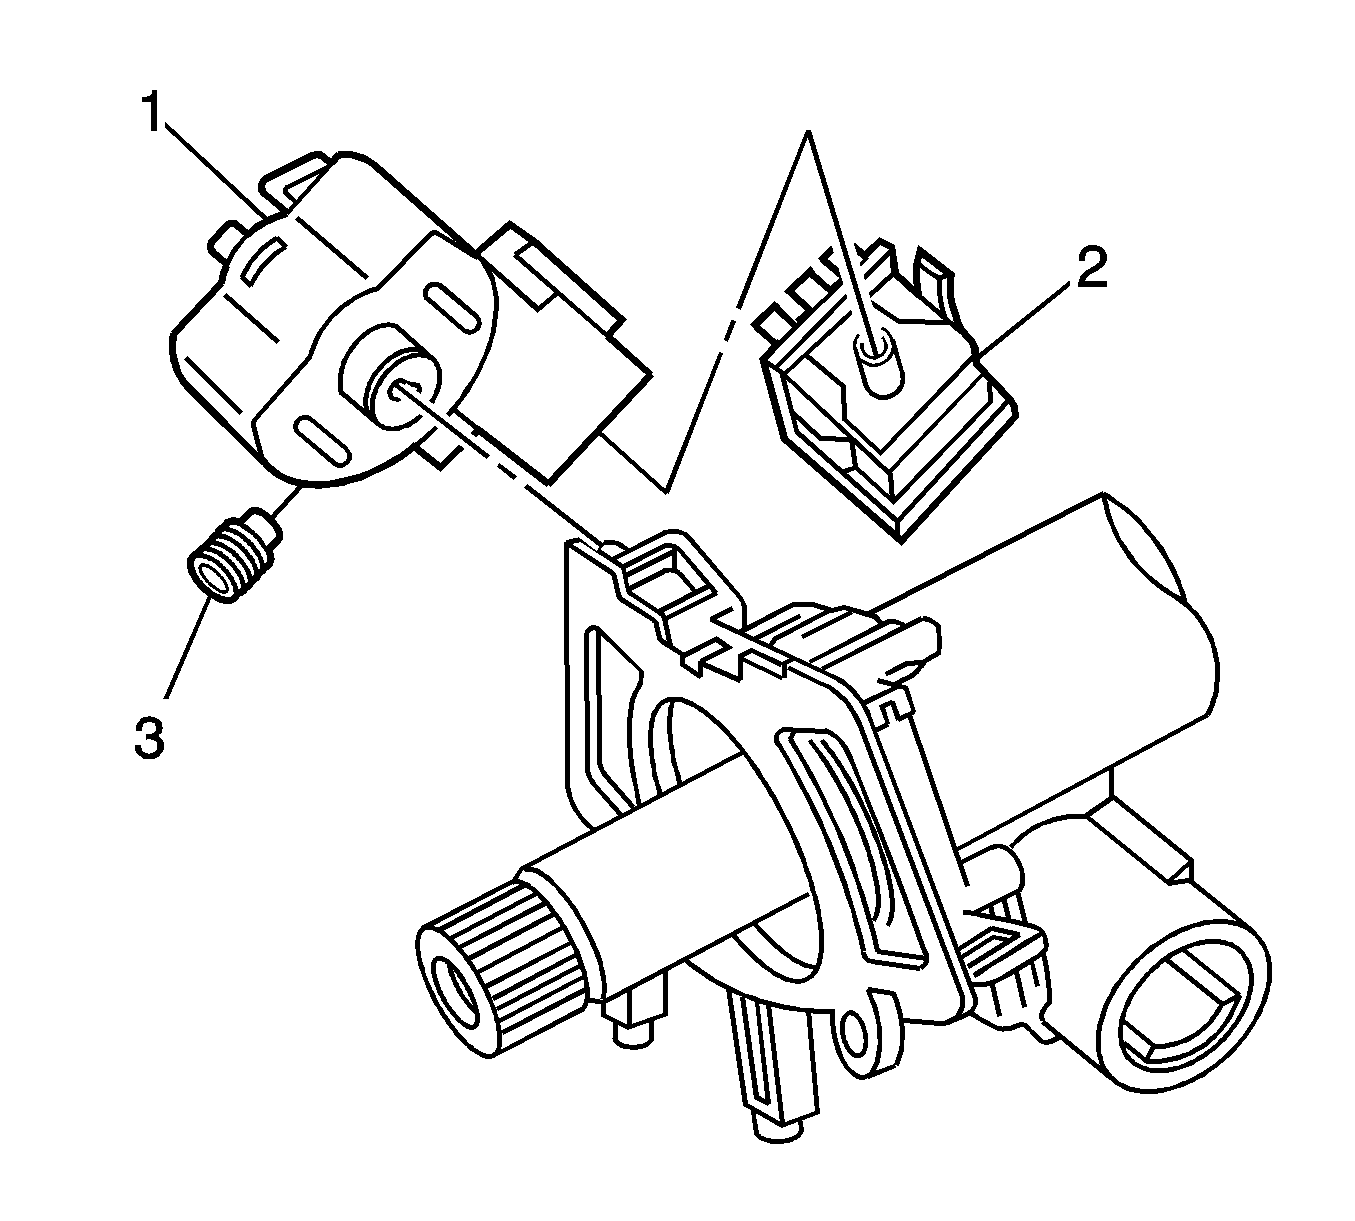
- If the vehicle has an automatic transmission, install the ignition lock cylinder solenoid (2) to the ignition switch (1). Engage the 2 clips in order to retain the solenoid to the switch.
- If equipped, install the washers to the ignition switch.
- Align the ignition switch with the roll pin in the ignition housing.
- Install the ignition switch to the ignition housing.
- Hold the ignition switch on the roll pin in order to properly align the switch with the housing.
- Use a TTX8 bit in order to install the bolt to the ignition switch.
- Connect the connector to the ignition switch. Ensure the clip engages the connector housing.
- Install the ignition lock cylinder. Refer to Ignition Lock Cylinder Replacement .

Notice: Refer to Fastener Notice in the Preface section.
Important: The ignition and start switch bolt (3), the roll pin, and the washers, if equipped, align the ignition switch with the ignition lock cylinder.
Tighten
Tighten the bolt to 1.2 N·m (10.6 lb in).
