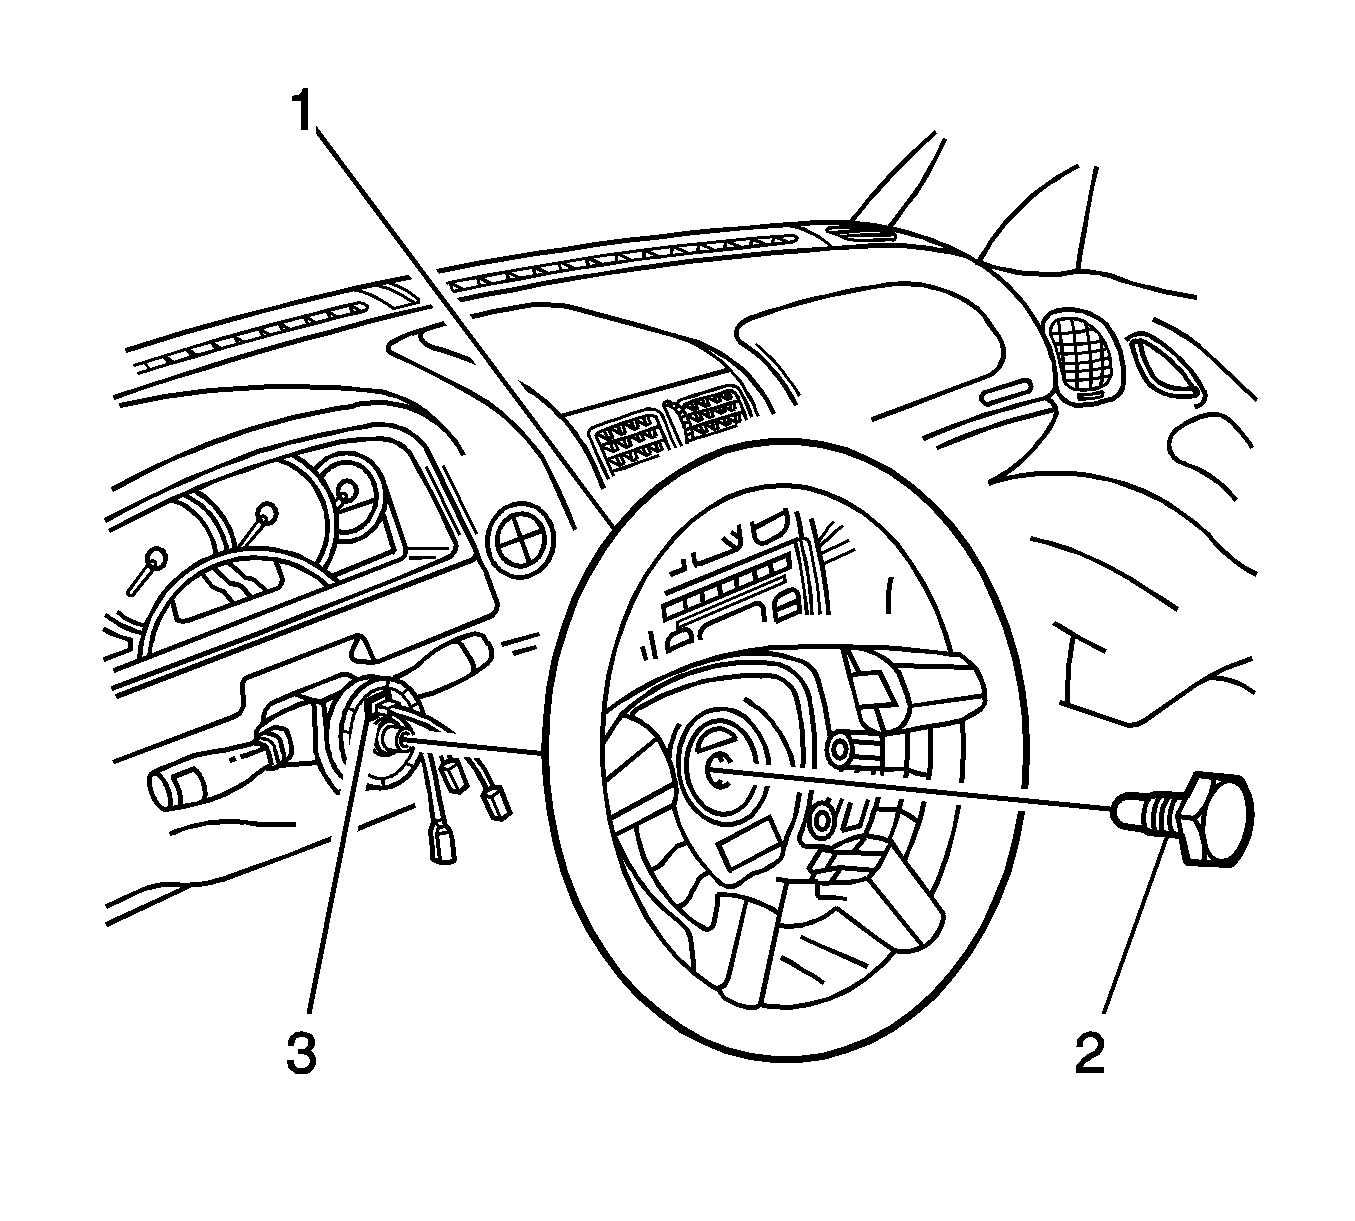
For 1990-2009 cars only
Tools Required
J 1859-A Steering Wheel Puller
Removal Procedure
- LOCK the steering column and verify the front wheels are in the straight ahead position.
- Remove the steering column trim covers. Refer to Steering Column Trim Covers Replacement .
- Disconnect the horn connector and remove the inflatable restraint steering wheel module. Refer to Inflatable Restraint Steering Wheel Module Replacement in SIR.
- Remove the bolt (2) from the steering wheel.
- Use paint in order to place match marks on the steering wheel and on the steering shaft.
- Remove the steering wheel. If necessary, use the J 1859-A , or equivalent.
Notice: Refer to Steering Column in Lock Position Notice in the Preface section.

Notice: When removing the steering wheel, use only the specified steering wheel puller. Do not hammer on the end of the steering column shaft. Hammering could loosen the plastic injections which maintain the steering column rigidity.
Installation Procedure
- If you are replacing the steering wheel, copy the match marks from the old steering wheel to the new steering wheel.
- Verify the front tires have not moved since the removal of the steering wheel.
- Verify the green indexing tab (3) on the SIR coil is aligned with the window in the coil casing. The green tab indicates the coil is locked in the centralized position.
- Align the match marks on the steering wheel and on the steering shaft.
- Install the steering wheel to the steering shaft.
- Clean the threads on the steering wheel bolt (2) and on the steering shaft.
- Apply LOCTITE 242, or equivalent, to the steering wheel bolt.
- Install the bolt to the steering wheel.
- Connect the horn connector and install the inflatable restraint steering wheel module. Refer to Inflatable Restraint Steering Wheel Module Replacement in SIR.
- Install the steering column trim covers. Refer to Steering Column Trim Covers Replacement .

Notice: Refer to Fastener Notice in the Preface section.
Tighten
Tighten the bolt to 45 N·m (33 lb ft).
