SERVICE MANUAL UPDATE SEC. 10 WELDED PANEL REPLACEMENT

Subject: SERVICE MANUAL UPDATE - SECTION 10 WELDED PANELS (USE OF ILLUSTRATIONS AND PANEL REPLACEMENT ILLUSTRATIONS)
Models Affected: 1992 GRAND AM MODELS
Service Manual update for Section 10 Welded Panel replacement and how to use illustrations addendum for the attached pages covering the 1992 Grand Am models.
Please update your current 1992 Grand Am Service Manual with the addition of this section.
SECTION 11-2 WELDED PANEL REPLACEMENT
CONTENTS
How to Use Illustrations ...................................... 11-2-1 Panel Replacement Illustrations ................................ 11-2-3
HOW TO USE ILLUSTRATIONS
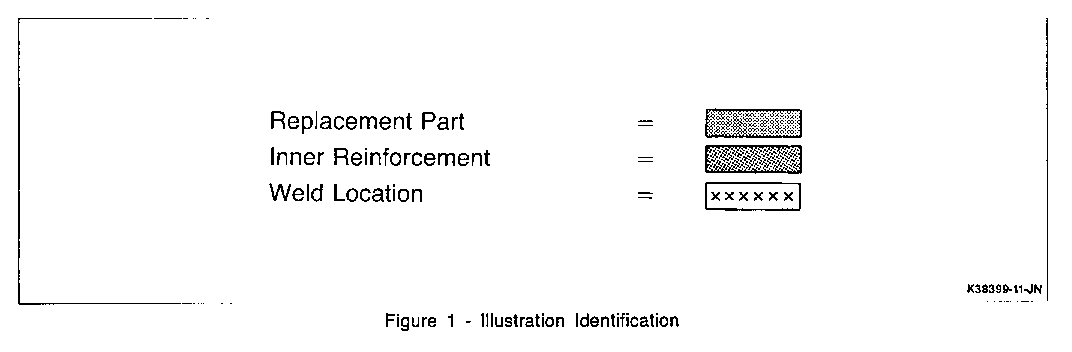
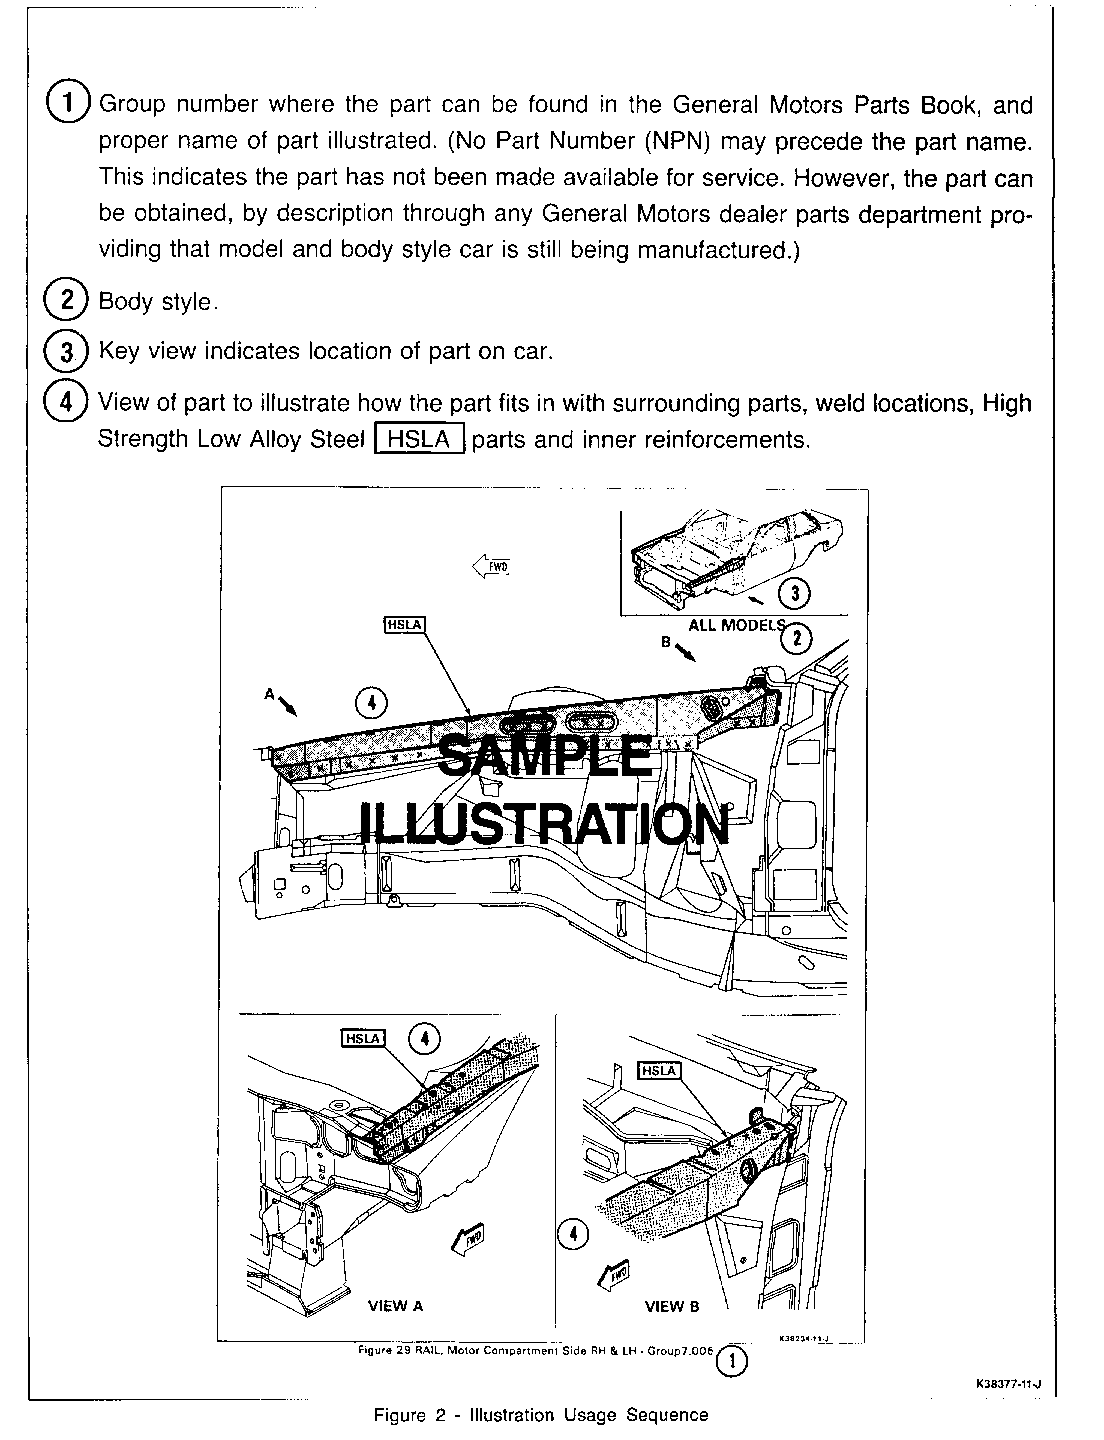
Figures 1 and 2
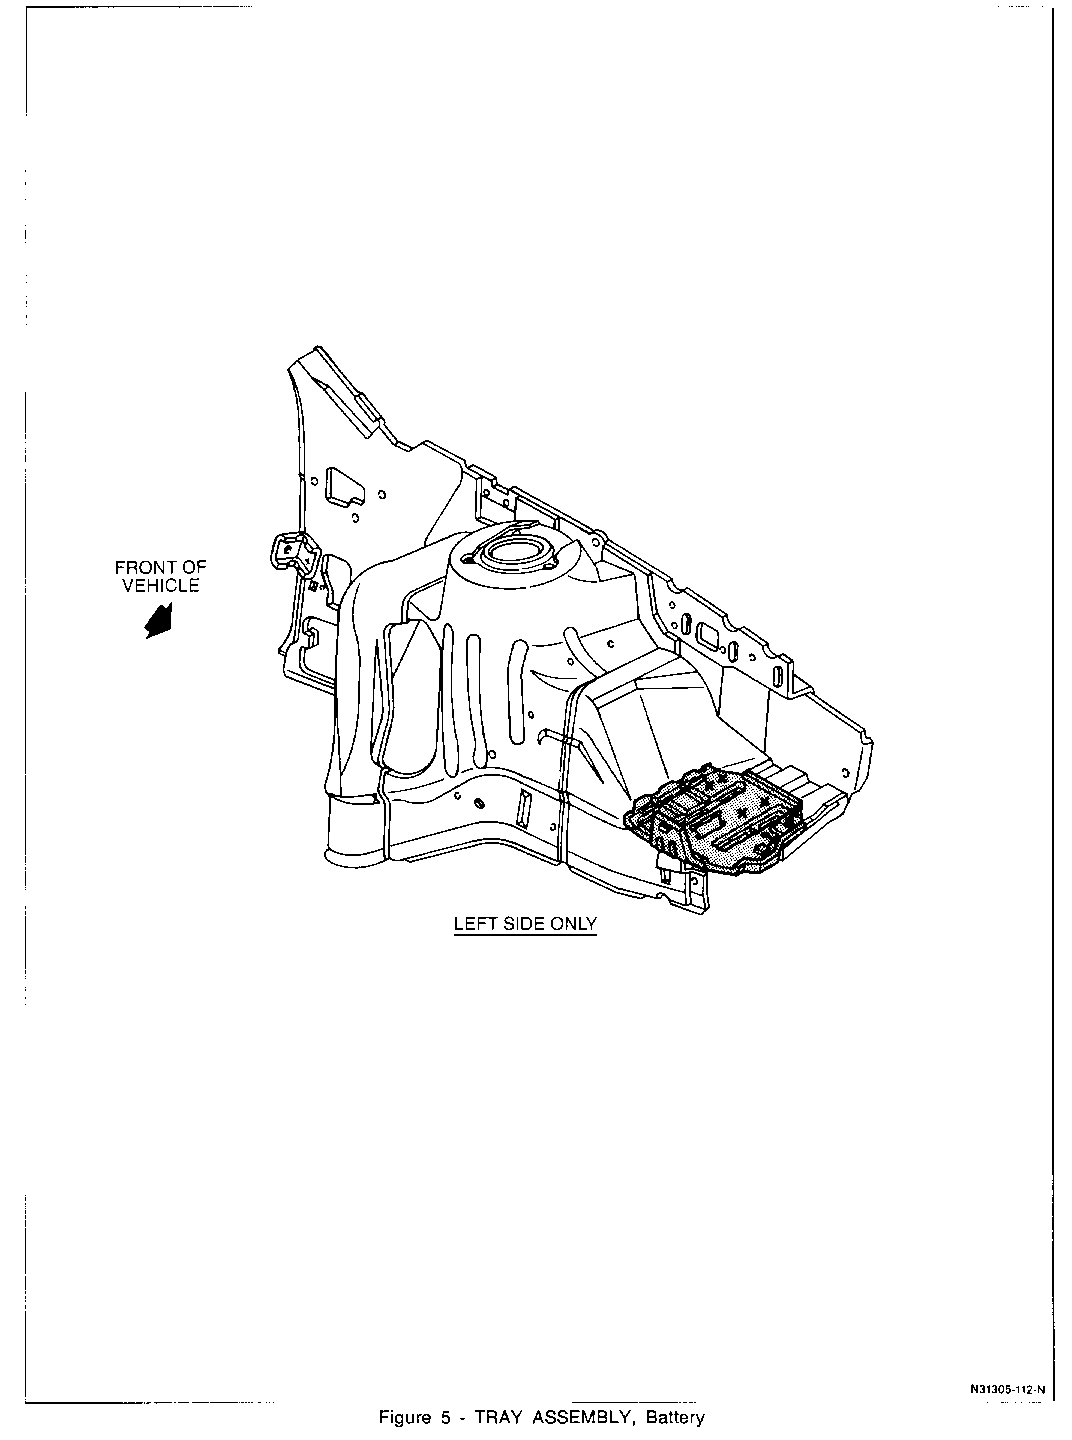
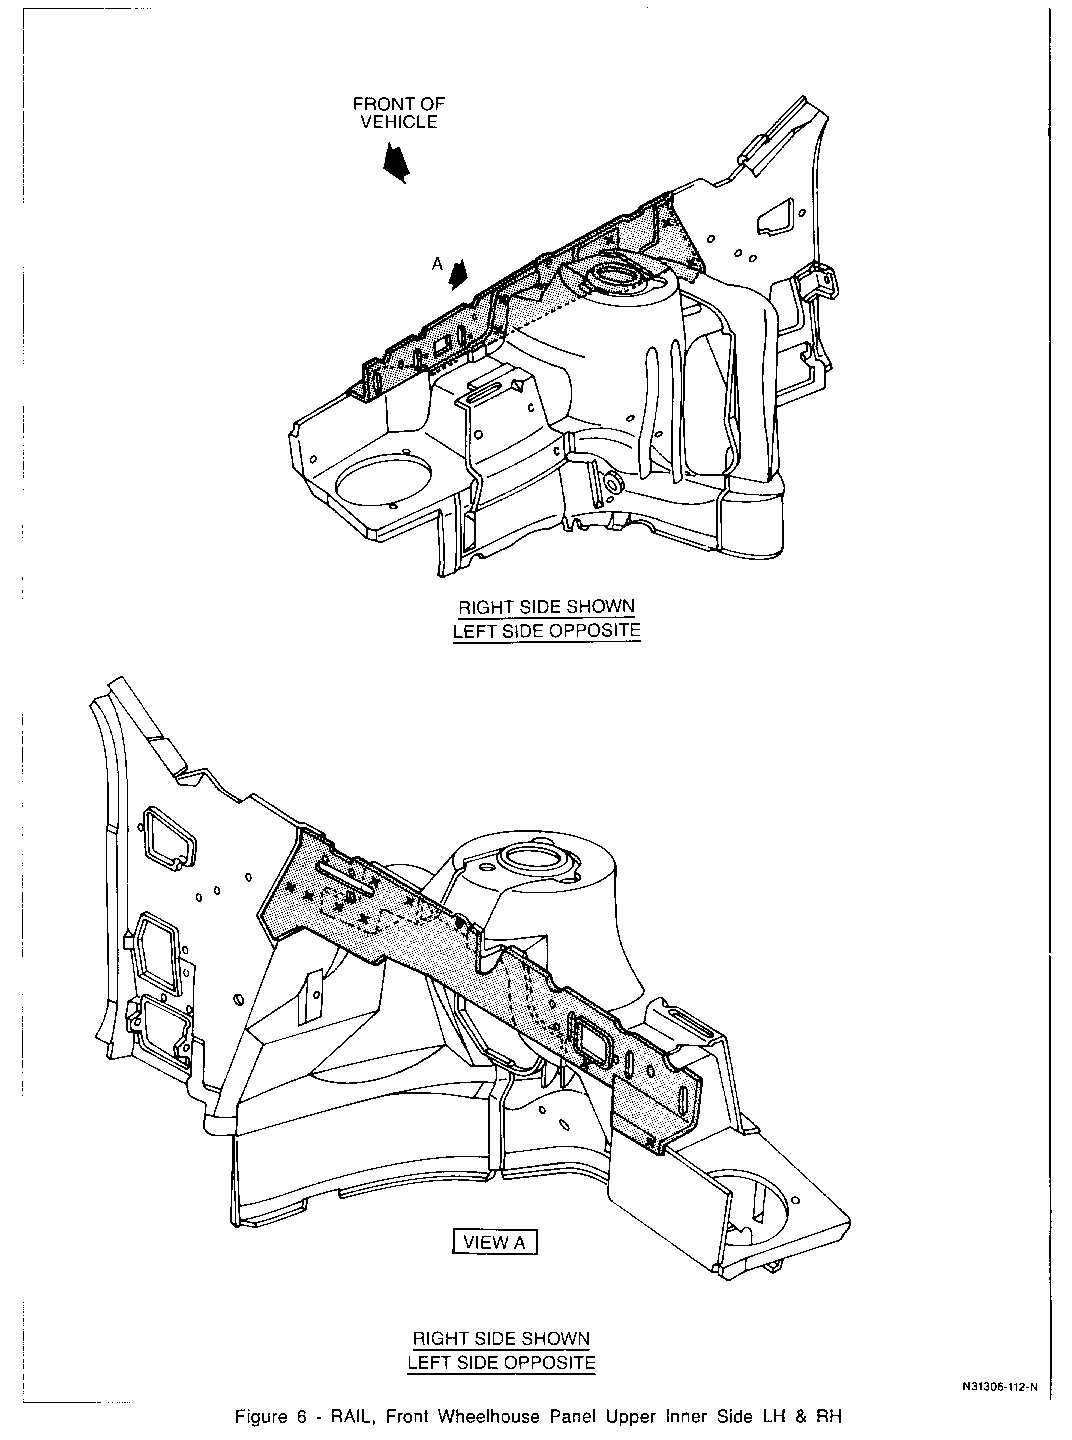
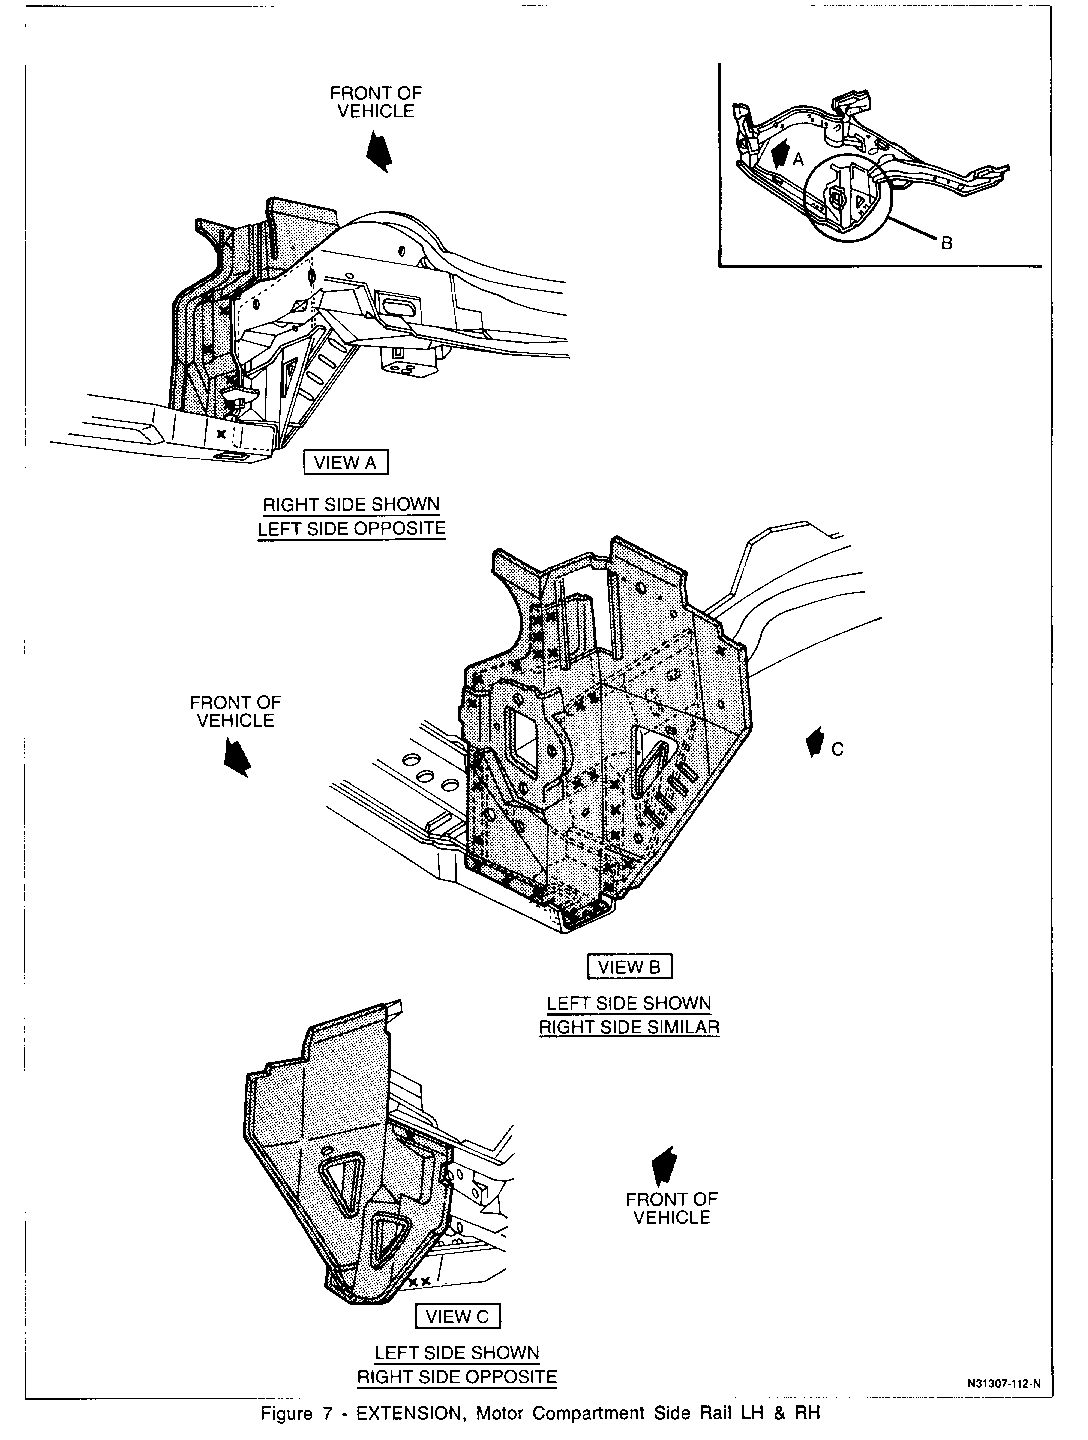
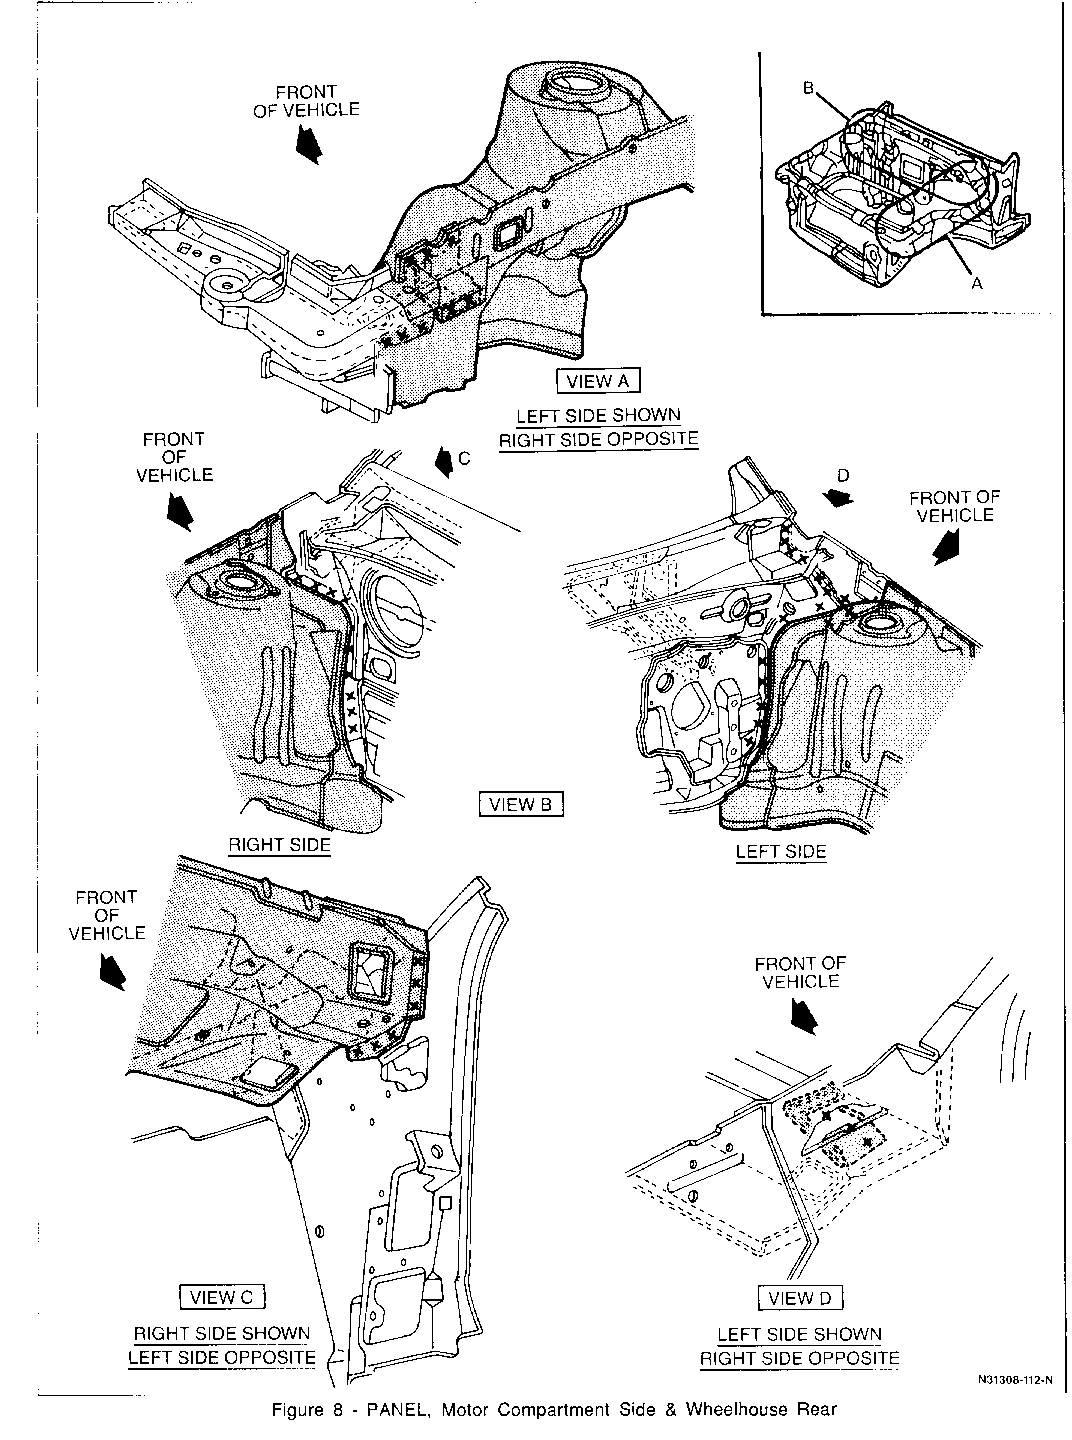
The illustrations in this Section represent all the welded parts that make up a unibody vehicle. Some parts are serviced as subassemblies and some as separate pieces. All of them are illustrated as they are serviced and as they appear on a vehicle. This will help in determining what parts need to be replaced as well as how they should be replaced. Arrows are provided in some views to help determine the angle from which the view is illustrated.
PANEL REPLACEMENT ILLUSTRATIONS
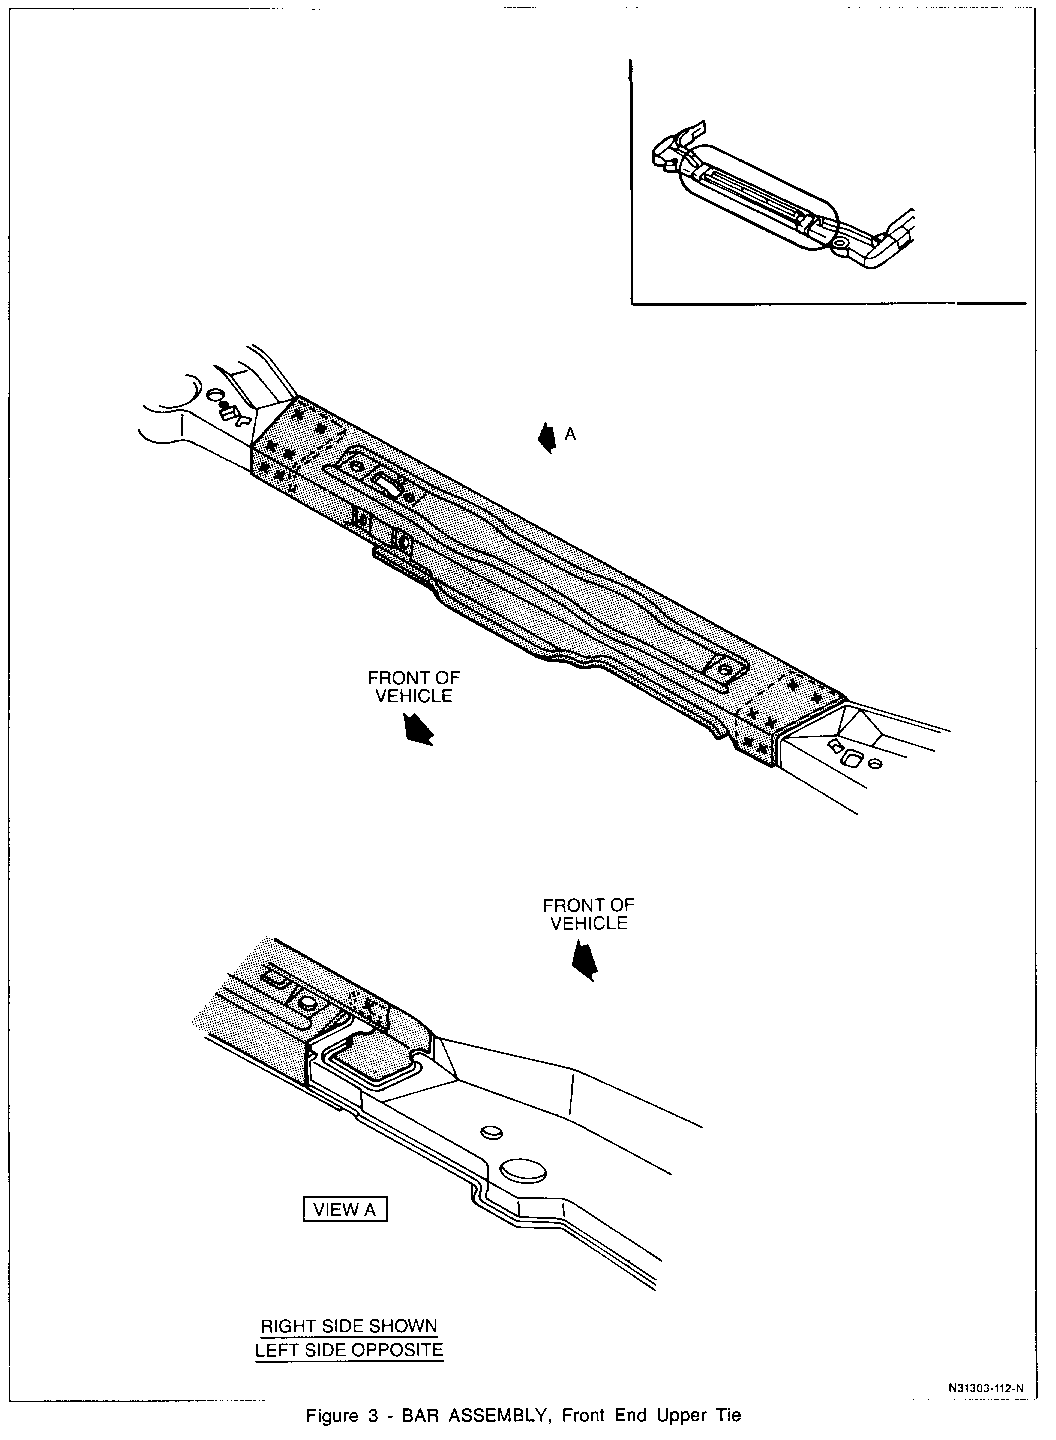
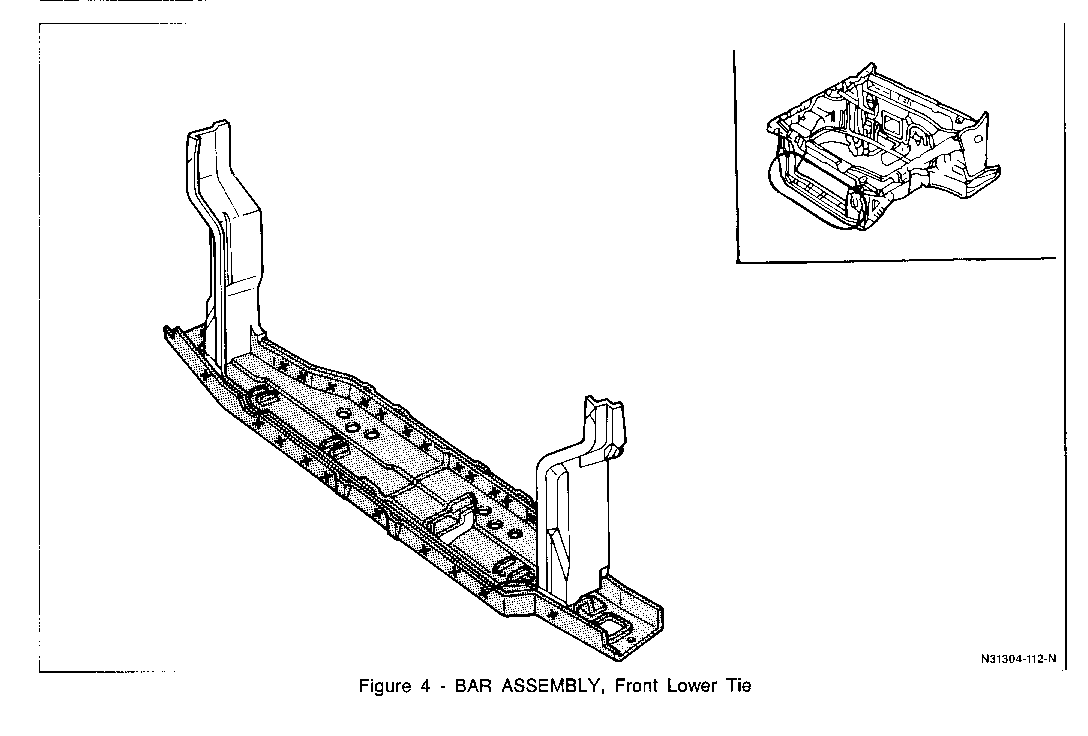
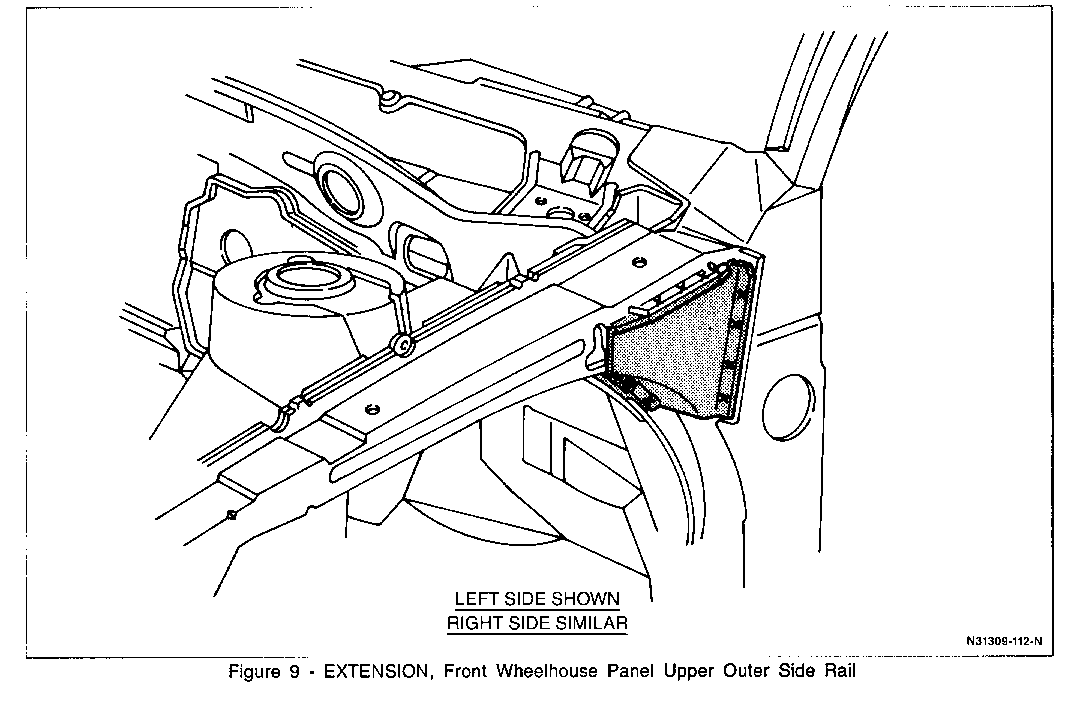
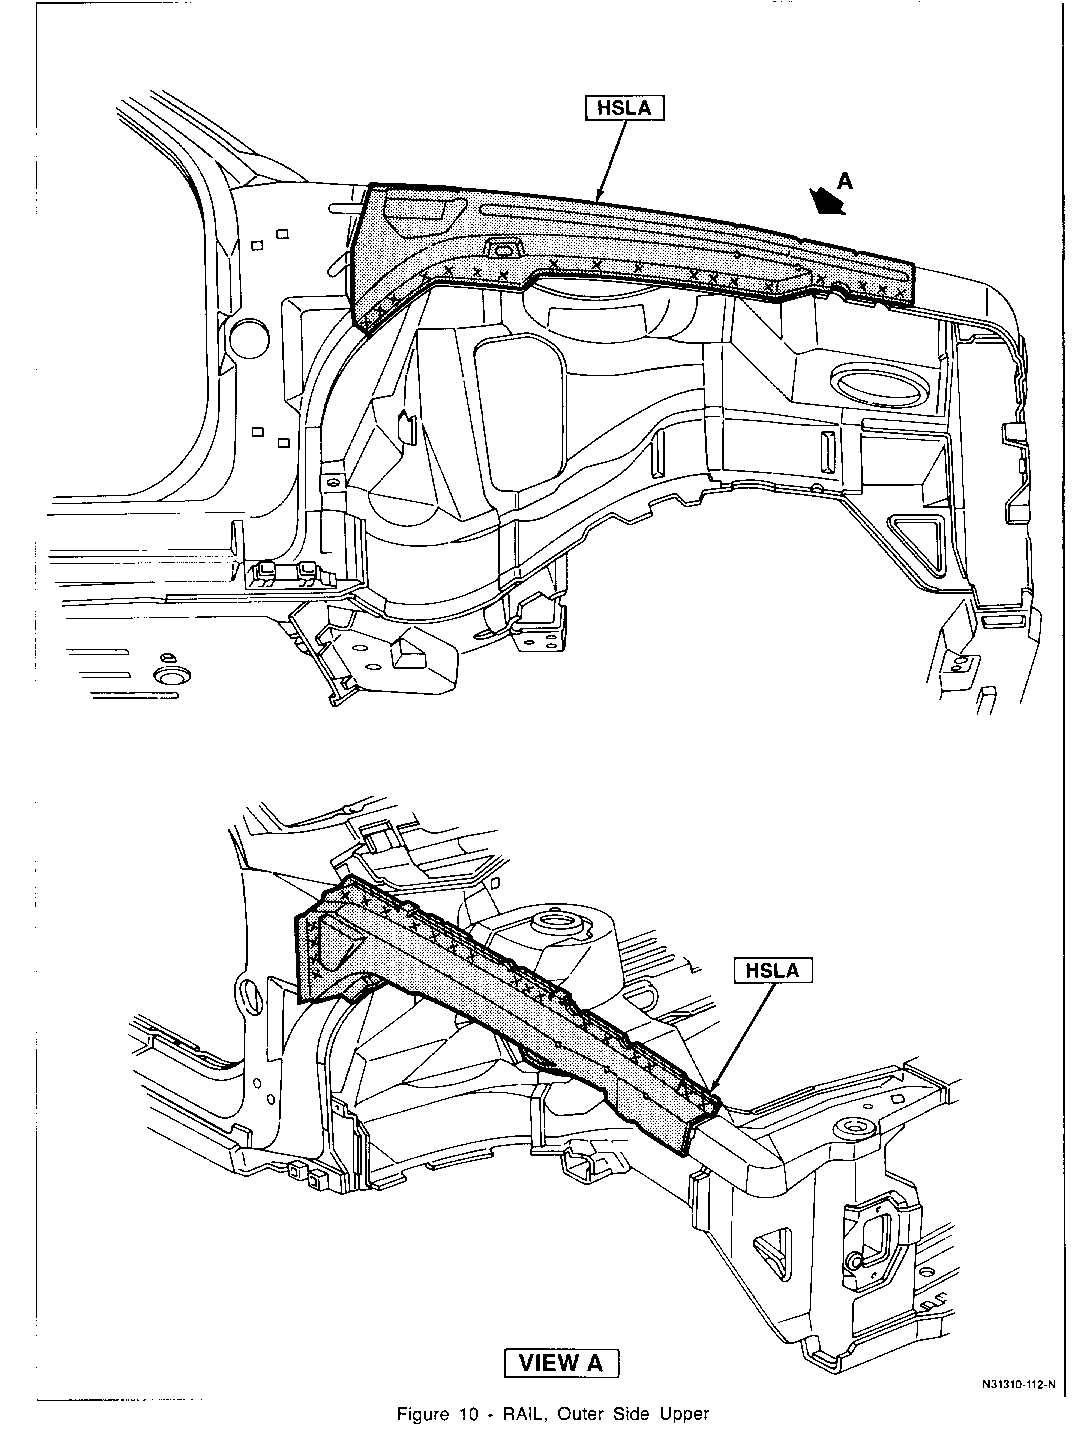
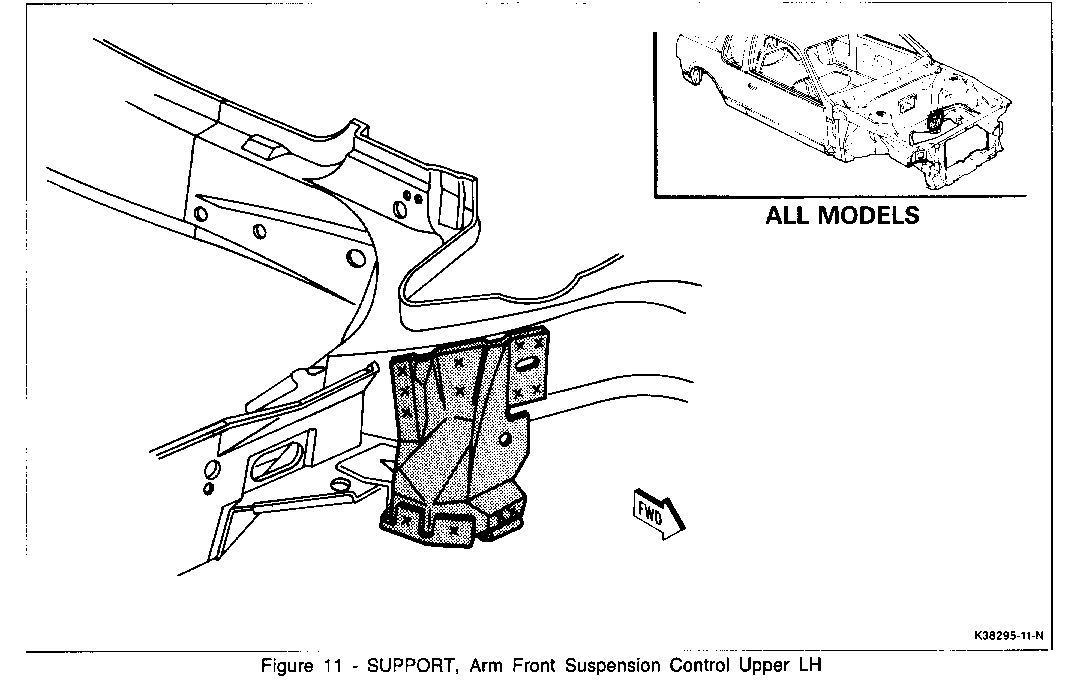
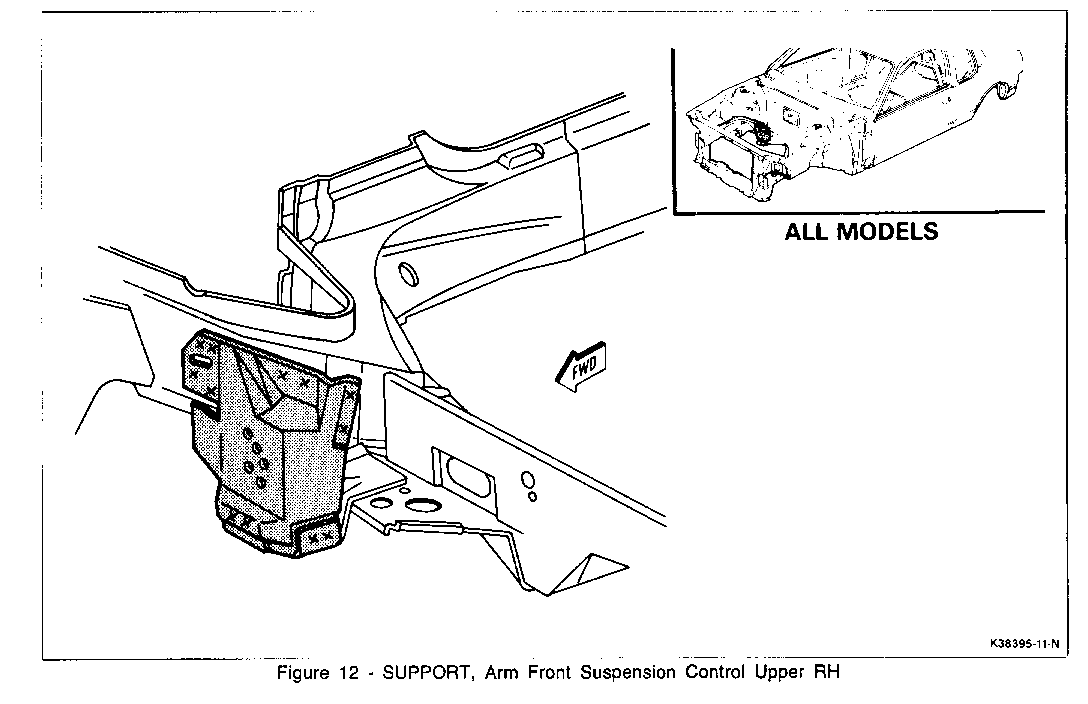
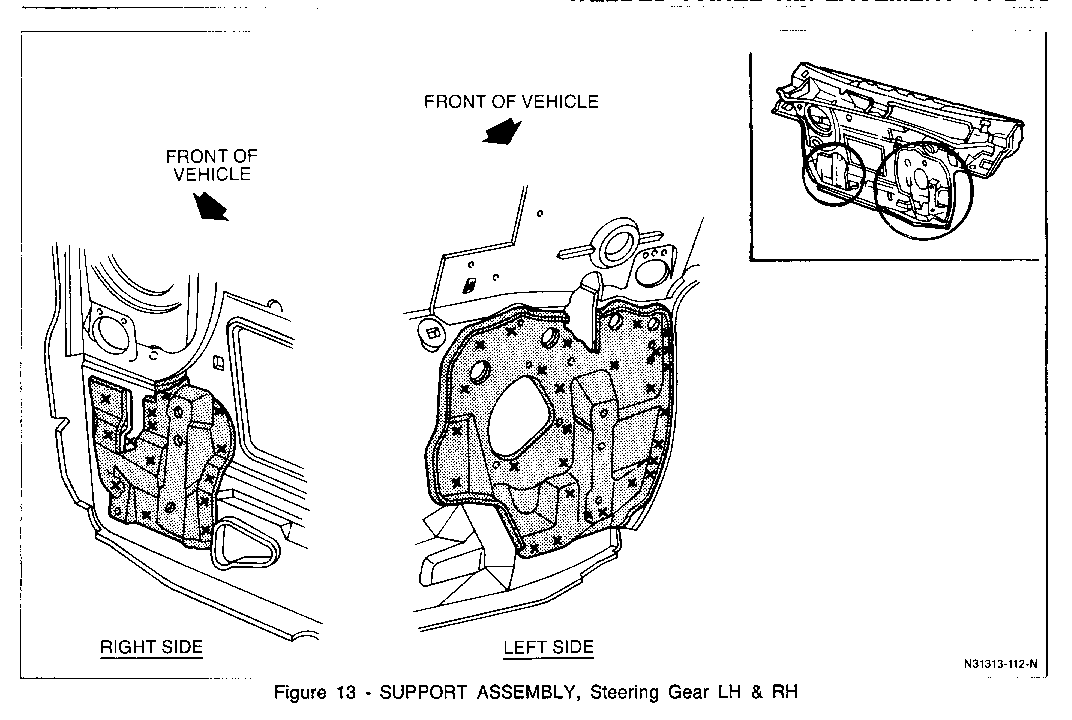
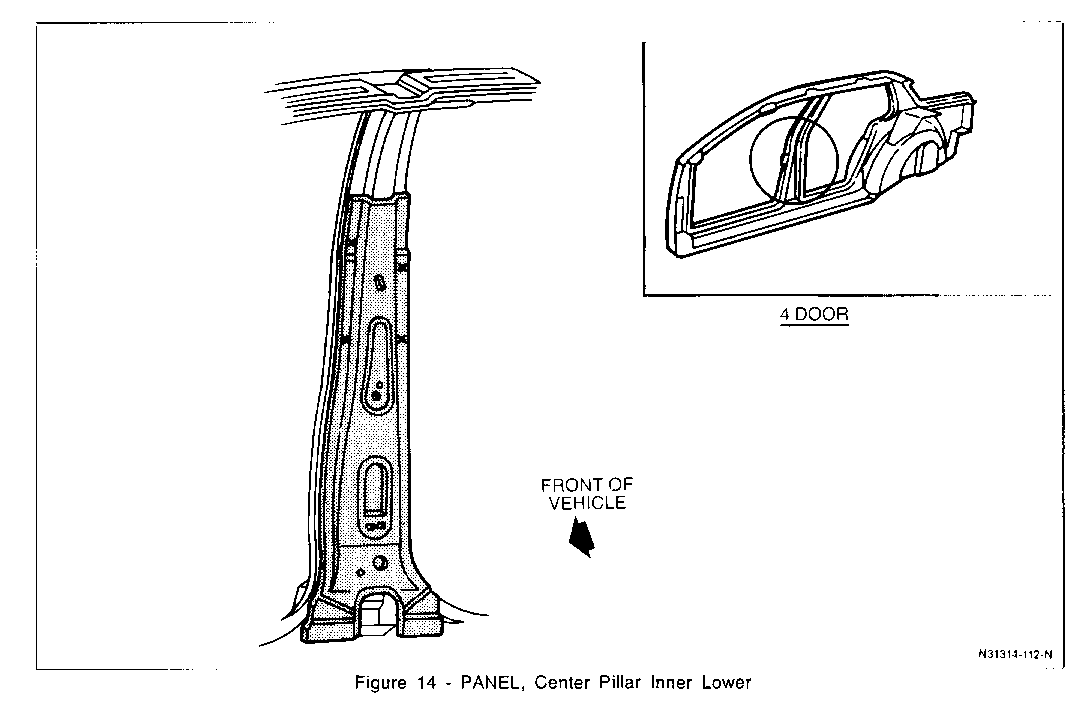
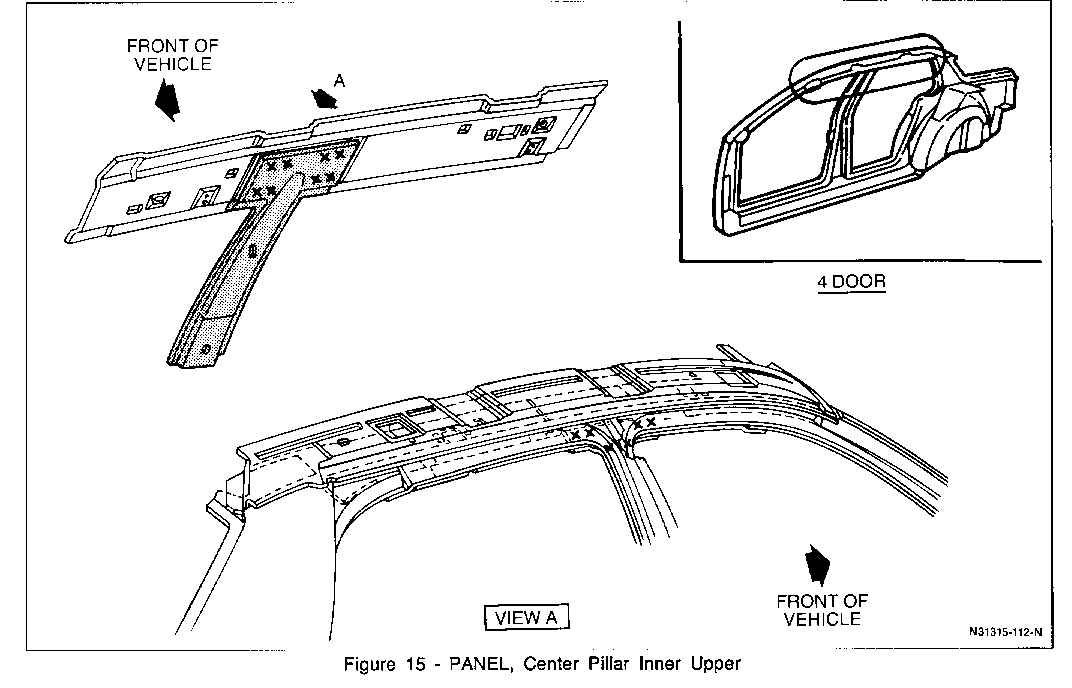
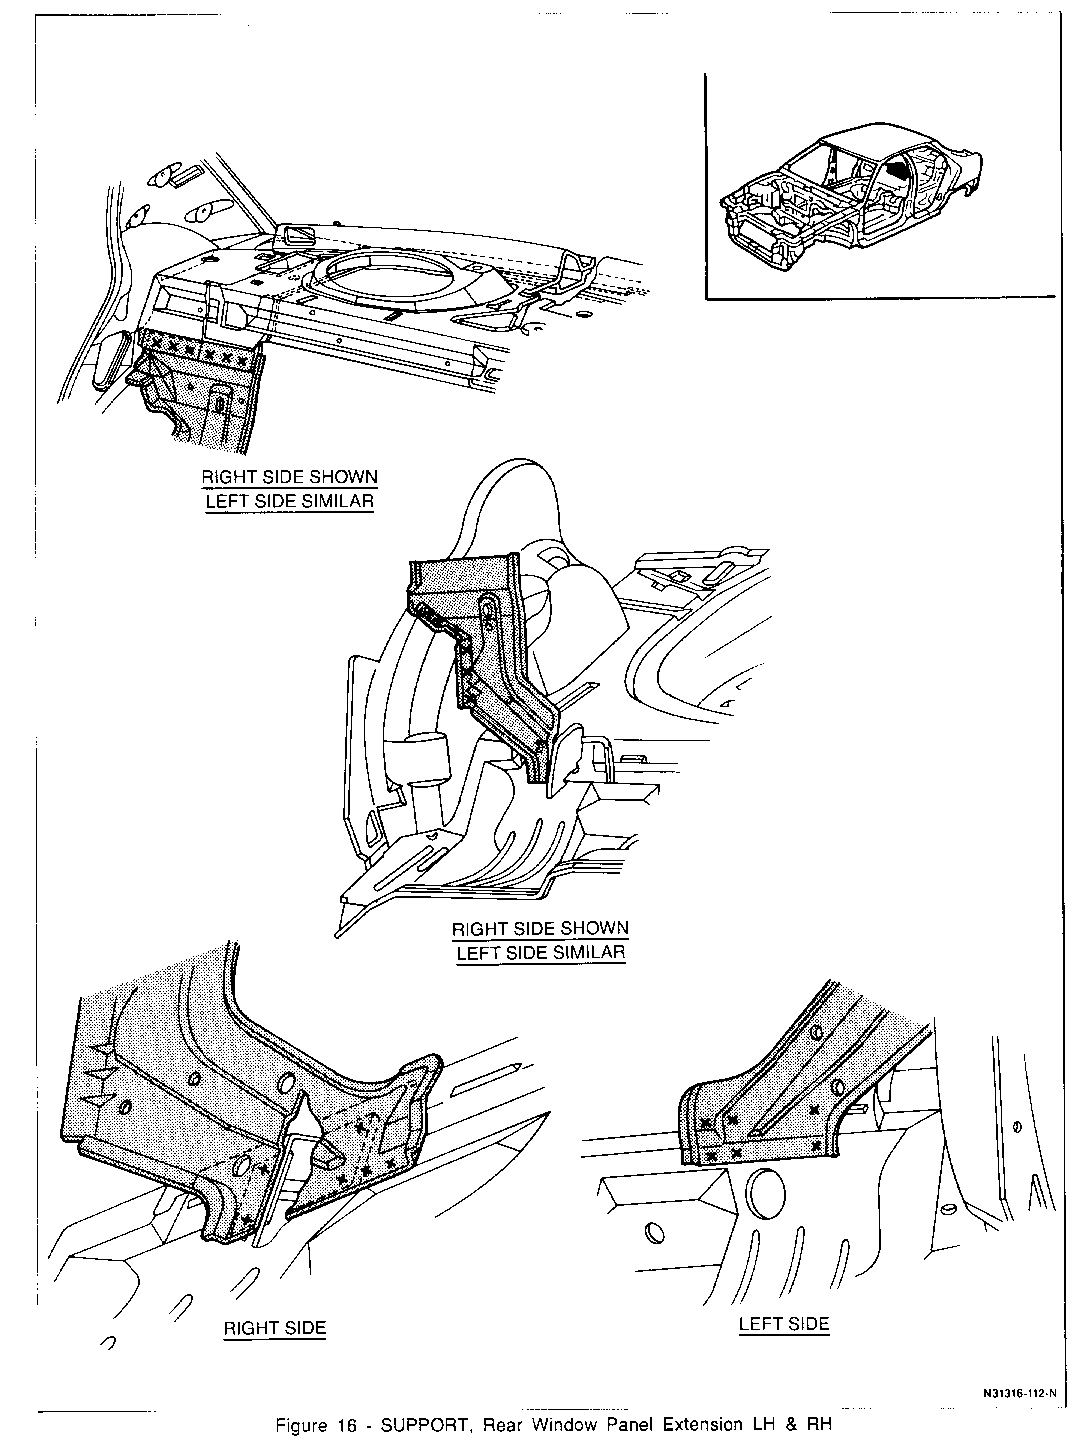
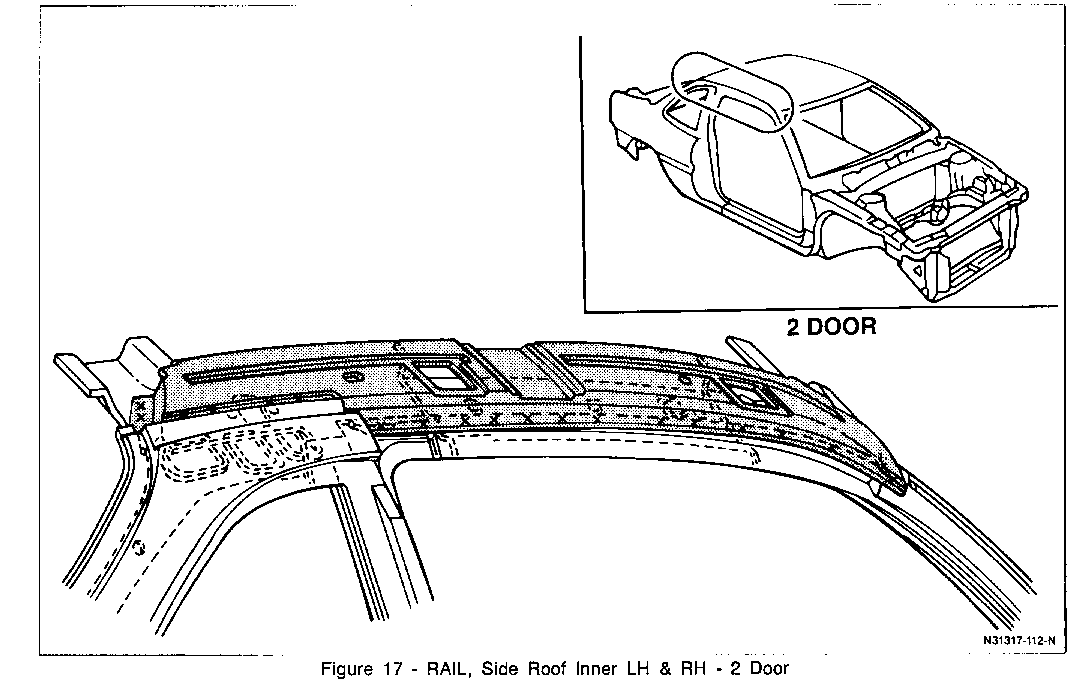
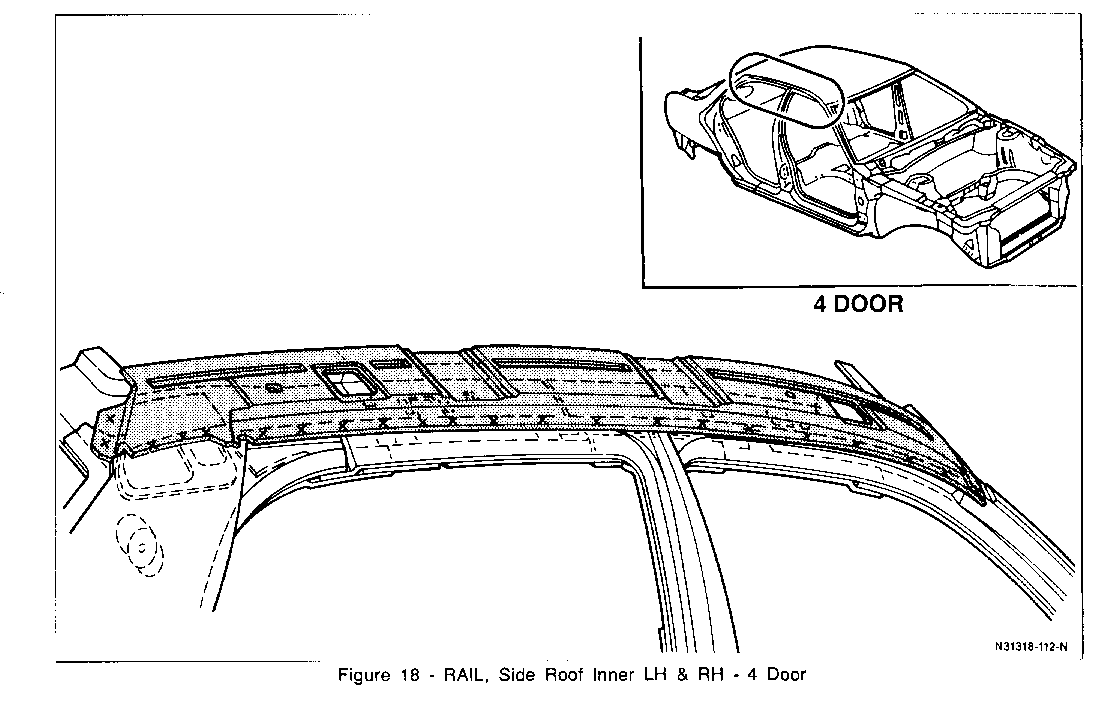
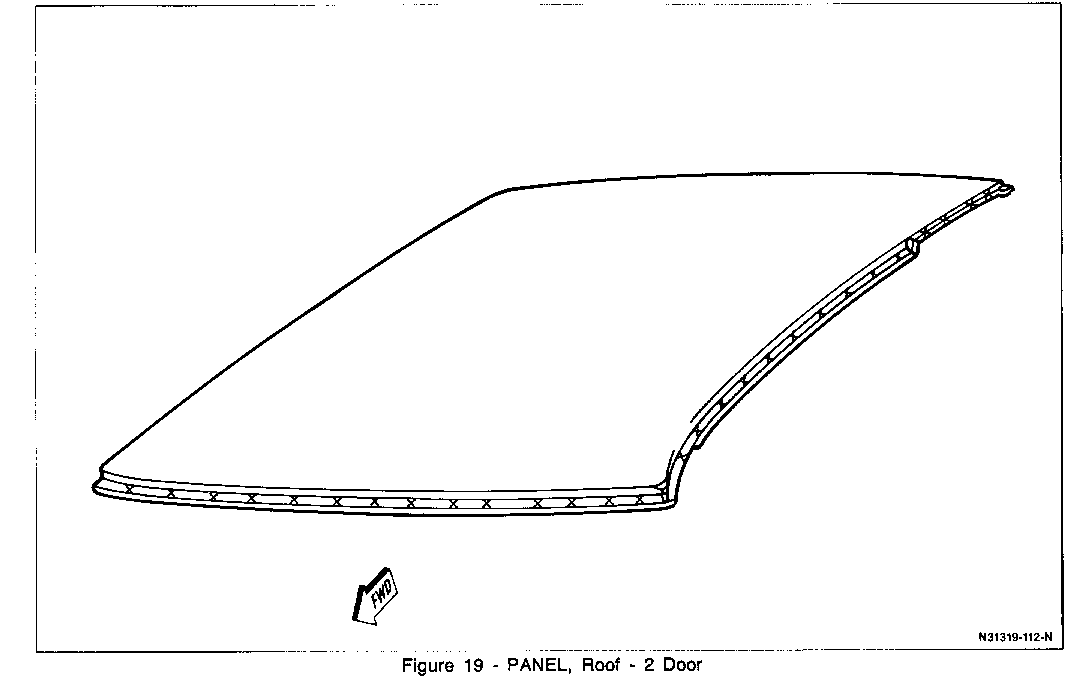
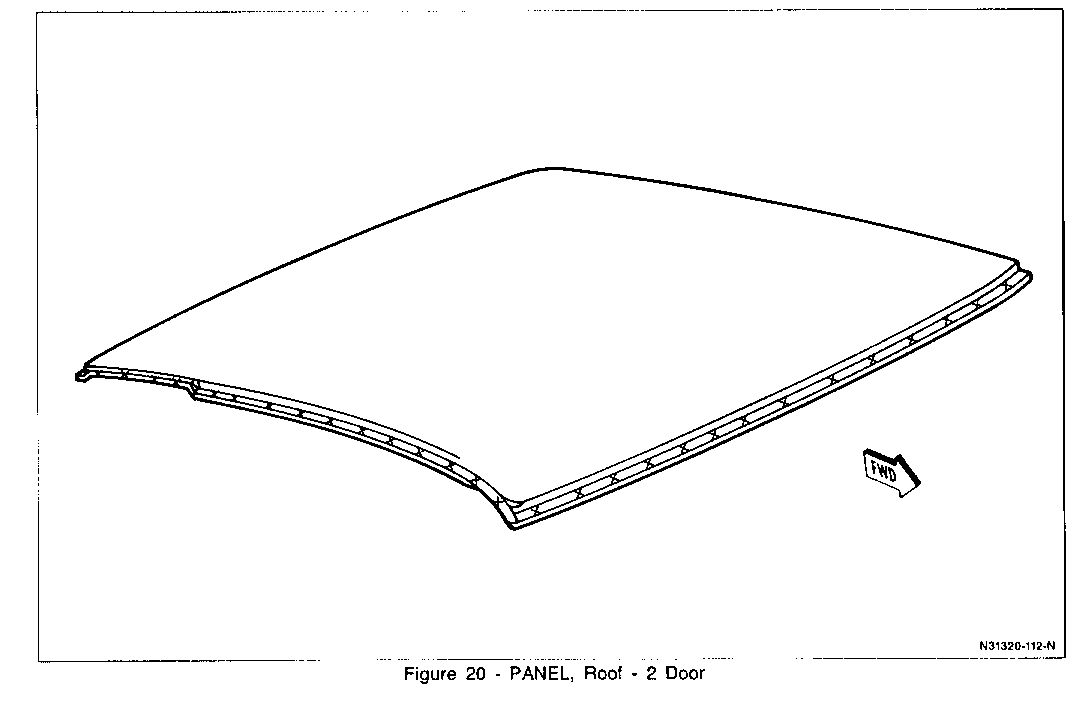
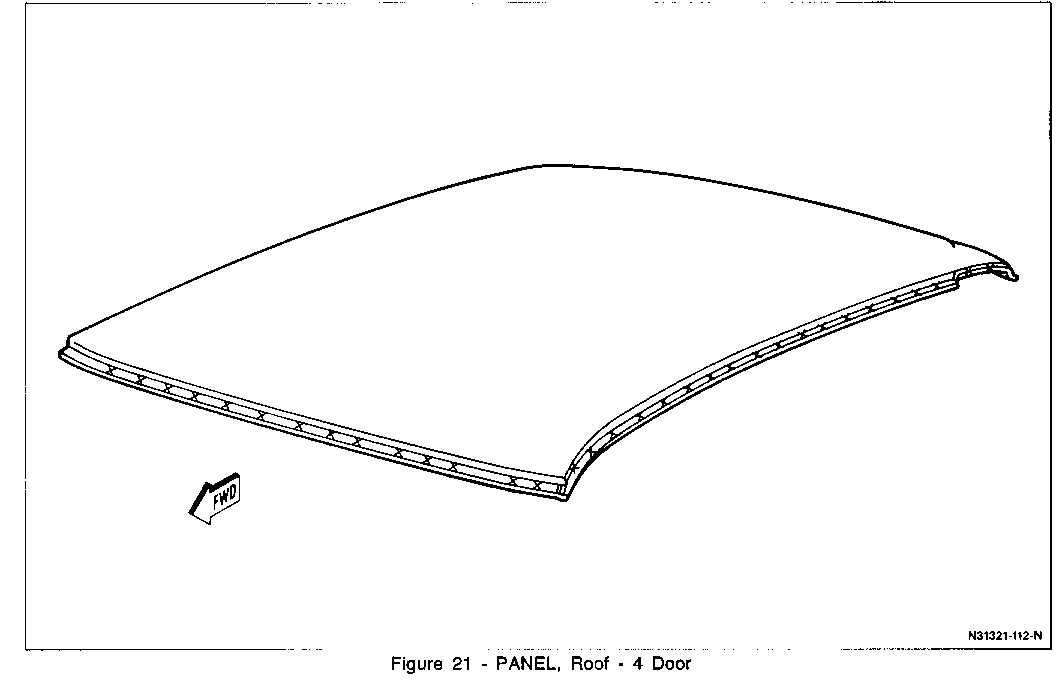
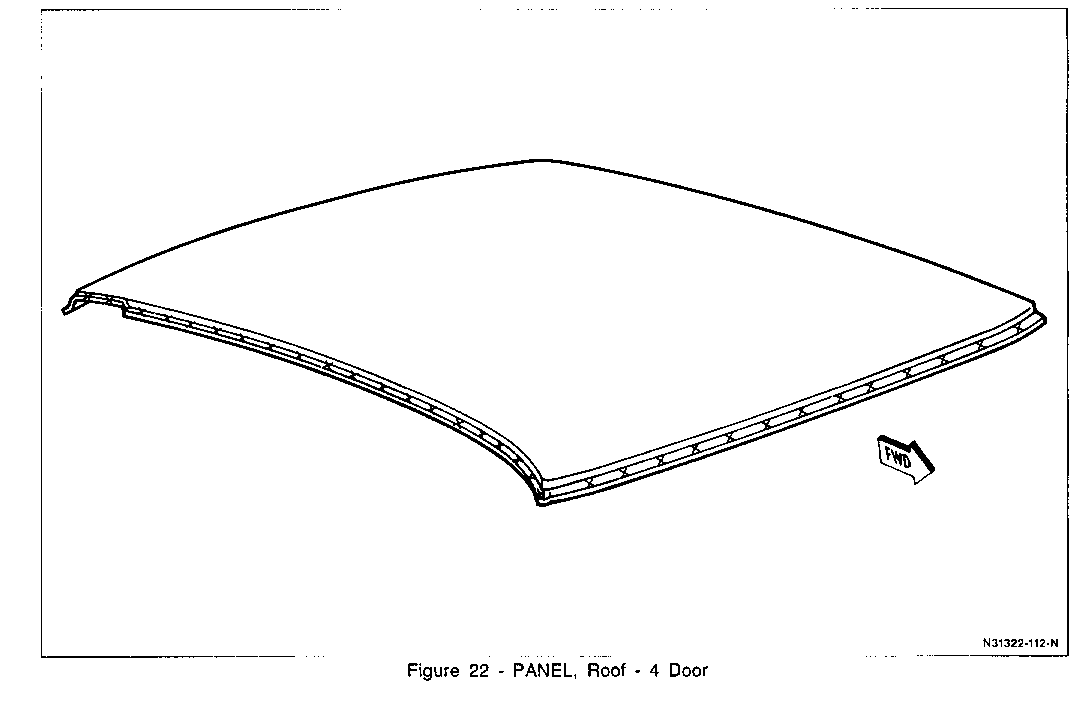
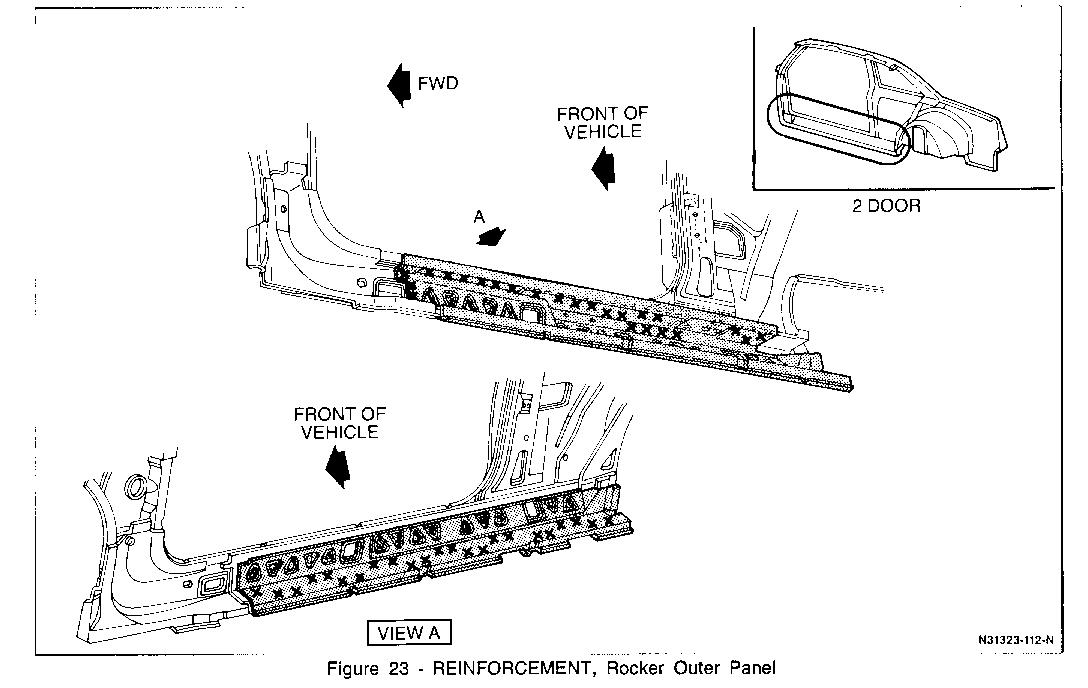
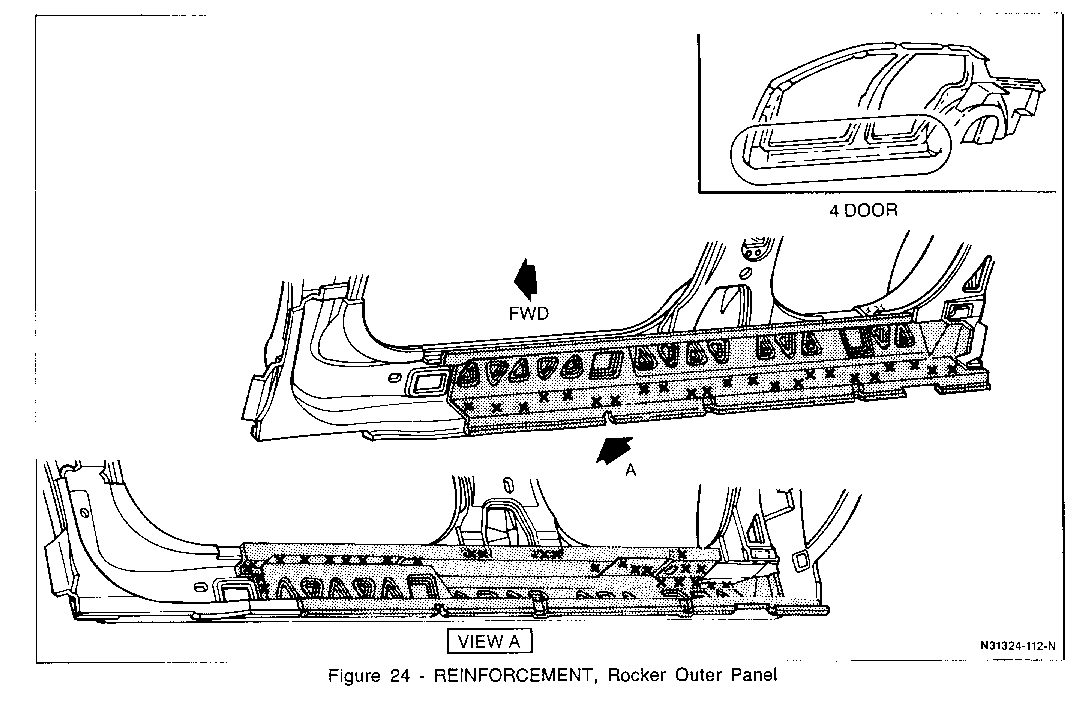
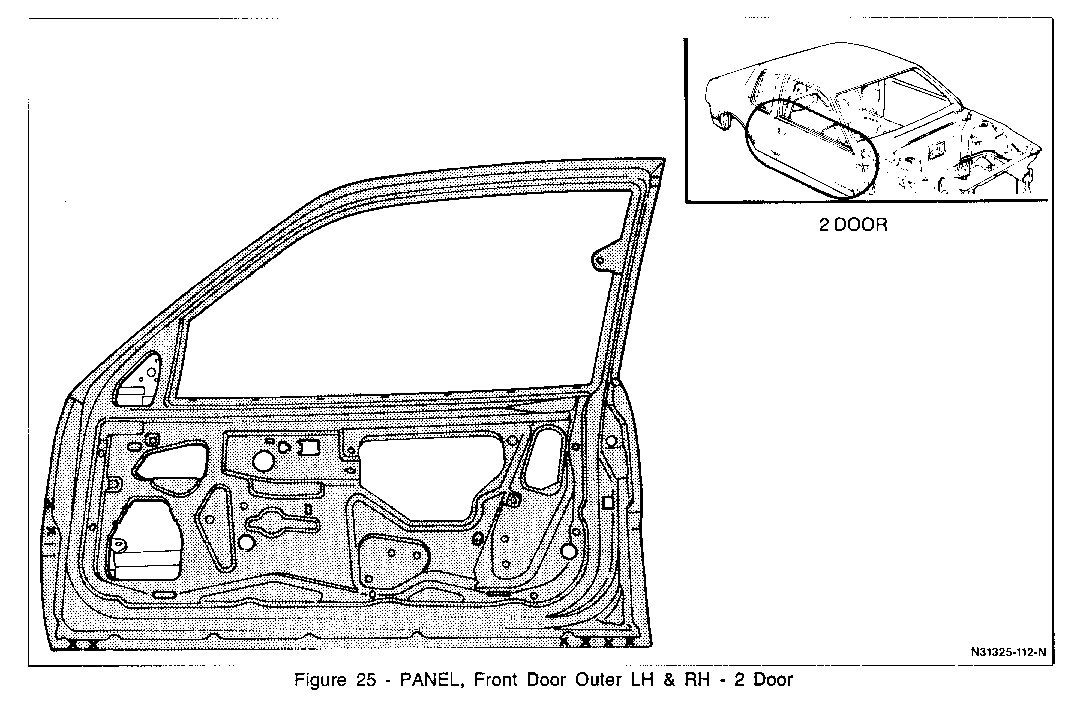
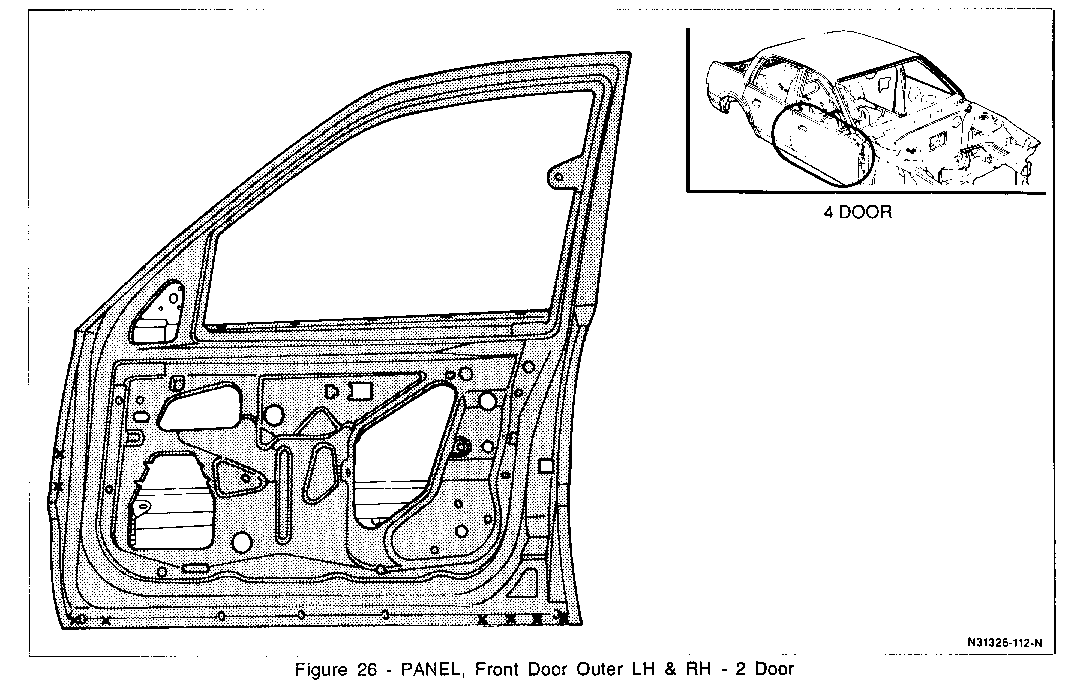
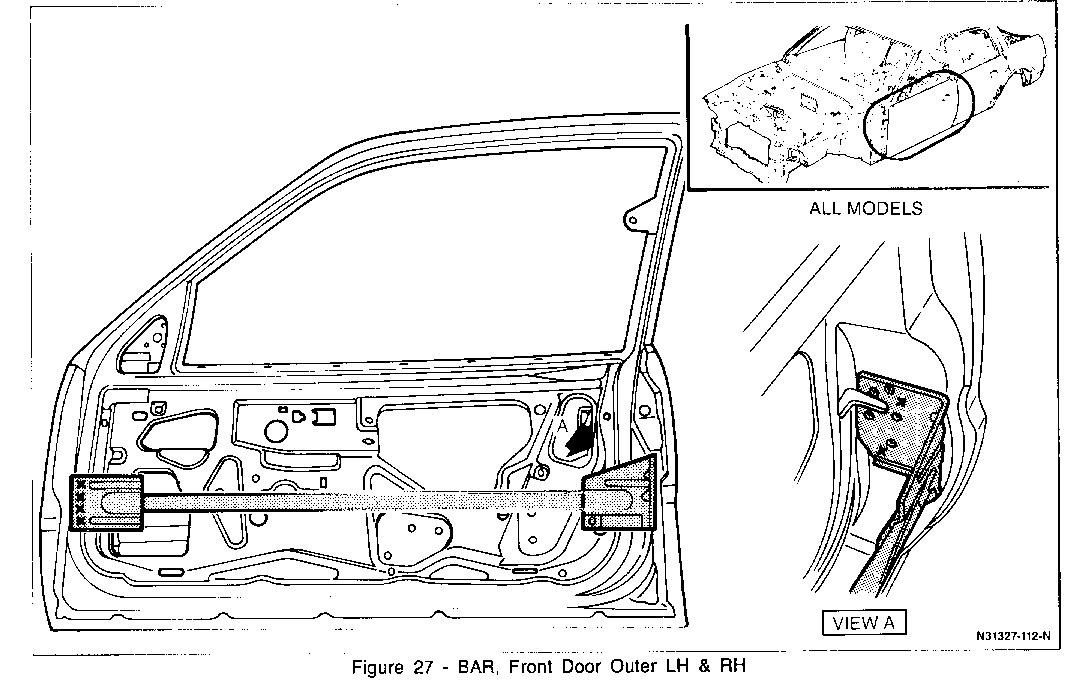
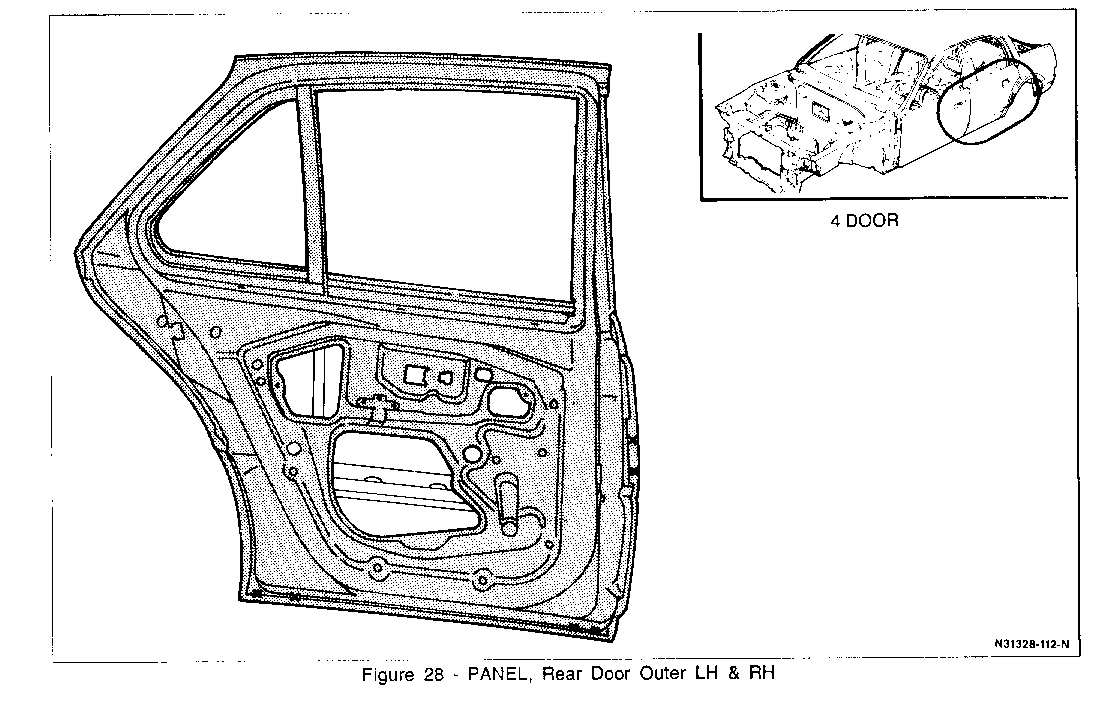
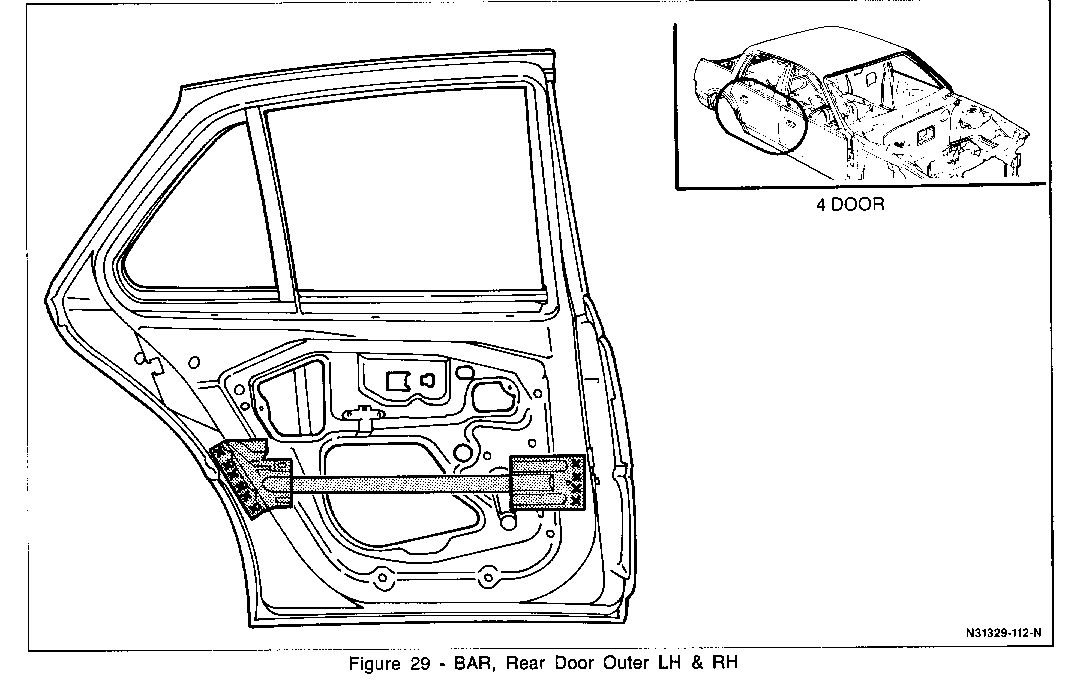
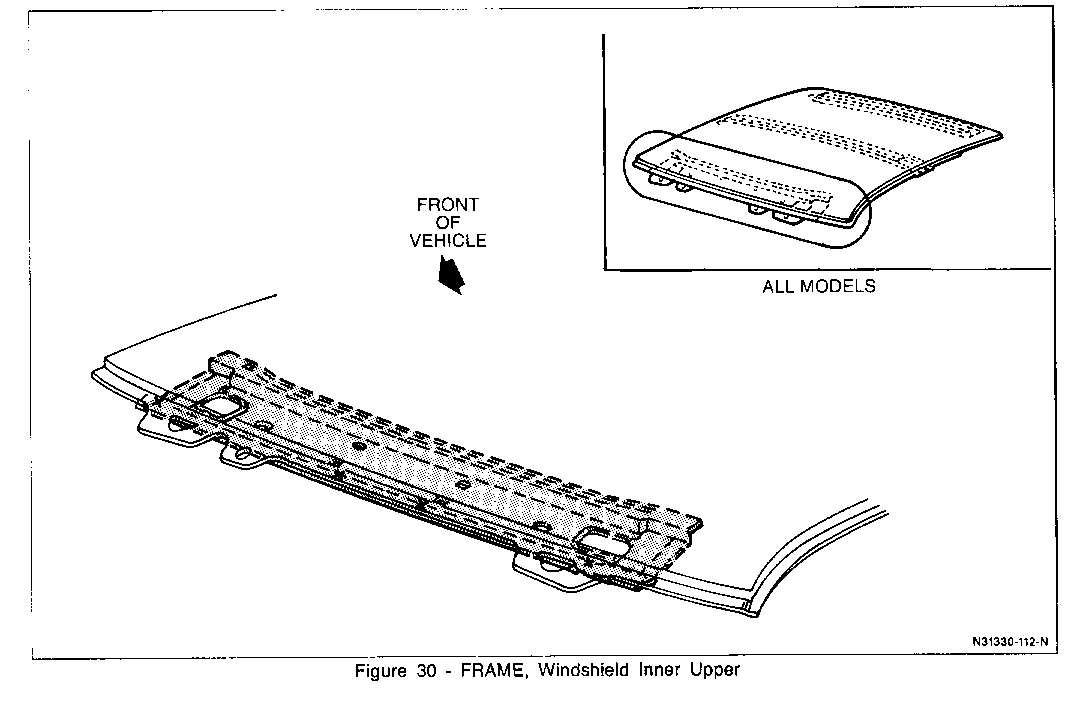
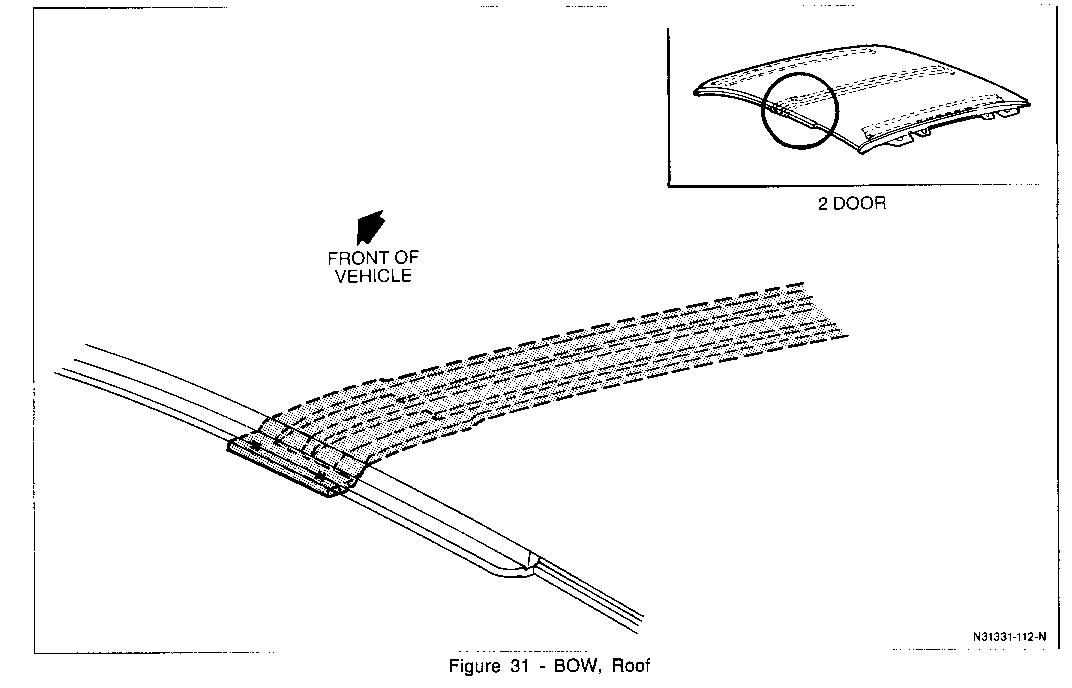
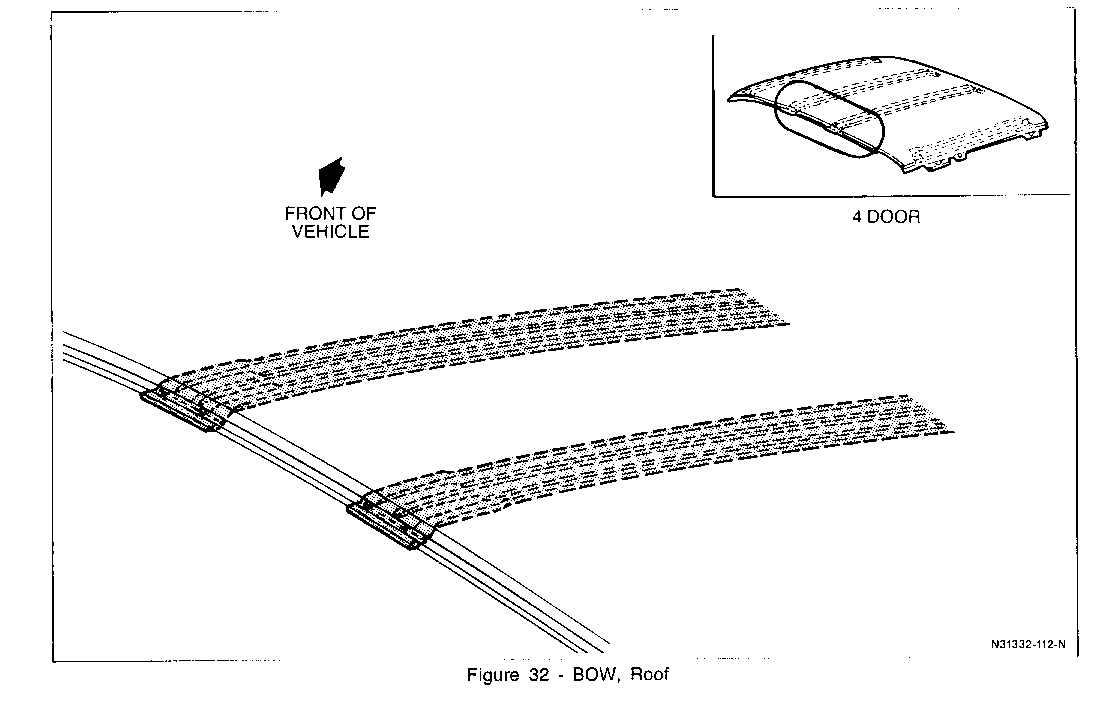
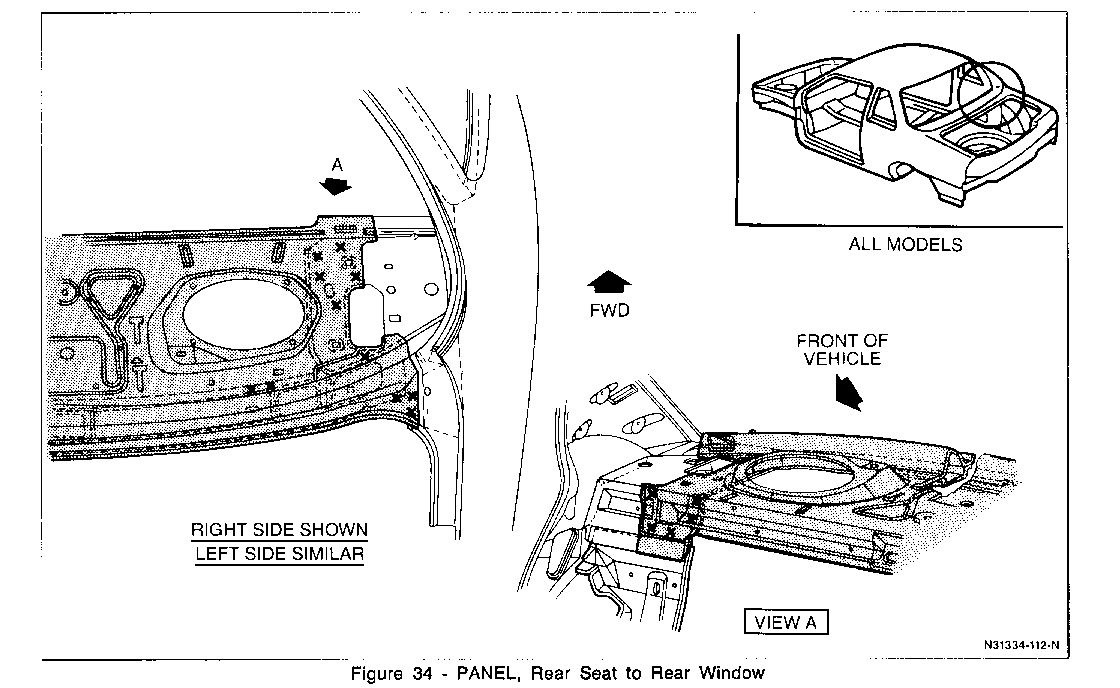
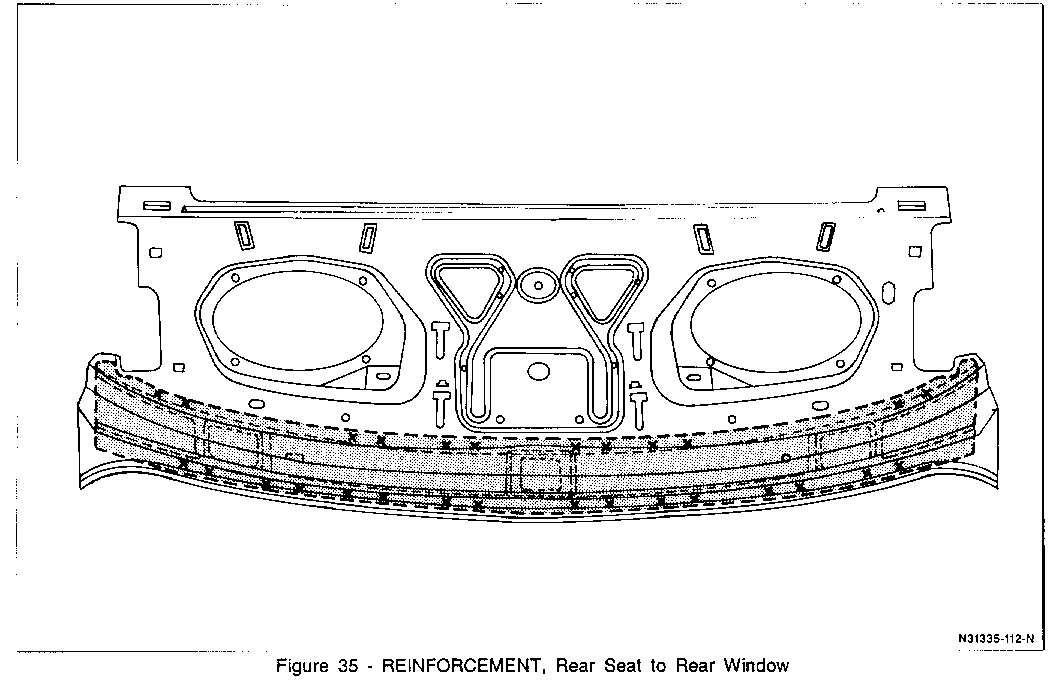
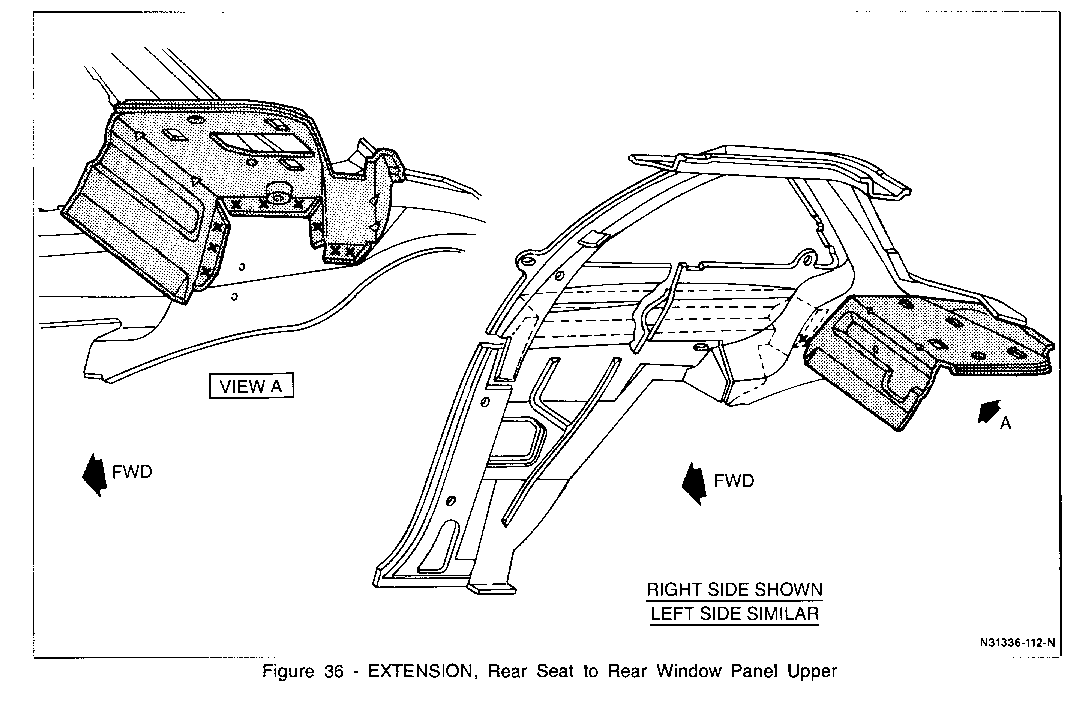
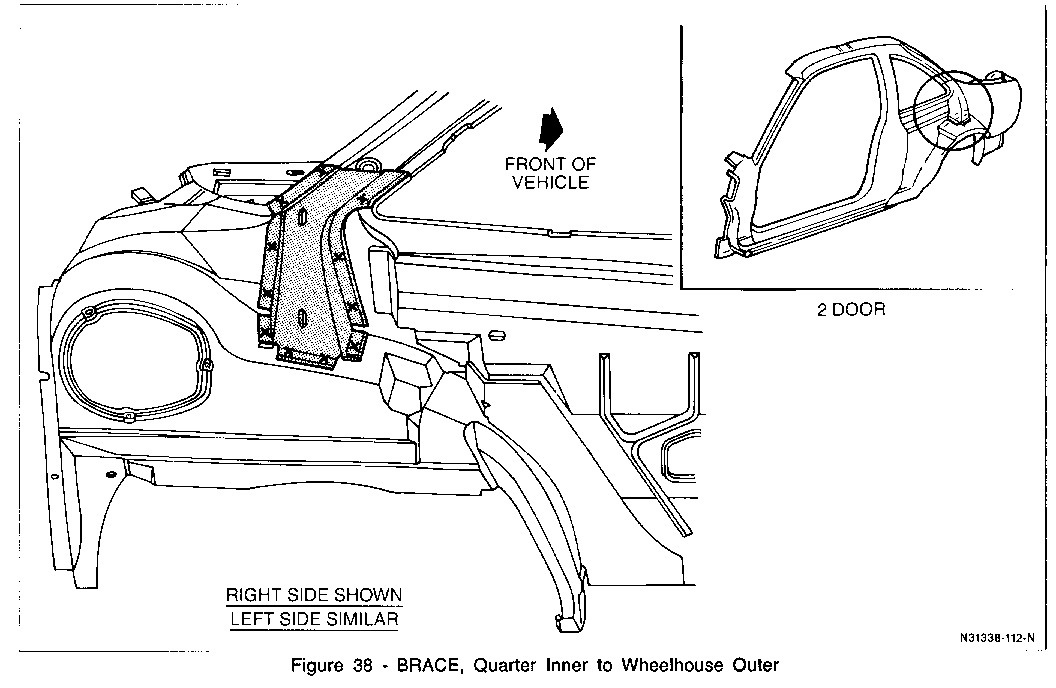
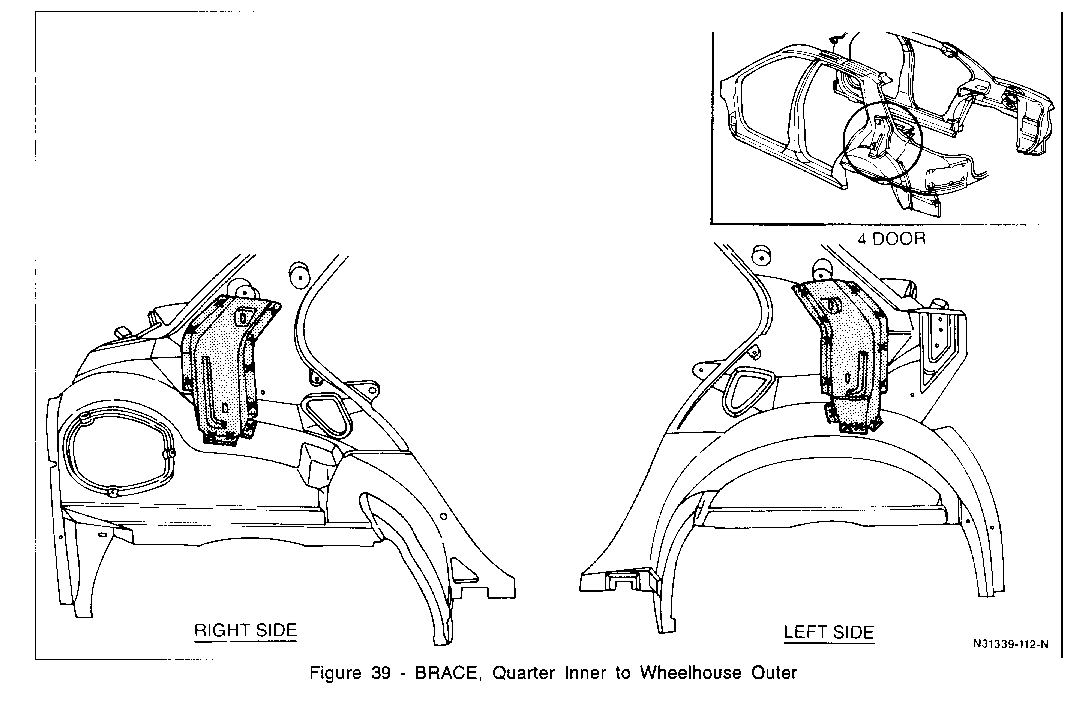
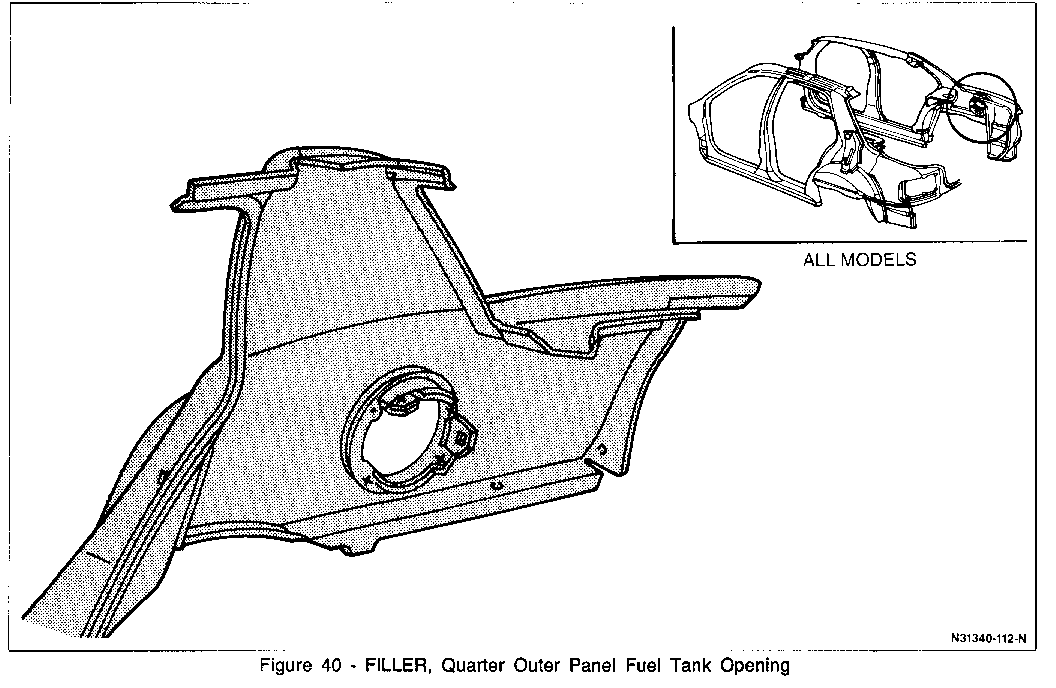
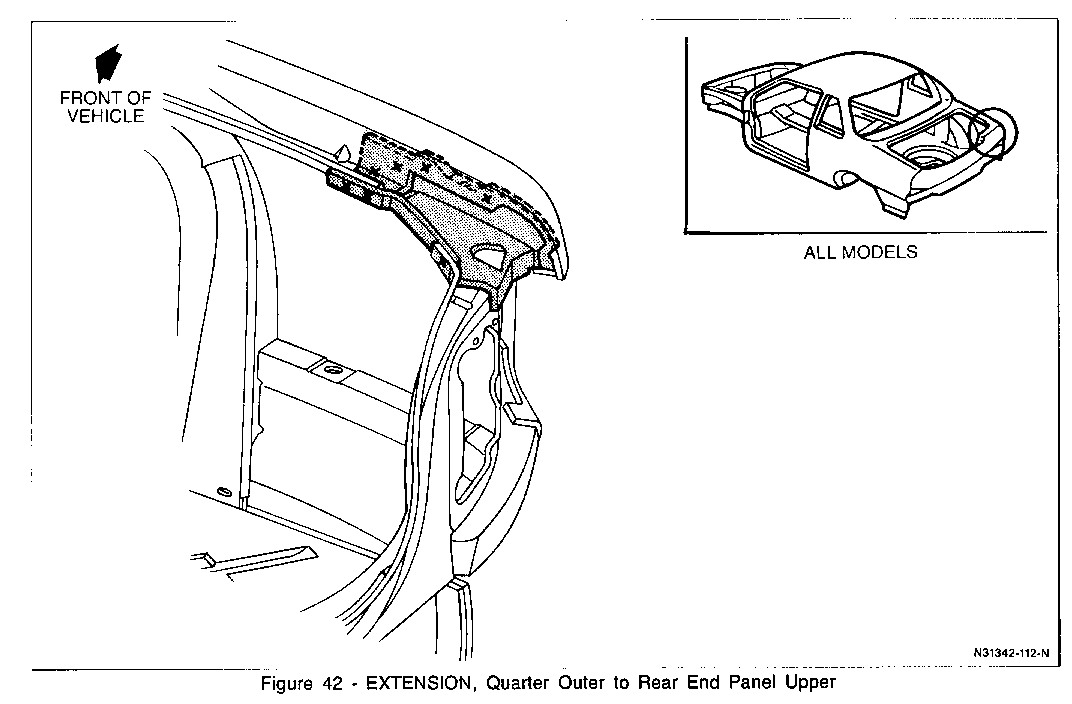
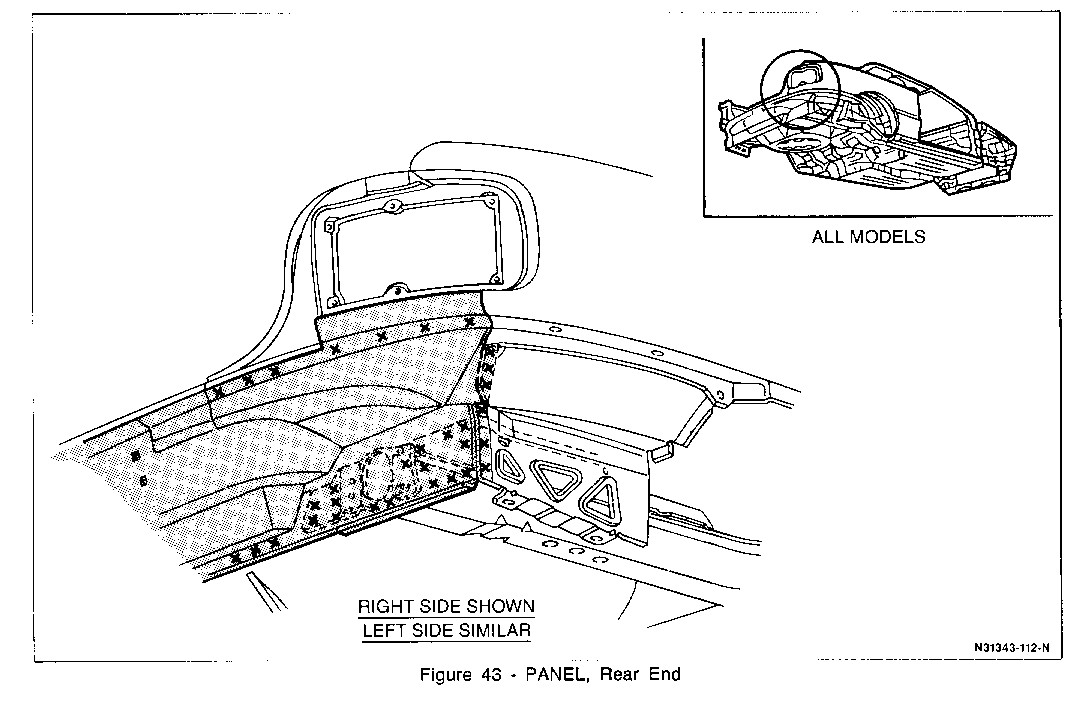
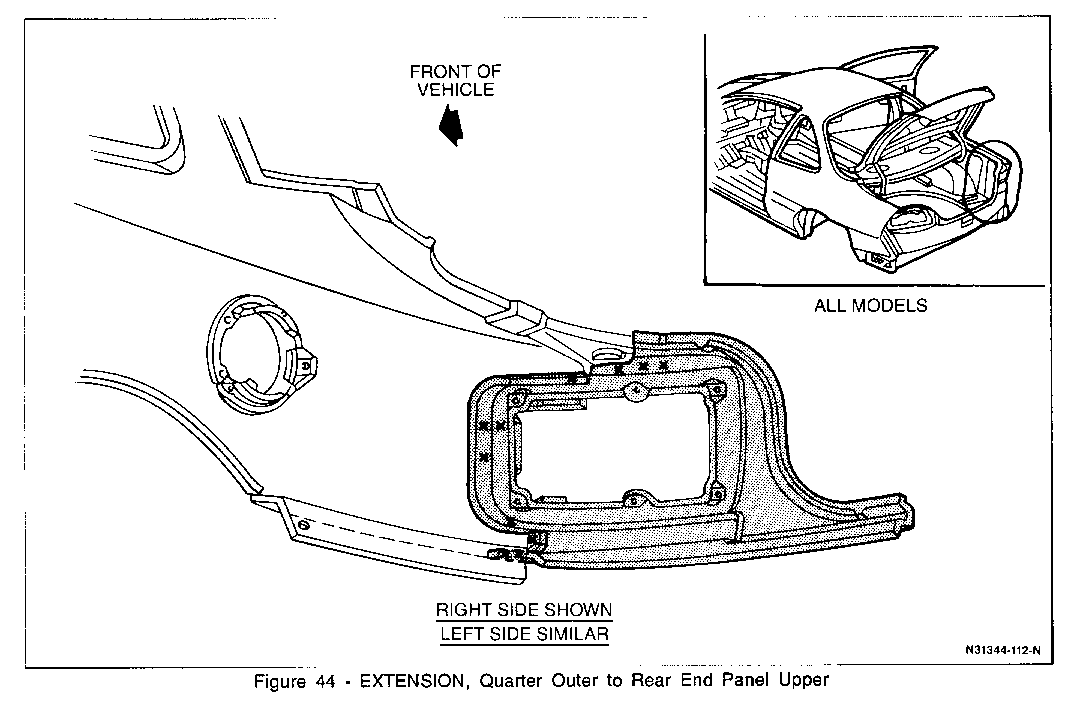
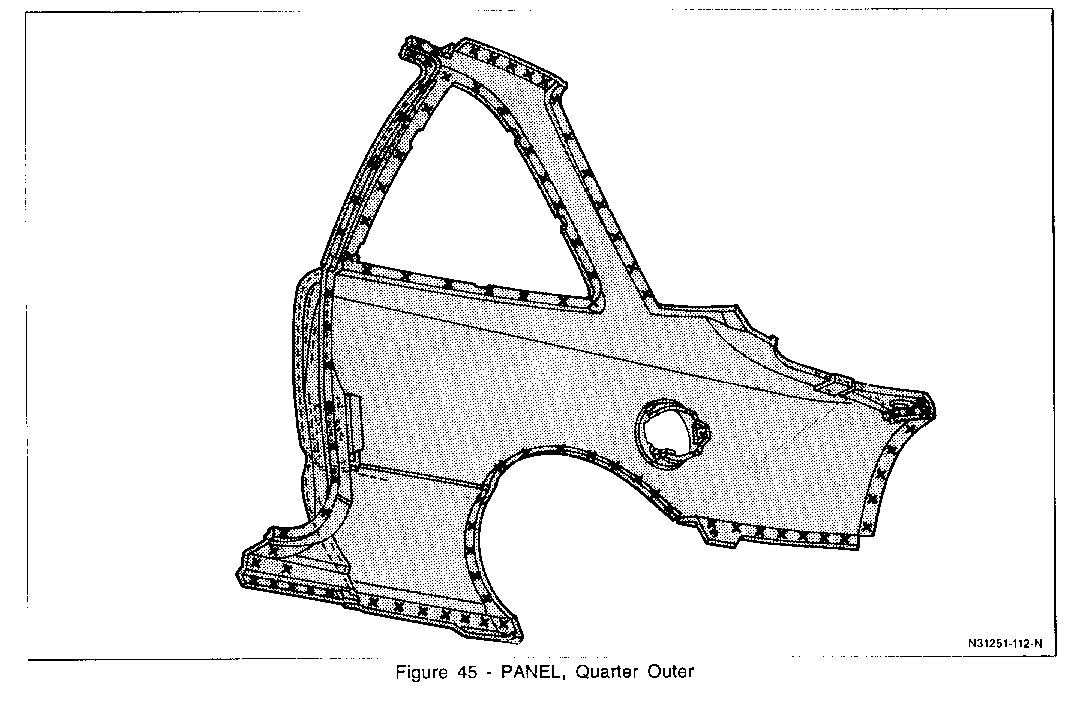
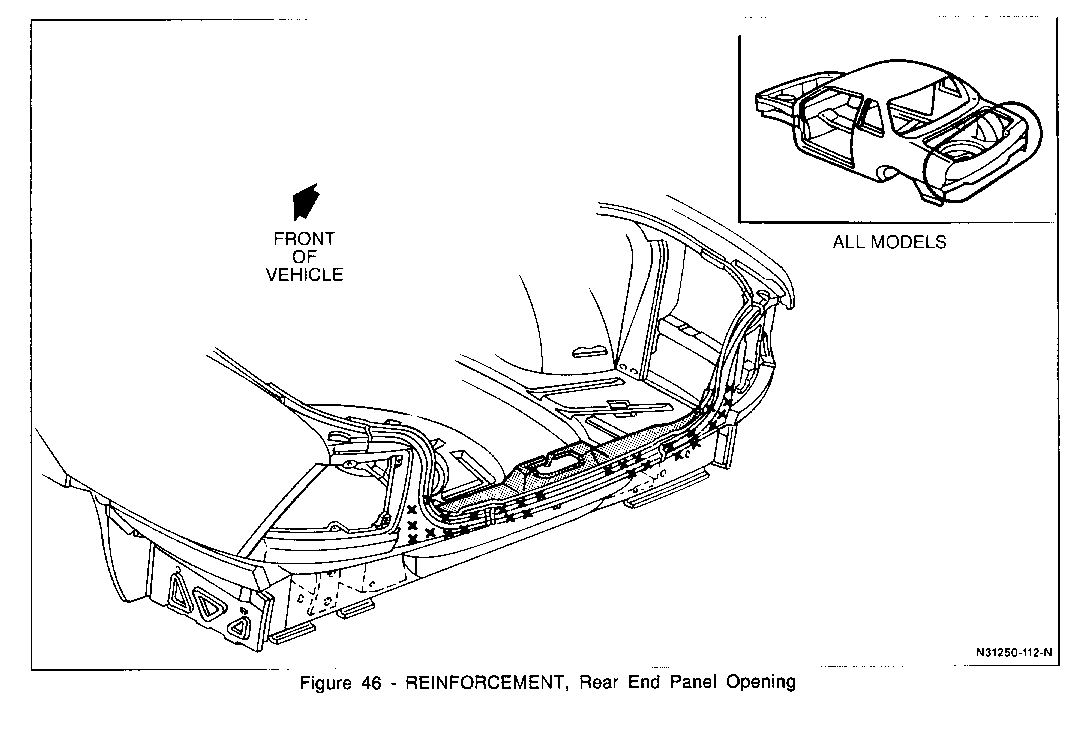
Figure 3 - BAR ASSEMBLY, Front End Upper Tie Figure 4 - BAR ASSEMBLY, Front End Lower Tie Figure 5 - TRAY ASSEMBLY, Battery Figure 6 - RAIL, Front Wheelhouse Panel Upper Inner Side LH & RH Figure 7 - EXTENSION, Motor Compartment Side Rail LH & RH Figure 8 - PANEL, Motor Compartment Side & Wheelhouse Rear Figure 9 - EXTENSION, Front Wheelhouse Panel Upper Outer Side Rail Figure 10 - RAIL, Outer Side Upper Figure 11 - SUPPORT, Arm Front Suspension Control Upper LH Figure 12 - SUPPORT, Arm Front Suspension Control Upper RH Figure 13 - SUPPORT ASSEMBLY, Steering Gear LH & RH Figure 14 - PANEL, Center Pillar Inner Lower Figure 15 - PANEL, Center Pillar Inner Upper Figure 16 - SUPPORT, Rear Window Panel Extension LH & RH Figure 17 - RAIL, Side Roof Inner LH & RH - 2 Door Figure 18 - RAIL, Side Roof Inner LH & RH - 4 Door Figure 19 - PANEL, Roof - 2 Door Figure 20 - PANEL, Roof - 2 Door Figure 21 - PANEL, Roof - 4 Door Figure 22 - PANEL, Roof - 4 Door Figure 23 - REINFORCEMENT, Rocker Outer Panel Figure 24 - REINFORCEMENT, Rocker Outer Panel Figure 25 - PANEL, Front Door Outer LH & RH - 2 Door Figure 26 - PANEL, Front Door Outer LH & RH - 2 Door Figure 27 - BAR, Front Door Outer LH & RH Figure 28 - PANEL, Rear Door Outer LH & RH Figure 29 - BAR, Rear Door Outer LH & RH Figure 30 - FRAME, Windshield Inner Upper Figure 31 - BOW, Roof Figure 32 - BOW, Roof Figure 33 - PANEL, Rear Window Inner Upper Figure 34 - PANEL, Rear Seat to Rear Window Figure 35 - REINFORCEMENT, Rear Seat to Rear Window Figure 36 - EXTENSION, Rear Seat to Rear Window Panel Upper Figure 37 - PANEL ASSEMBLY, Wheelhouse Inner Upper LH & RH Figure 38 - BRACE, Quarter Inner to Wheelhouse Outer Figure 39 - BRACE, Quarter Inner to Wheelhouse Outer Figure 40 - FILLER, Quarter Outer Panel Fuel Tank Opening Figure 41 - FILLER, Rear Compartment to Quarter Outer Panel Figure 42 - EXTENSION, Quarter Outer to Rear End Panel Upper Figure 43 - PANEL, Rear End Figure 44 - EXTENSION, Quarter Outer to Rear End Panel Upper Figure 45 - PANEL, Quarter Outer Figure 46 - REINFORCEMENT, Rear End Panel


General Motors bulletins are intended for use by professional technicians, not a "do-it-yourselfer". They are written to inform those technicians of conditions that may occur on some vehicles, or to provide information that could assist in the proper service of a vehicle. Properly trained technicians have the equipment, tools, safety instructions and know-how to do a job properly and safely. If a condition is described, do not assume that the bulletin applies to your vehicle, or that your vehicle will have that condition. See a General Motors dealer servicing your brand of General Motors vehicle for information on whether your vehicle may benefit from the information.
