FRT. MARKER LAMP APPEARANCE REPOSITION AND/OR TRIM TO FIT

SUBJECT: FRONT SIDE MARKER LAMP FIT TO FENDER (REPOSITION AND/OR TRIM SIDE MARKER LAMP)
VEHICLES AFFECTED: 1992 PONTIAC "N" CAR -----------------------------------------------------------------------------
Condition:
---------- Some 1992 Pontiac Grand Ams built prior to:
Lansing Plant "C" VIN C203444
Lansing Plant "M" VIN M002222
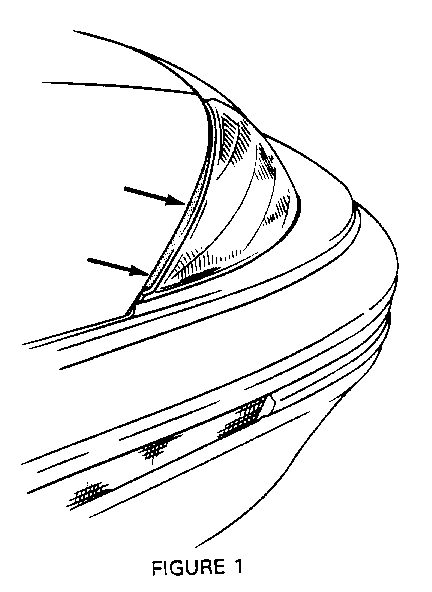
may have left and/or right side marker lamp(s) that extend beyond the fender or exhibit an undesirable gap. Refer to Figure 1. The lamps are correctly positioned when the lamp flange is 1mm - 4mm (1/16 to 5/32 in.) inboard of fender and the gap from the side view does not exceed 2 mm (1/16").
Cause:
------ Some side marker lamp tabs may not be completely seated in the composite headlamp housing slot(s) or may have excess material that prevents proper alignment with the fender.
Correction:
----------- Most lamp fit concerns may be corrected by removing and re-installing the lamps to improve appearance or by revising the locating tab as follows.
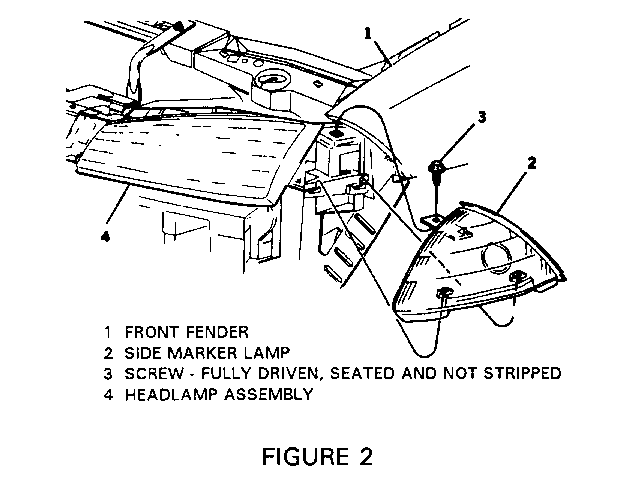
1. Open hood.
2. Remove lamp screw.
3. Remove lamp and re-install making certain both locating tabs are seated in the headlamp housing slots by a gently rocking motion making certain the lamp is rearward and inboard as far as possible using hand pressure only.
4. Install lamp screw.
If fit is still not acceptable use the following procedure.
5. Remove lamp screw.
6. Remove bulb/socket from lamp.
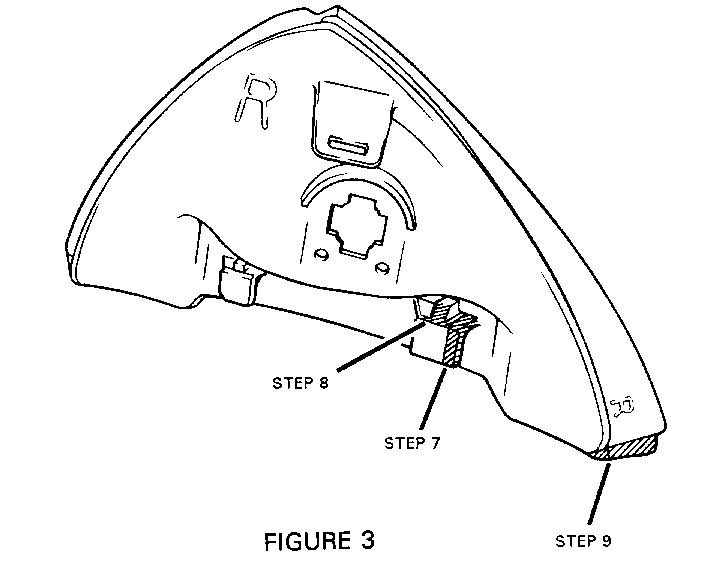
7. Using diagonal style pliers, trim 4 mm (5/32 in.) from lamp rear tab as shown in Figure 3.
8. Remove 1/2 to 1 mm of material from angular surface as shown in Figure 3 making certain to maintain existing angle to retain anti- rattle/wedge fit.
9. File 4 mm (5/32 in.) material on rear corner of lamp as shown in Figure 3 being cautious not to disturb the seal of the lens or the plastic weld.
10. Install bulb/socket lamp.
11. Install side marker lamp to headlamp assembly as in step 3 above.
12. Install screw to side marker lamp.
13. Close hood.
For vehicles repaired under warranty use:
Labour Operation Number: N1564 (Left) N1565 (Right)
Labour Time : .2 Per Side


General Motors bulletins are intended for use by professional technicians, not a "do-it-yourselfer". They are written to inform those technicians of conditions that may occur on some vehicles, or to provide information that could assist in the proper service of a vehicle. Properly trained technicians have the equipment, tools, safety instructions and know-how to do a job properly and safely. If a condition is described, do not assume that the bulletin applies to your vehicle, or that your vehicle will have that condition. See a General Motors dealer servicing your brand of General Motors vehicle for information on whether your vehicle may benefit from the information.
