Removal Procedure
- Remove the master cylinder. Refer to Master Cylinder Replacement
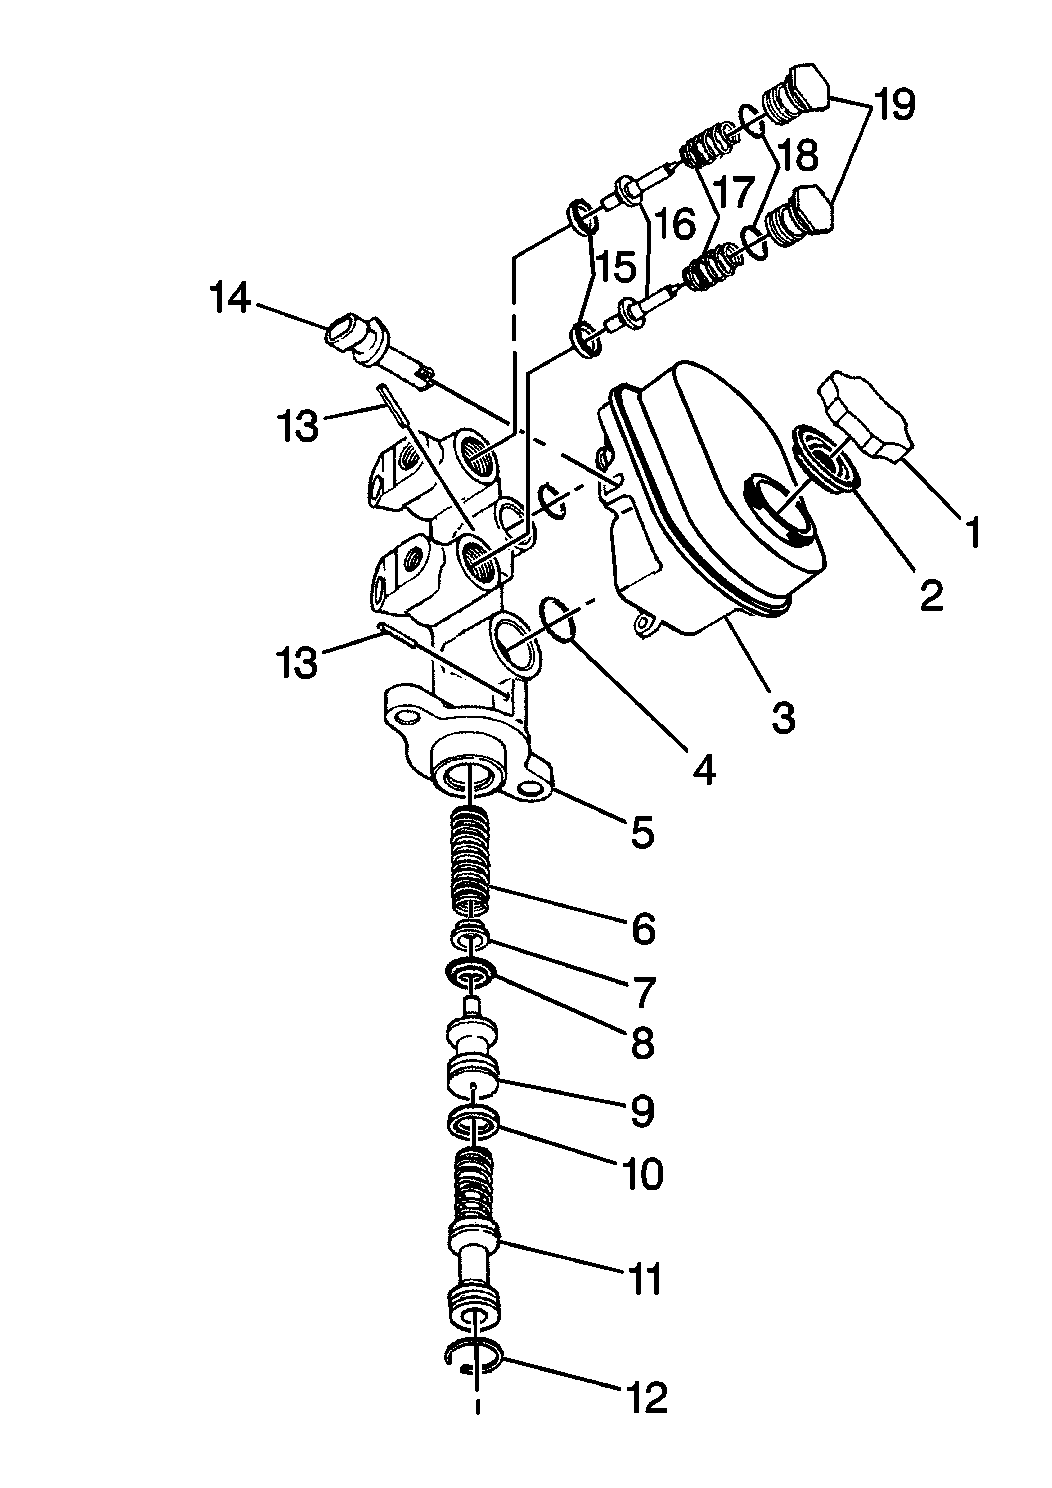
- Clamp the flange of the master cylinder body (3) in a vise.
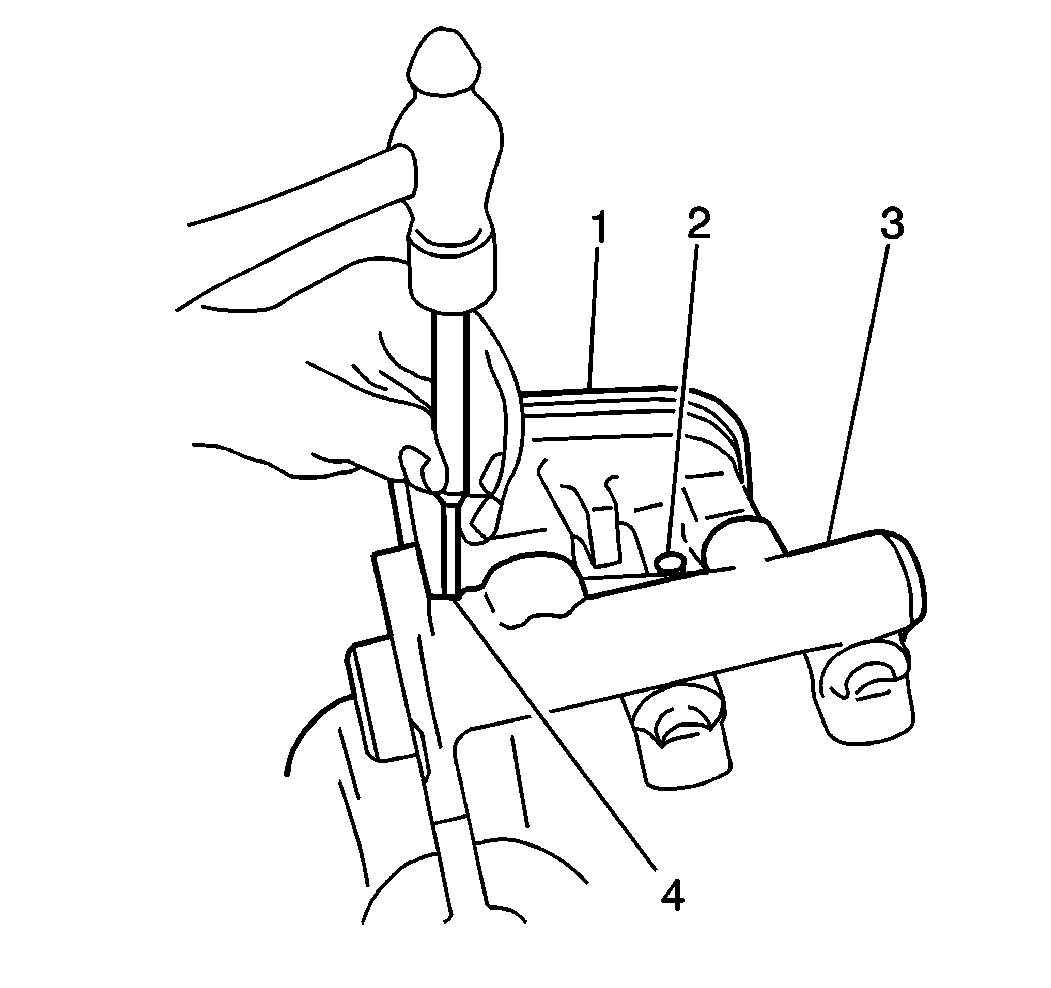
- Drive out the spring pins (13) using a 1/8 inch punch.
- Remove the master cylinder reservoir (3).
- Remove the O-rings (4) from the grooves on the master cylinder reservoir (3). Discard the O-rings.
- Clean the reservoir (3) with clean denatured alcohol.
- Dry the reservoir (3) with non-lubricated compressed air.
- Inspect the master cylinder reservoir (3) for cracks or deformation. Replace the reservoir (3) if damage is evident.

Notice: Do not clamp on master cylinder body. Doing so may damage the master cylinder.

Do not damage the reservoir (3) or the cylinder body (5) when driving out the spring pins (13).
Pull the master cylinder reservoir (3) straight up and away from the master cylinder body (5).
Remove the reservoir (3) from the body (5).
Installation Procedure
Caution: Brake fluid may irritate eyes and skin. In case of contact, take the
following actions:
• Eye contact--rinse thoroughly with water. • Skin contact--wash with soap and water. • If ingested--consult a physician immediately.
Notice: Avoid spilling brake fluid on any of the vehicle's painted surfaces, wiring, cables or electrical connectors. Brake fluid will damage paint and electrical connections. If any fluid is spilled on the vehicle, immediately flush the area with water to minimize the potential for damage.
- Lubricate the new O-rings (4) with clean brake fluid.
- Lubricate the reservoir flanges with clean brake fluid.
- Install the new O-rings (4) into the grooves on the master cylinder reservoir (3).
- Ensure that the O-rings (4) are properly seated.
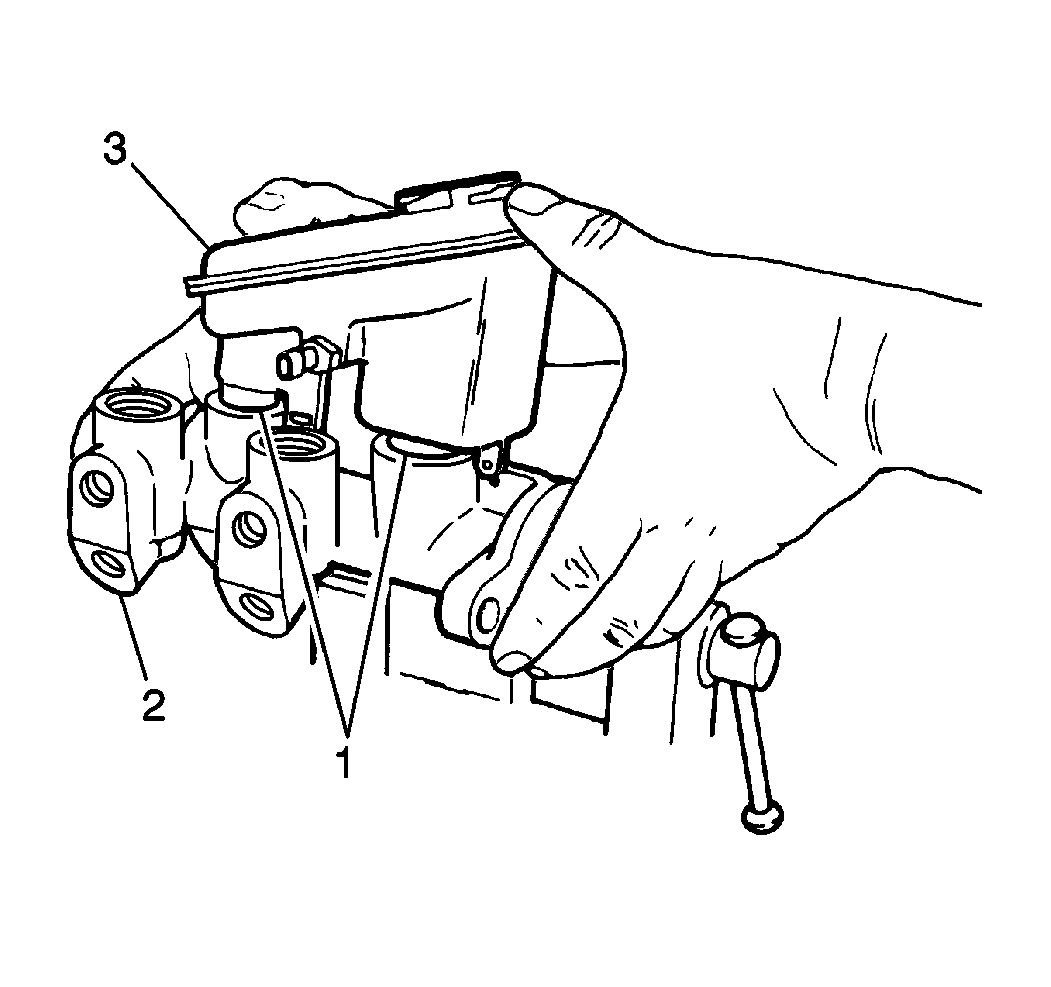
- Install the master cylinder reservoir (3) to the master cylinder body (2). Press straight down by hand into the master cylinder body (2).
- Install the spring pins (2, 4) using a 1/8 inch punch (4).
- Install the master cylinder.


Do not damage the reservoir (1) or the master cylinder body (3).
