Parking Brake Lever Replacement Olds And Buick
Removal Procedure
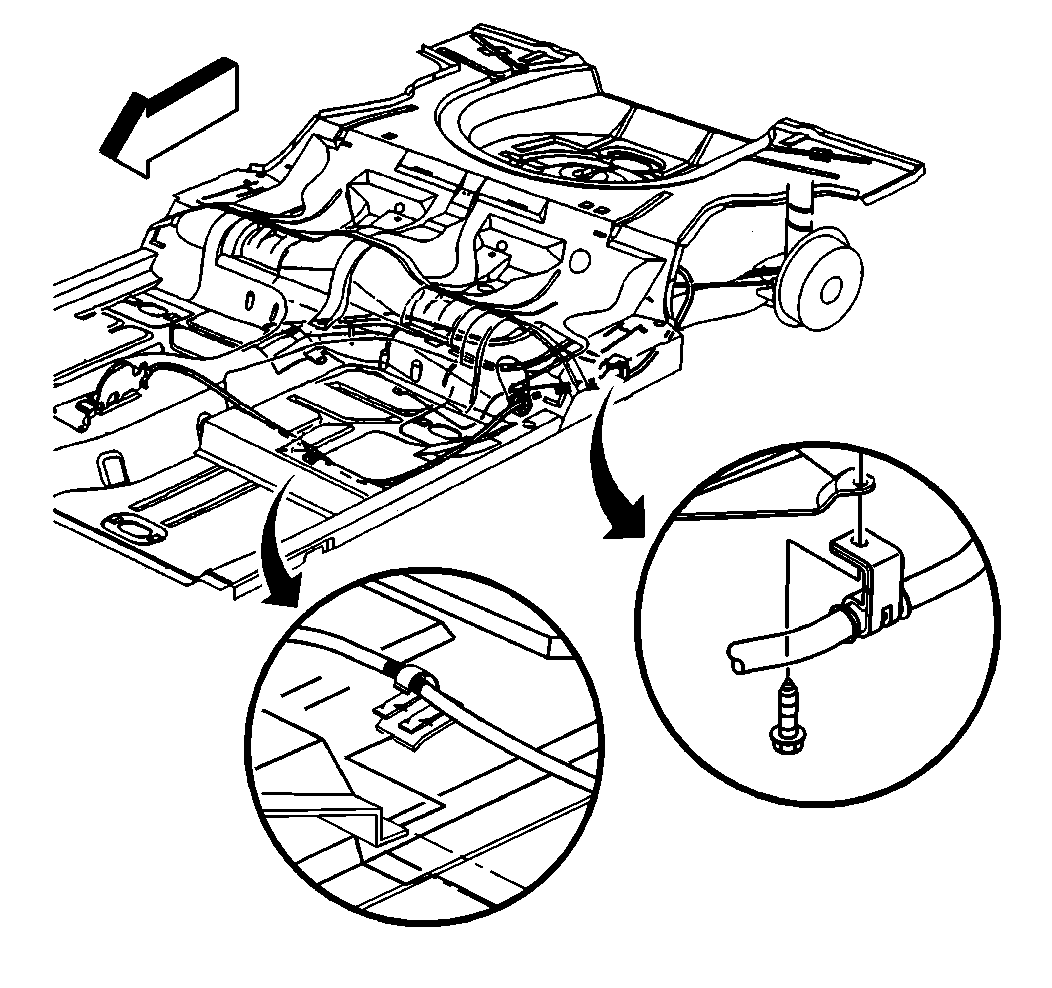
- Raise the vehicle. Support the vehicle. Refer to Lifting and Jacking the Vehicle in General Information.
- Bend the tang on the connector (10) in order to allow the cable removal.
- Pull and hold the cable (1) towards the rear of the car in order to create slack in the cable.
- Disconnect the cable (3) from the connector (6).
- Lower the vehicle.
- Remove the front parking brake cable from the reel assembly on the lever.
- Remove the cable conduit fitting from the lever assembly while depressing the retaining tangs.
- Disconnect the electrical connector (2).
- Remove the nuts securing the lever (9).
- Remove the lever (9).


Notice: Use caution when removing the spring. This is to avoid hitting and knocking the self adjusting spring loose.


Installation Procedure
- Connect the front parking brake cable to the reel assembly and secure the cable conduit fittings into the lever assembly (1).
- Install the parking brake lever (9) and attaching nuts.
- Install electrical connector (2).
- Raise the vehicle. Support the vehicle. Refer to Lifting and Jacking the Vehicle in General Information.
- Connect the cable (3) to the connector (6).
- Fully apply and release the foot brake 4 - 6 times in order to self adjust the system.


Notice: Use the correct fastener in the correct location. Replacement fasteners must be the correct part number for that application. Fasteners requiring replacement or fasteners requiring the use of thread locking compound or sealant are identified in the service procedure. Do not use paints, lubricants, or corrosion inhibitors on fasteners or fastener joint surfaces unless specified. These coatings affect fastener torque and joint clamping force and may damage the fastener. Use the correct tightening sequence and specifications when installing fasteners in order to avoid damage to parts and systems.
Tighten
Tighten the parking brake lever nuts to 32 N·m (24 lb ft).

Notice: Parking brake adjustment is not necessary. This is a self adjusting system and damage may result from attempting to adjust or modify this system in any way. It may be necessary to adjust the rear brakes to obtain the proper tension in the system.
Parking Brake Lever Replacement Pontiac
Removal Procedure
- Raise the vehicle. Support the vehicle. Refer to Lifting and Jacking the Vehicle in General Information.
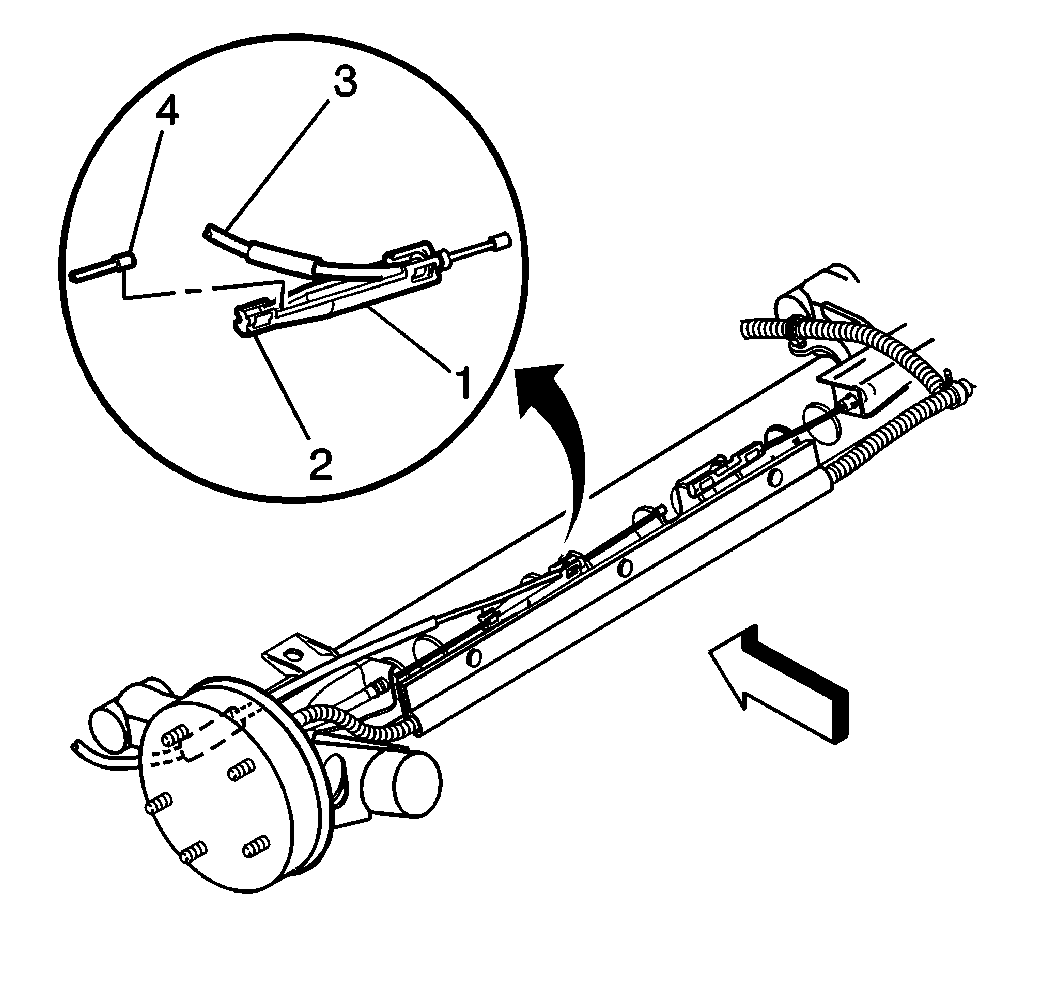
- Pull and hold the cable (3) towards the rear of the car in order to create slack in the cable.
- Bend the tang (1) on the connector (4) in order to allow cable removal.
- Disconnect the cable from the connector.
- Lower the vehicle.
- Remove the console (and the shifter boot).
- Move the lever to the off position.
- Remove the cable conduit end fitting from the handle assembly.
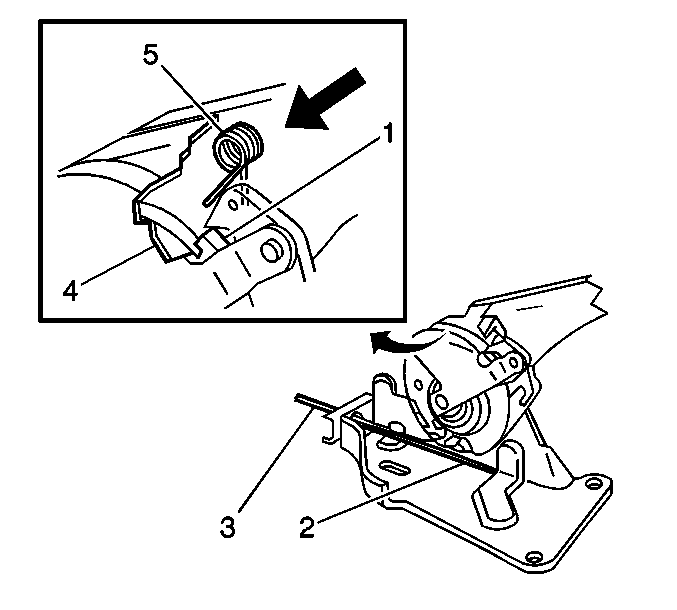
- Pull the cable (3) until the notch on the ratchet (4) is visible through the cover plate opening.
- Push the pawl spring (5) downward toward the notch in the ratchet.
- Release the cable (3) slowly in order to allow the notch to catch the leg of the spring.
- Remove the front parking brake cable button (2) from the reel assembly.
- Disconnect the electrical connector (1).
- Remove the nuts (4) securing the lever (3).
- Remove the lever (3).


Installation Procedure
- Ensure that the pawl spring (5) is properly engaged.
- Install the front parking brake cable (4) to the handle assembly (2) and secure the cable conduit fittings into the lever assembly.
- Install the parking brake lever (3) and the attaching nuts (4).
- Connect the electrical connector (1).
- Raise the vehicle. Support the vehicle. Refer to Lifting and Jacking the Vehicle in General Information.
- Connect the cable to the connector.
- Lower the vehicle.
- Fully apply and release the hand brake 4 - 6 times in order to activate the self adjust system.
- Install the console (and the shifter boot).

Pull the cable (3) until the notch on the ratchet (4) is visible through the cover plate opening.
Push the pawl spring (5) downward toward the notch in the ratchet.
Release the cable (3) slowly in order to allow the notch to catch the leg of the spring.

Notice: Use the correct fastener in the correct location. Replacement fasteners must be the correct part number for that application. Fasteners requiring replacement or fasteners requiring the use of thread locking compound or sealant are identified in the service procedure. Do not use paints, lubricants, or corrosion inhibitors on fasteners or fastener joint surfaces unless specified. These coatings affect fastener torque and joint clamping force and may damage the fastener. Use the correct tightening sequence and specifications when installing fasteners in order to avoid damage to parts and systems.
Tighten
Tighten the parking brake lever nuts to 25 N·m (18 lb ft).

Notice: Parking brake adjustment is not necessary. This is a self adjusting system and damage may result from attempting to adjust or modify this system in any way. It may be necessary to adjust the rear brakes to obtain the proper tension in the system.

