For 1990-2009 cars only
Crankshaft Balancer Replacement for Pontiac Grand Am 2000
Tools Required
| • | J 38122-A Harmonic Balancer Holder |

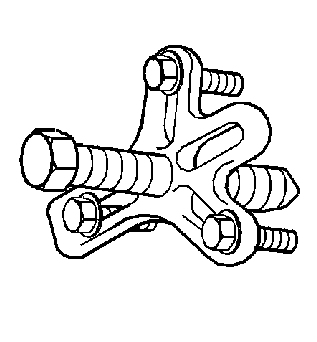
| • | J 24420-B Crankshaft Balancer Puller |
Removal Procedure
- Disconnect the negative battery cable. Refer to Battery Negative Cable Disconnection and Connection in Engine Electrical.
- Remove the drive belt. Refer to Drive Belt Replacement .
- Install the engine support fixture. Refer to Engine Support Fixture .
- Remove the engine mount. Refer to Engine Mount Replacement .
- Raise and suitably support the vehicle. Refer to Lifting and Jacking the Vehicle in General Information.
- Remove the right front wheel assembly. Refer to Tire and Wheel Removal and Installation in Tires and Wheels.
- Remove the A/C line from the retainer on the engine cradle.
- Lower the engine.
- Remove the right splash shield. Refer to Wheelhouse Splash Shield Replacement in Body Front End.
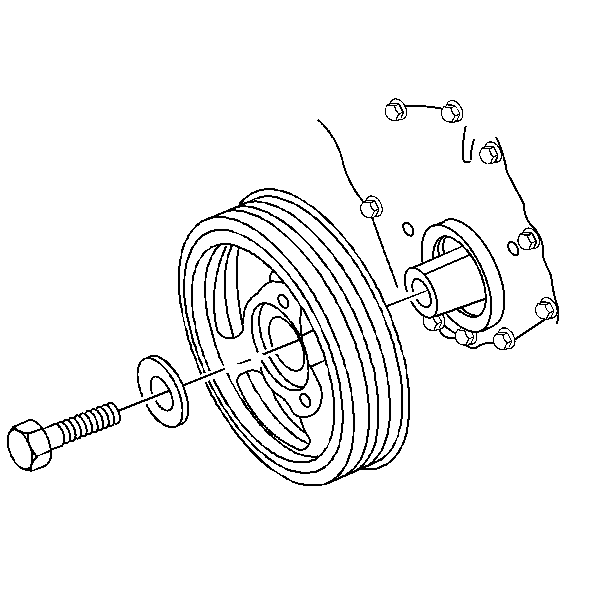
- Remove the balancer retaining bolt and the washer. Use J 38122-A in order to prevent crankshaft rotation when loosening the bolt.
- Remove the balancer assembly using J 24420-B .
Installation Procedure
- Lubricate the front seal and the sealing surface of the balancer with Chassis Grease GM P/N 1051344 or equivalent.
- Install the balancer onto the crankshaft indexing keyway. Tap the balancer into place using a rubber or sand-filled mallet.
- Install the retaining bolt and the washer.
- Raise the engine.
- Install the A/C line into the retainers.
- Install the right splash shield. Refer to Wheelhouse Splash Shield Replacement in Body Front End.
- Install the right front tire and wheel assembly. Refer to Tire and Wheel Removal and Installation in Tires and Wheels.
- Lower the vehicle. Refer to Lifting and Jacking the Vehicle in General Information.
- Install the engine mount. Refer to Engine Mount Replacement .
- Install the accessory drive belt. Refer to Drive Belt Replacement .
- Connect the negative battery cable. Refer to Battery Negative Cable Disconnection and Connection in Engine Electrical.
Important: Do NOT install the automatic transmission crankshaft balancer on an engine equipped with a manual transmission.
Notice: Do not use the J 36660 Torque Angle Meter to rotate the retaining bolt an additional 90 degrees. The torque capacity of the tool will be exceeded and damage to the tool will result.
Tighten
Tighten the crankshaft balancer bolt to 175 N·m (129 lb ft).
Use J 38122-A
in order
to prevent crankshaft rotation. Put a mark on the socket next to one
of the 4 marks on J 38122-A
. This mark will represent the 0-degree point. Tighten
the bolt by rotating the socket clockwise 90 degrees. At 90 degrees
the socket will index with the next mark on the tool.
