Removal Procedure
Caution: Refer to Brake Fluid Irritant Caution in the Preface section.
Notice: Refer to Brake Fluid Effects on Paint and Electrical Components Notice in the Preface section.
Caution: For safety reasons, the brake pressure modulator valve assembly must not be repaired, the complete unit must be replaced. With the exception of the EBCM, no screws on the brake pressure modulator valve assembly may be loosened. If screws are loosened, it will not be possible to get the brake circuits leak-tight and personal injury may result.
- Remove the battery. Refer to Battery Replacement in Engine Electrical.
- Remove the battery tray.
- Disconnect the caliper and wheel cylinder brake pipes (2) from the brake pedal modulator valve (BPMV) (3). Cover the ends of the brake pipes to avoid dripping or contamination.
- Disconnect the master cylinder brake pipes (1) from the BPMV (3). Cover the ends of the brake pipes to avoid dripping or contamination.
- Raise and support the vehicle on a suitable hoist. Refer to Lifting and Jacking the Vehicle in General Information.
- Remove the front engine splash shield.
- Remove the left engine splash shield.
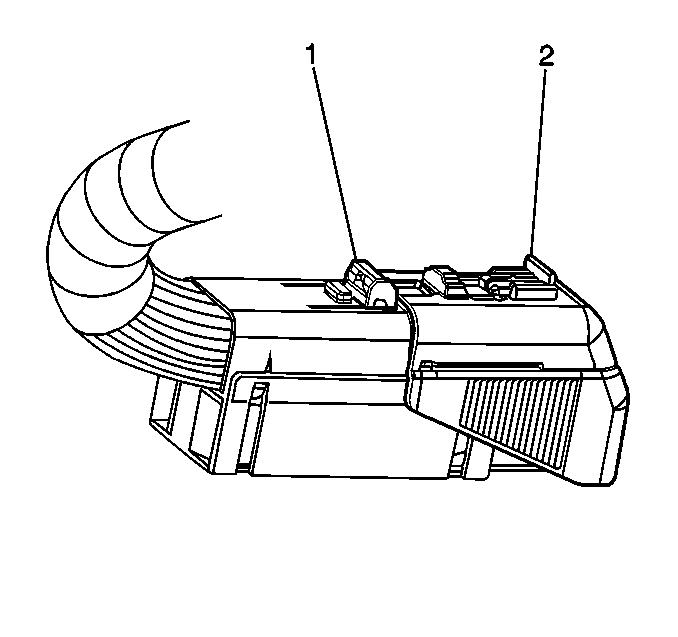
- Disconnect the Connector Position Assurance (CPA) (2) from the electronic brake control module (EBCM) connector.
- Push the lock tab (1) down and then move the sliding connector cover to the open position.
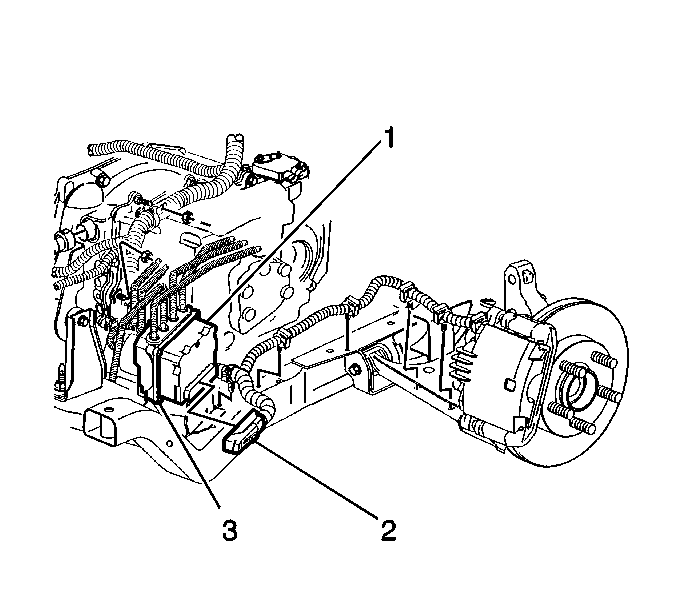
- Disconnect the EBCM harness connector (2) from the EBCM (1).
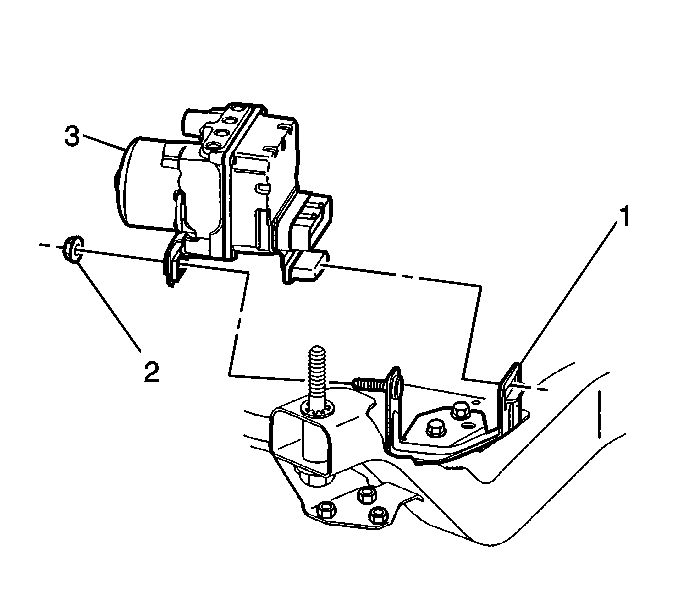
- Remove the BPMV retaining nut (2).
- Remove the EBCM/BPMV assembly (3) from the vehicle.
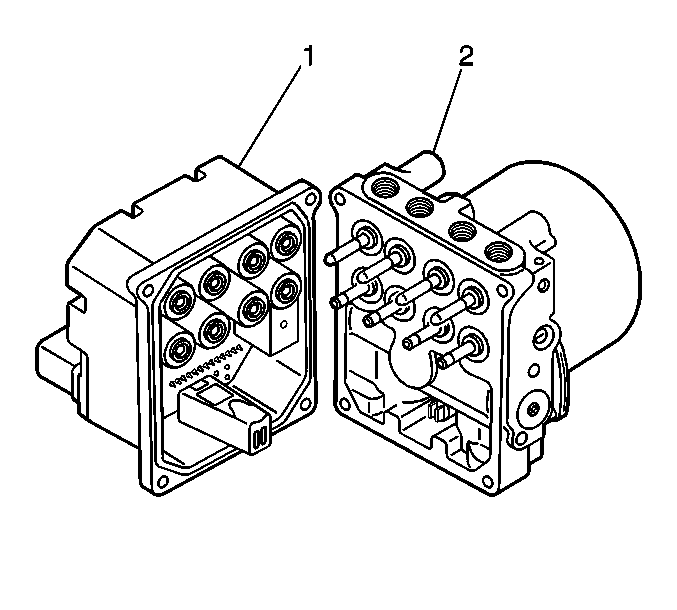
- Remove the EBCM (1) from the BPMV (2).
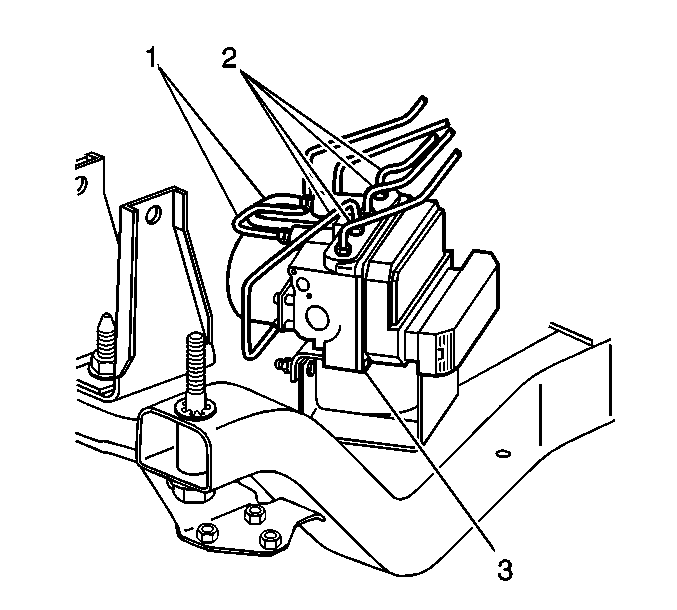
Important: Note the locations of the brake pipes in order to aid in installation.
Installation Procedure
- Install the EBCM (1) to the BPMV (2).
- Install the EBCM/BPMV assembly (3) to the vehicle.
- Install the BPMV retaining nut (2).
- Connect the EBCM harness connector (2) to the EBCM (1).
- Push down the lock tab (1) and then move the sliding connector cover back in the home position to lock.
- Insert the CPA (2) back into place.
- Install the left engine splash shield.
- Install the front engine splash shield.
- Lower the vehicle. Refer to Lifting and Jacking the Vehicle in General Information.
- Connect the master cylinder brake pipes (1) to the BPMV (3).
- Connect the caliper and wheel cylinder brake pipes (2) to the BPMV (3).
- Install the battery tray.
- Install the battery. Refer to Battery Replacement in Engine Electrical.
- Perform the Service Programming System (SPS) in Programming and Setup.
- Refer to Control Module References for programming and setup information.
Notice: Refer to Fastener Notice in the Preface section.

Tighten
Tighten the 4 screws that connect the EBCM (1) to the BPMV (2) to 5 N·m (44 lb in).

Tighten
Tighten the retaining nut to 10 N·m (7 lb ft).


Caution: Make sure brake pipes are correctly connected to brake pressure modulator valve. If brake pipes are switched by mistake, wheel lockup will occur and personal injury may result. The only two ways this condition can be detected are by using a Scan Tool or by doing an Antilock stop.
Tighten
Tighten the brake pipe fittings to 23 N·m (17 lb ft).
Tighten
Tighten the brake pipe fittings to 23 N·m (17 lb ft).
