HEADLAMP BULB CHANGE (REPLACE 'PEANUT' BULB)

SUBJECT: HEADLAMP BULB CHANGE (REPLACE "PEANUT" BULB)
VEHICLES AFFECTED: 1993 PONTIAC "W" MODELS (SEDAN ONLY)
APPLICATION:
----------- 1993 Pontiac Grand Prix (Sedan Only)
CONDITION:
--------- Note: Each headlamp assembly has a Low Beam, High Beam, and two "Peanut" type bulbs. This bulletin addresses the "Peanut" bulb.
The following two conditions may exist.
1. On some 1993 Pontiac Grand Prix STE Sedans, the Driver Information Center may beep and produce a message indicating that a front headlamp "Peanut" bulb is burned out when it is not. These vehicles will have the push-in type (wedge type) bulb.
2. All 1993 Pontiac Grand Prix Sedans have "Peanut" bulbs that either push-in (wedge type) or twist-in (bayonet type).
CORRECTION:
---------- Correction for Condition 1:
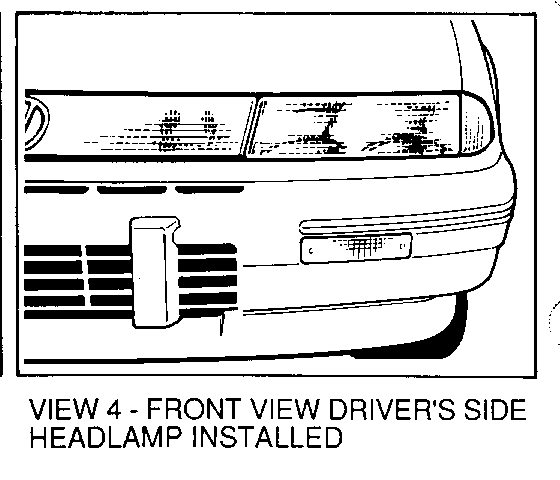
Replace headlamp "Peanut" bulbs with P/N 9427587 (trade #193). Procedure for bulb replacement: (Figure A and View 1 thru View 4).
1. Open hood.
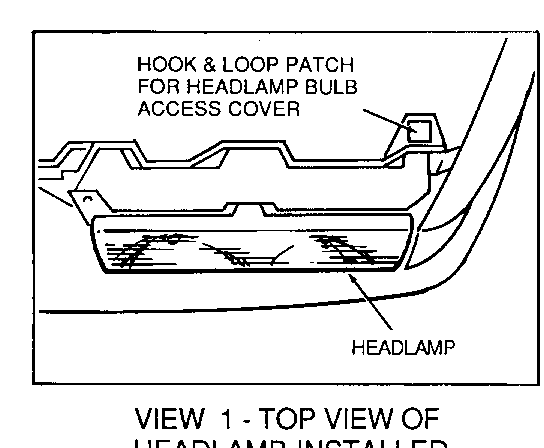
2. Remove both headlamp bulb access covers.
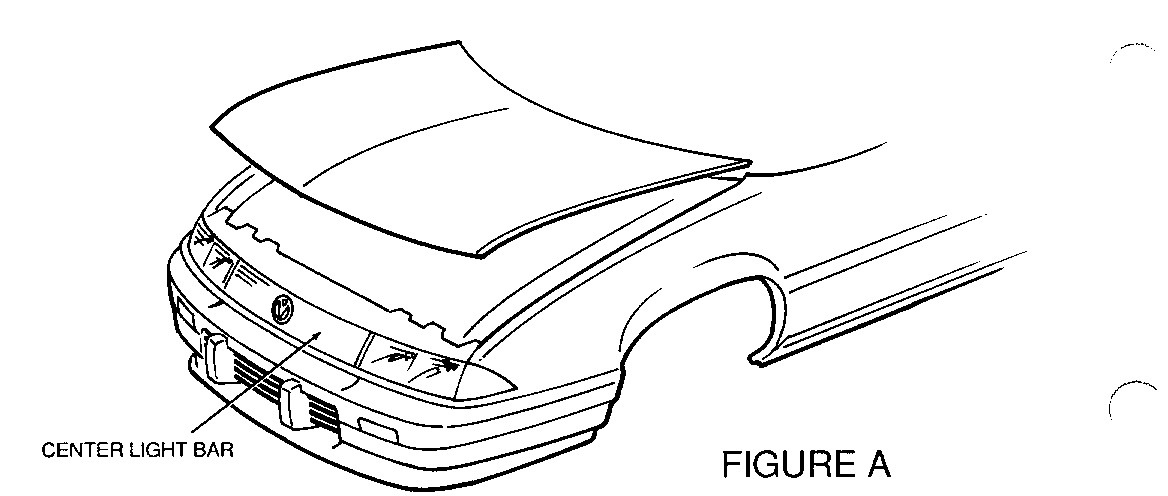
3. Remove five fasteners for Center Light Bar. The electrical connectors do not have to be disconnected. Carefully lay the Center Light Bar in the underhood area and protect it from any damage.
4. Remove four headlamp bolts (two at bottom rear of assembly and two at top rear, behind the assembly). Refer to Service Manual Section 8B-8.
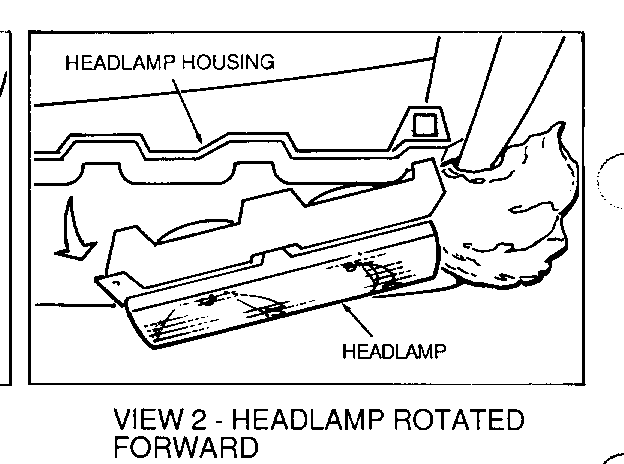
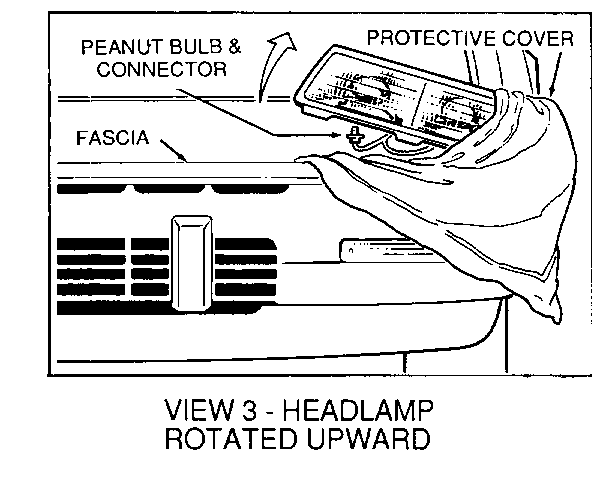
5. Cover fender front corner, sidemarker lamp and fascia under headlamp to protect from damage. See View 2 and 3.
Note: Steps 6 through 7 will allow the inboard side of the headlamp assembly to rotate forward as illustrated in View 2.
6. Move lower front inboard corner of the headlamp forward so that it rests on top of the fascia.
7. Move lower rear inboard corner of the headlamp assembly further forward so that the center of the headlamp assembly also rests on top of the fascia.
Note: Steps 8 thru 9 allow the headlamp assembly to be rotated upward as shown in View 3.
8. Move upper rear outboard corner of headlamp assembly slightly forward so that it can pivot below the headlamp housing. The inboard corner will still be forward of the outboard corner. See View 2.
9. Rotate inboard side of headlamp assembly upward as illustrated in View 3.
10. Remove "Peanut" bulb connector from bottom of headlamp assembly and remove "Peanut" bulb from connector and discard bulb. See View 3.
Note: For "Condition 1", all four "Peanut" bulbs should be replaced (two for each headlamp).
11. Install a new "Peanut" bulb, P/N 9427587, into the connector.
12. Install "Peanut" bulb connector into bottom of headlamp assembly.
13. Install headlamp assembly to the headlamp housing.
14. Remove protective cover from fender, sidemarker lamp and fascia.
15. Install Center Light Bar to headlamp housing panel.
16. Install headlamp bulb access cover and close hood.
Correction for Condition 2:
When replacing a burned out "Peanut" bulb, take note of what type it is. If it is the push-in type, replace it with P/N 9427587 (trade#193). If it is the twist-in type, replace it with P/N 9416927 (trade#1893). Procedure for bulb replacement is similar to that for "Correction for Condition 1 ". Only the burned out bulb needs to be replaced when replacing at twist-in type bulb, P/N 9416927. When replacing a push-in type bulb, if the old one is different from the new P/N 9427587, all four bulbs should be checked and replaced so that only the new P/N 9427587 is installed.
For vehicles repaired under warranty use:
Labour Time: 0.6 Hours for one headlamp 0.8 Hours for both headlamps
General Motors bulletins are intended for use by professional technicians, not a "do-it-yourselfer". They are written to inform those technicians of conditions that may occur on some vehicles, or to provide information that could assist in the proper service of a vehicle. Properly trained technicians have the equipment, tools, safety instructions and know-how to do a job properly and safely. If a condition is described, do not assume that the bulletin applies to your vehicle, or that your vehicle will have that condition. See a General Motors dealer servicing your brand of General Motors vehicle for information on whether your vehicle may benefit from the information.
