Tools Required
J 39916-A CD and Cassette
Diagnostic Kit
| • | The following are the recommended cleaning times for the cassette
tape player: |
| • | Every 15 hours for the best performance |
| • | Every 50 hours in order to prevent damage to the tape head |
| • | Leave the tape player in the vehicle. |
| | Reach through the tape door and clean the following components on the
tape player : |
| • | This service should be performed at least every 50 hours of cassette
operation. After 50 hours of tape play CLN (clean) will appear on the display
as a reminder. |
| • | Although the system will still function when this message is displayed
the following will occur: |
| • | Sound quality is reduced. |
| • | Damage to the cassette tape is possible until the tape player
is cleaned. |
| • | After cleaning the cassette tape player, press and hold the EJECT
button for 5 seconds in order to reset the CLN indicator. The radio will display -- -- --
in order to show the clean feature has been reset. |
| | A tape player that is not cleaned regularly is subject to the following
conditions: |
| • | Cassette tapes that are not stored in plastic cases may not operate
properly or cause premature failure of the tape player. The cassettes are
subject to wear and the sound quality may degrade over time. |
| | Store the cassette tapes in their plastic cases away from the following
factors: |
| • | Before servicing a tape player ensure that the following conditions
exist: |
| • | The cassette tape is in good condition |
| • | The tape player is clean |
| • | If a reduction in sound quality is audible, insert a different
cassette tape in order to detect if the tape or the tape player is at fault. |
| | If the second cassette tape results in no improvement in sound quality,
clean the tape player. |
Cleaning Procedure
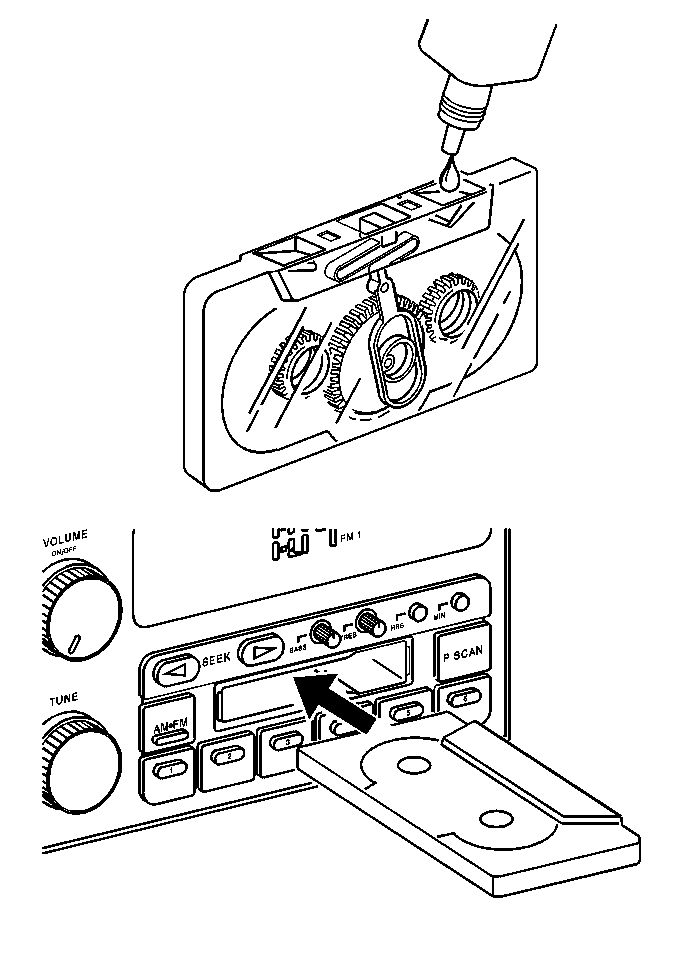
Use the J 39916-A
in order to clean the tape player.
This kit is a wet-type cleaning system. This system uses a cleaning
cassette with pads which scrub the tape head while the hubs of the cleaner
cassette turns.
During the cleaning process, the radio may display an error message
and eject the cartridge. This is a result of an added feature in the tape
player that detects broken tapes.
If an error message occurs, complete the cassette tape head and capstan
cleaning either of the following 2 ways:
| • | Activate the bypass feature: |
| - | Turn the ignition to the ON position. |
| - | Press the TAPE/PLAY button and hold for 3 seconds. |
| - | After the 3 seconds, ensure the tape symbol in the display flashes
for 2 seconds indicating the bypass feature is active. |
| - | Insert the cleaning cassette. |
| - | The bypass feature will remain active until the EJECT button is pressed. |
| • | Insert the cleaning cassette at least 3 times in order to thoroughly
clean the tape player. |
A non-scrubbing action, wet-type cleaner with a fabric belt may also
be used. This cleaner will not cause an error message. However, the tape player
will not be cleaned as thoroughly.
