Removal Procedure
- Open the hood.
- Remove the left front headlamp. Refer to Headlamp Replacement in Lighting Systems.
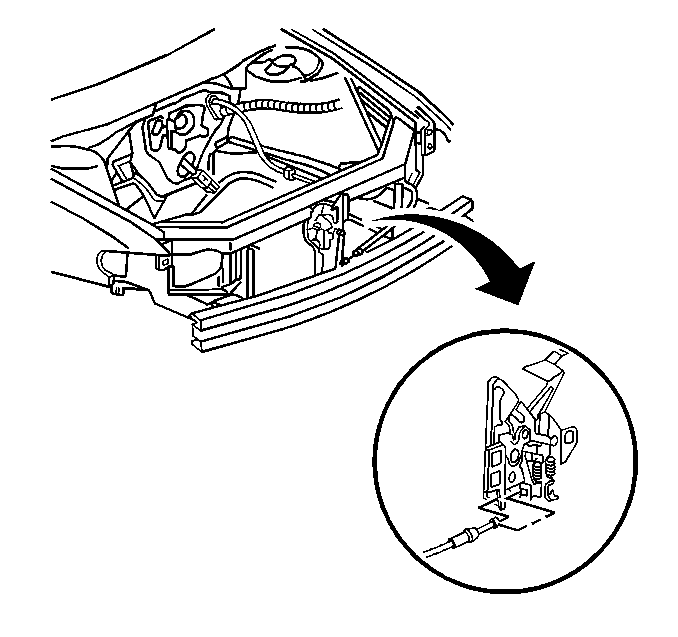
- Remove the door latch release cable from the hood latch.
- Remove the front sheet metal diagonal brace. Refer to Front End Sheet Metal Diagonal Brace Replacement .
- Remove the air cleaner. Refer to one of the following procedures:
- Tie a wire or string to the end of the hood release cable in order to aid in the installation of the new hood release cable. Ensure that the end of the wire or string remains in the engine compartment.
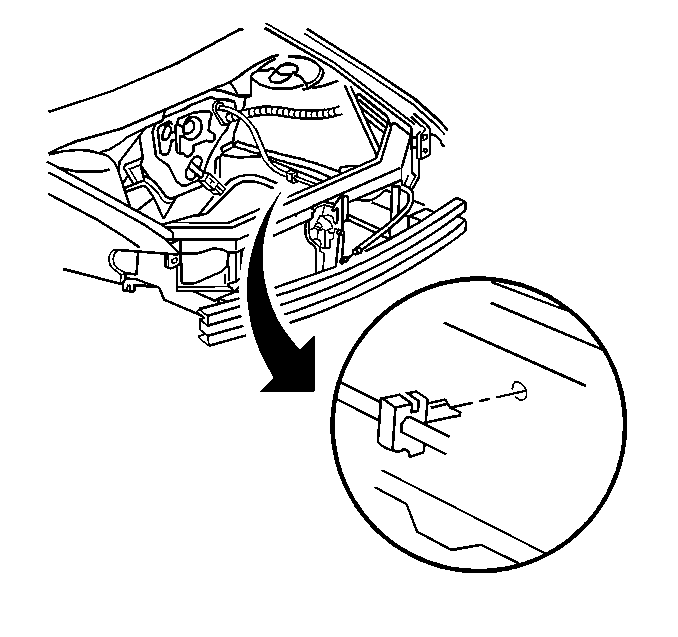
- Remove the hood release cable retainers from the engine compartment side rail.
- Pull the carpet back in order to access the hood release.
- Remove the nut from the parking brake bracket.
- Remove the bolts from the bolts from hood release handle.
- Remove the hood release cable from the hood release handle.
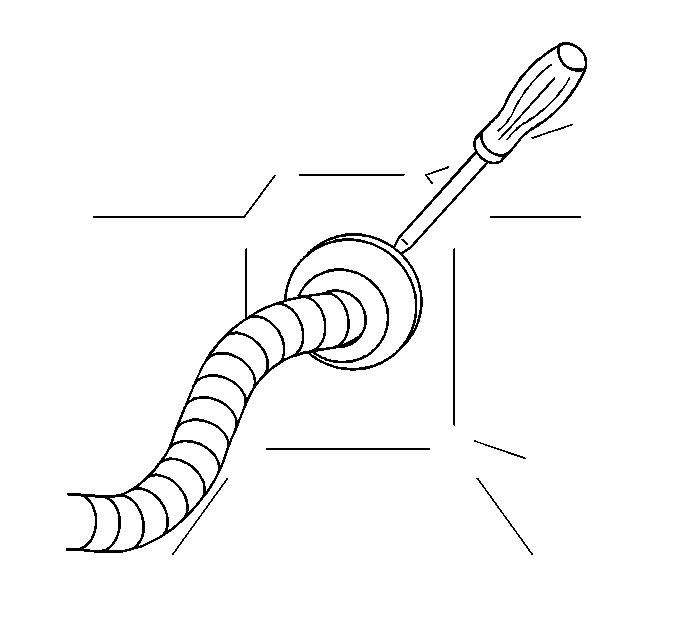
- Using a small flat bladed tool in order to remove the grommet from the dash panel.
- Remove the hood latch release cable from the dash panel.
Important: Block the latch in order to prevent the hood from locking until you have installed the hood release cable.
| • | Air Cleaner Assembly Replacement in Engine Controls - 3.1L |
| • | Air Cleaner Element Replacement in Engine Controls - 3.8L |

Installation Procedure
- Tie the hood latch release cable to a wire or string. Feed the hood latch release cable grommet through the dash panel.
- Apply strip caulk sealer, or an equivalent, around the grommet.
- Install the hood latch release cable to the hood release handle.
- Install the bolts to the hood release handle.
- Install the nut to the parking brake bracket.
- Pull back the carpet.
- Install the hood latch release cable retainers to the engine compartment side rail retainers.
- Route the hood latch release cable through the radiator support.
- Install the air cleaner. Refer to one of the following procedures:
- Install the front sheet metal diagonal brace. Refer to Front End Sheet Metal Diagonal Brace Replacement .
- Install the hood latch release cable to the hood latch.
- Install the left front headlamp. Refer to Headlamp Replacement in Lighting Systems.
- Remove the block from the latch mechanism.
- Close the hood.
Notice: Use the correct fastener in the correct location. Replacement fasteners must be the correct part number for that application. Fasteners requiring replacement or fasteners requiring the use of thread locking compound or sealant are identified in the service procedure. Do not use paints, lubricants, or corrosion inhibitors on fasteners or fastener joint surfaces unless specified. These coatings affect fastener torque and joint clamping force and may damage the fastener. Use the correct tightening sequence and specifications when installing fasteners in order to avoid damage to parts and systems.
Tighten
Tighten the hood release handle bolts to 5 N·m (44 lb in).
Tighten
Tighten the parking brake bracket nut to 5 N·m (44 lb in).
| • | Air Cleaner Assembly Replacement in Engine Controls - 3.1L |
| • | Air Cleaner Element Replacement in Engine Controls - 3.8L |
