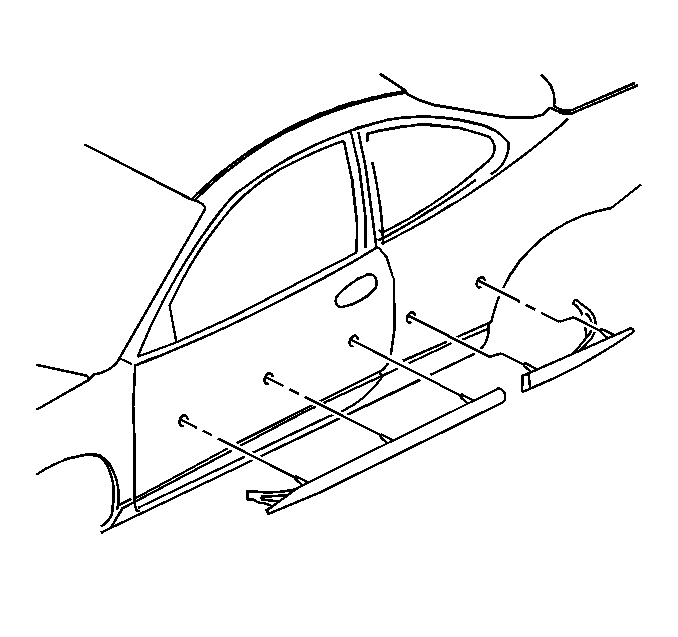
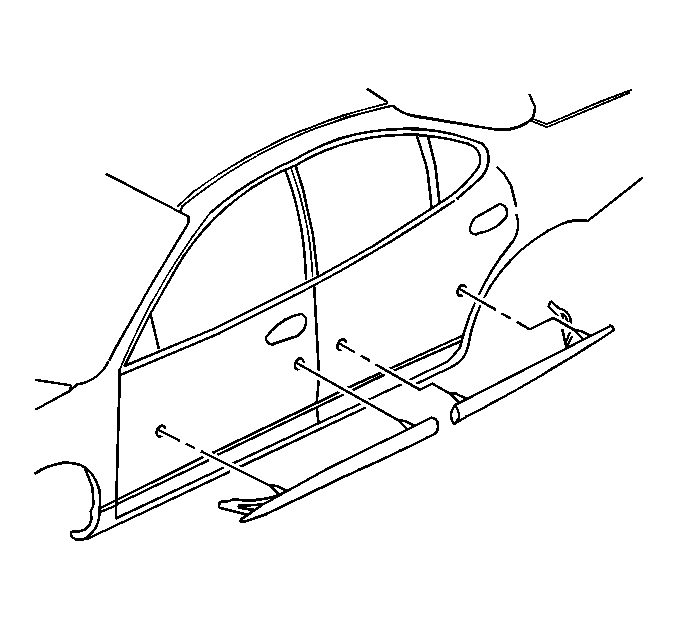
Adhesive Body Side Moldings
Adhesive tape attaches the following components to the body panels:
| • | The body side moldings |
| • | The emblems |
| • | The name plates |
Ensure that the following conditions exist before you replace any of the above components:
| • | The surface temperature measures 21-32°C (70-90°F). |
| • | The panel surface is clean. |
| • | The panel is free of wax or oily film. |
Adhesive Body Side Moldings End Loose
Use the following method in order to attach loose molding ends:
- Wash the affected area with Liquid Wash and Wax GM P/N 1052870 or equivalent.
- Wipe the panel and the adhesive side of the molding using a clean cloth and one of the following solutions:
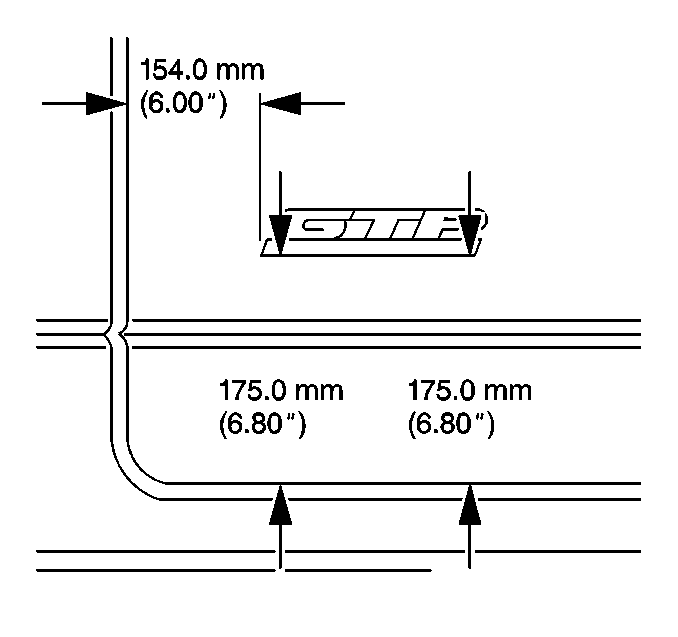
- Apply a length of masking tape to the vehicle for a molding guide, as needed. Use a straightedge, as needed.
- Apply adhesive to the back of the molding.
Wipe the area dry.
| • | Varnish Makers and Painters (VM&P) naphtha |
| • | Isopropyl alcohol |
Press the molding into place.
If you use adhesive GM P/N 1052621 or equivalent, apply constant pressure to the molding for 30 seconds or until a firm bond is made.
Adhesive Body Side Moldings Completely Removed
Use the following method in order to install moldings that are removed from the vehicle:
- Remove all of the adhesive from the body panel and the back of the molding.
- Thoroughly wash the repair area with soap and water.
- Use masking tape in order to mark the correct position of the molding.
- Use a heat lamp or a heat gun in order to warm the body panel to a minimum temperature of 21°C (70°F).
- Apply a piece of gray double-coated foam tape 3M P/N 06382 or equivalent to the molding.
- Align the molding to the tape guideline on the body panel.
- Peel the backing from the end of the molding.
- Press the molding firmly into place while you continue to remove the backing.
- Hand roll the molding to the body in order to ensure proper adhesion.
Important: The following procedure is for moldings that are not damaged. Do not use the following procedure if the molding is dented or pried from the vehicle.
Use 3M ScotchBrite molding adhesive remover disk 3M P/N 07501 or equivalent.
Wipe the area dry.
Use the adjacent moldings as a guide.
Adhesive Body Side Moldings, Emblems and Name Plates
Removal Procedure
- Use a heat gun in order to heat the molding, emblems and name plates 152 mm (6 in) from the surface.
- Use a flat-bladed tool in order to peel the molding, emblems and name plates from the panel surface.
- Remove all adhesive from the body panel and back of molding, emblems and name plates using 3M ScotchBrite molding adhesive remover disk 3M P/N 07501 or equivalent.
- Use Varnish Makers and Painters (VM&P) naptha or equivalent in order to clean the body panel.
Apply the heat for approximately 30 seconds using a circular motion.
Notice: When removing body panels, apply tape to corners of panel and adjacent surfaces to help prevent paint damage.

Installation Procedure
- Use a heat lamp or heat gun in order to warm the body panel to a minimum of 21°C (70°F).
- Peel the backing from the front end of the molding, emblems and name plates.
- Press the molding, emblems and name plates to the body while continuing to remove the backing.
- Hand roll the molding, emblems and name plates to the body in order to ensure proper adhesion.
- Inspect the molding ends for bonding.
Do not touch the adhesive backing.
Hand roll the loose ends.
